Installation
This page details how to install Port's Bitbucket Cloud integration (powered by the Ocean framework). It outlines the following steps:
- How to create a workspace token/app password to give the integration permissions to query your Bitbucket Cloud account.
- How to configure and customize the integration before deploying it.
- How to deploy the integration in the configuration that fits your use case.
Prerequisites
- A Bitbucket Cloud account with admin privileges to the workspace you want to ingest data from.
- If you choose the real time & always on installation method, you will need a kubernetes cluster on which to install the integration.
- Your Port user role is set to
Admin.
Setup
Create a workspace token or app password
We recommend using workspace tokens from accounts dedicated to the integration, as this will provide a more secure and scalable solution.
Different credentials from the same Bitbucket account share the same rate limits, which can cause issues when using the integration in a large organization. Using dedicated workspace tokens helps manage rate limits more effectively.
The integration requires either a workspace token or an app password with username to authenticate with your Bitbucket Cloud account. You can create a workspace token by following the steps here or an app password by following these steps.
The token or app password should have read permission scope for each of the supported resources you want to ingest into Port and a read and write permission scope for the webhooks.
We recommend using workspace tokens when possible, as they provide better security and are easier to manage than app passwords.
BaseUrl & listening to hooks
The baseUrl parameter is used specifically to enable the real-time functionality of the integration.
If it is not provided, the integration will continue to function correctly. In such a configuration, to retrieve the latest information from the target system, the scheduledResyncInterval parameter has to be set, or a manual resync will need to be triggered through Port's UI.
In order for the Bitbucket Cloud integration to update the data in Port on every change in the Bitbucket Cloud workspace, you need to specify the baseUrl parameter.
The baseUrl parameter should be set to the url of your Bitbucket Cloud integration instance. The webhookSecret parameter should also be set to a string of your choice so that the integration can verify the webhook requests.
Deploy the integration
Choose one of the following installation methods:
- Hosted by Port
- Real-time (self-hosted)
- Scheduled (CI)
Using this installation option means that the integration will be hosted by Port, with a customizable resync interval to ingest data into Port.
Live event support
This integration supports live events, allowing real-time updates to your software catalog without waiting for the next scheduled sync.
Supported live event triggers
Repository:
- repository:created
- repository:updated
- repository:push
Pull Request:
- pullrequest:created
- pullrequest:updated
- pullrequest:approved
- pullrequest:unapproved
- pullrequest:fulfilled
- pullrequest:rejected
Alternatively, you can install the integration using the Real-time (self-hosted) method to update Port in real time using webhooks.
Installation
To install, follow these steps:
-
Go to the Data sources page of your portal.
-
Click on the
+ Data sourcebutton in the top-right corner. -
Click on the relevant integration in the list.
-
Under
Select your installation method, chooseHosted by Port. -
Configure the
integration settingsandapplication settingsas you wish (see below for details).
Application settings
Every integration hosted by Port has the following customizable application settings, which are configurable after installation:
-
Resync interval: The frequency at which Port will ingest data from the integration. There are various options available, ranging from every 1 hour to once a day. -
Send raw data examples: A boolean toggle (enabledby default). If enabled, raw data examples will be sent from the integration to Port. These examples are used when testing your mapping configuration, they allow you to run yourjqexpressions against real data and see the results.
Integration settings
Every integration has its own tool-specific settings, under the Integration settings section.
Each of these settings has an ⓘ icon next to it, which you can hover over to see a description of the setting.
Port secrets
Some integration settings require sensitive pieces of data, such as tokens.
For these settings, Port secrets will be used, ensuring that your sensitive data is encrypted and secure.
When filling in such a setting, its value will be obscured (shown as ••••••••).
For each such setting, Port will automatically create a secret in your organization.
To see all secrets in your organization, follow these steps.
Limitations
- The maximum time for a full sync to run is based on the configured resync interval. For very large amounts of data where a resync operation is expected to take longer, please use a longer interval.
Port source IP addresses
When using this installation method, Port will make outbound calls to your 3rd-party applications from static IP addresses.
You may need to add these addresses to your allowlist, in order to allow Port to interact with the integrated service:
- Europe (EU)
- United States (US)
54.73.167.226
63.33.143.237
54.76.185.219
3.234.37.33
54.225.172.136
3.225.234.99
Using this installation option means that the integration will be able to update Port in real time using webhooks.
Prerequisites
To install the integration, you need a Kubernetes cluster that the integration's container chart will be deployed to.
Please make sure that you have kubectl and helm installed on your machine, and that your kubectl CLI is connected to the Kubernetes cluster where you plan to install the integration.
If you are having trouble installing this integration, please refer to these troubleshooting steps.
For details about the available parameters for the installation, see the table below.
- Helm
- ArgoCD
To install the integration using Helm:
-
Go to the Bitbucket Cloud data source page in your portal.
-
Select the
Real-time and always onmethod: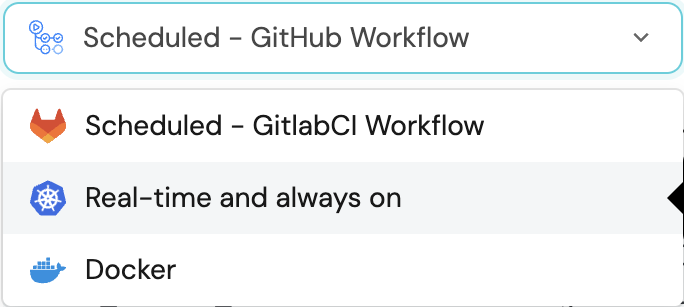
-
A
helmcommand will be displayed, with default values already filled out (e.g. your Port client ID, client secret, etc).
Copy the command, replace the placeholders with your values, then run it in your terminal to install the integration.
The port_region, port.baseUrl, portBaseUrl, port_base_url and OCEAN__PORT__BASE_URL parameters are used to select which instance or Port API will be used.
Port exposes two API instances, one for the EU region of Port, and one for the US region of Port.
- If you use the EU region of Port (https://app.port.io), your API URL is
https://api.port.io. - If you use the US region of Port (https://app.us.port.io), your API URL is
https://api.us.port.io.
To install the integration using ArgoCD:
- Create a
values.yamlfile inargocd/my-ocean-bitbucket-cloud-integrationin your git repository with the content:
Remember to replace the placeholders for BITBUCKET_USERNAME, BITBUCKET_APP_PASSWORD, BITBUCKET_WORKSPACE and BITBUCKET_WORKSPACE_TOKEN.
initializePortResources: true
scheduledResyncInterval: 120
integration:
  identifier: my-ocean-bitbucket-cloud-integration
  type: bitbucket-cloud
  eventListener:
    type: POLLING
  config:
    bitbucketUsername: BITBUCKET_USERNAME
    bitbucketWorkspace: BITBUCKET_WORKSPACE
  secrets:
    bitbucketAppPassword: BITBUCKET_APP_PASSWORD
    bitbucketWorkspaceToken: BITBUCKET_WORKSPACE_TOKEN
- Install the
my-ocean-bitbucket-cloud-integrationArgoCD Application by creating the followingmy-ocean-bitbucket-cloud-integration.yamlmanifest:
Remember to replace the placeholders for YOUR_PORT_CLIENT_ID YOUR_PORT_CLIENT_SECRET and YOUR_GIT_REPO_URL.
Multiple sources ArgoCD documentation can be found here.
ArgoCD Application
apiVersion: argoproj.io/v1alpha1
kind: Application
metadata:
  name: my-ocean-bitbucket-cloud-integration
  namespace: argocd
spec:
  destination:
    namespace: my-ocean-bitbucket-cloud-integration
    server: https://kubernetes.default.svc
  project: default
  sources:
  - repoURL: 'https://port-labs.github.io/helm-charts/'
    chart: port-ocean
    targetRevision: 0.1.14
    helm:
      valueFiles:
      - $values/argocd/my-ocean-bitbucket-cloud-integration/values.yaml
      parameters:
        - name: port.clientId
          value: YOUR_PORT_CLIENT_ID
        - name: port.clientSecret
          value: YOUR_PORT_CLIENT_SECRET
        - name: port.baseUrl
          value: https://api.getport.io
  - repoURL: YOUR_GIT_REPO_URL
    targetRevision: main
    ref: values
  syncPolicy:
    automated:
      prune: true
      selfHeal: true
    syncOptions:
    - CreateNamespace=true
The port_region, port.baseUrl, portBaseUrl, port_base_url and OCEAN__PORT__BASE_URL parameters are used to select which instance or Port API will be used.
Port exposes two API instances, one for the EU region of Port, and one for the US region of Port.
- If you use the EU region of Port (https://app.port.io), your API URL is
https://api.port.io. - If you use the US region of Port (https://app.us.port.io), your API URL is
https://api.us.port.io.
- Apply your application manifest with
kubectl:
kubectl apply -f my-ocean-bitbucket-cloud-integration.yaml
This table summarizes the available parameters for the installation.
| Parameter | Description | Required |
|---|---|---|
port.clientId | Your port client id | ✅ |
port.clientSecret | Your port client secret | ✅ |
port.baseUrl | Your Port API URL - https://api.getport.io for EU, https://api.us.getport.io for US | ✅ |
integration.identifier | Change the identifier to describe your integration | ✅ |
integration.type | The integration type | ✅ |
integration.eventListener.type | The event listener type | ✅ |
integration.config.bitbucketUsername | The username of the Bitbucket Cloud account | ✅ |
integration.config.bitbucketWorkspace | The workspace of the Bitbucket Cloud account | ✅ |
integration.config.bitbucketAppPassword | The app password of the Bitbucket Cloud account | ✅ |
integration.config.bitbucketWorkspaceToken | The workspace token of the Bitbucket Cloud account | ✅ |
integration.config.webhookSecret | The secret used to verify the webhook requests | ❌ |
scheduledResyncInterval | The number of minutes between each resync | ❌ |
initializePortResources | Default true, When set to true the integration will create default blueprints and the port App config Mapping | ❌ |
sendRawDataExamples | Enable sending raw data examples from the third party API to port for testing and managing the integration mapping. Default is true | ❌ |
baseUrl | The base url of the instance where the Bitbucket Cloud integration is hosted, used for real-time updates. (e.g.https://mybitbucketcloudoceanintegration.com) | ❌ |
For advanced configuration such as proxies or self-signed certificates, click here.
This workflow/pipeline will run the Bitbucket Cloud integration once and then exit, this is useful for scheduled ingestion of data.
If you want the integration to update Port in real time using webhooks you should use the Real-time (self-hosted) installation option.
- GitHub
- Jenkins
- Azure Devops
- GitLab
Make sure to configure the following Github Secrets:
| Parameter | Description | Example | Required |
|---|---|---|---|
OCEAN__INTEGRATION__CONFIG__BITBUCKET_WORKSPACE_TOKEN | The workspace token used to query authenticate with your Bitbucket Cloud account | ✅ | |
OCEAN__INTEGRATION__CONFIG__BITBUCKET_WORKSPACE | The workspace you want to retrieve git objects from | ✅ | |
OCEAN__INTEGRATION__CONFIG__BITBUCKET_USERNAME | The username used to authenticate with your Bitbucket Cloud account | ✅ | |
OCEAN__INTEGRATION__CONFIG__BITBUCKET_APP_PASSWORD | The app password used to authenticate with your Bitbucket Cloud account | ✅ | |
OCEAN__BASE_URL | The URL of your Bitbucket Cloud integration instance, used for real-time updates. | ❌ | |
OCEAN__PORT__CLIENT_ID | Your Port client (How to get the credentials) id | ✅ | |
OCEAN__PORT__CLIENT_SECRET | Your Port client (How to get the credentials) secret | ✅ | |
OCEAN__PORT__BASE_URL | Your Port API URL - https://api.getport.io for EU, https://api.us.getport.io for US | ✅ | |
OCEAN__INITIALIZE_PORT_RESOURCES | Default true, When set to true the integration will create default blueprints and the port App config Mapping. Read more about initializePortResources | ❌ | |
OCEAN__INTEGRATION__IDENTIFIER | The identifier of the integration that will be installed | ❌ |
Here is an example for bitbucket-cloud-integration.yml workflow file:
name: Bitbucket Cloud Exporter Workflow

on:
  workflow_dispatch:
  schedule:
    - cron: '0 */1 * * *' # Determines the scheduled interval for this workflow. This example runs every hour.

jobs:
  run-integration:
    runs-on: ubuntu-latest
    timeout-minutes: 30 # Set a time limit for the job

    steps:
      - uses: port-labs/ocean-sail@v1
        with:
          type: 'bitbucket-cloud'
          port_client_id: ${{ secrets.OCEAN__PORT__CLIENT_ID }}
          port_client_secret: ${{ secrets.OCEAN__PORT__CLIENT_SECRET }}
          port_base_url: https://api.getport.io
          config: |
            bitbucketUsername: ${{ secrets.OCEAN__INTEGRATION__CONFIG__BITBUCKET_USERNAME }}
            bitbucketWorkspace: ${{ secrets.OCEAN__INTEGRATION__CONFIG__BITBUCKET_WORKSPACE }}
            bitbucketAppPassword: ${{ secrets.OCEAN__INTEGRATION__CONFIG__BITBUCKET_APP_PASSWORD }}
            bitbucketWorkspaceToken: ${{ secrets.OCEAN__INTEGRATION__CONFIG__BITBUCKET_WORKSPACE_TOKEN }}
Your Jenkins agent should be able to run docker commands.
Make sure to configure the following Jenkins Credentials
of Secret Text type:
| Parameter | Description | Example | Required |
|---|---|---|---|
OCEAN__INTEGRATION__CONFIG__BITBUCKET_WORKSPACE_TOKEN | The workspace token used to query authenticate with your Bitbucket Cloud account | ✅ | |
OCEAN__INTEGRATION__CONFIG__BITBUCKET_WORKSPACE | The workspace you want to retrieve git objects from | ✅ | |
OCEAN__INTEGRATION__CONFIG__BITBUCKET_USERNAME | The username used to authenticate with your Bitbucket Cloud account | ✅ | |
OCEAN__INTEGRATION__CONFIG__BITBUCKET_APP_PASSWORD | The app password used to authenticate with your Bitbucket Cloud account | ✅ | |
OCEAN__BASE_URL | The URL of your Bitbucket Cloud integration instance, used for real-time updates. | ❌ | |
OCEAN__PORT__CLIENT_ID | Your Port client (How to get the credentials) id | ✅ | |
OCEAN__PORT__CLIENT_SECRET | Your Port client (How to get the credentials) secret | ✅ | |
OCEAN__PORT__BASE_URL | Your Port API URL - https://api.getport.io for EU, https://api.us.getport.io for US | ✅ | |
OCEAN__INITIALIZE_PORT_RESOURCES | Default true, When set to true the integration will create default blueprints and the port App config Mapping. Read more about initializePortResources | ❌ | |
OCEAN__INTEGRATION__IDENTIFIER | The identifier of the integration that will be installed | ❌ |
Here is an example for Jenkinsfile groovy pipeline file:
pipeline {
    agent any

    stages {
        stage('Run PagerDuty Integration') {
            steps {
                script {
                    withCredentials([
                        string(credentialsId: 'OCEAN__INTEGRATION__CONFIG__BITBUCKET_USERNAME', variable: 'OCEAN__INTEGRATION__CONFIG__BITBUCKET_USERNAME'),
                        string(credentialsId: 'OCEAN__INTEGRATION__CONFIG__BITBUCKET_WORKSPACE', variable: 'OCEAN__INTEGRATION__CONFIG__BITBUCKET_WORKSPACE'),
                        string(credentialsId: 'OCEAN__INTEGRATION__CONFIG__BITBUCKET_APP_PASSWORD', variable: 'OCEAN__INTEGRATION__CONFIG__BITBUCKET_APP_PASSWORD'),
                        string(credentialsId: 'OCEAN__INTEGRATION__CONFIG__BITBUCKET_WORKSPACE_TOKEN', variable: 'OCEAN__INTEGRATION__CONFIG__BITBUCKET_WORKSPACE_TOKEN'),
                        string(credentialsId: 'OCEAN__PORT__CLIENT_ID', variable: 'OCEAN__PORT__CLIENT_ID'),
                        string(credentialsId: 'OCEAN__PORT__CLIENT_SECRET', variable: 'OCEAN__PORT__CLIENT_SECRET'),
                    ]) {
                        sh('''
                            #Set Docker image and run the container
                            integration_type="bitbucket-cloud"
                            version="latest"
                            image_name="ghcr.io/port-labs/port-ocean-${integration_type}:${version}"
                            docker run -i --rm --platform=linux/amd64 \
                                -e OCEAN__EVENT_LISTENER='{"type":"ONCE"}' \
                                -e OCEAN__INITIALIZE_PORT_RESOURCES=true \
                                -e OCEAN__SEND_RAW_DATA_EXAMPLES=true \
                                -e OCEAN__INTEGRATION__CONFIG__BITBUCKET_USERNAME=$OCEAN__INTEGRATION__CONFIG__BITBUCKET_USERNAME \
                                -e OCEAN__INTEGRATION__CONFIG__BITBUCKET_WORKSPACE=$OCEAN__INTEGRATION__CONFIG__BITBUCKET_WORKSPACE \
                                -e OCEAN__INTEGRATION__CONFIG__BITBUCKET_APP_PASSWORD=$OCEAN__INTEGRATION__CONFIG__BITBUCKET_APP_PASSWORD \
                                -e OCEAN__INTEGRATION__CONFIG__BITBUCKET_WORKSPACE_TOKEN=$OCEAN__INTEGRATION__CONFIG__BITBUCKET_WORKSPACE_TOKEN \
                                -e OCEAN__PORT__CLIENT_ID=$OCEAN__PORT__CLIENT_ID \
                                -e OCEAN__PORT__CLIENT_SECRET=$OCEAN__PORT__CLIENT_SECRET \
                                -e OCEAN__PORT__BASE_URL='https://api.getport.io' \
                                $image_name

                            exit $?
                        ''')
                    }
                }
            }
        }
    }
}
Your Azure Devops agent should be able to run docker commands. Learn more about agents here.
Variable groups store values and secrets you'll use in your pipelines across your project. Learn more
Setting Up Your Credentials
- Create a Variable Group: Name it port-ocean-credentials.
- Store the required variables (see the table below).
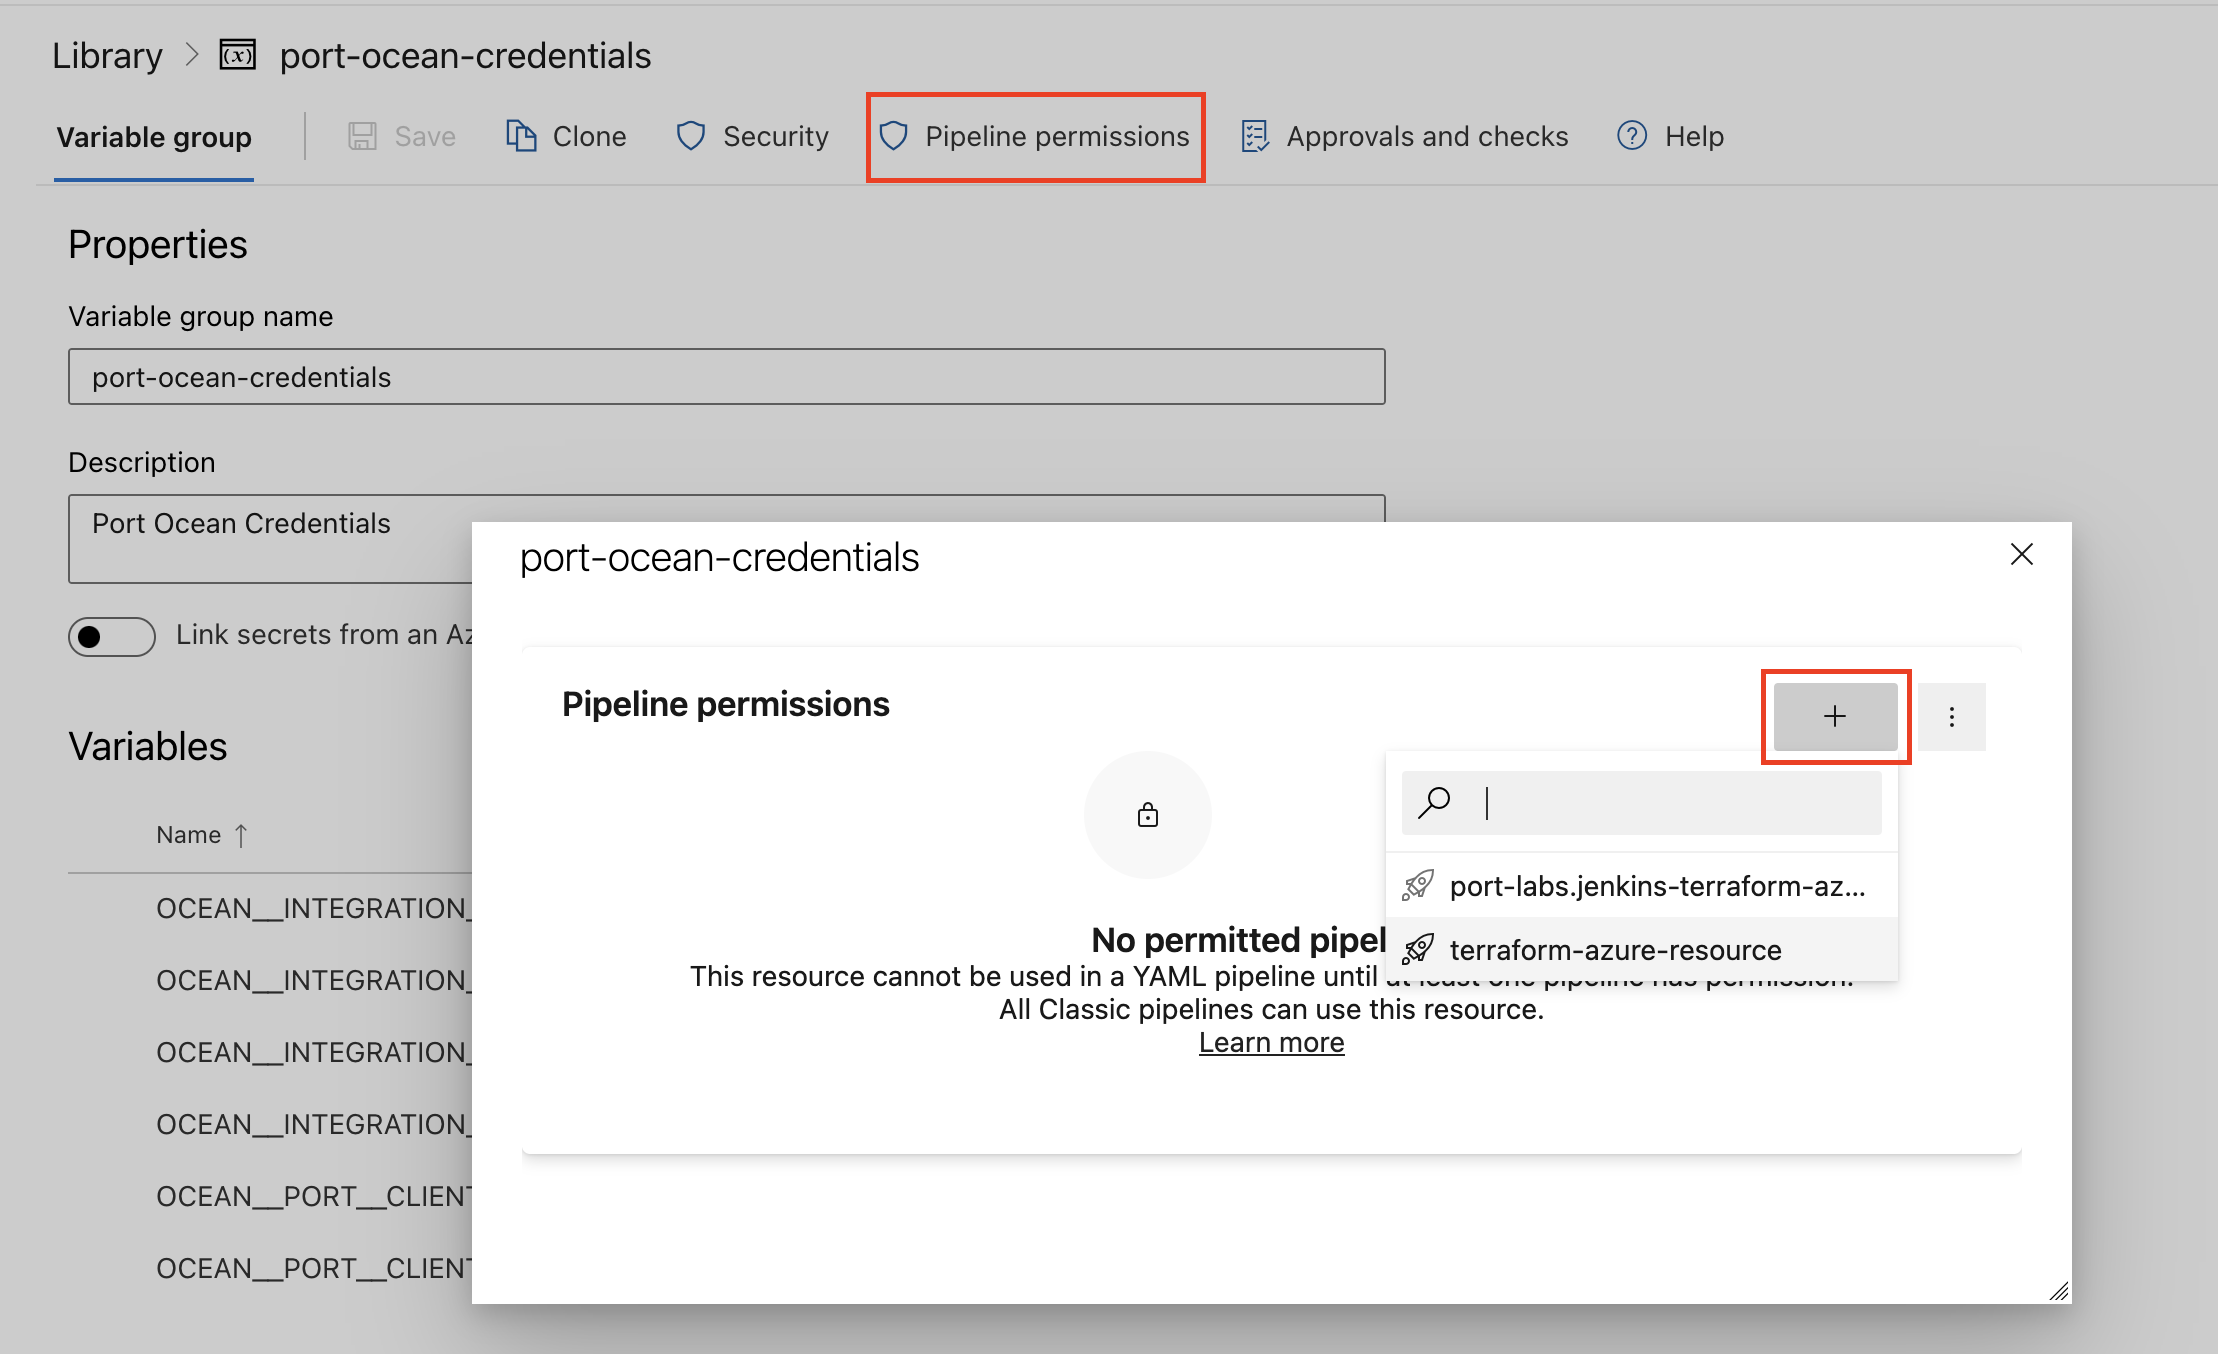
- Authorize Your Pipeline:
- Go to "Library" -> "Variable groups."
- Find port-ocean-credentials and click on it.
- Select "Pipeline Permissions" and add your pipeline to the authorized list.
| Parameter | Description | Example | Required |
|---|---|---|---|
OCEAN__INTEGRATION__CONFIG__BITBUCKET_WORKSPACE_TOKEN | The workspace token used to query authenticate with your Bitbucket Cloud account | ✅ | |
OCEAN__INTEGRATION__CONFIG__BITBUCKET_WORKSPACE | The workspace you want to retrieve git objects from | ✅ | |
OCEAN__INTEGRATION__CONFIG__BITBUCKET_USERNAME | The username used to authenticate with your Bitbucket Cloud account | ✅ | |
OCEAN__INTEGRATION__CONFIG__BITBUCKET_APP_PASSWORD | The app password used to authenticate with your Bitbucket Cloud account | ✅ | |
OCEAN__BASE_URL | The URL of your Bitbucket Cloud integration instance, used for real-time updates. | ❌ | |
OCEAN__PORT__CLIENT_ID | Your Port client (How to get the credentials) id | ✅ | |
OCEAN__PORT__CLIENT_SECRET | Your Port client (How to get the credentials) secret | ✅ | |
OCEAN__PORT__BASE_URL | Your Port API URL - https://api.getport.io for EU, https://api.us.getport.io for US | ✅ | |
OCEAN__INITIALIZE_PORT_RESOURCES | Default true, When set to true the integration will create default blueprints and the port App config Mapping. Read more about initializePortResources | ❌ | |
OCEAN__INTEGRATION__IDENTIFIER | The identifier of the integration that will be installed | ❌ |
Here is an example for bitbucket-cloud-integration.yml pipeline file:
trigger:
- main

pool:
  vmImage: "ubuntu-latest"

variables:
  - group: port-ocean-credentials


steps:
- script: |
    # Set Docker image and run the container
    integration_type="bitbucket-cloud"
    version="latest"

    image_name="ghcr.io/port-labs/port-ocean-$integration_type:$version"

    docker run -i --rm --platform=linux/amd64 \
        -e OCEAN__EVENT_LISTENER='{"type":"ONCE"}' \
        -e OCEAN__INITIALIZE_PORT_RESOURCES=true \
        -e OCEAN__SEND_RAW_DATA_EXAMPLES=true \
        -e OCEAN__INTEGRATION__CONFIG__BITBUCKET_USERNAME=$(OCEAN__INTEGRATION__CONFIG__BITBUCKET_USERNAME) \
        -e OCEAN__INTEGRATION__CONFIG__BITBUCKET_WORKSPACE=$(OCEAN__INTEGRATION__CONFIG__BITBUCKET_WORKSPACE) \
        -e OCEAN__INTEGRATION__CONFIG__BITBUCKET_APP_PASSWORD=$(OCEAN__INTEGRATION__CONFIG__BITBUCKET_APP_PASSWORD) \
        -e OCEAN__INTEGRATION__CONFIG__BITBUCKET_WORKSPACE_TOKEN=$(OCEAN__INTEGRATION__CONFIG__BITBUCKET_WORKSPACE_TOKEN) \
        -e OCEAN__PORT__CLIENT_ID=$(OCEAN__PORT__CLIENT_ID) \
        -e OCEAN__PORT__CLIENT_SECRET=$(OCEAN__PORT__CLIENT_SECRET) \
        -e OCEAN__PORT__BASE_URL='https://api.getport.io' \
        $image_name

    exit $?
  displayName: 'Ingest Data into Port'
Make sure to configure the following GitLab variables:
| Parameter | Description | Example | Required |
|---|---|---|---|
OCEAN__INTEGRATION__CONFIG__BITBUCKET_WORKSPACE_TOKEN | The workspace token used to query authenticate with your Bitbucket Cloud account | ✅ | |
OCEAN__INTEGRATION__CONFIG__BITBUCKET_WORKSPACE | The workspace you want to retrieve git objects from | ✅ | |
OCEAN__INTEGRATION__CONFIG__BITBUCKET_USERNAME | The username used to authenticate with your Bitbucket Cloud account | ✅ | |
OCEAN__INTEGRATION__CONFIG__BITBUCKET_APP_PASSWORD | The app password used to authenticate with your Bitbucket Cloud account | ✅ | |
OCEAN__BASE_URL | The URL of your Bitbucket Cloud integration instance, used for real-time updates. | ❌ | |
OCEAN__PORT__CLIENT_ID | Your Port client (How to get the credentials) id | ✅ | |
OCEAN__PORT__CLIENT_SECRET | Your Port client (How to get the credentials) secret | ✅ | |
OCEAN__PORT__BASE_URL | Your Port API URL - https://api.getport.io for EU, https://api.us.getport.io for US | ✅ | |
OCEAN__INITIALIZE_PORT_RESOURCES | Default true, When set to true the integration will create default blueprints and the port App config Mapping. Read more about initializePortResources | ❌ | |
OCEAN__INTEGRATION__IDENTIFIER | The identifier of the integration that will be installed | ❌ |
Here is an example for .gitlab-ci.yml pipeline file:
default:
  image: docker:24.0.5
  services:
    - docker:24.0.5-dind
  before_script:
    - docker info

variables:
  INTEGRATION_TYPE: bitbucket-cloud
  VERSION: latest

stages:
  - ingest

ingest_data:
  stage: ingest
  variables:
    IMAGE_NAME: ghcr.io/port-labs/port-ocean-$INTEGRATION_TYPE:$VERSION
  script:
    - |
      docker run -i --rm --platform=linux/amd64 \
        -e OCEAN__EVENT_LISTENER='{"type":"ONCE"}' \
        -e OCEAN__INITIALIZE_PORT_RESOURCES=true \
        -e OCEAN__SEND_RAW_DATA_EXAMPLES=true  \
        -e OCEAN__INTEGRATION__CONFIG__BITBUCKET_USERNAME=$OCEAN__INTEGRATION__CONFIG__BITBUCKET_USERNAME \
        -e OCEAN__INTEGRATION__CONFIG__BITBUCKET_WORKSPACE=$OCEAN__INTEGRATION__CONFIG__BITBUCKET_WORKSPACE \
        -e OCEAN__INTEGRATION__CONFIG__BITBUCKET_APP_PASSWORD=$OCEAN__INTEGRATION__CONFIG__BITBUCKET_APP_PASSWORD \
        -e OCEAN__INTEGRATION__CONFIG__BITBUCKET_WORKSPACE_TOKEN=$OCEAN__INTEGRATION__CONFIG__BITBUCKET_WORKSPACE_TOKEN \
        -e OCEAN__PORT__CLIENT_ID=$OCEAN__PORT__CLIENT_ID \
        -e OCEAN__PORT__CLIENT_SECRET=$OCEAN__PORT__CLIENT_SECRET \
        -e OCEAN__PORT__BASE_URL='https://api.getport.io' \
        $IMAGE_NAME

  rules: # Run only when changes are made to the main branch
    - if: '$CI_COMMIT_BRANCH == "main"'
The port_region, port.baseUrl, portBaseUrl, port_base_url and OCEAN__PORT__BASE_URL parameters are used to select which instance or Port API will be used.
Port exposes two API instances, one for the EU region of Port, and one for the US region of Port.
- If you use the EU region of Port (https://app.port.io), your API URL is
https://api.port.io. - If you use the US region of Port (https://app.us.port.io), your API URL is
https://api.us.port.io.
For advanced configuration such as proxies or self-signed certificates, click here.