JumpCloud
Follow this step-by-step guide to configure the integration between Port and JumpCloud.
Port-JumpCloud integration benefits
- Connect to the Port application via a JumpCloud app.
- Your JumpCloud teams will be automatically synced with Port, upon user sign-in.
- Set granular permissions on Port according to your JumpCloud user groups.
Create a new JumpCloud application
-
In the Admin Portal, go to User Authentication -> SSO.
-
Click
Add New Application.
-
In the search box type Auth0:

-
Define the initial Port application settings:
-
Display Label: Insert a name of your choice for the Port app, likePort. -
Add an icon (optional):
Port Logo (click to expand)

-
(Optional) In the SSO tab, change the default IDP URL suffix.
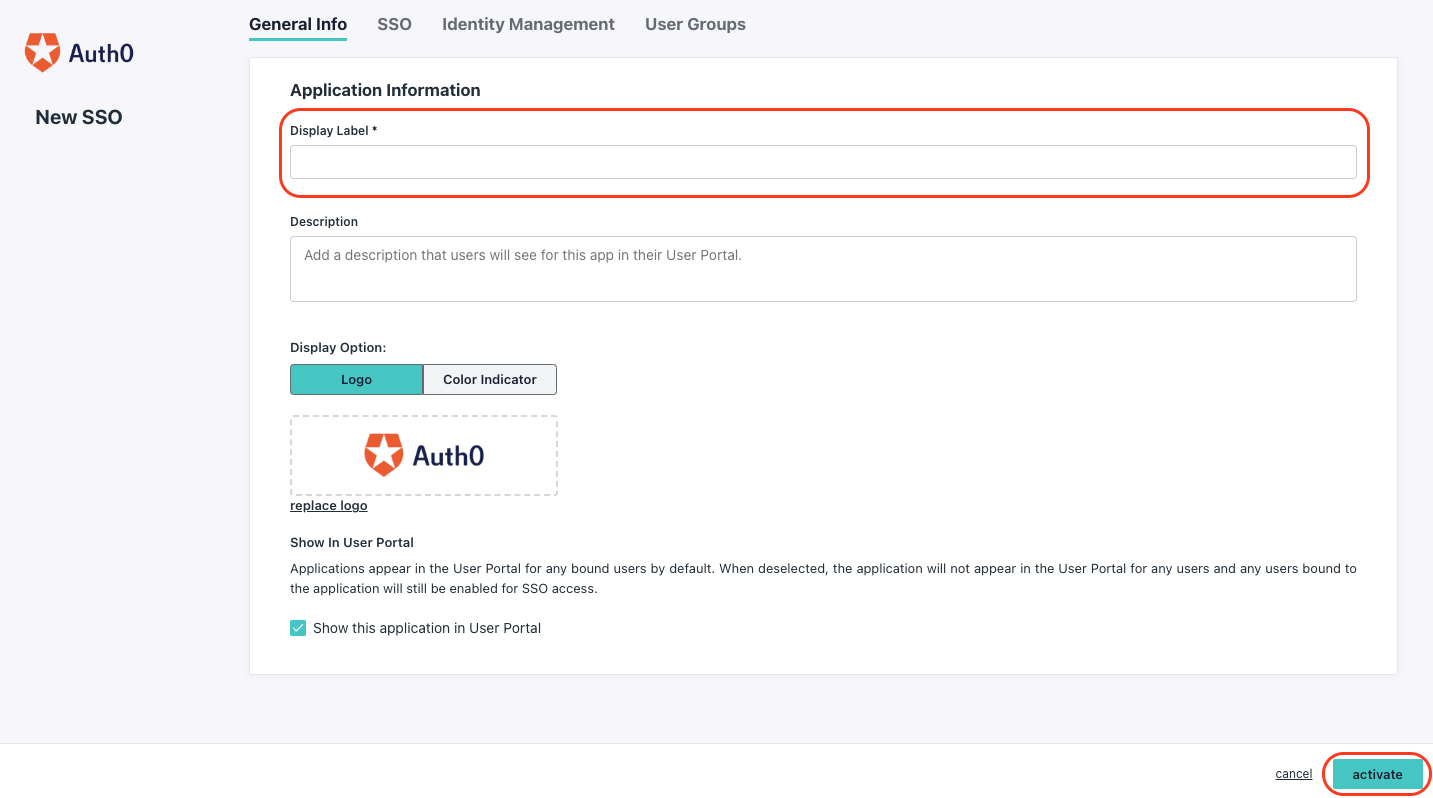
Click
activate.
-
-
Click on the newly created application.
-
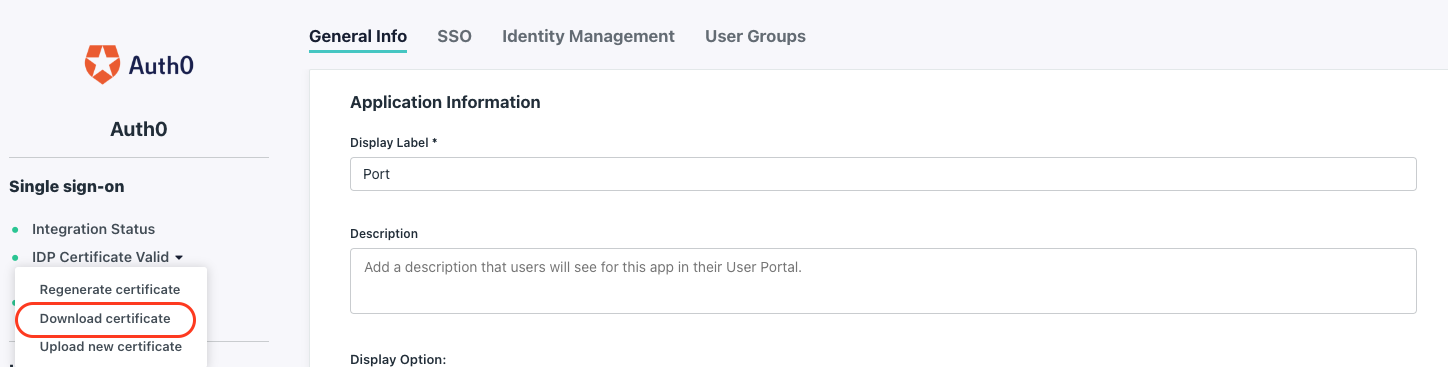
Download the IDP Certificate:
-
Copy the
IDP URLfrom the SSO tab: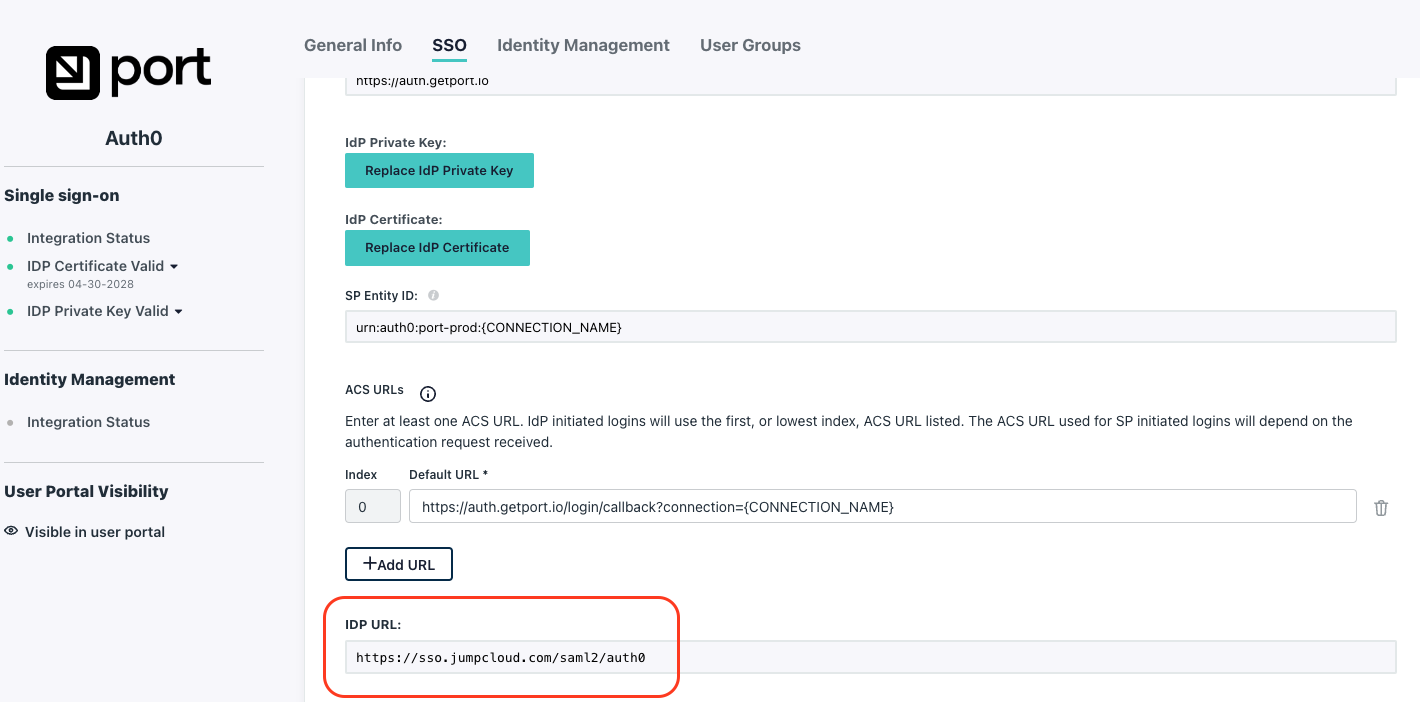
-
-
In the Configure Connection section of the Port self-serve SSO setup flow, provide your JumpCloud credentials using one of the following options:
- Automatic - paste your JumpCloud metadata URL to auto-populate the connection settings.
- Manual - upload the downloaded PEM certificate and enter the copied IDP URL.
-
In the same Configure Connection section, open Advanced settings and set the following:
- Sign Request Algorithm:
RSA-SHA256 - Sign Request Algorithm Digest:
SHA256 - Protocol Binding:
HTTP-Post
- Sign Request Algorithm:
Your connection name follows the format company-<companyID>-SSO. You can find it in the Single Sign-On URL shown during the self-serve SSO setup flow. Look for the connection parameter in the URL.
Configure your JumpCloud application
Most of the following steps involve editing the initial Port app you created. You can always go back to it by opening the admin console and going to User Authentication -> SSO - the Port app will appear in the application list.
In the Port app, go to the SSO menu and follow these steps:
-
Under
IdP Entity ID:paste the following URL:https://auth.getport.io -
Under
SP Entity ID:set:urn:auth0:port-prod:company-<companyID>-SSO. -
Under
ACS URLs, set:https://auth.getport.io/login/callback?connection=company-<companyID>-SSO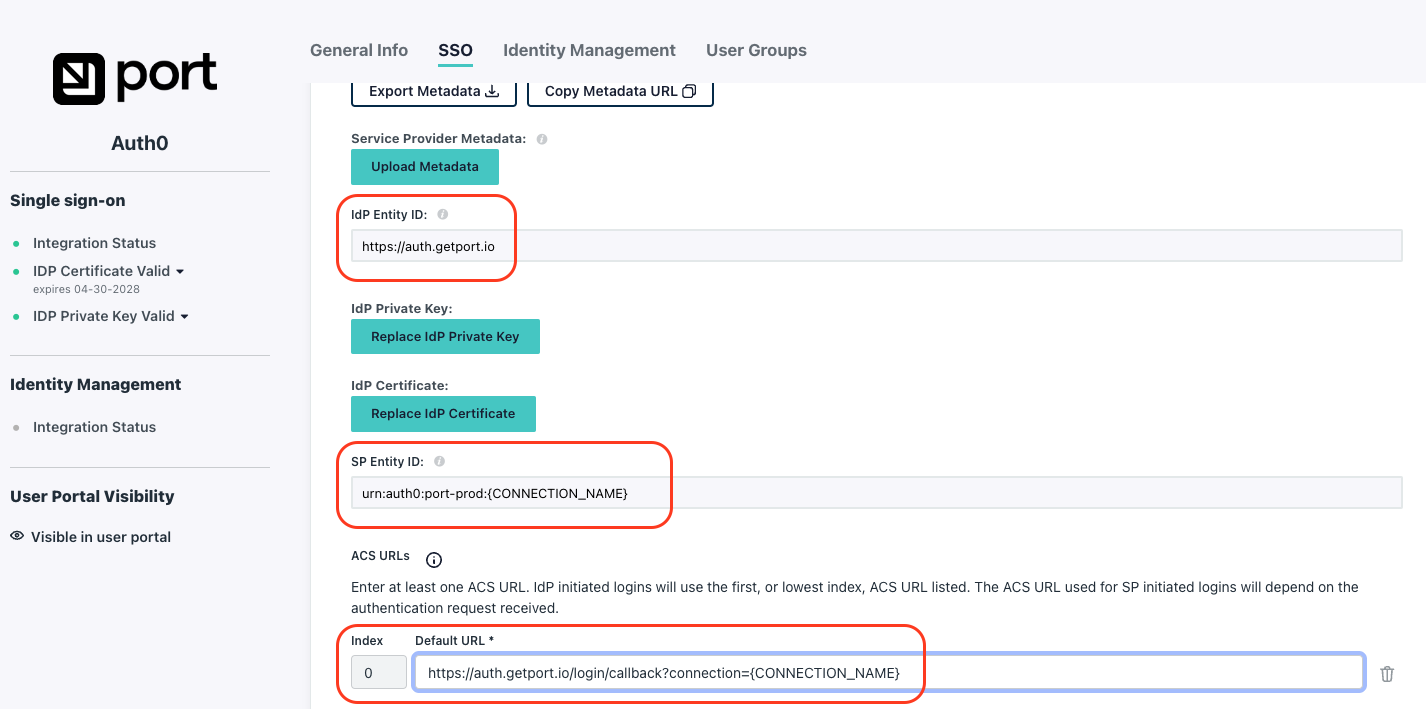
Click
Save.
Add user attributes
The family_name and given_name attributes are required. These are used by Port to show the full name of a logged in user. To create these attributes follow these steps:
The email user attribute is created by default when creating the app.
Make sure the switch next to the email field is set to on.
-
In the Port app, go to the
SSOtab, under the User Attribute Mapping section: -
Click on
add attribute. -
Set the
Service Provider Attribute Nametogiven_name -
In the
Valuefield enter the value:firstname -
Click on
add attributeagain. -
Set the
Service Provider Attribute Nametofamily_name -
In the
Valuefield enter the value:lastname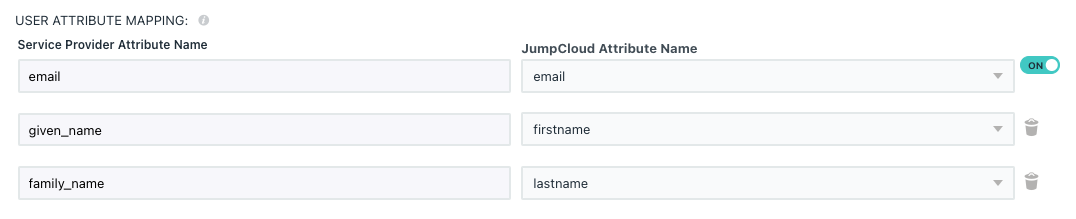
Add email_verified constant attribute
The use of Auth0 requires that JumpCloud passes to Port an email_verified field upon user login. JumpCloud does not store and expose that field by default, so in this step, you are going to configure that field and apply it to all users in your JumpCloud account.
-
In the Port app, go to the
SSOtab, under the Constant Attributes section: -
Click on
add attribute. -
Set the
Service Provider Attribute Nametoemail_verified -
In the
Valuefield enter the value:true
It is also possible to manually change the value of the email_verified field to true for each user that requires access to Port in your organization. However, granting access manually to a large number of users is not scalable.
Expose the application to your organization
-
In the Port app, go to the
User Groupstab. -
Select the user groups you want to expose the Port app to:
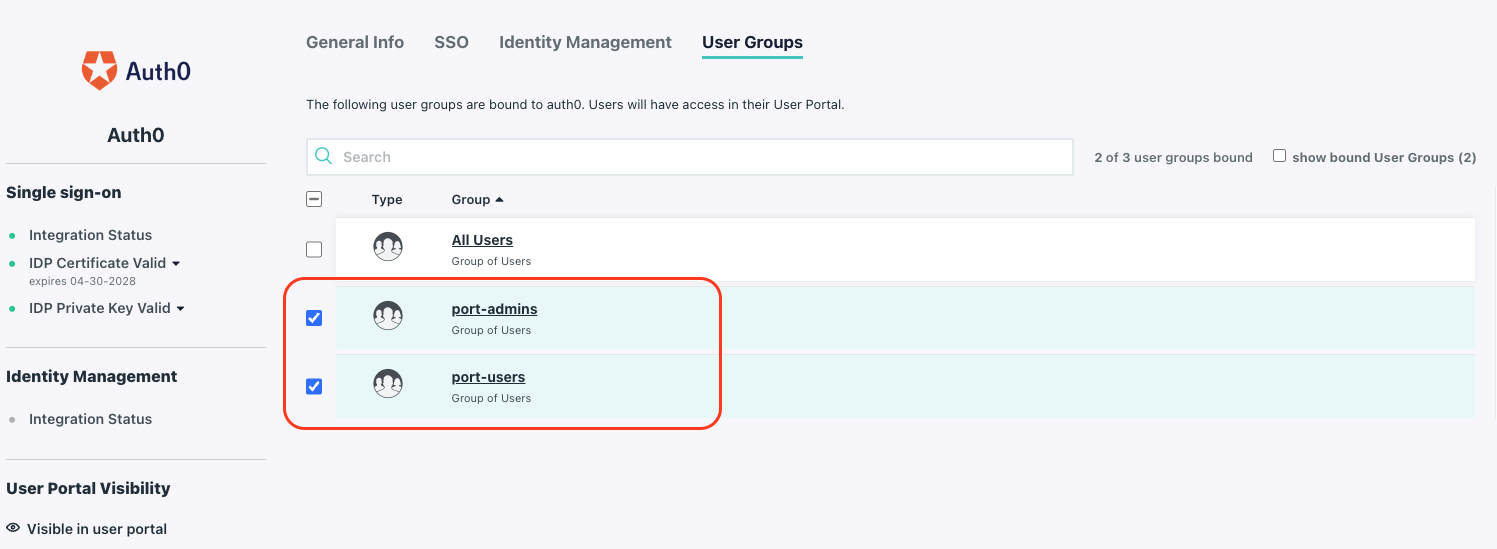
-
Click
Save.
After completing these steps, users with roles that the Port app was assigned to, will see the Port app in their Portal and upon clicking it, will be logged in to Port:
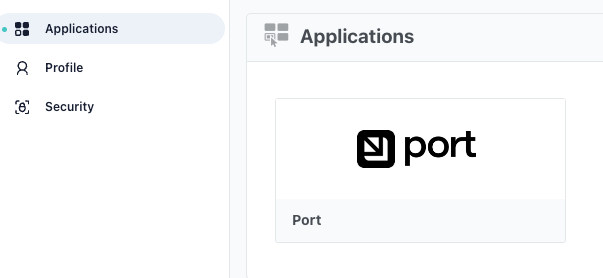
After configuring the SSO connection, you can initiate the login flow directly via URL. Use the following URL based on your account region, replacing company-<companyID>-SSO with your actual connection name. You can find your connection name in the Single Sign-On URL shown during the self-serve SSO setup flow - look for the connection parameter in the URL.
- EU
- US
https://auth.getport.io/authorize?response_type=token&client_id=96IeqL36Q0UIBxIfV1oqOkDWU6UslfDj&connection=company-<companyID>-SSO&redirect_uri=https%3A%2F%2Fapp.port.io
https://auth.us.getport.io/authorize?response_type=token&client_id=4lHUry3Gkds317lQ3JcgABh0JPbT3rWx&connection=company-<companyID>-SSO&redirect_uri=https%3A%2F%2Fapp.us.port.io
Pull JumpCloud groups into Port
This stage is OPTIONAL and is required only if you wish to pull all of your JumpCloud Groups into Port inherently.
Benefit: managing permissions and user access on Port.
Outcome: for every user that logs in, we will automatically get their associated JumpCloud Groups, according to your definition in the settings below.
To allow automatic Groups Groups support in Port, please follow these steps:
-
In the Port app, go to the
SSOtab, under the Group Attributes section -
Check the
include group attributesbox -
Set the group attributes' name:
memberOf
-
Click
Save.