Google Workspace
Follow this step-by-step guide to configure the integration between Port and Google Workspace.
Port-Google Workspace integration benefits
- Connect to the Port application via your Google Workspace Application.
- Your Google Workspace teams will be automatically synced with Port upon a user sign-in.
- Set granular permissions on Port according to your Google Workspace groups.
Create your Google Workspace application
-
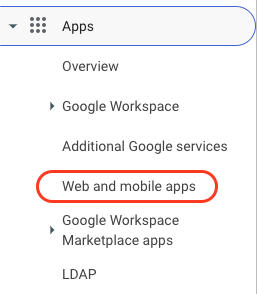
In the Google Admin Console, in the sidebar menu, navigate to Apps -> Web and mobile apps:
-
Click on
Add appfollowed byAdd custom SAML app: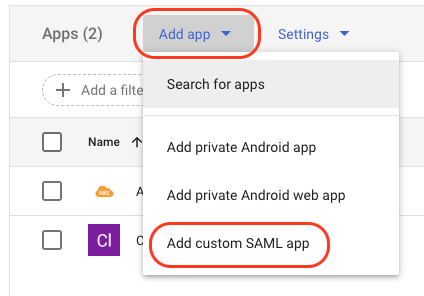
-
Define the initial Port application settings:
-
App name: Insert a name of your choice for the Port app, likePort. -
Add an
App icon(optional):Port Logo (click to expand)

-
Press
Continue.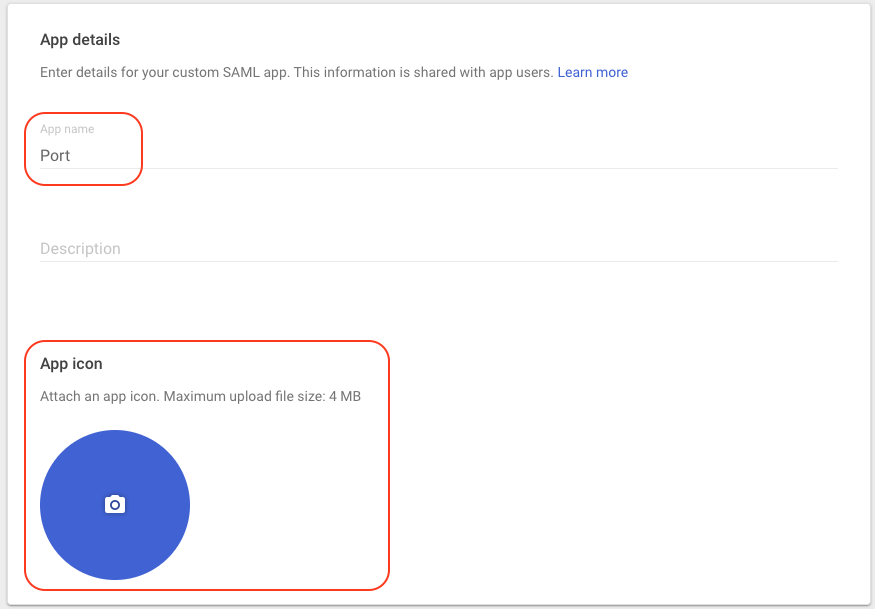
-
-
Take note of the following:
-
Your
SSO URL. -
Your
Certificate.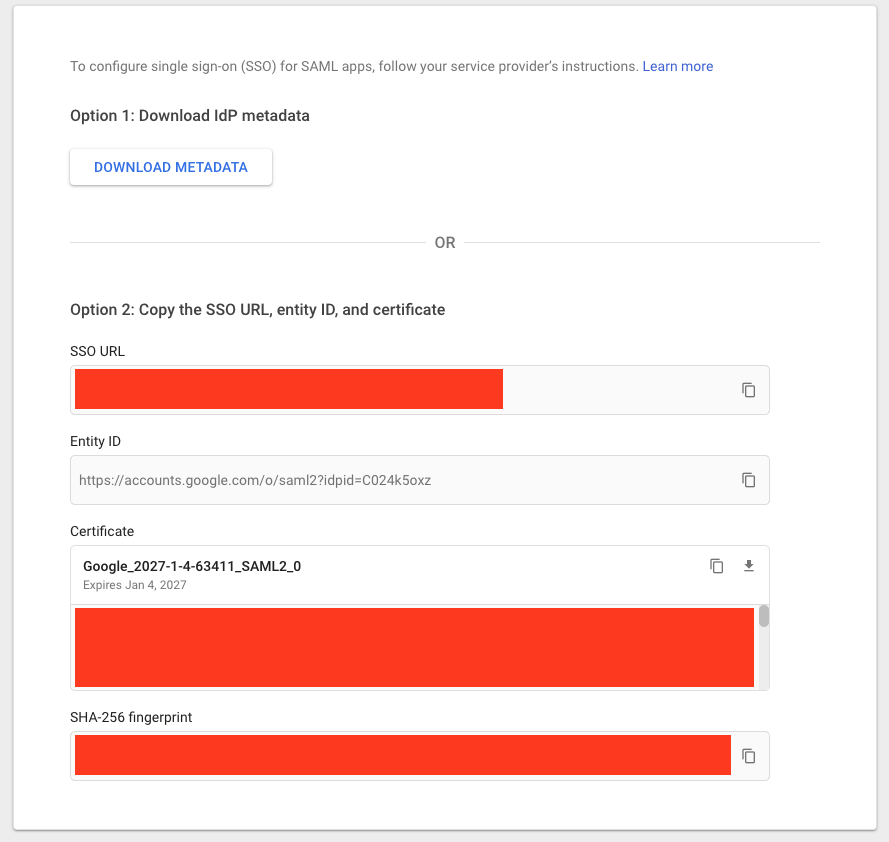
Add this in your Custom SAML Self serve SSO Application.
PressContinue. -
-
Configure your new application as shown below:
Finding your connection nameYour connection name follows the format
company-<companyID>-SSO. You can find it in the Single Sign-On URL shown during the self-serve SSO setup flow. Look for theconnectionparameter in the URL.
-
ACS URL(also known as: Single Sign On URL) -https://auth.getport.io/login/callback?connection=company-<companyID>-SSO -
Entity ID-urn:auth0:port-prod:company-<companyID>-SSOPress
Continue.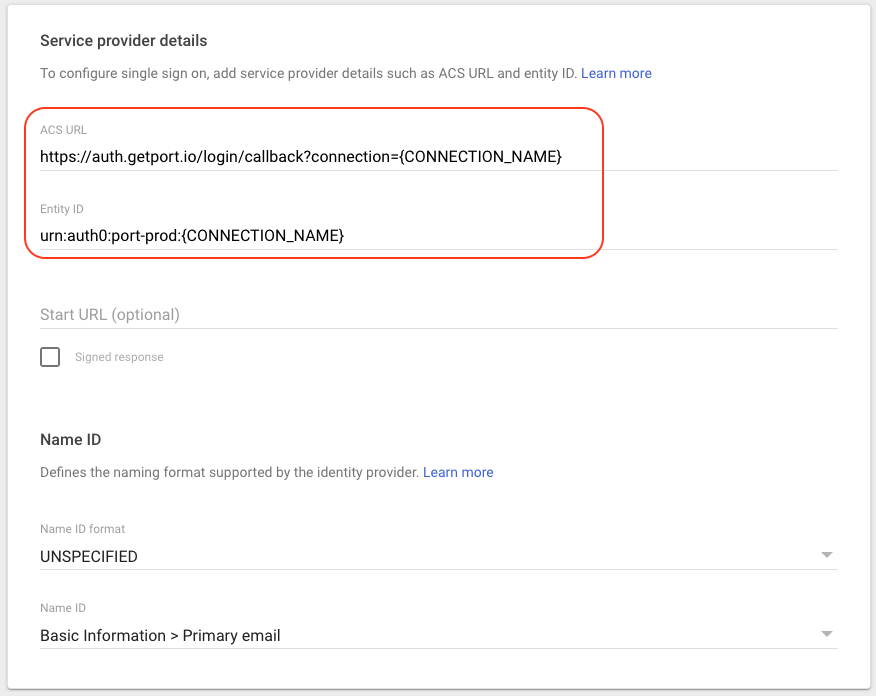
-
Create the following mappings (
email_verifiedneeds to be a constant for all users, with the valuetrue):Google Directory attributes:
Primary email->emailFirst name->nameemail_verified->email_verified
Google membership (optional): This mapping is only relevant if you wish to pass groups to Port.
Configure group membershipGoogle Workspace does not include group membership in the SAML response by default. In the Google Admin console, navigate to Apps -> Web and mobile apps -> Port -> SAML attribute mapping. Under Group membership (optional), select each Google Group you want to send to Port and set App attribute to
groups.If you do not configure this section, Port cannot ingest the user's Google Groups during sign-in. For more information, see Google's group membership mapping documentation.
Google Groups(list) ->groups
Press
Finish.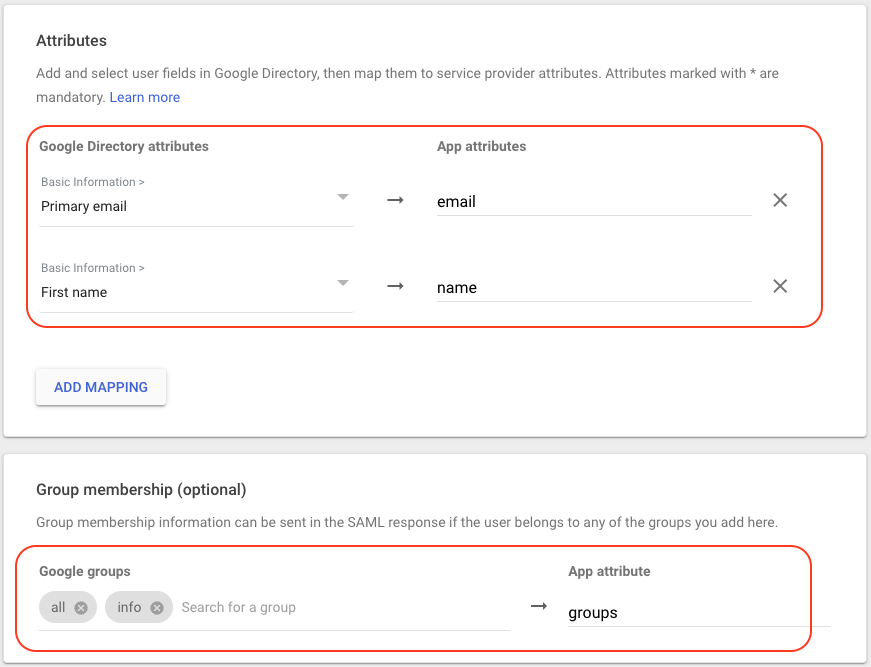
-
Specify permissions to the application:
After creating the app, you need to set up permissions for who has access to this application.
Navigate to your your new application's page, and click User access:
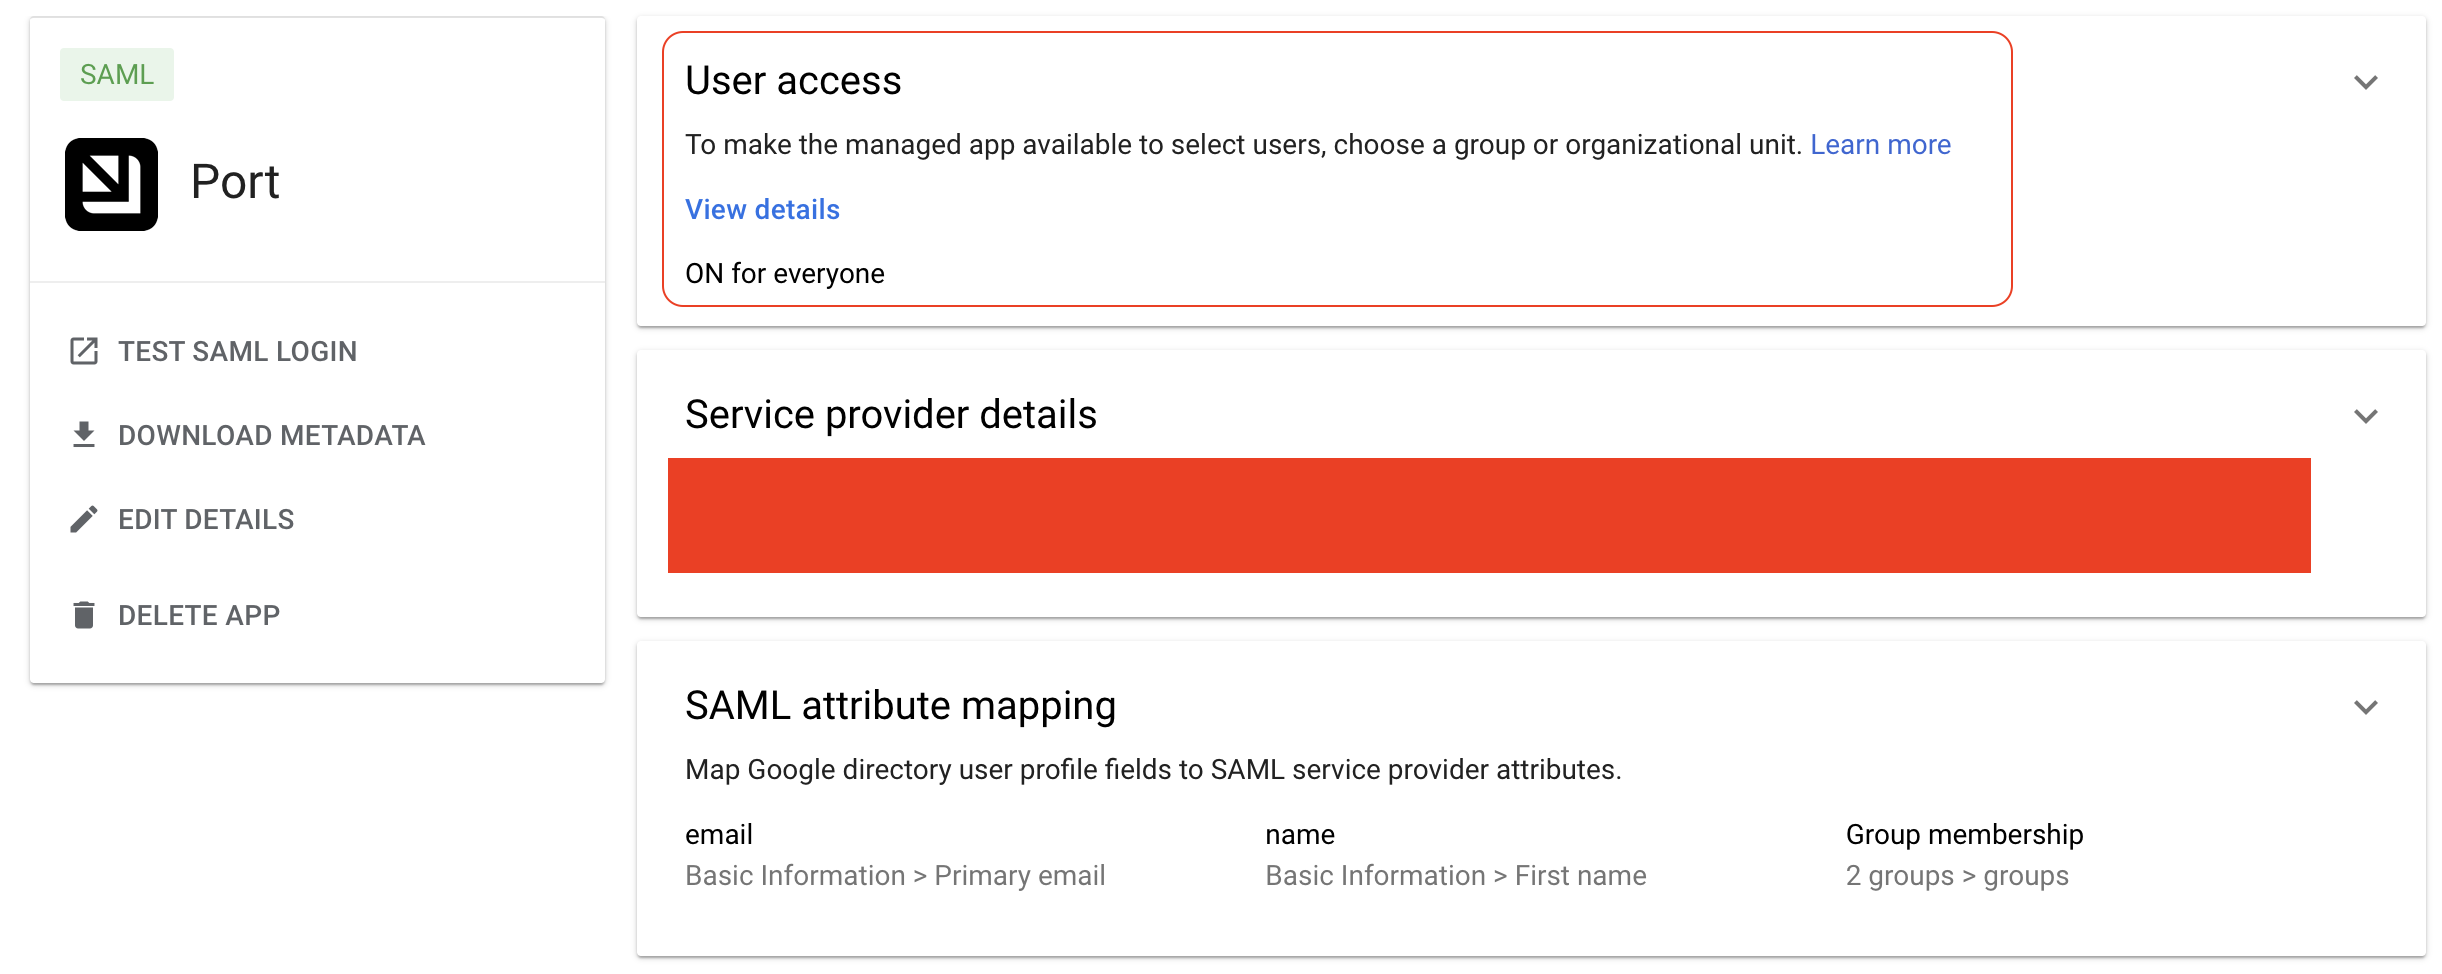
Then choose from the left side menu, either to enable the app for
Everyone, forGroupsor forOrganizational units.Make sure that for any of the options you would like to enable the app for, you check the
ONcheckbox: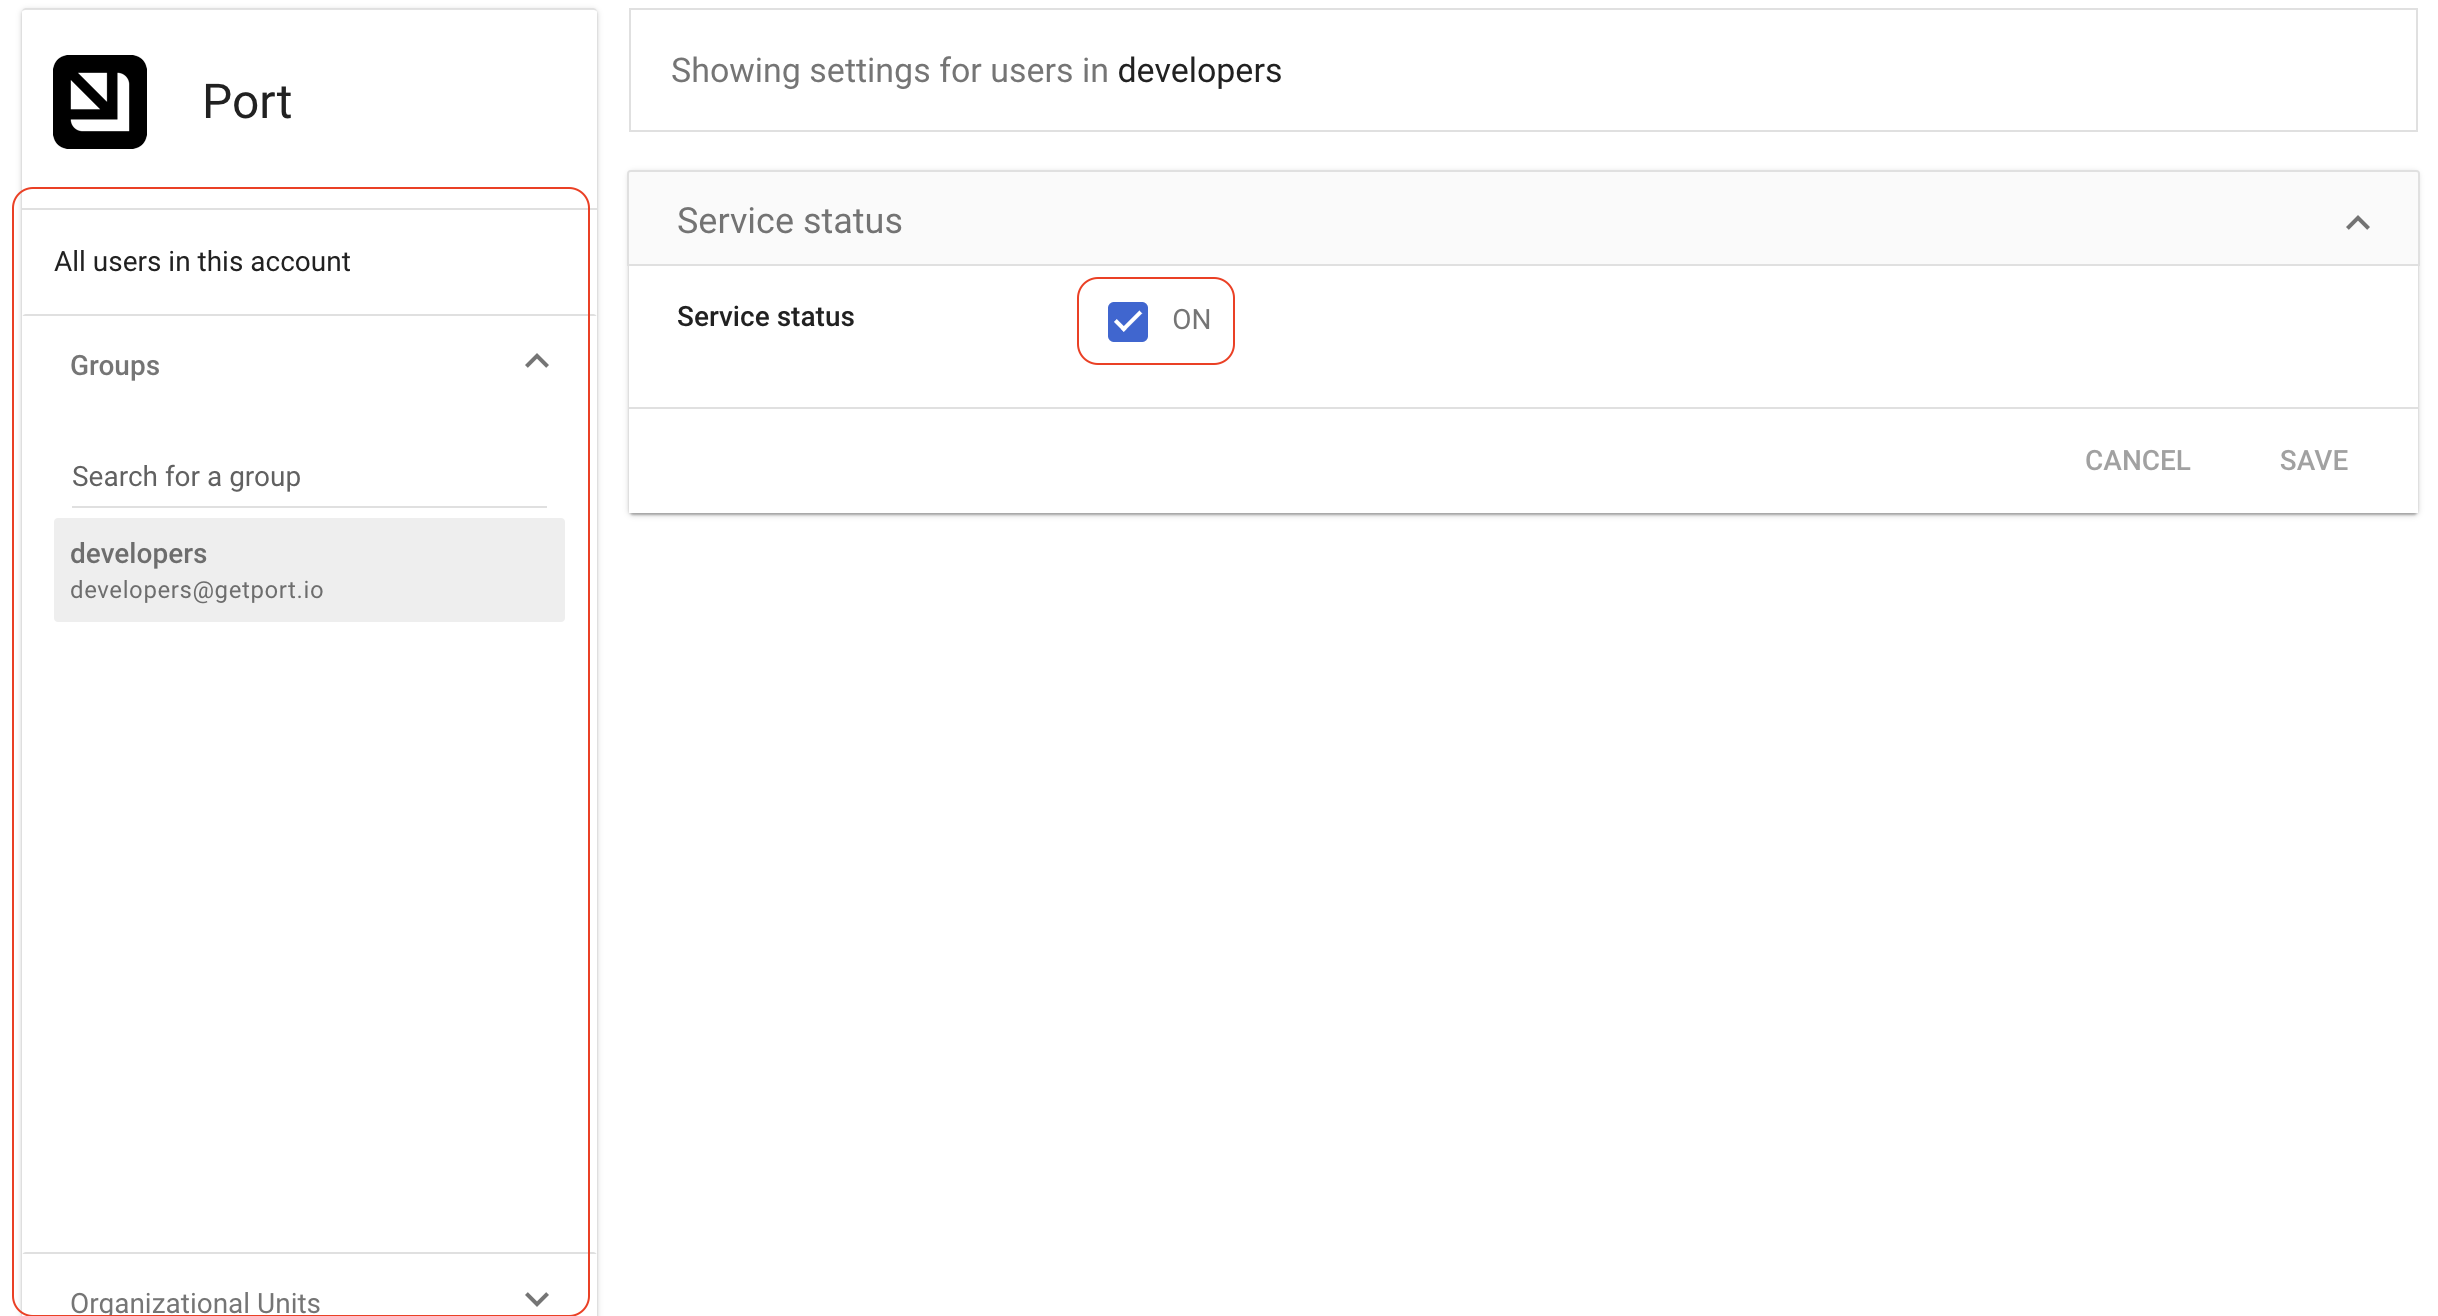
-
Log in with using your new Google app:
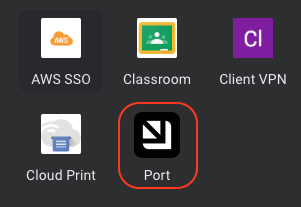
After configuring the SSO connection, you can initiate the login flow directly via URL. Use the following URL based on your account region, replacing company-<companyID>-SSO with your actual connection name. You can find your connection name in the Single Sign-On URL shown during the self-serve SSO setup flow - look for the connection parameter in the URL.
- EU
- US
https://auth.getport.io/authorize?response_type=token&client_id=96IeqL36Q0UIBxIfV1oqOkDWU6UslfDj&connection=company-<companyID>-SSO&redirect_uri=https%3A%2F%2Fapp.port.io
https://auth.us.getport.io/authorize?response_type=token&client_id=4lHUry3Gkds317lQ3JcgABh0JPbT3rWx&connection=company-<companyID>-SSO&redirect_uri=https%3A%2F%2Fapp.us.port.io