Onelogin
Follow this step-by-step guide to configure the integration between Port and Onelogin.
In order to complete the process you will need to contact Port to deliver and receive information, as detailed in the guide below.
Port-Onelogin integration benefits
- Connect to the Port application via a Onelogin app;
- Your Onelogin roles will be automatically synced with Port, upon user sign-in;
- Set granular permissions on Port according to your Onelogin roles.
How to configure the Onelogin app integration for Port
Step #1: Create a new Onelogin application
- In the Admin Console, go to Applications -> Applications.
- Click
Add App.

- In the search box type OpenID Connect, then select
OpenId Connect (OIDC):

-
Define the initial Port application settings:
Display Name: Insert a name of your choice for the Port app, likePort.- Add rectangular and square icons (optional):


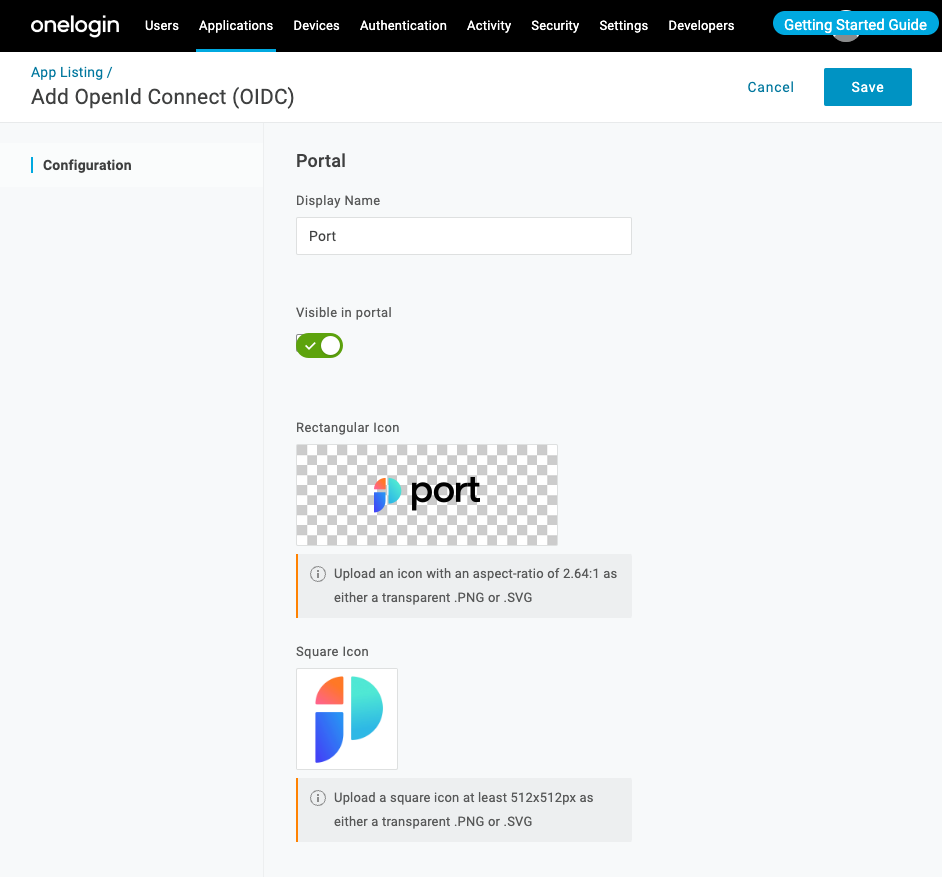
Click Save.
Most of the following steps involve editing the initial Port app you created. Keep in mind you can always go back to it by opening the admin console and going to Applications -> Applications, the Port app will appear in the application list.
Step #2: Configure your Onelogin application
In the Port app, go to the Configuration menu and follow these steps:
- Under
Login URLpaste the following login URL:
Port exposes two API instances, one for the EU region of Port, and one for the US region of Port.
Use the correct endpoint based on your account region, and make sure to to replace {CONNECTION_NAME} with the value provided to you by Port.
- EU
- US
https://auth.getport.io/authorize?response_type=token&client_id=96IeqL36Q0UIBxIfV1oqOkDWU6UslfDj&connection={CONNECTION_NAME}&redirect_uri=https%3A%2F%2Fapp.port.io
https://auth.us.getport.io/authorize?response_type=token&client_id=4lHUry3Gkds317lQ3JcgABh0JPbT3rWx&connection={CONNECTION_NAME}&redirect_uri=https%3A%2F%2Fapp.us.port.io
We will provide your {CONNECTION_NAME} (Contact us using chat/Slack/mail to support.port.io).
-
Under
Redirect URI'sset:https://auth.getport.io/login/callback.- The Redirect URI is where Onelogin sends the authentication response and ID token for the sign-in request.
Click Save.
Be sure to click save before moving on to the next step because without the Redirect URI's filled in, trying to save any other application parameter will result in an error.
Step #3: Configure OIDC settings
In the Port app, go to the SSO menu and follow these steps:
-
Copy the
Client IDand theClient Secretand send it to Port (on the slack channel). -
Click on the
Well-known ConfigurationLink, and send the page address to Port (its format will behttps://{YOUR_DOMAIN}.onelogin.com/oidc/2/.well-known/openid-configuration) -
Change the Token Endpoint - Authentication Method to
None (PKCE):
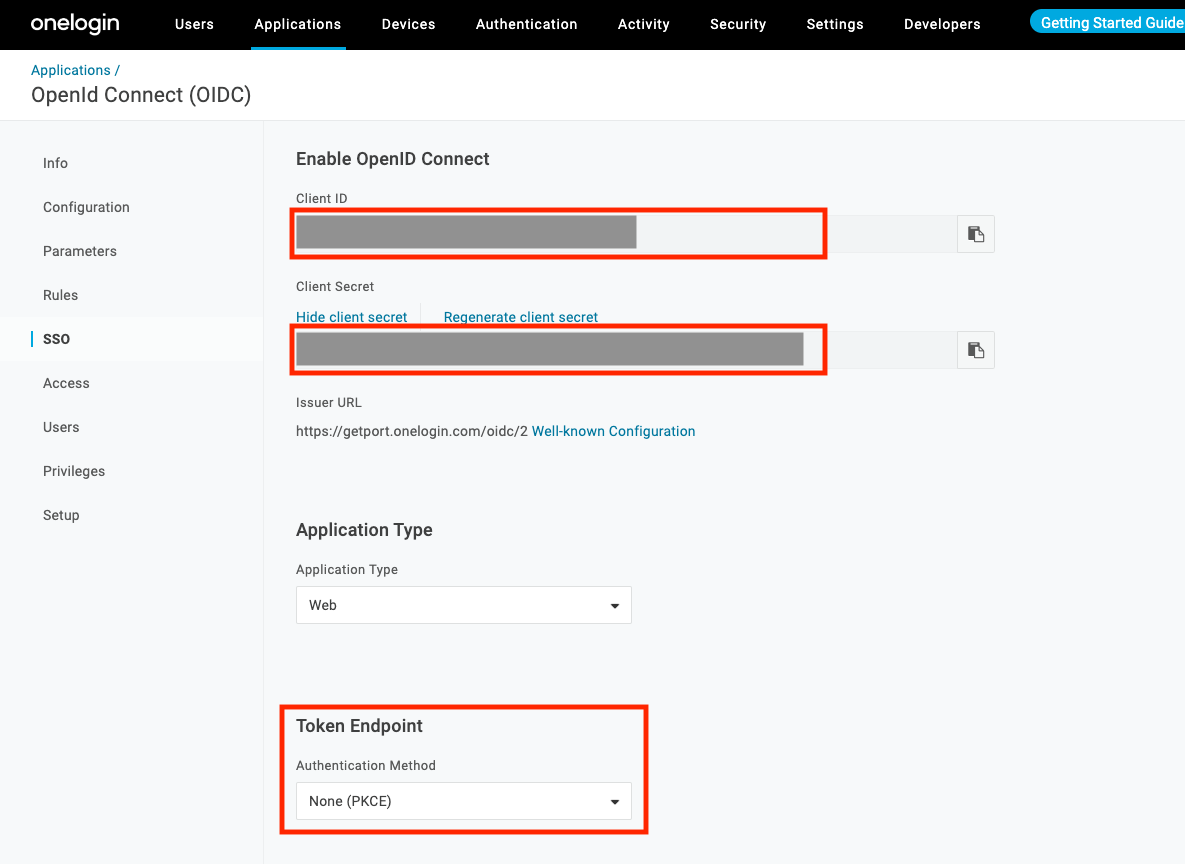
Click Save.
Step #4: Add email_verified custom property to all users
The use of OpenID requires that Onelogin passes to Port an email_verified field upon user login. Onelogin does not store and expose that field by default, so in this step, you are going to configure that field and apply it to all users in your Onelogin account. The steps outlined here can also be found in the Onelogin documentation.
- In the Admin Console, go to Users -> Custom User Fields.
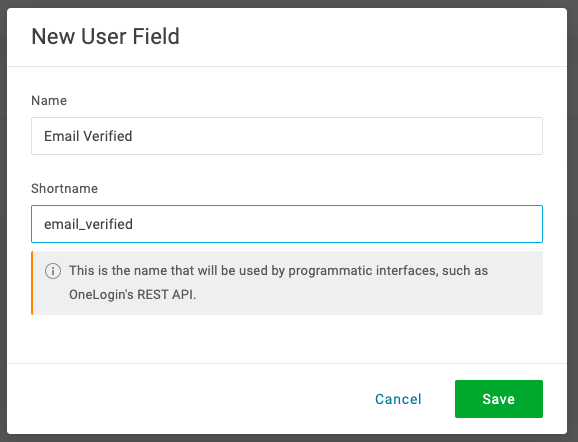
- Click on
New User Field. - Enter the following details:
Name: Email VerifiedShortname: email_verified
The custom field is null by default, in order to change its value to true you will create a custom mapping rule:
It is also possible to manually change the value of the Email Verified field to true for each user that requires access to Port in your organization. However, granting access manually to a large number of users is not scalable.
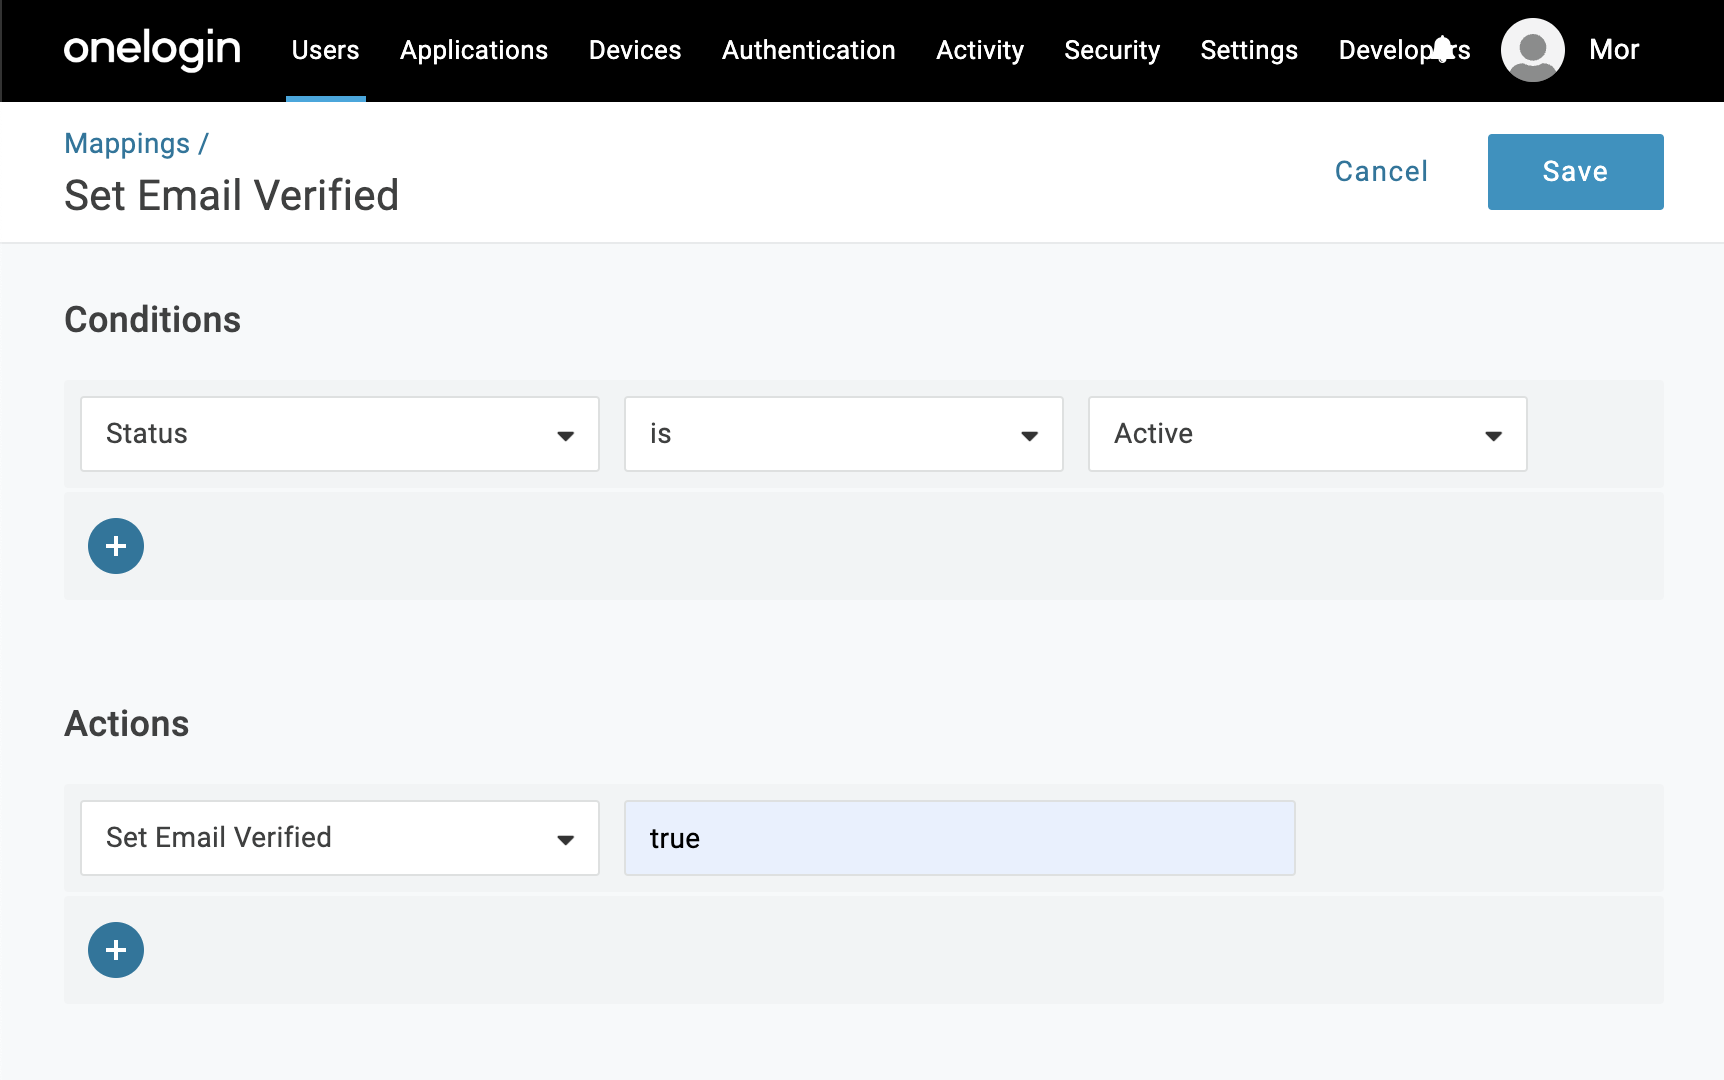
The mapping specified here will set the value of the Email Verified custom field to true for every user whose Status is Active in your Onelogin organization. Feel free to use a different mapping if you seek a specific mapping.
- Go to Users -> Mappings
- Click on
New Mapping - Enter mapping details:
Name: Insert a friendly name for the mapping, likeSet Email Verified;Conditions: Set the condition: - Status - is - Active;Actions: Set the action: Set Email Verified - true.
- Click
Save.
After creating the mapping rule, go back to Users -> Mappings and click on Reapply All Mappings. The new mapping might process for a few minutes before it is applied. You can check the mapping job status either by going to Activity -> Jobs or by looking at a specific user and verifying that it has the Email Verified field set to true (and not the default empty field).
Step #5: Configure OpenID Claims
In the Port app, go to the Parameters menu and follow these steps:
- Click on the
+button; - In the form that appears, under
Field Namewrite:openidand clicksave; - In the value drop down that appears, select
OpenID name.
Repeat the process two more times and add the following additional parameters:
Field Name: email,Value: EmailField Name: email_verified,Value: Email Verified (Custom)
At the end of the process, your Parameters section will look like this:
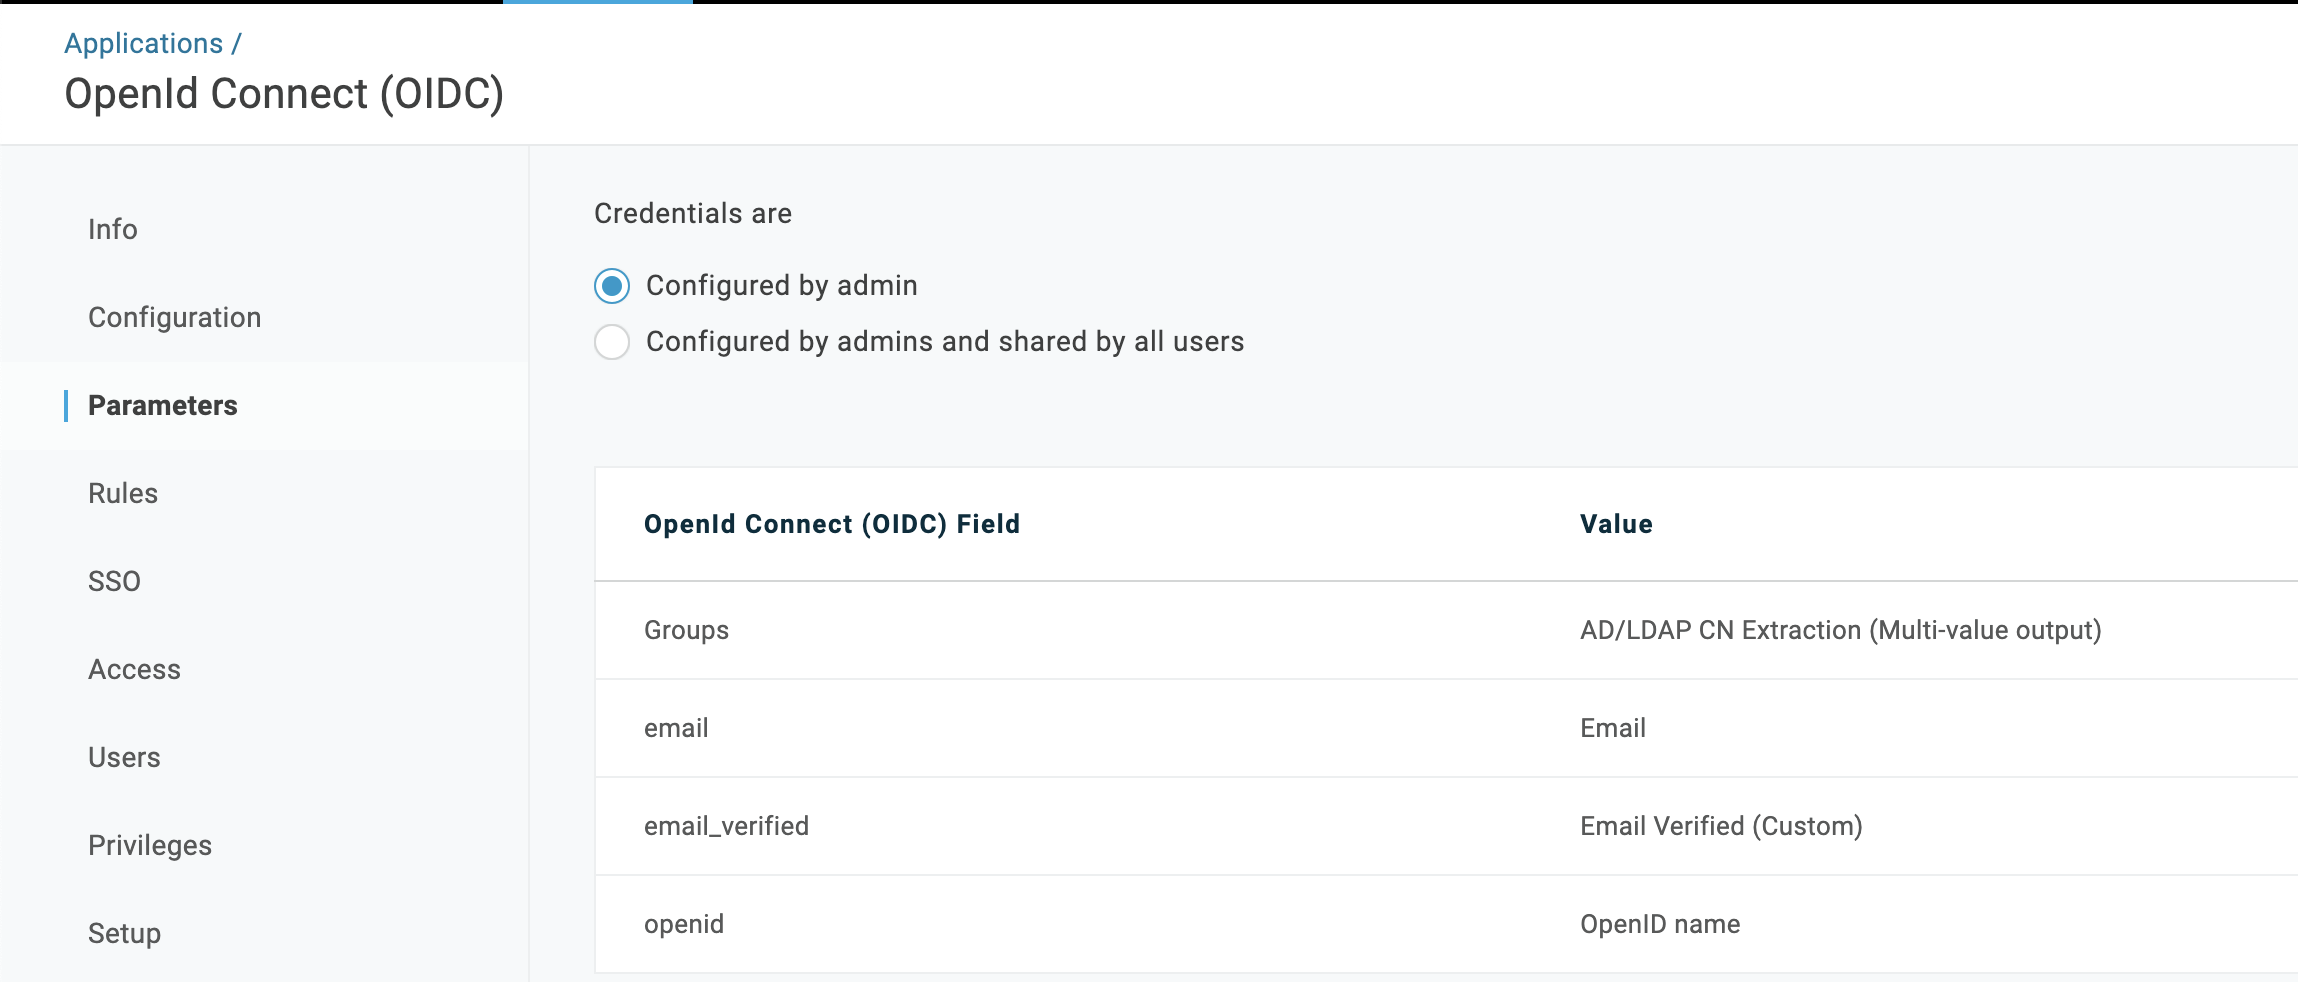
Click Save.
Step #6: Exposing the application to your organization
-
In the
Applicationpage, select the Port app and go to theAccessmenu. -
In the
Rolessection, select the roles you want to expose the Port app to: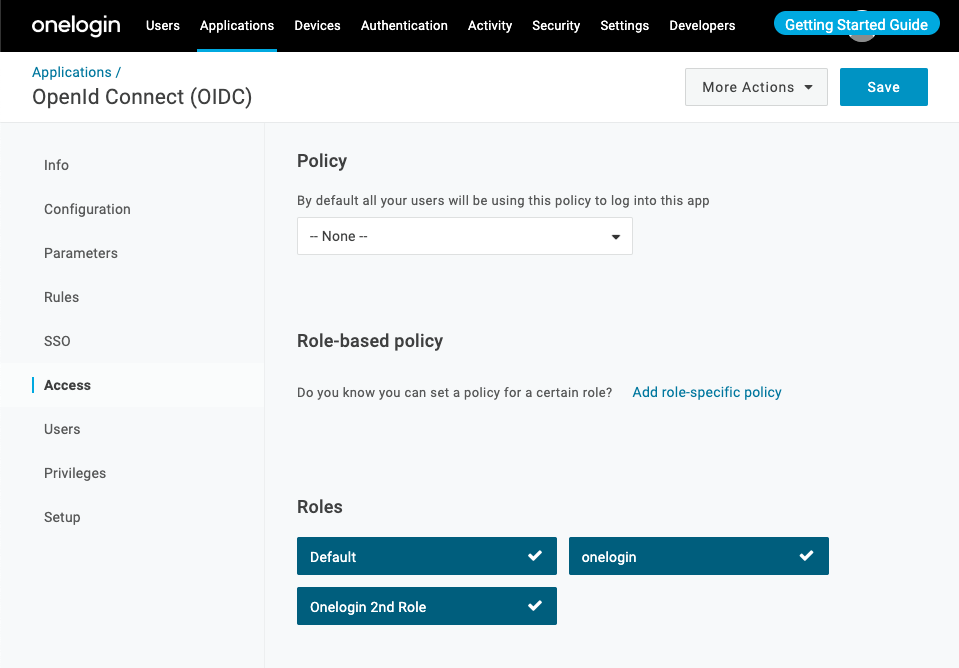
-
Click
Save.
After completing these steps, users with roles that the Port app was assigned to, will see the Port app in their Portal and upon clicking it, will be logged in to Port:
After configuring the SSO connection, you can initiate the login flow directly via URL.
Use the following URL based on your account region, and make sure to to replace {CONNECTION_NAME} with the value provided to you by Port.
- EU
- US
https://auth.getport.io/authorize?response_type=token&client_id=96IeqL36Q0UIBxIfV1oqOkDWU6UslfDj&connection={CONNECTION_NAME}&redirect_uri=https%3A%2F%2Fapp.port.io
https://auth.us.getport.io/authorize?response_type=token&client_id=4lHUry3Gkds317lQ3JcgABh0JPbT3rWx&connection={CONNECTION_NAME}&redirect_uri=https%3A%2F%2Fapp.us.port.io
How to allow pulling Onelogin roles to Port
This stage is OPTIONAL and is required only if you wish to pull all of your Onelogin roles into Port inherently.
Benefit: managing permissions and user access on Port.
Outcome: for every user that logs in, we will automatically get their associated Onelogin roles, according to your definition in the settings below.
To allow automatic Onelogin roles support in Port, please follow these steps:
-
In the
Applicationpage, select the Port app and go to theParametersmenu; -
Click on the
Groupsclaim: -
Update the groups claim:
- Change the value of
Default if no value selectedtoUser Roles; - From the dropdown, select
Semicolon delimited input:
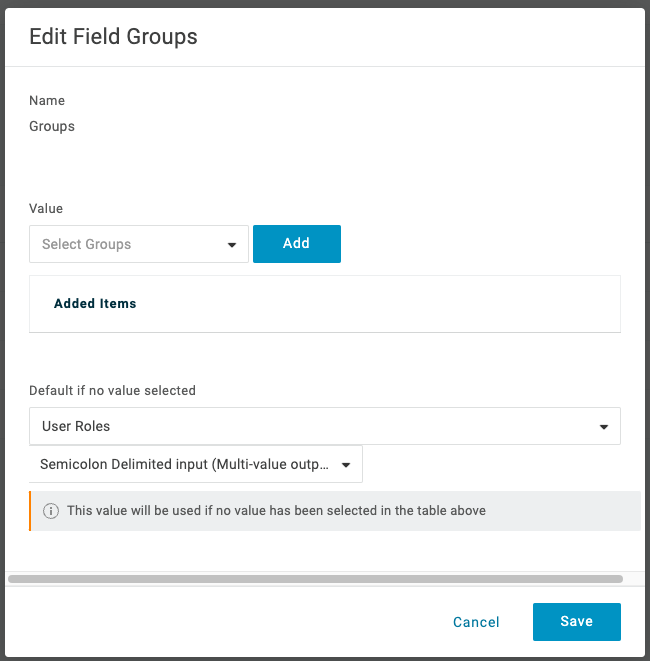
- Click
Save.
- Change the value of
-
Click
Save.