Entra ID (AzureAD)
This guide demonstrates how to configure Single Sign-On (SSO) integration between Port and Microsoft Entra ID (AzureAD) using OIDC.
Once implemented:
- Users can connect to Port via an AzureAD app.
- AzureAD teams will be automatically synced with Port upon user sign-in.
- You can set granular permissions in Port according to your AzureAD groups.
Prerequisites
Before starting the configuration, ensure you have:
- Access to the Microsoft Azure Portal with permissions to create and configure applications.
- Users who need access to Port must have a valid value in their
Emailfield in Azure AD.
Register a new application
Create the application registration
-
In the Microsoft Azure Portal, go to
Azure Active Directory. -
Click on
App registrations.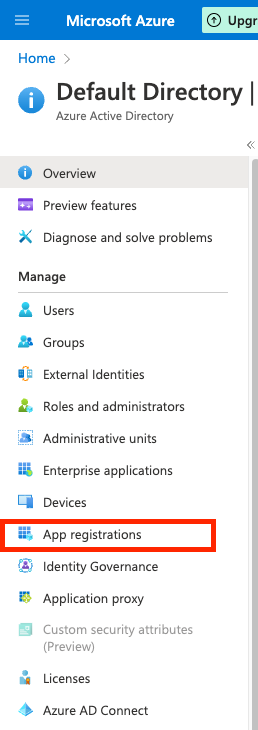
-
Click on
New registrationat the top of the page.
-
Define the Port application settings:
4.1 Name: Insert a friendly name for the Port app, like
Port.4.2 Supported account types: Please select the option that is appropriate for your organization.
For most use cases this would be Accounts in this organizational directory only (Default Directory only - Single tenant).
4.3 Redirect URI:
-
Set
PlatformtoWeb -
Set
URLtohttps://auth.getport.io/login/callback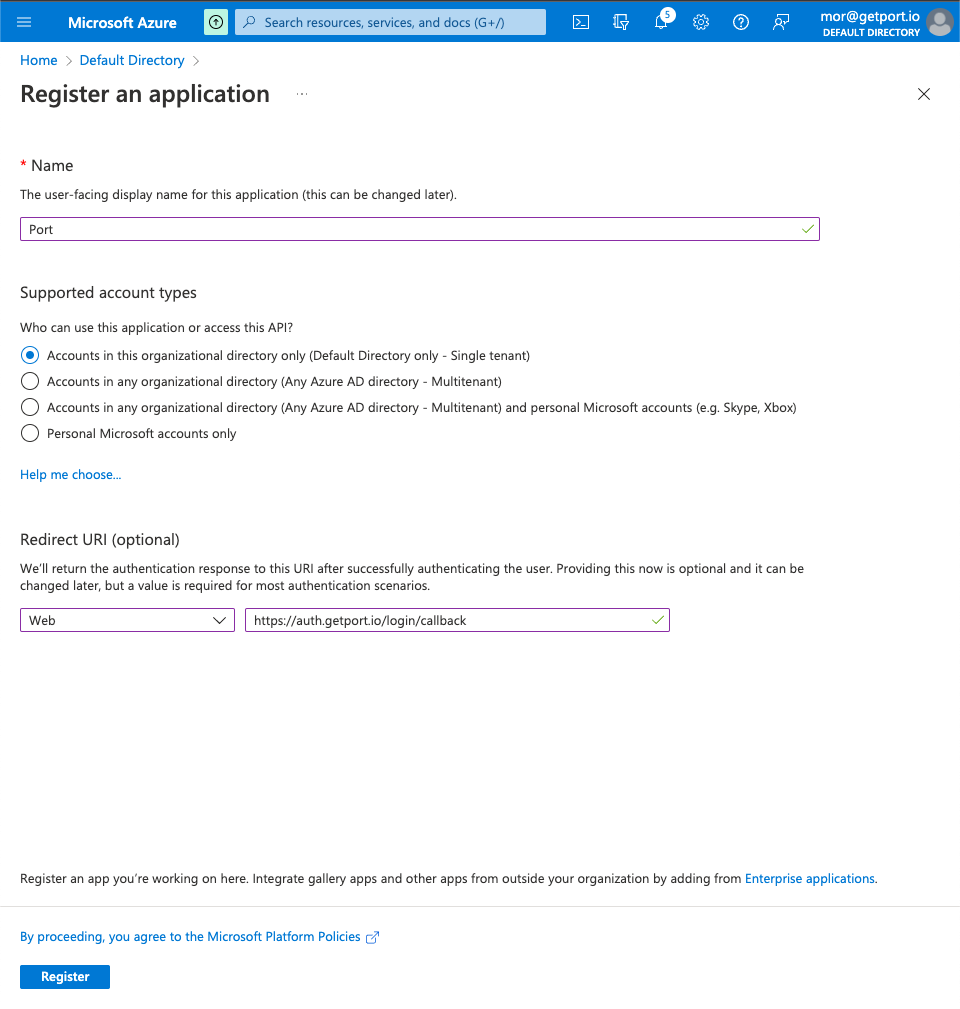
4.4 Click
Register. -
Configure authentication settings
-
On the new Port App page, click
Authentication.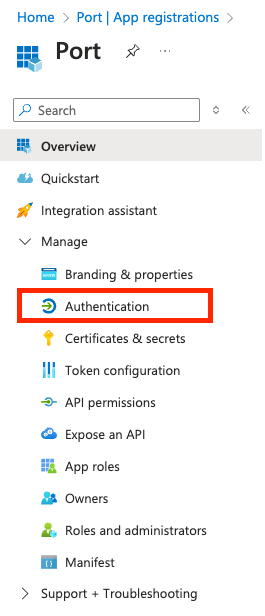
-
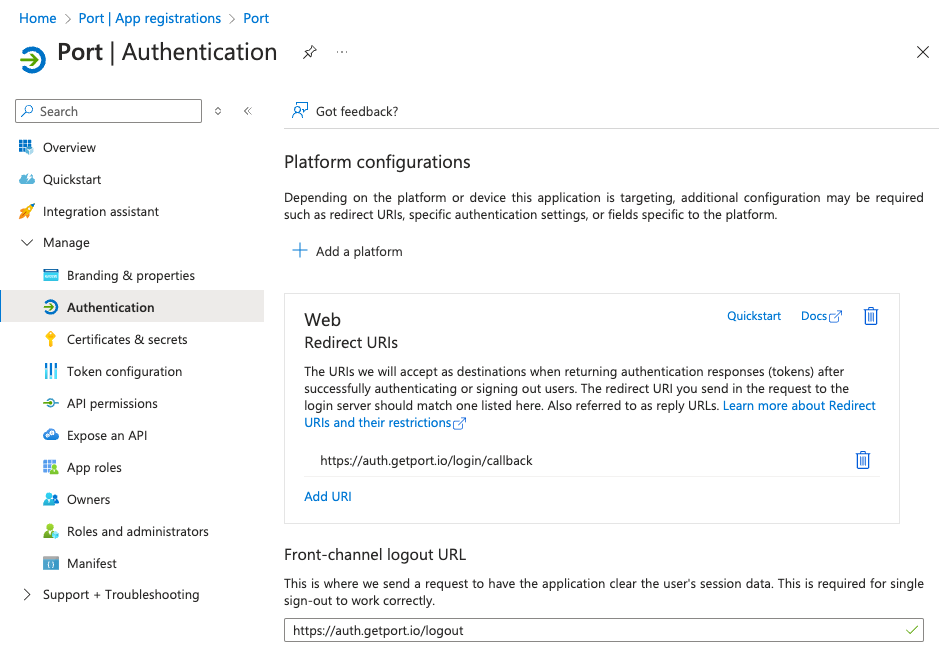
Add the Front-channel logout URL: paste the following URL:
https://auth.getport.io/logoutAdding the front-channel logout URL will enable single sign-out, meaning when a user logs out from Port, it also logs them out from their identity provider.
-
Click
Save.
Configure application branding
-
On the new Port App page, click
Branding & Properties.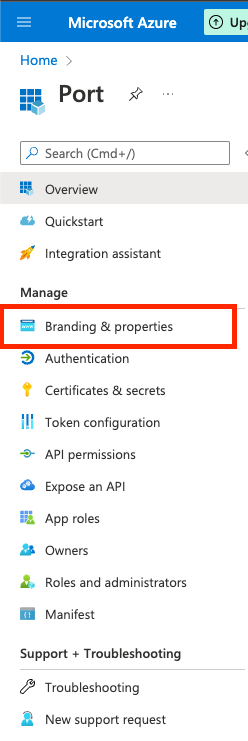
-
Configure the following settings:
-
Home page URL: paste the following URL:
Set authorization endpoint based on account regionPort exposes two API instances, one for the EU region and one for the US region. Use the correct endpoint based on your account region, replacing
company-<companyID>-SSOwith your actual connection name.To find your connection name: open the Credentials modal, go to the Organization tab, and copy the Company ID. Use only the ID portion. For example, if your Company ID is
company_123456789, your connection name iscompany-123456789-SSO.- EU
- US
https://auth.getport.io/authorize?response_type=token&client_id=96IeqL36Q0UIBxIfV1oqOkDWU6UslfDj&connection=company-<companyID>-SSO&redirect_uri=https%3A%2F%2Fapp.port.iohttps://auth.us.getport.io/authorize?response_type=token&client_id=4lHUry3Gkds317lQ3JcgABh0JPbT3rWx&connection=company-<companyID>-SSO&redirect_uri=https%3A%2F%2Fapp.us.port.io -
Publisher domain: Select the domain matching your user emails (for example
port.io).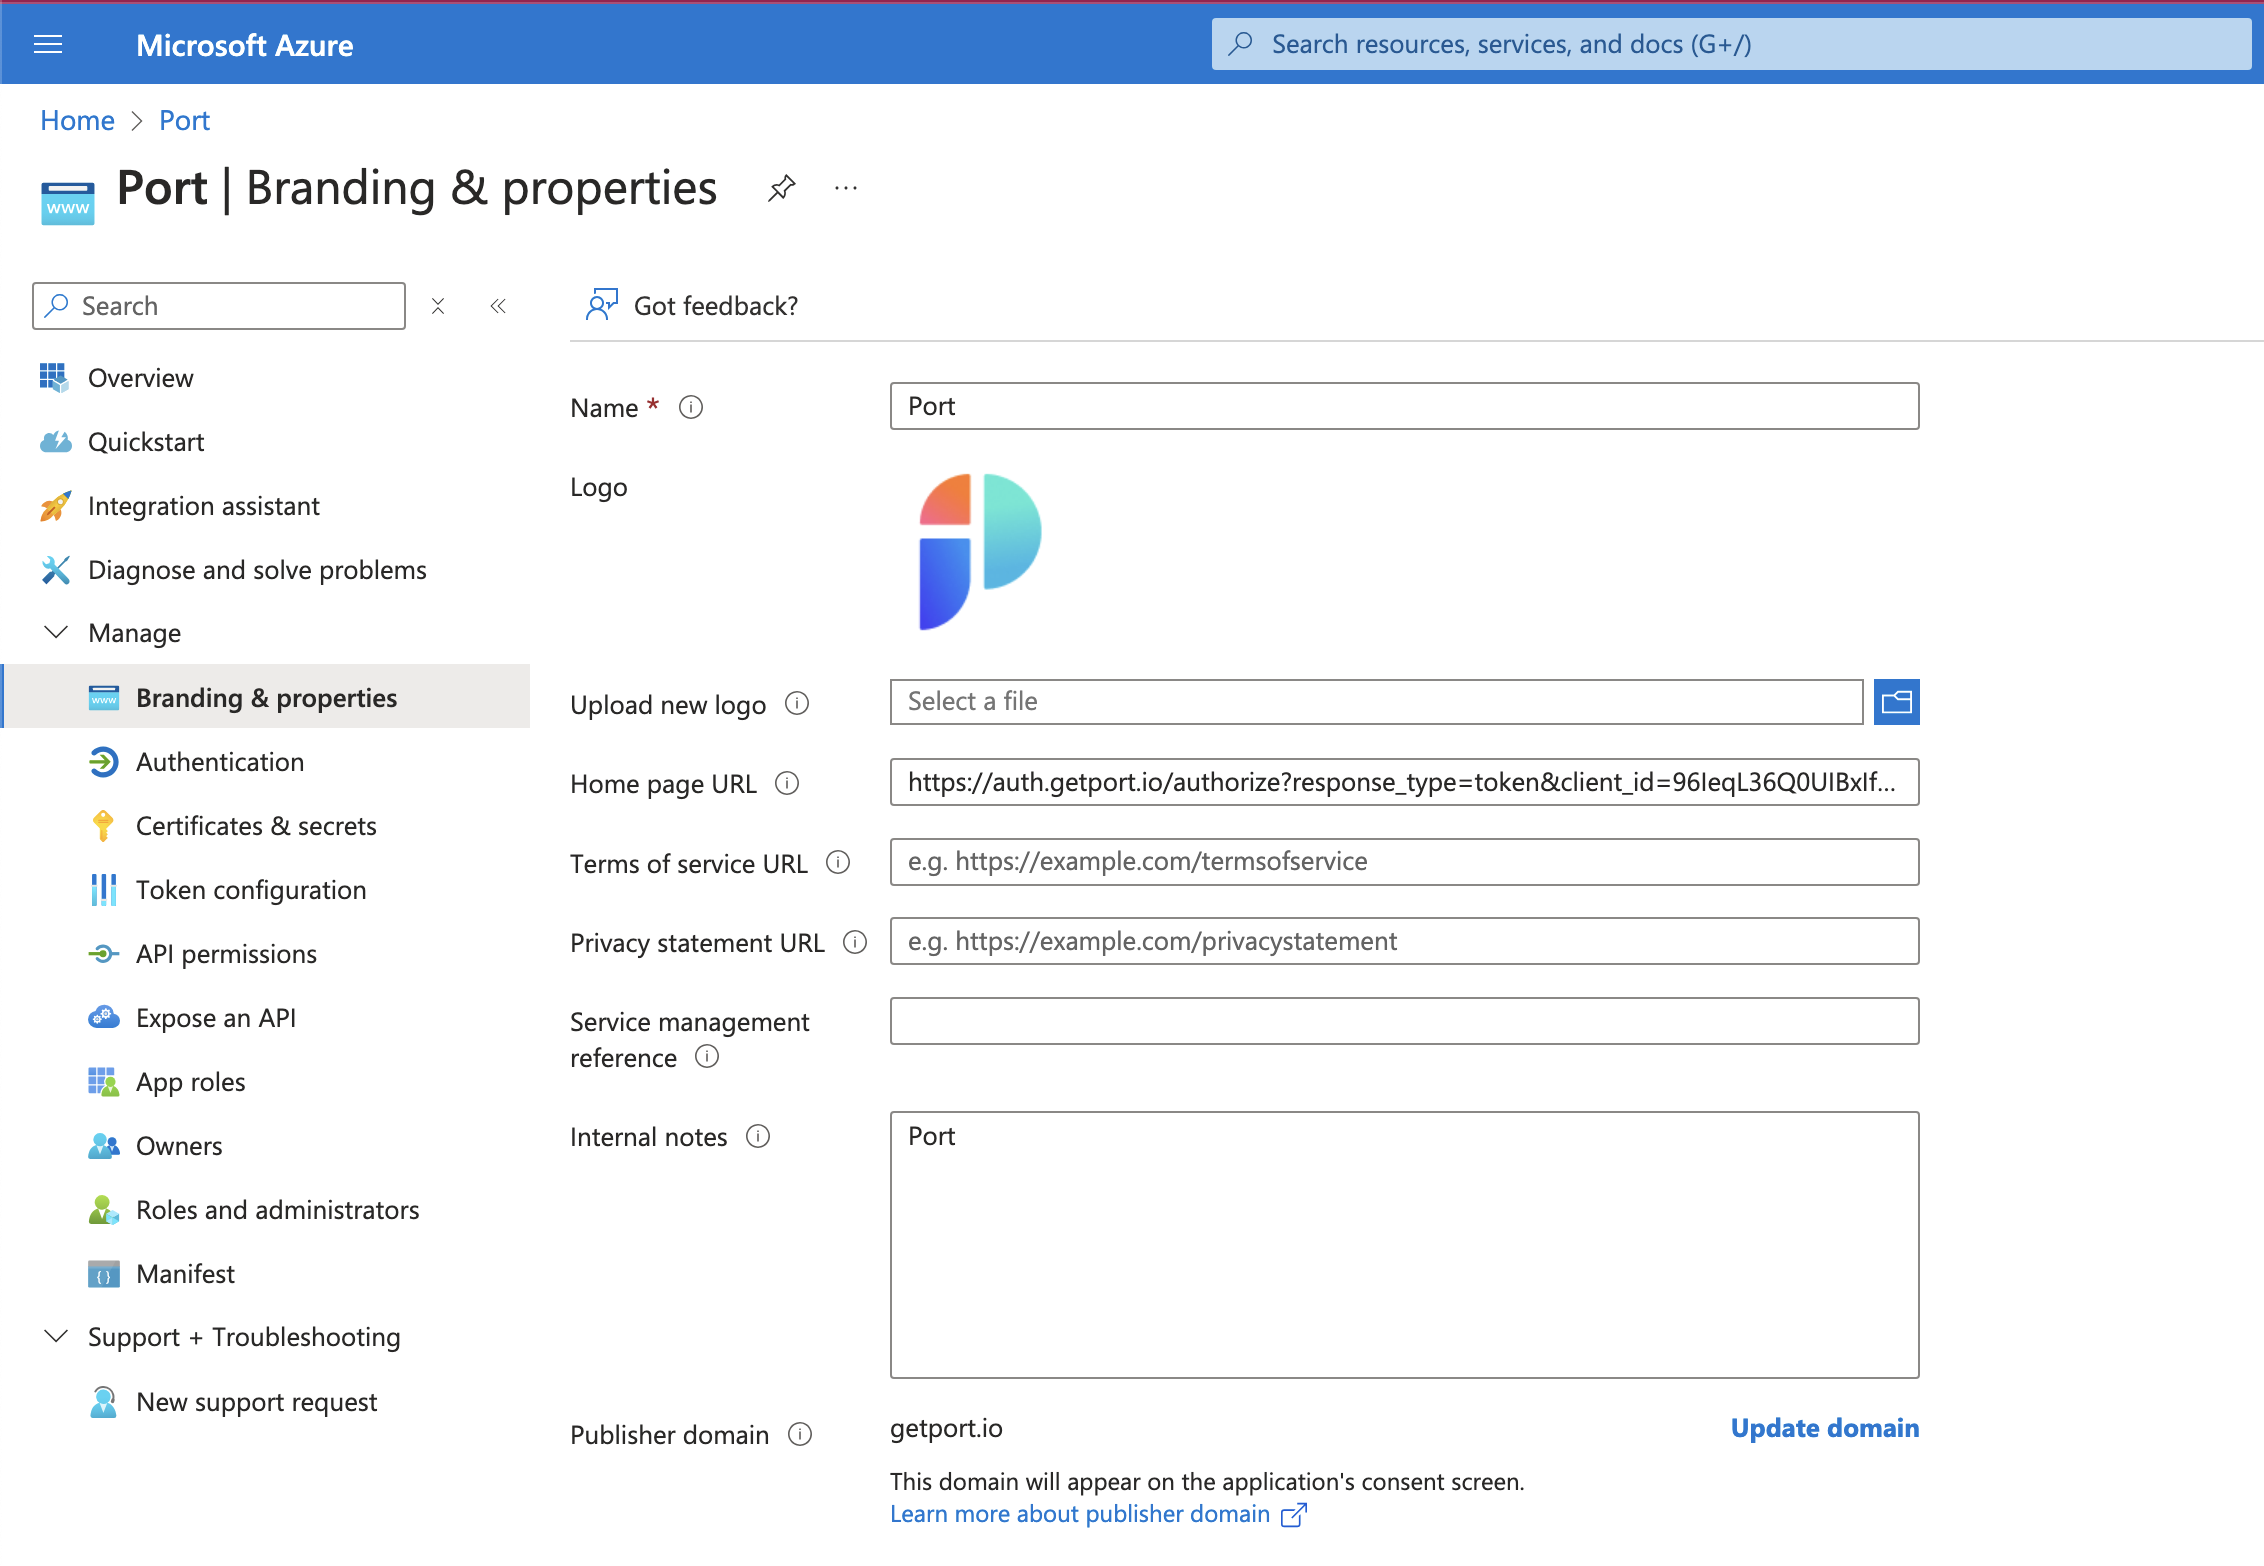
-
-
Click
Save.
Set up application permissions
Add required permissions
-
On the Port App page, click
API Permissions.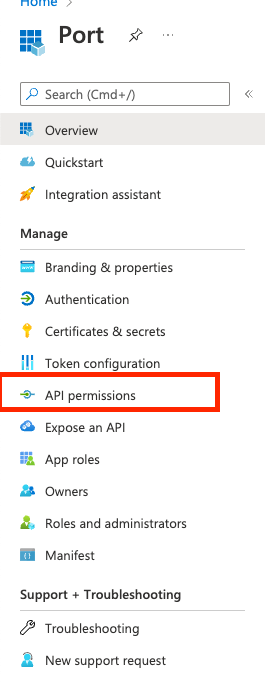
-
Click
Add a permission.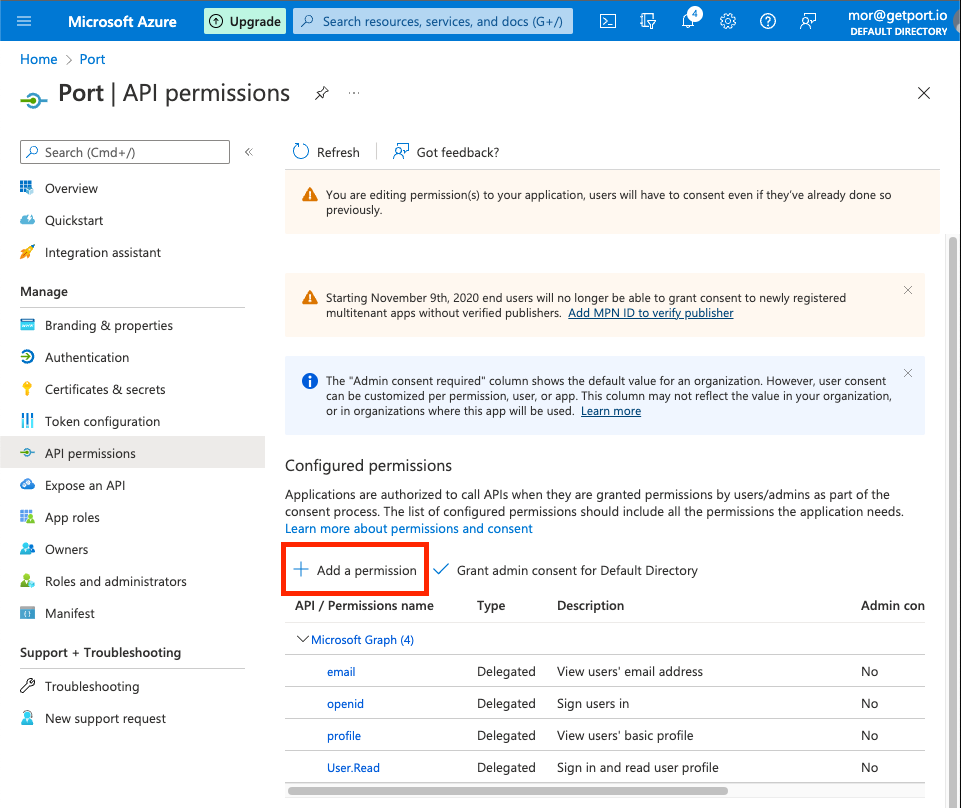
-
On the
Microsoft APIstab:-
Click on
Microsoft Graph.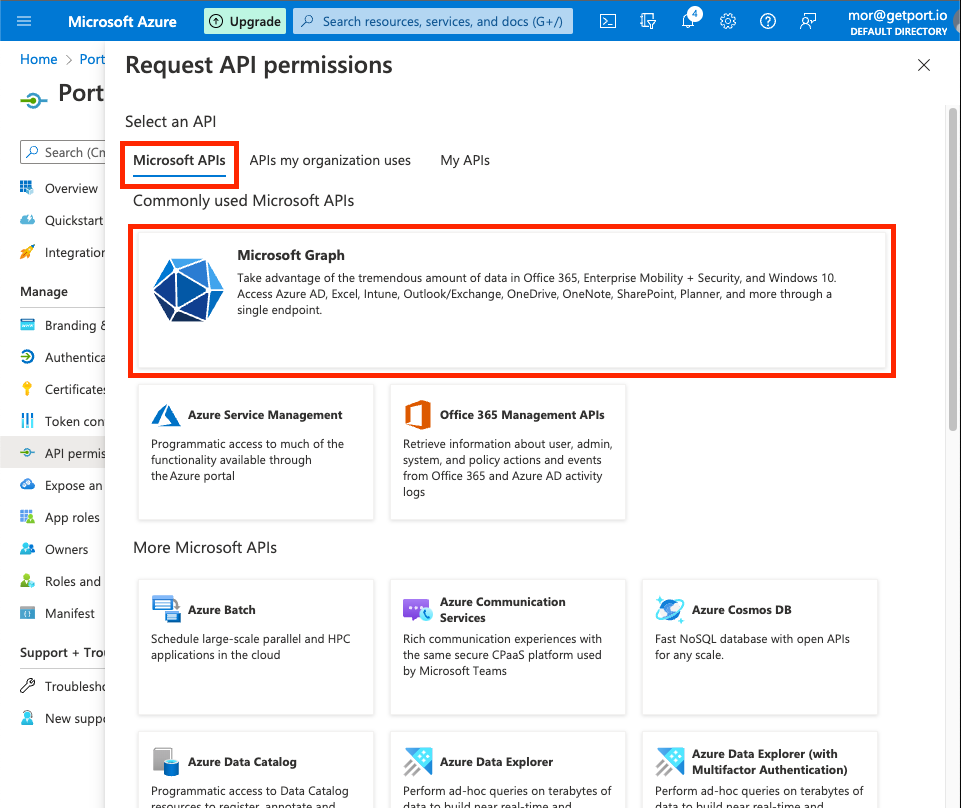
-
Click on
Delegate Permissions.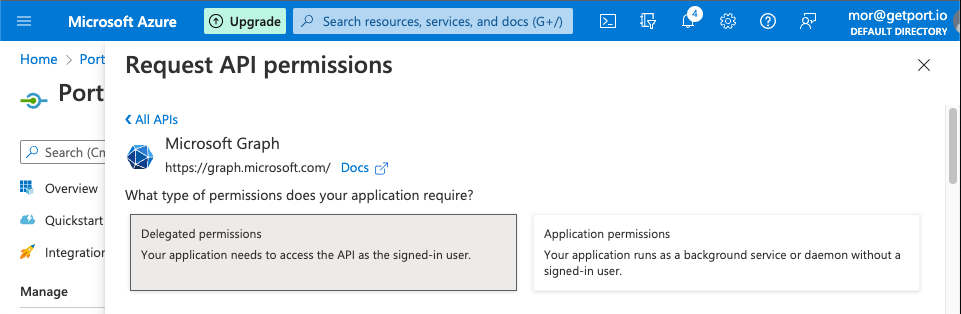
- Search and mark the following permissions:
email,openid,profile,User.read
AzureAD groups integrationIf you wish to pull in AzureAD groups into Port, you will also need to add the
Directory.Read.Allpermission.
See Permissions required to pull AzureAD groups to Port for more details.
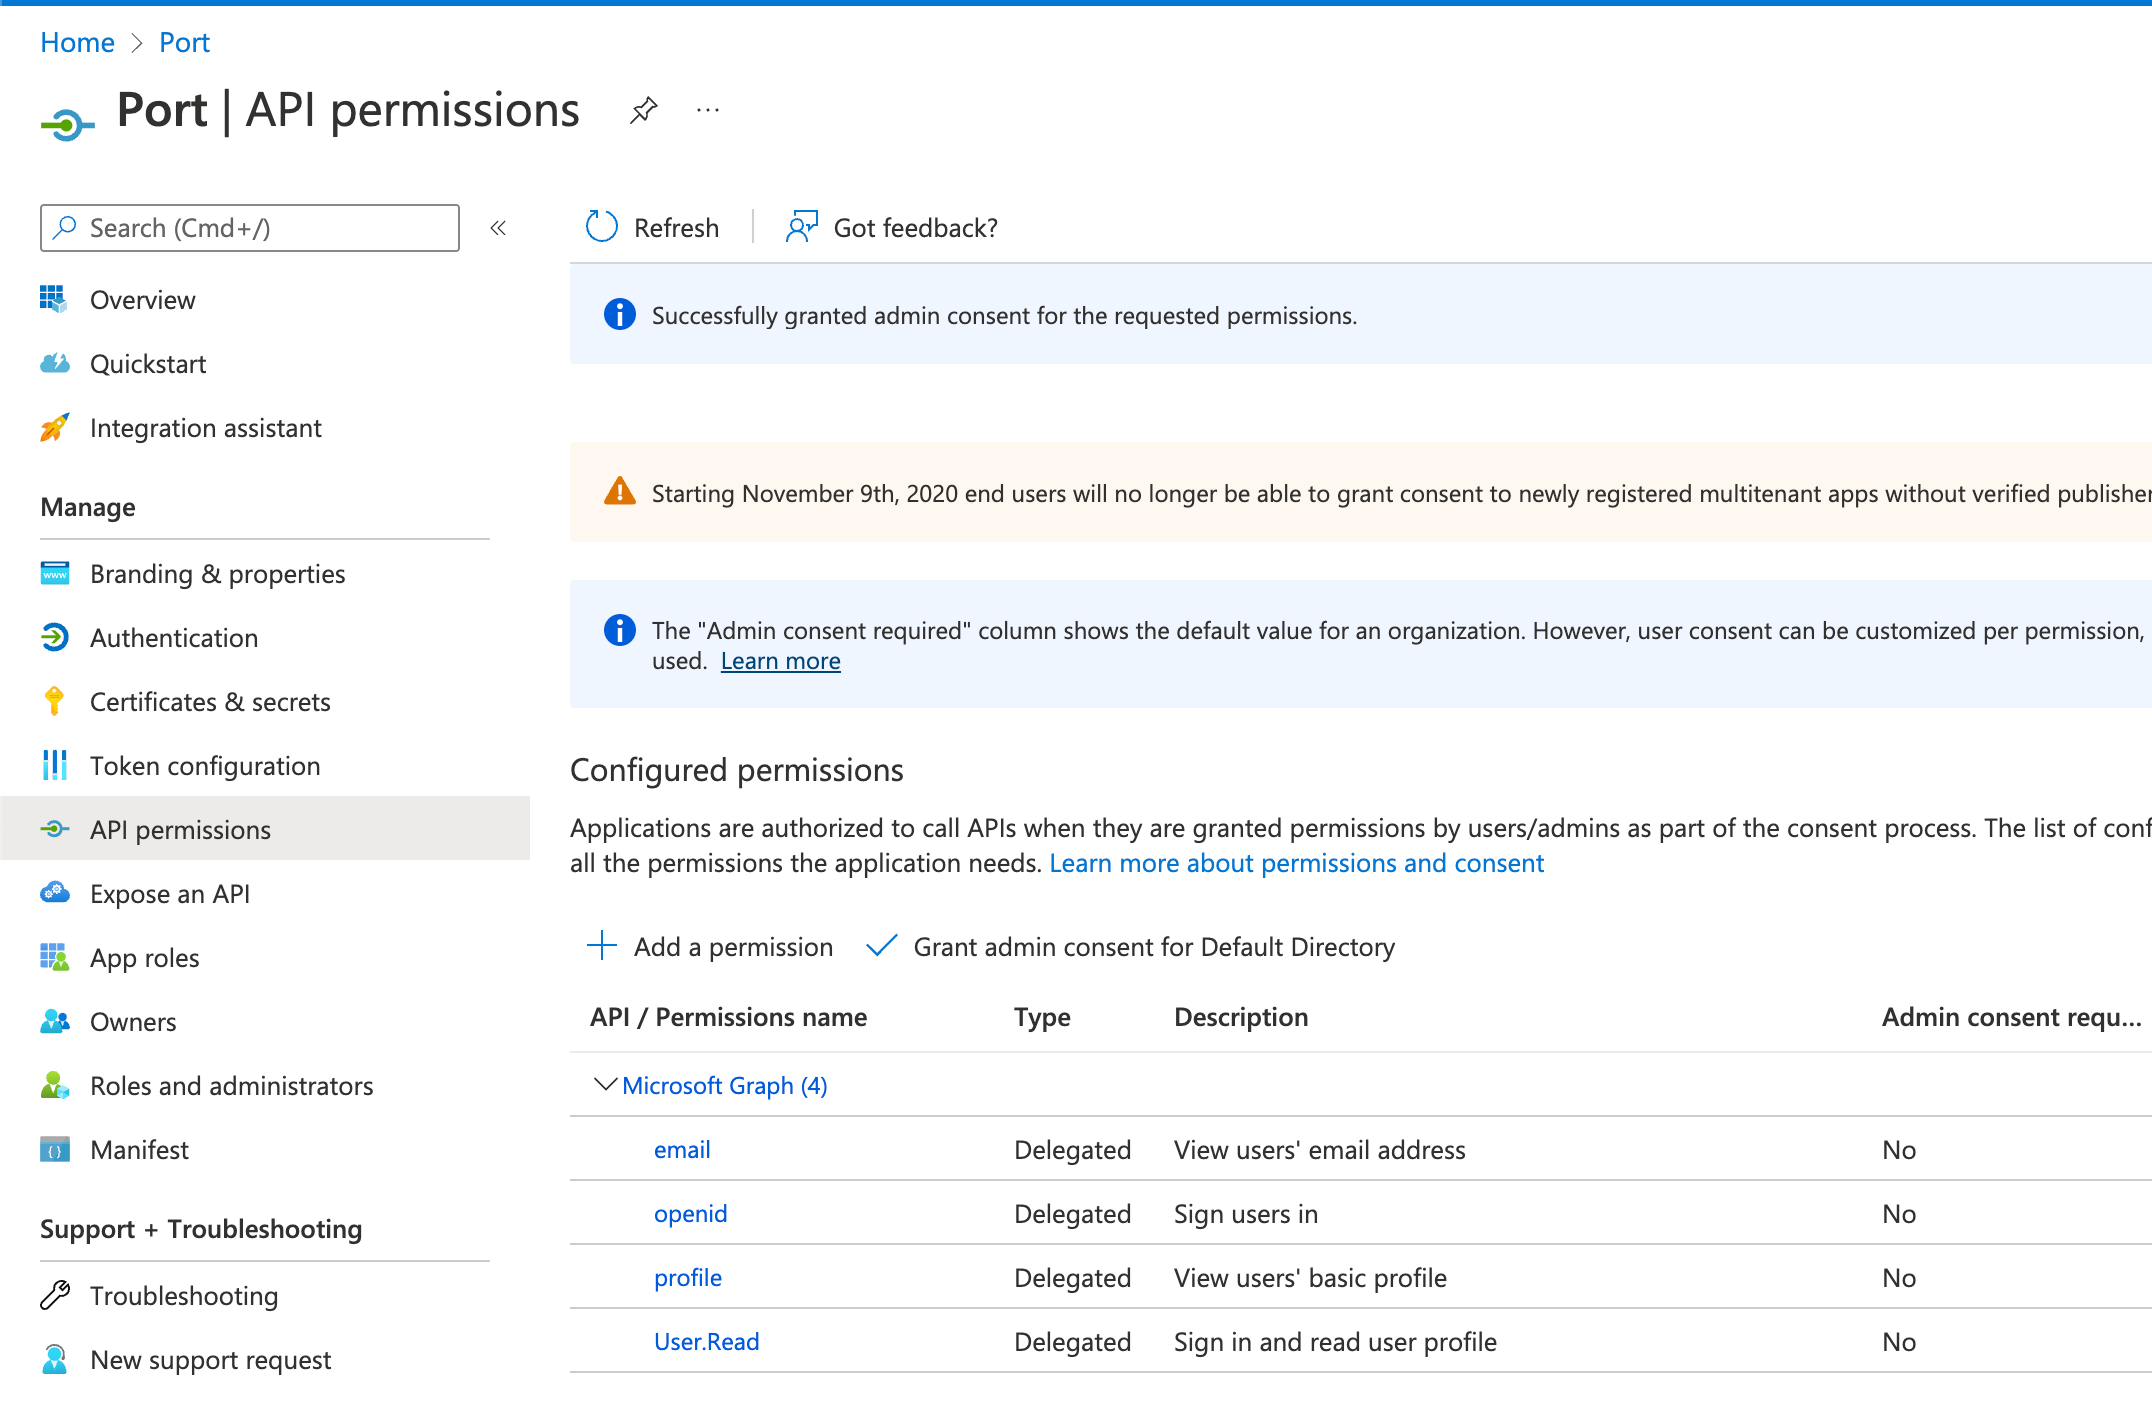
-
Click
Add permissions.Grant admin consent(OPTIONAL)
Grant admin consent: when users from your organization will first log in, they will be prompted to confirm the permissions specified here. You can click theGrant admin consent for Default Directoryto automatically approve their permissions.
-
Configure application claims
Add optional claims
-
On the Port App page, click
Token configuration.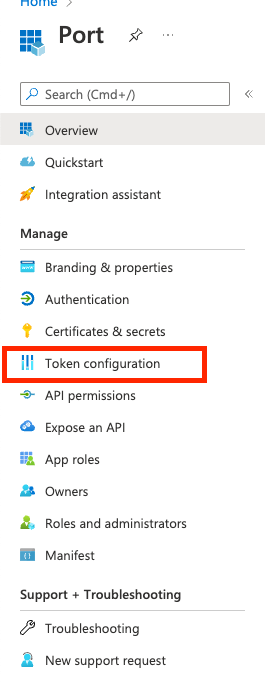
-
Click
Add optional claim.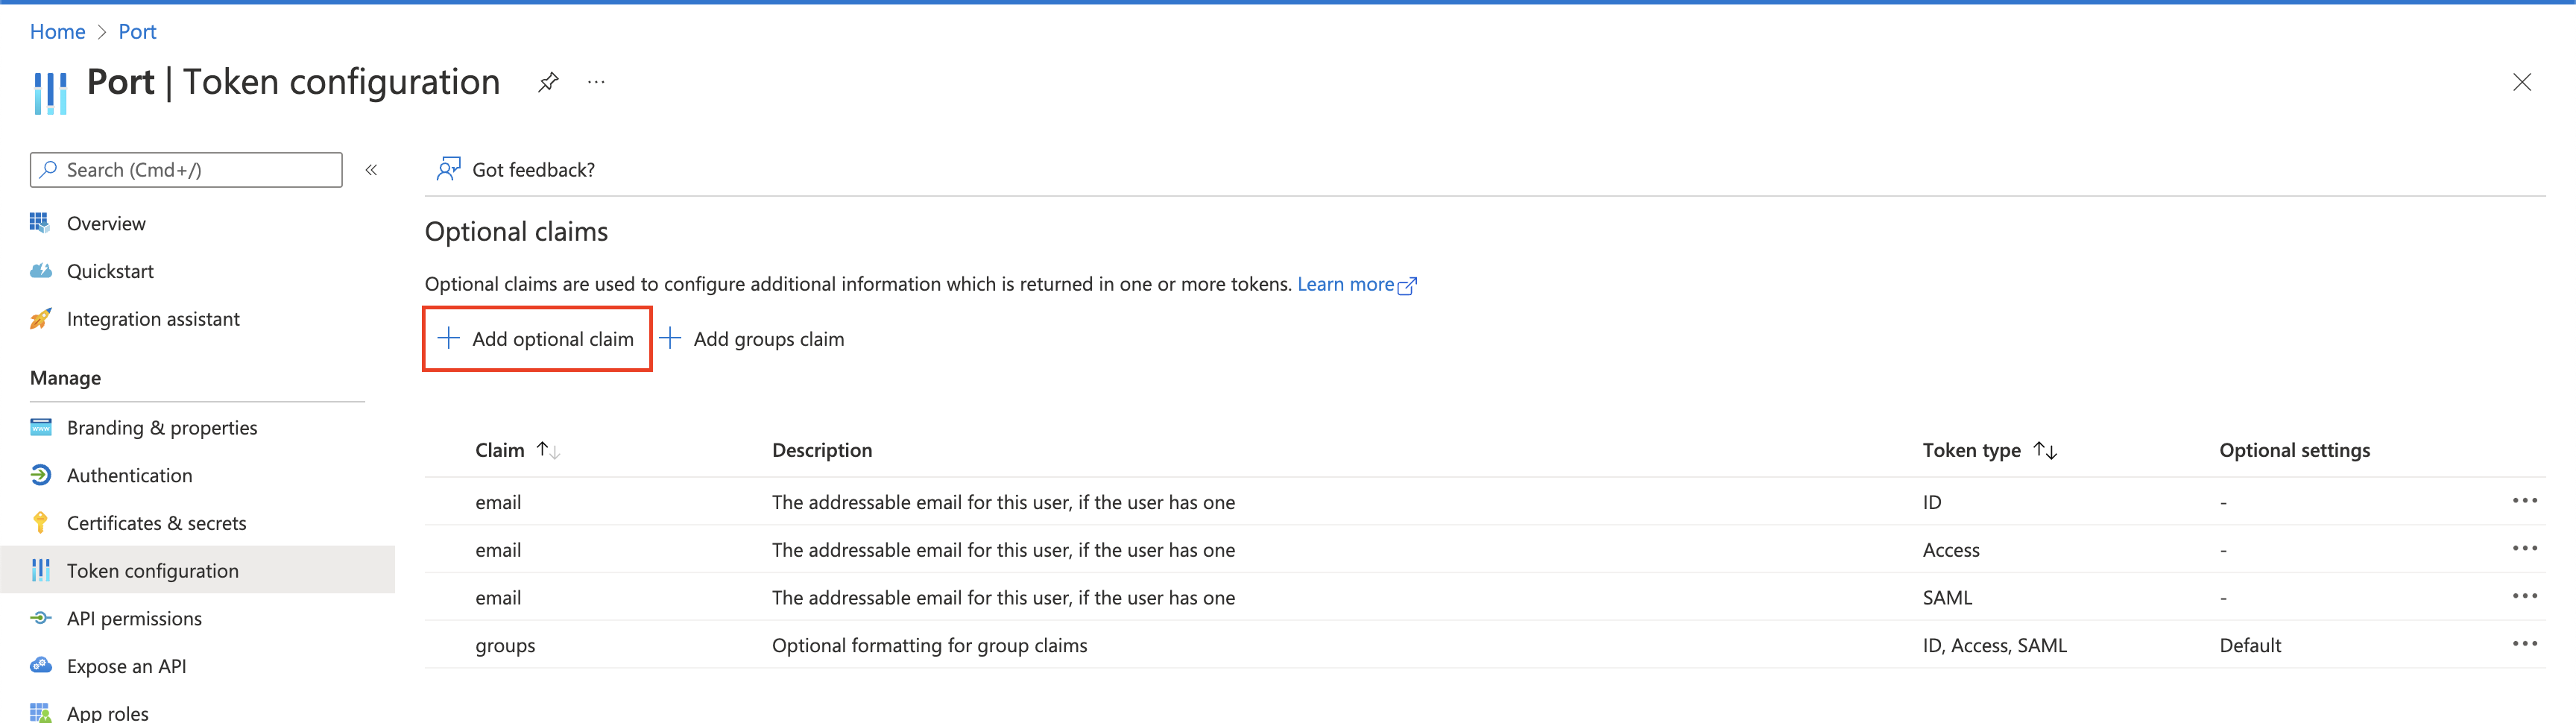
-
Select
IDas the token type and then select theemailclaim, then clickAdd.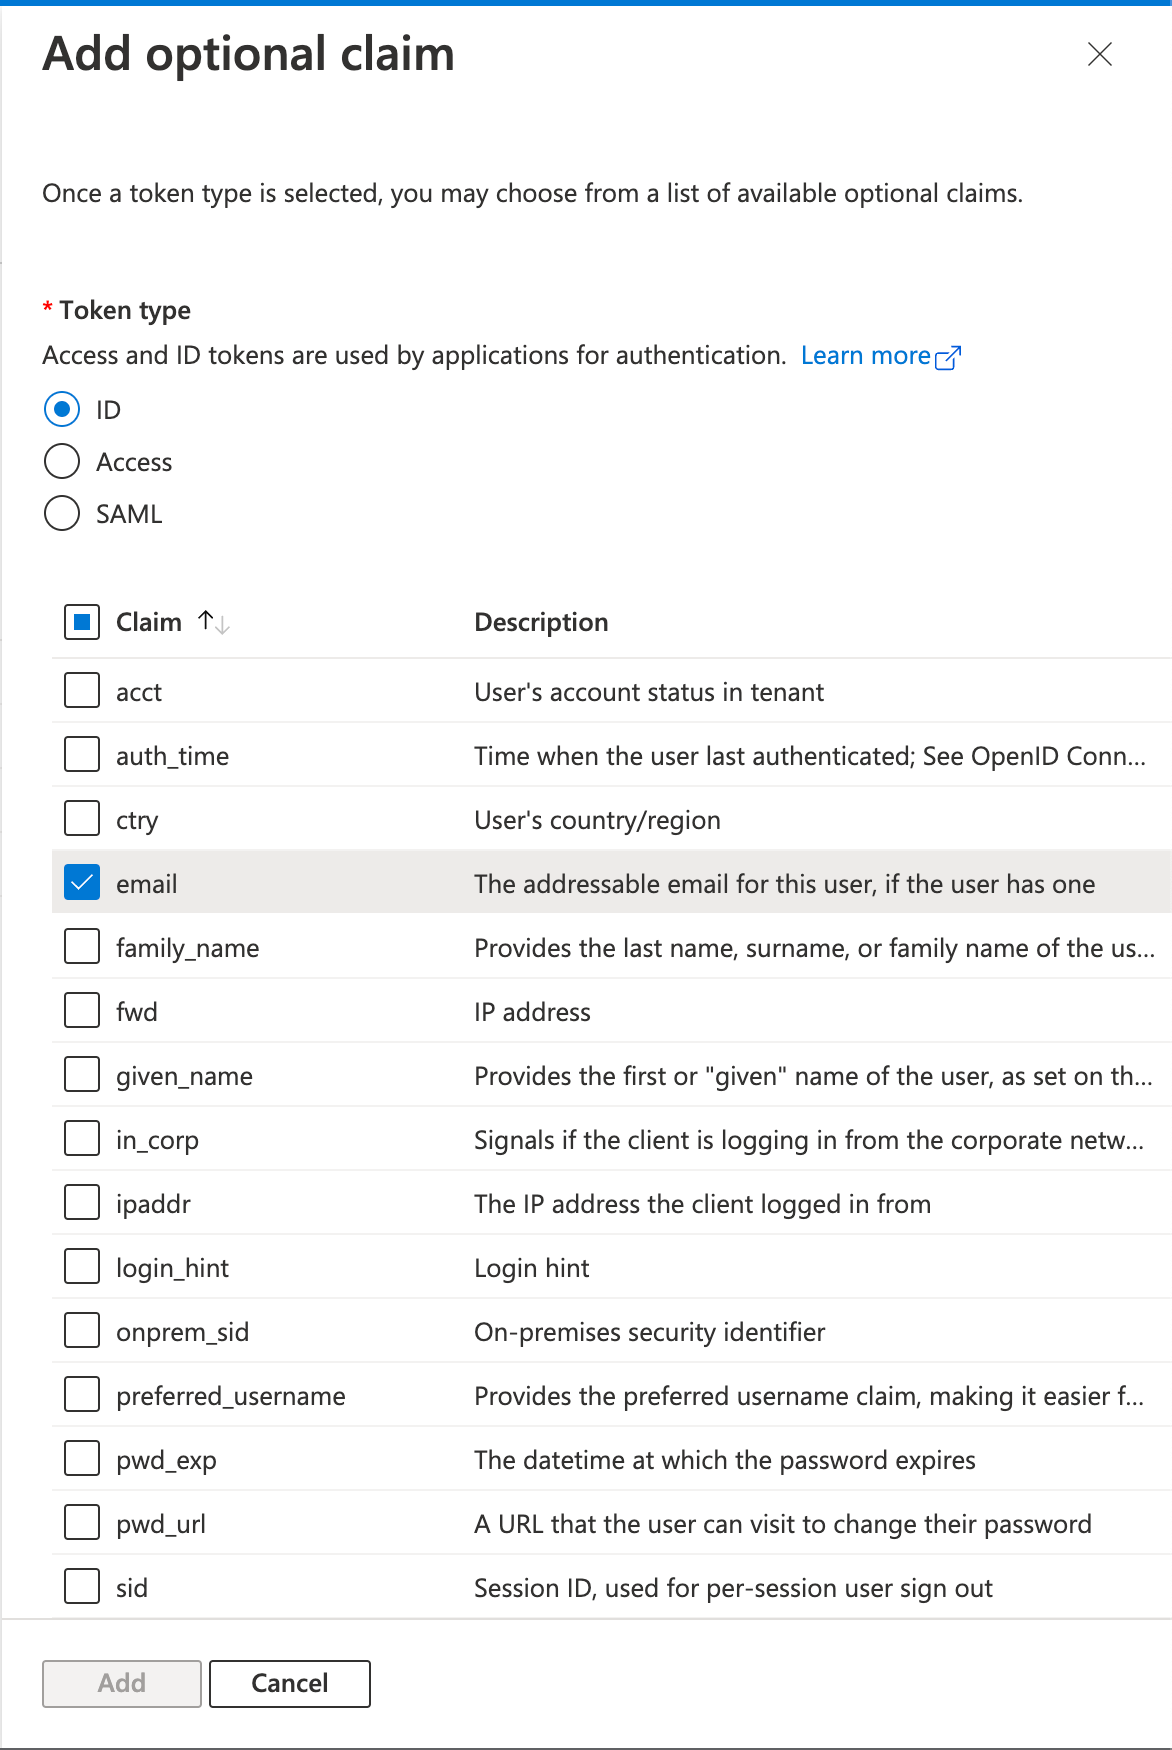
Repeat the same process for
AccessandSAML(3 times total). -
Your optional claims will look like this:

Multiple Azure AD SSO connections
If you have multiple Port environments, it is possible to setup an OIDC Azure AD SSO connection for each environment.
However, note that in this instance you will not be able to use Port's main login page to reliably sign in to a specific environment. When you enter your email address to login, it will take you to one of your Port environments but it is not guaranteed to take you to the same Port environment every time.
In that case you have the following options:
- Use the https://myapplications.microsoft.com dashboard provided by Azure AD and select the desired Port environment to connect to.
- Use the manual login URL for each environment directly, by specifying the desired environment based on its respective connection name (e.g.
company-<companyID>-SSO).
Enable AzureAD groups integration
Port can query the group membership of users who log in through the AzureAD SSO, and add their teams as team entities inside Port. This allows platform engineers to take advantage of both existing groups from AzureAD and teams created manually inside Port to manage permissions and access to resources inside Port's catalog.
In order to import Azure AD groups into Port, Port will require the connection app to approve the Directory.Read.All permission.