Getting started with your first Autonomous Ticket Resolution agentic workflow
This guide walks you through building a complete Autonomous Ticket Resolution (ATR) workflow from scratch. By the end, a Jira ticket will arrive in Port already enriched with service context, scored for AI readiness, and delegated to Cursor after a single human approval.
The guide covers the Triage and Build stages of the ATR lifecycle:
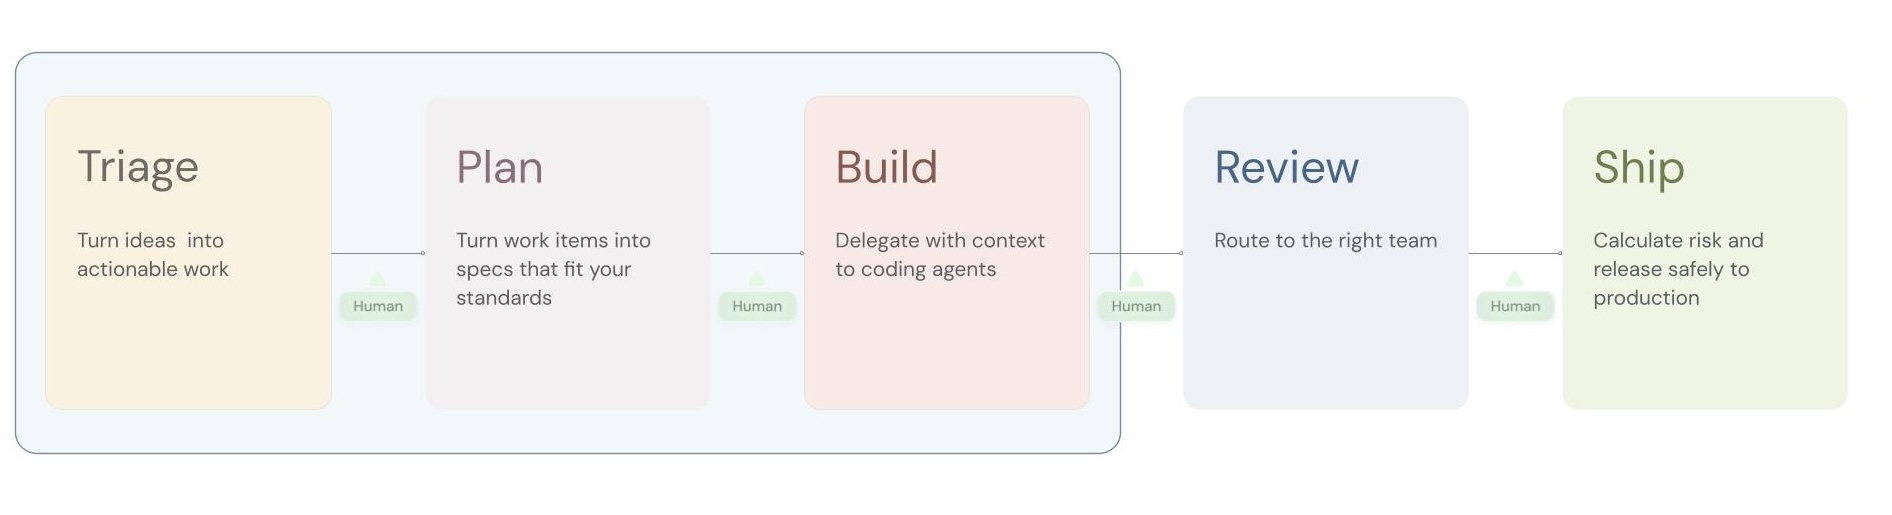
- Triage - enrich the ticket with catalog context, then score it for AI readiness using deterministic scorecard rules.
- Build - surface the enriched ticket for human review via Slack, then delegate to Cursor with one click.
Want to follow the guide step by step? Scroll down to Build it step by step.
Or implement it in one shot with your coding assistant


Connect Port MCP to your coding assistant, then copy the prompt below to implement this entire guide automatically against your Port account.
I want to set up an Autonomous Ticket Resolution (ATR) workflow in Port.

Here is what I need you to do, step by step:

1. Extend the Jira Issue blueprint in Port with the following properties:
   - serviceTier (string): tier of the related service, mirrored from the catalog
   - activeIncidents (number): open incidents on the related service
   - repoUrl (string, url): primary repository for the related service
   - aiReadinessReason (string, markdown): reason the ticket passed or failed AI readiness scoring
   Add a relation called "service" targeting the "service" blueprint (required: false, many: false).

2. Create a scorecard on the Jira Issue blueprint called "AI readiness" with these three rules:
   - serviceTier != "Tier 1" (Tier 1 services need human oversight)
   - activeIncidents == 0 (no active incidents on the service)
   - description != "" (ticket must have a description)
   Set Bronze level when all three rules pass.

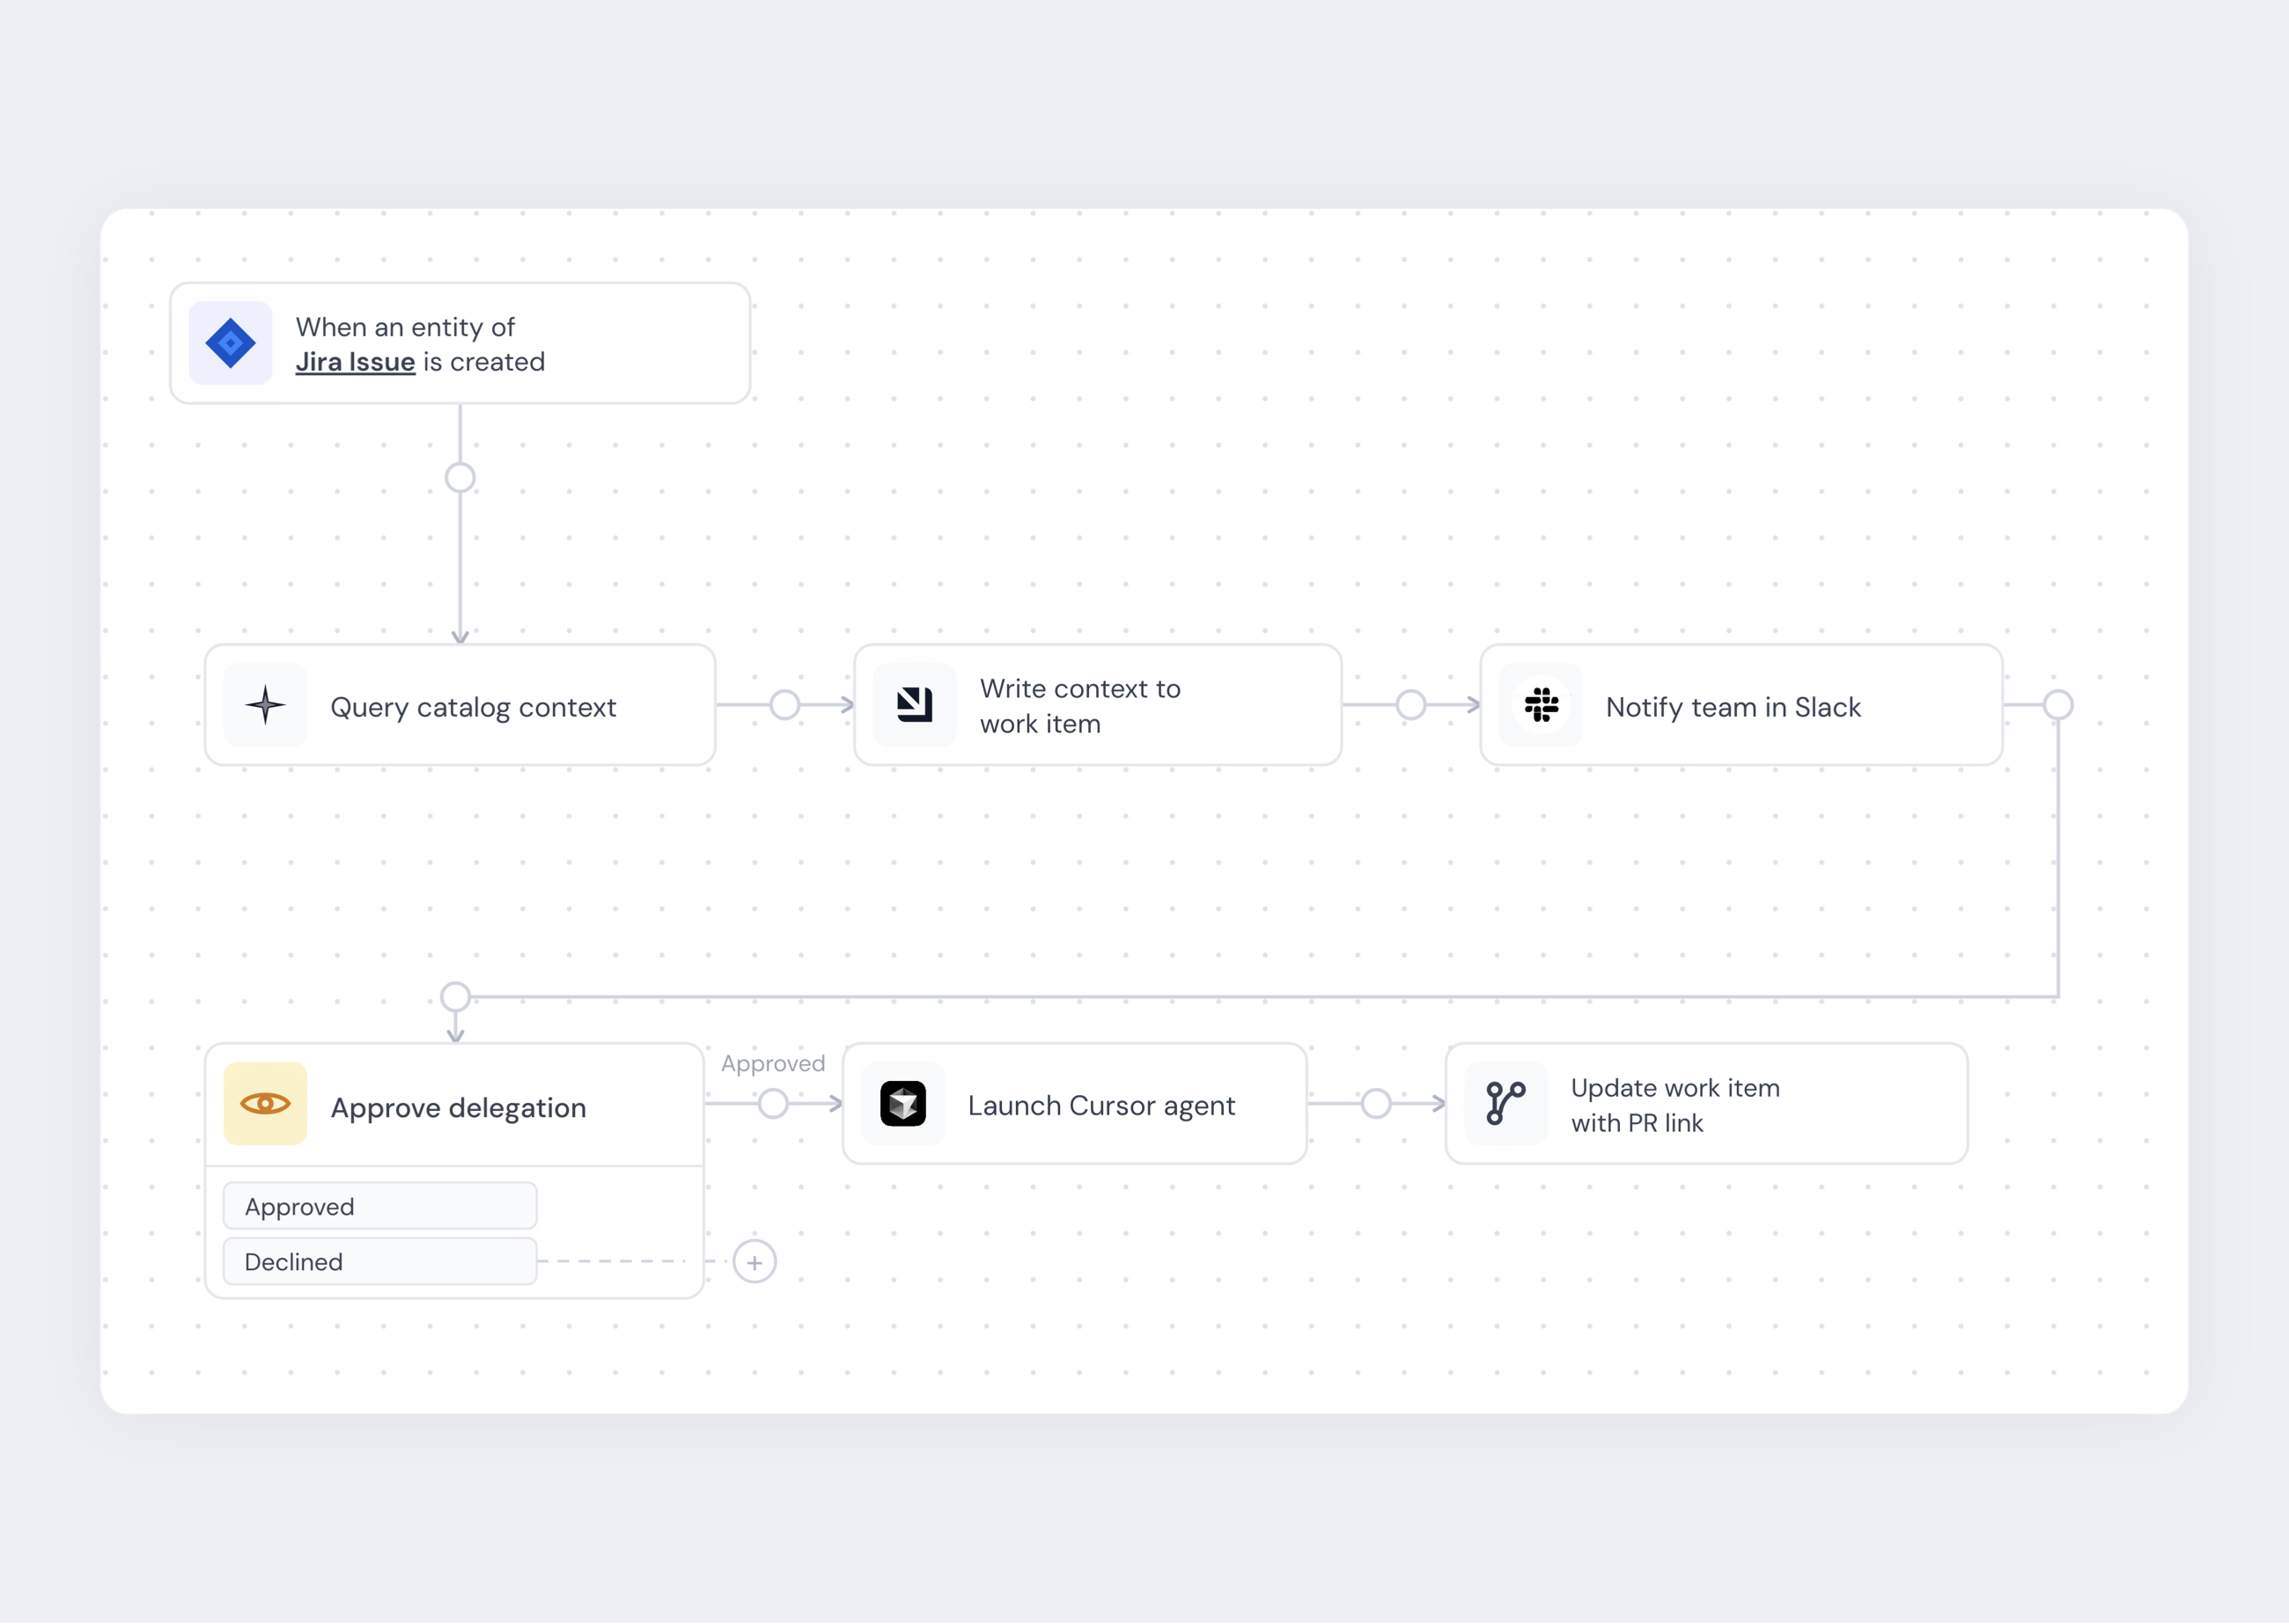
3. Create a Port workflow with identifier "atr-workflow" and title "ATR: Triage and build".
   The workflow must contain these nodes in sequence:
   - trigger (EVENT_TRIGGER): fires on ENTITY_CREATED for jiraIssue blueprint
   - enrich (AI): queries the catalog for service tier, active incidents, and repo URL related to the Jira issue. Uses tools get_entity and search_entities. Returns serviceTier (string), activeIncidents (number), repoUrl (string).
   - writeback (UPSERT_ENTITY): writes serviceTier, activeIncidents, repoUrl back to the Jira issue entity using mapping.
   - notify (WEBHOOK): POSTs a Slack message to {{ .secrets["SLACK_WEBHOOK_URL"] }} with the ticket title, service tier, active incidents count, and a link to the entity in Port.
   - approve (INPUT): pauses the workflow and asks a human to approve or decline delegation to Cursor. Two buttons: Approve (PRIMARY) and Decline (DANGER). One responder required for each outlet.
   - delegate (CURSOR_AGENT): launches a Cursor cloud agent using {{ .secrets["CURSOR_API_KEY"] }}, passes the ticket title, description, and service tier in the prompt, uses repoUrl from the enrich step as the source repository, and sets autoCreatePr: true.
   - update-status (UPSERT_ENTITY): writes the PR URL from the Cursor agent back to aiReadinessReason on the Jira issue entity.

   Connections: trigger → enrich → writeback → notify → approve → delegate (approve outlet only) → update-status.

4. Add the two required secrets in Port Settings > Secrets:
   - SLACK_WEBHOOK_URL: the Slack incoming webhook URL
   - CURSOR_API_KEY: the Cursor API key

Use Port MCP to create each artifact. Confirm each step before moving to the next.
Prerequisites
- A Port account.
- Port's Jira integration installed and syncing issues.
- A
serviceblueprint in your catalog with at least one entity. If you haven't set this up, see Port's GitHub integration or create a service blueprint manually. - A Cursor API key.
- A Slack incoming webhook URL.
The scorecard and enrichment steps use the related service to determine AI readiness. You can still follow this guide with a manually created test service entity. The enrichment will be less rich, but the workflow structure is identical.
Build it step by step
This guide uses Jira for tickets, Port's service catalog for context, Slack for notifications, and Cursor for delegation. Each of these is a choice, not a requirement. The same workflow pattern works with Linear, your own entity model, any webhook-based notification channel, and any coding agent that accepts a prompt and a repository.
What you built
A ticket arrives in Port with a title and description. One workflow handles everything: it pulls service tier, incidents, and repo from the catalog, writes them back to the work item, and posts a Slack notification. The workflow then pauses and waits. A human reviews the enriched ticket, checks the AI readiness scorecard, and clicks Approve. Cursor picks it up, opens a PR, and the link comes back to the work item.
That's the core ATR loop.
What's next
The workflow you built covers the Triage and Build stages. The next steps extend the same pattern to the full SDLC:
- Add more catalog context - connect GitHub or GitLab to populate repo data automatically and enrich your services with dependencies, recent deploys, and ownership history.
- Make the scorecard smarter - add rules for blast radius, priority, and service ownership completeness as your catalog grows.
- Automate the delegation decision - once you trust the scorecard, add a workflow condition that delegates automatically when AI readiness passes, keeping humans in the loop only for failed or borderline tickets.
- Add code review enrichment - use the PR Enricher agent to surface catalog context on the PR Cursor creates.
- Gate the release - add a blast radius check and deployment gates before the PR reaches production.
For the full picture of each stage, see the ATR solution overview.