Entra ID (AzureAD)
Follow this step-by-step guide to configure the integration between Port and Azure AD using a SAML application
Port-AzureAd integration benefits
- Connect to the Port application via an AzureAD app.
- Your AzureAD teams will be automatically synced with Port upon a user sign-in.
- Set granular permissions on Port according to your AzureAD groups.
Register a new application
-
Head to your Azure portal and enter the Entra ID portal.
-
Click on
Enterprise Applicationsand create a new application. -
Click on
Create your own applicationand selectIntegrate any other application you don't find in the gallery (Non-gallery). -
In the getting started section, select the
Set up Single Sign Onbutton, and choose the SAML method. -
Edit the Basic SAML Configuration (step 1) and add the following information:
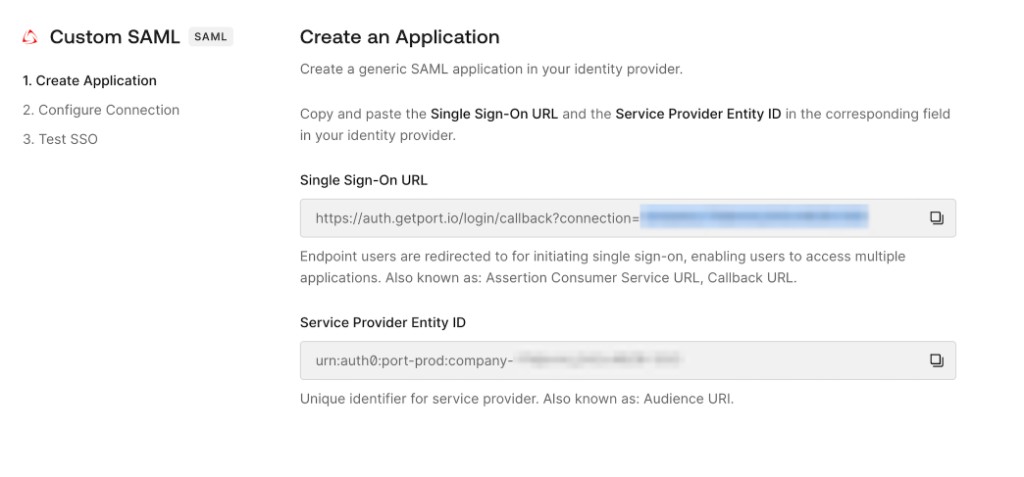
The Port setup flow shows you the exact values to use. Copy the Single Sign-On URL as the Reply URL (Assertion Consumer Service URL), and the Service Provider Entity ID as the Identifier (Entity ID):
Under Logout URL (optional), set:
https://auth.getport.io/logout(EU) orhttps://auth.us.getport.io/logout(US).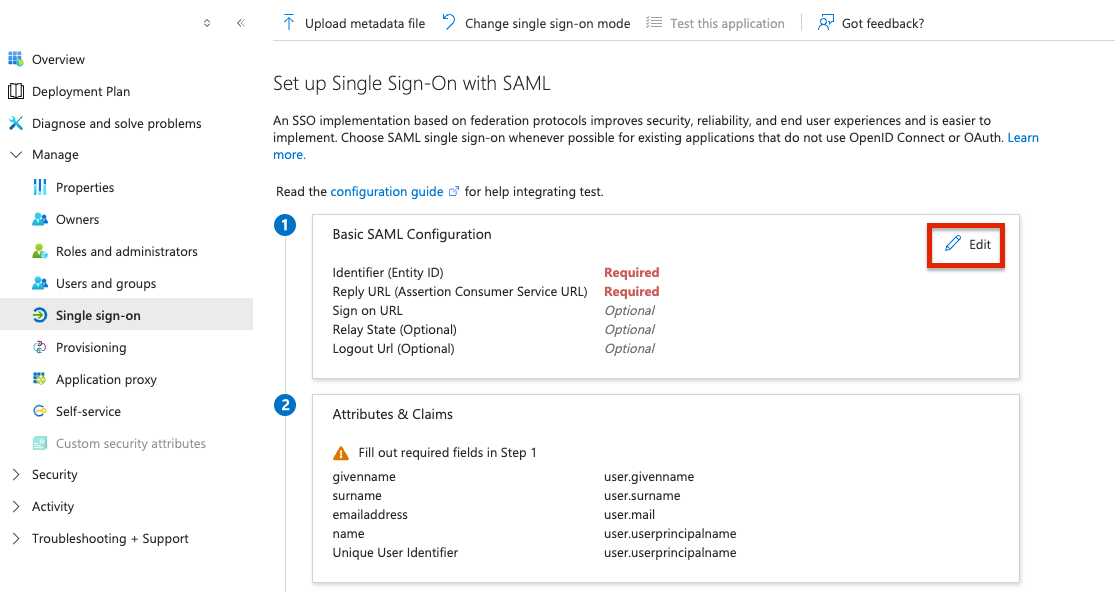
-
In the
Single sign-ontab, head to the 2nd section (Attributes & Claims), Click onEditand add a new claim:Name:email_verifiedSource attribute:user.accountenabled
-
Under
SAML certificates(step 3), Click the Edit button to expand the certificates section. Click the 3 dot icon next to the Active certificate, and choosePEM certificate download.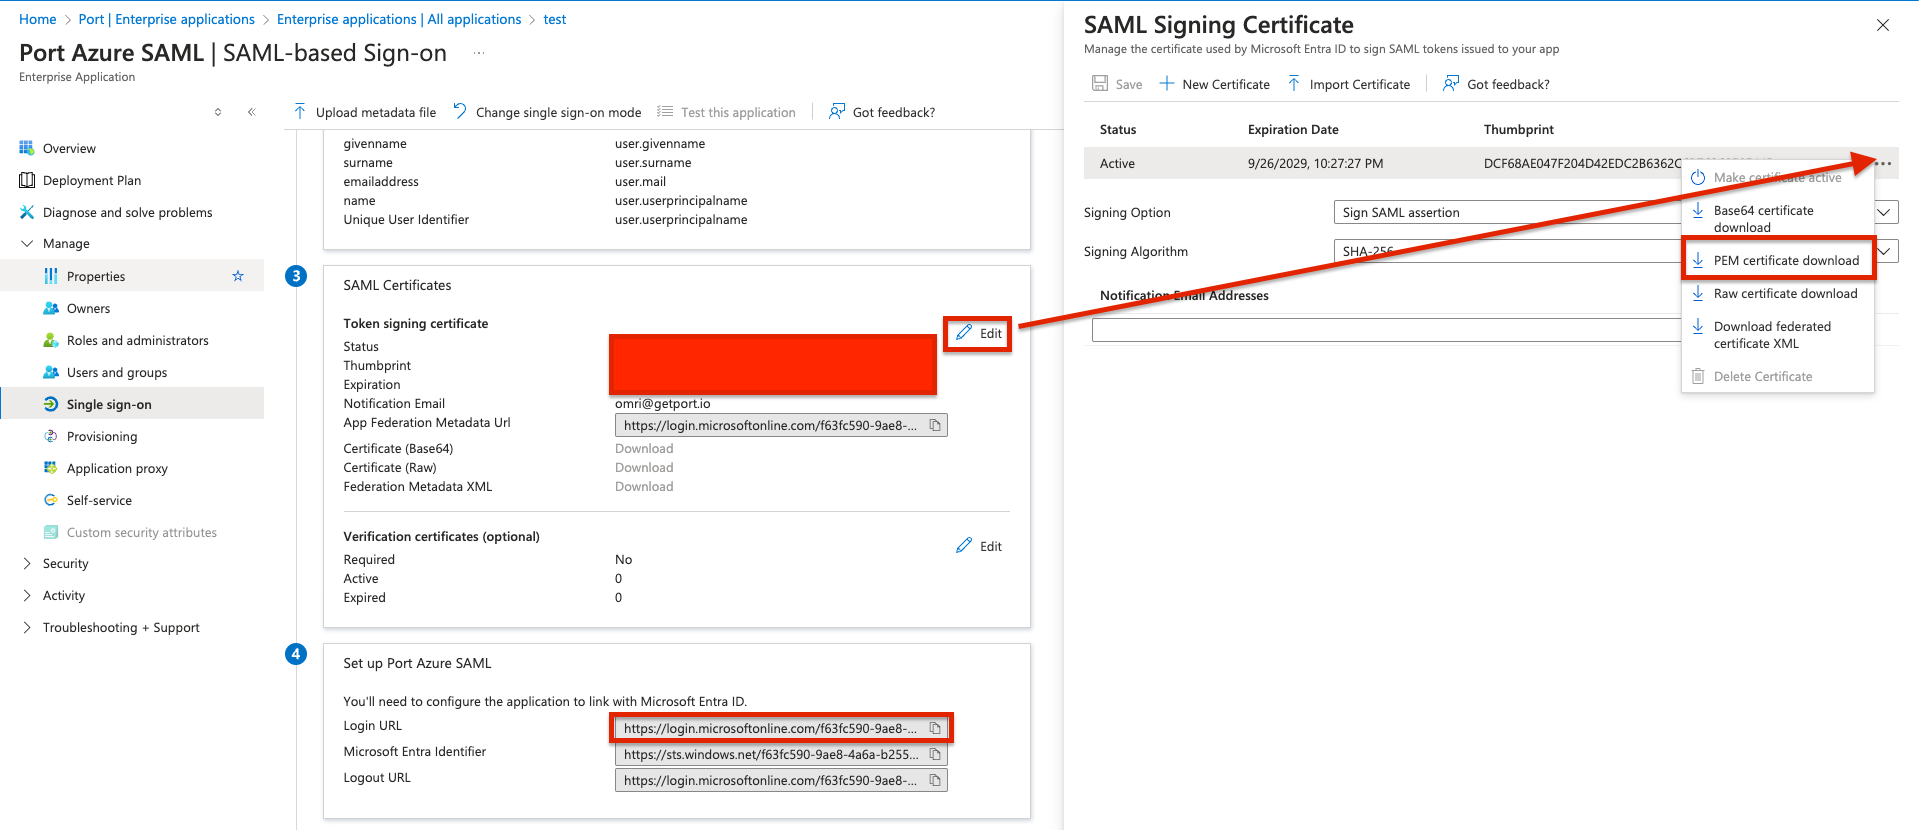
Use the downloaded PEM certificate in step 2 of the SAML integration setup to configure the connection in Port.
At the top of the SAML configuration page, click the
upload metadata filebutton and create an XML file with the relevant URL below (based on your region):- EU:
https://auth.getport.io/samlp/metadata?connection=company-<companyID>-SSO - US:
https://auth.us.getport.io/samlp/metadata?connection=company-<companyID>-SSO
- EU:
After configuring the SSO connection, you can initiate the login flow directly via URL. Use the following URL based on your account region, replacing company-<companyID>-SSO with your actual connection name. You can find your connection name in the Single Sign-On URL shown during the self-serve SSO setup flow - look for the connection parameter in the URL.
- EU
- US
https://auth.getport.io/authorize?response_type=token&client_id=96IeqL36Q0UIBxIfV1oqOkDWU6UslfDj&connection=company-<companyID>-SSO&redirect_uri=https%3A%2F%2Fapp.port.io
https://auth.us.getport.io/authorize?response_type=token&client_id=4lHUry3Gkds317lQ3JcgABh0JPbT3rWx&connection=company-<companyID>-SSO&redirect_uri=https%3A%2F%2Fapp.us.port.io
Expose groups
In order to expose your Azure groups to Port via the application, do the following:
- Head to the
Single sign onsection in the application configuration, and edit theAttributes & Claims. - Press the
Add a group claimbutton - Select
Groups assigned to the applicationand in the source attribute selectCloud-only group display names. - Assign the relevant groups you want to expose to the application, these will be ingested into Port as teams you can use to manage user permissions and RBAC in your Port account.
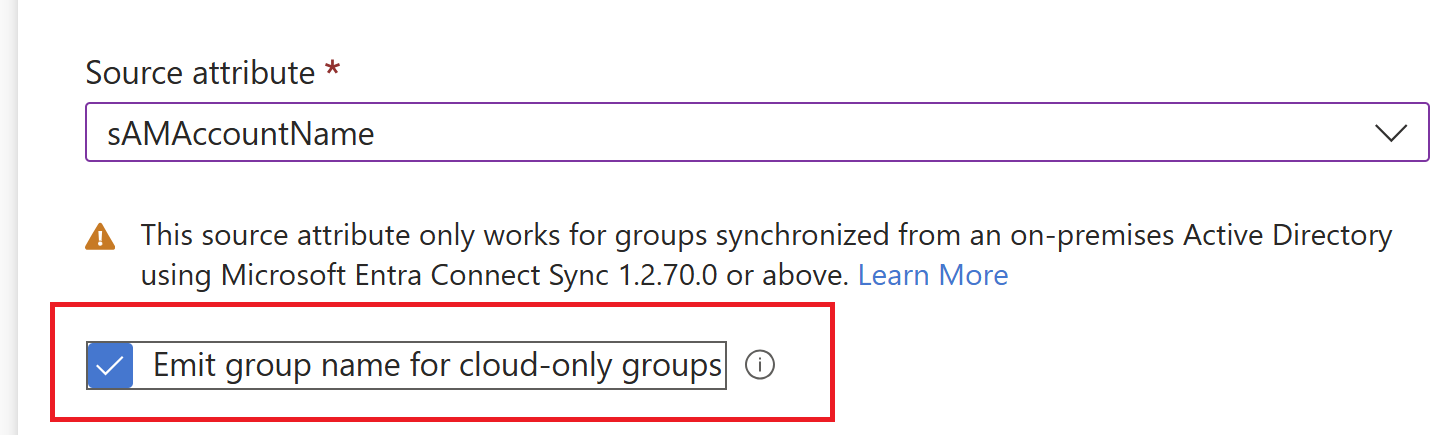
Alternatively, if you are syncing your groups from an on-prem AD into Entra, configure the group claim like so (sAMAccountName as source attribute, and box checked):