Visualize and manage your ServiceNow incidents
This guide demonstrates how to bring your ServiceNow incident management experience into Port. You will learn how to:
- Ingest ServiceNow incident data into Port's software catalog using Port's ServiceNow integration.
- Set up self-service actions to manage incidents (create, resolve, and delete).
- Build dashboards in Port to monitor and act on incidents.
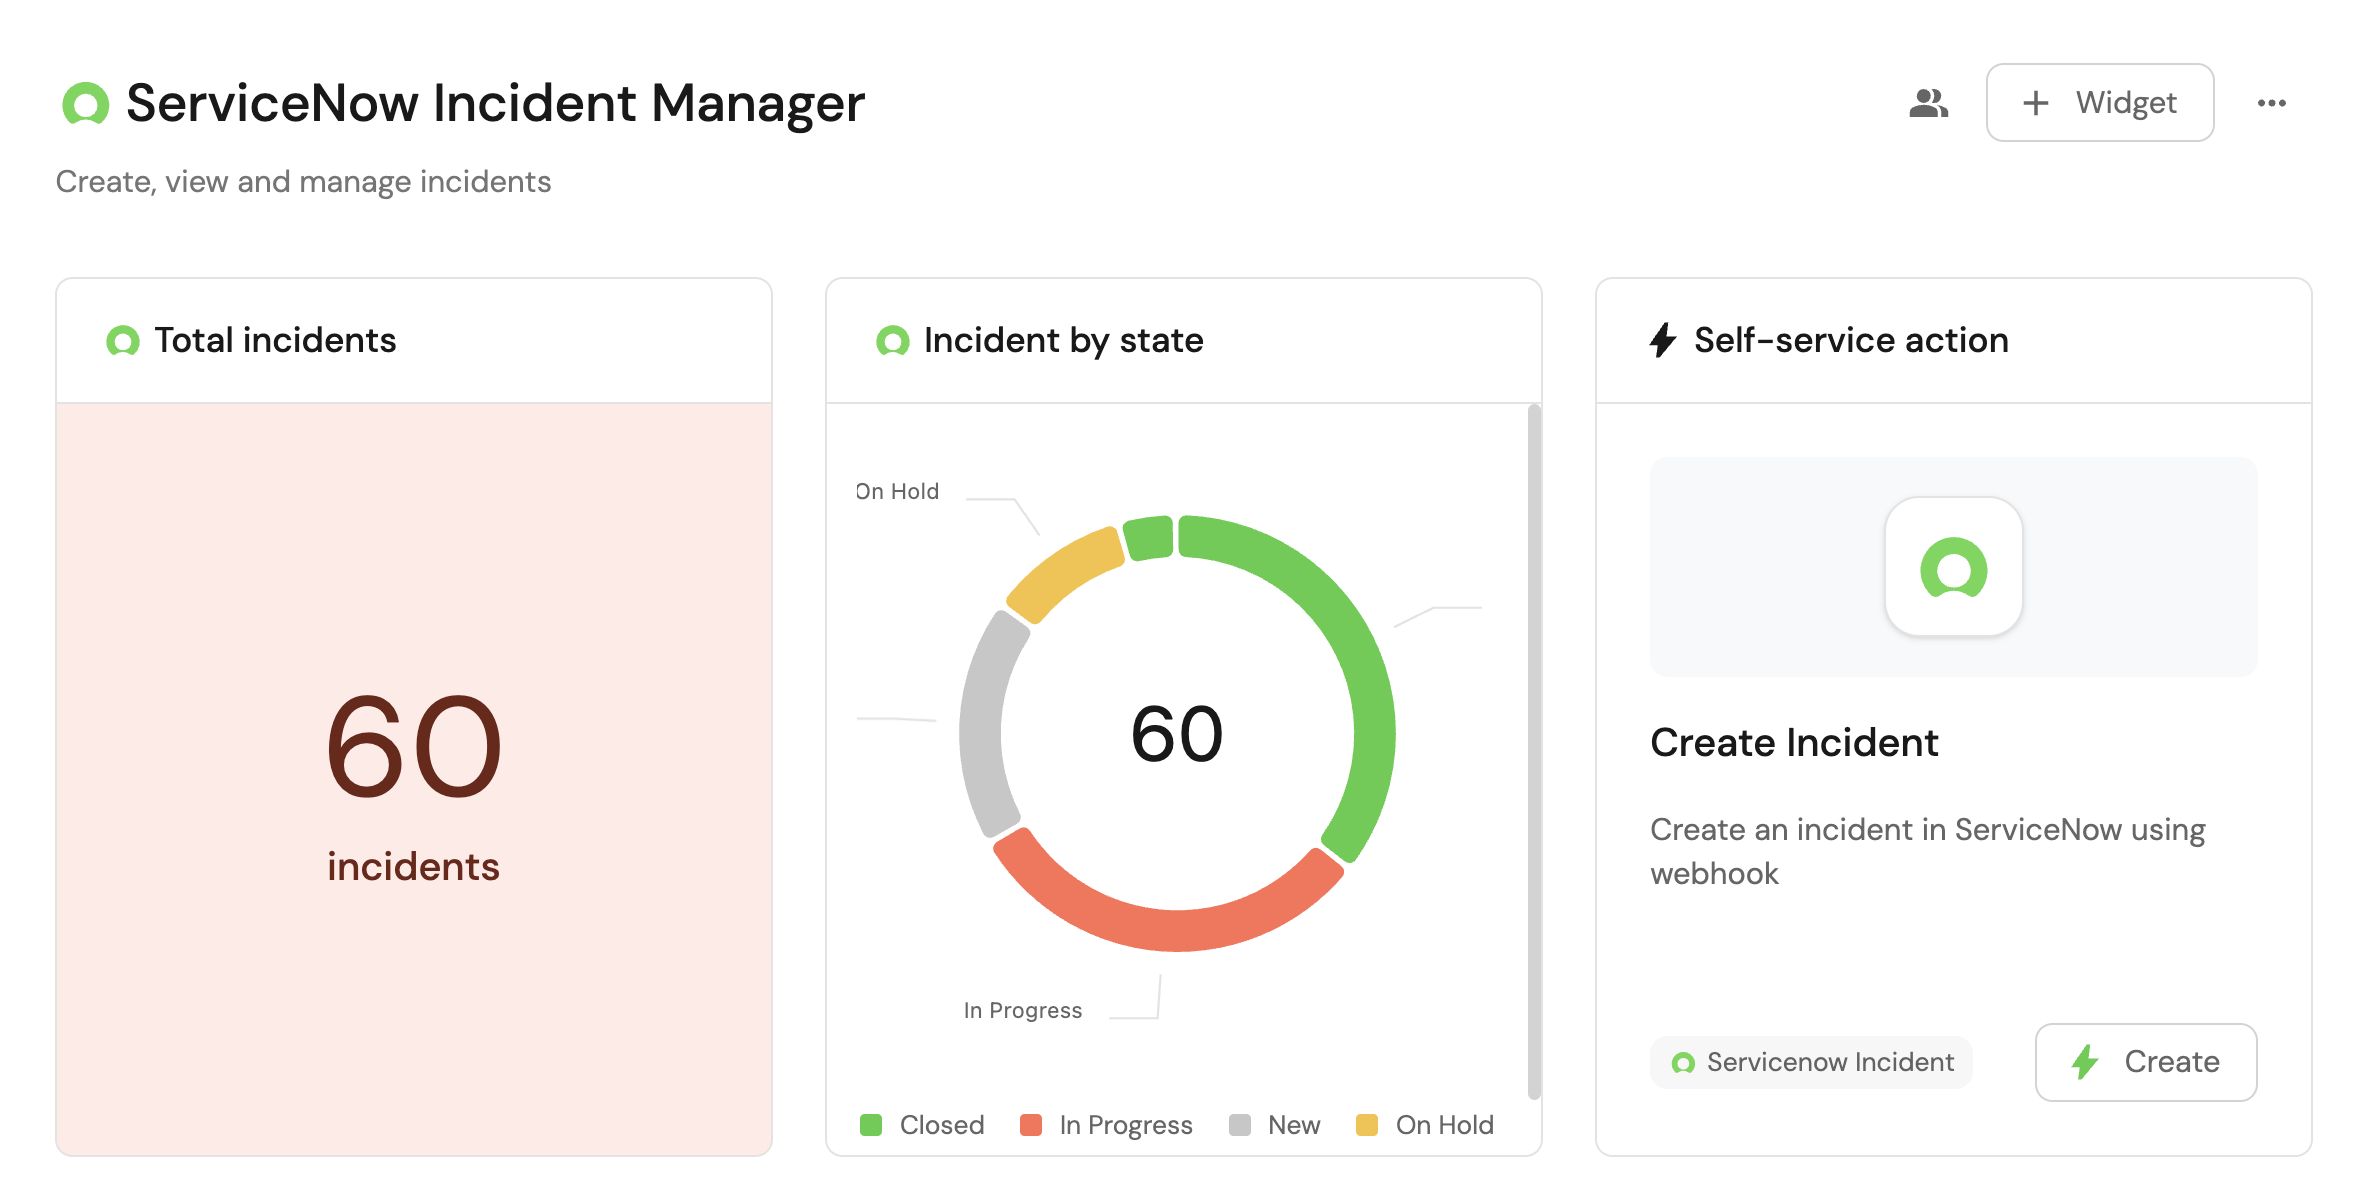
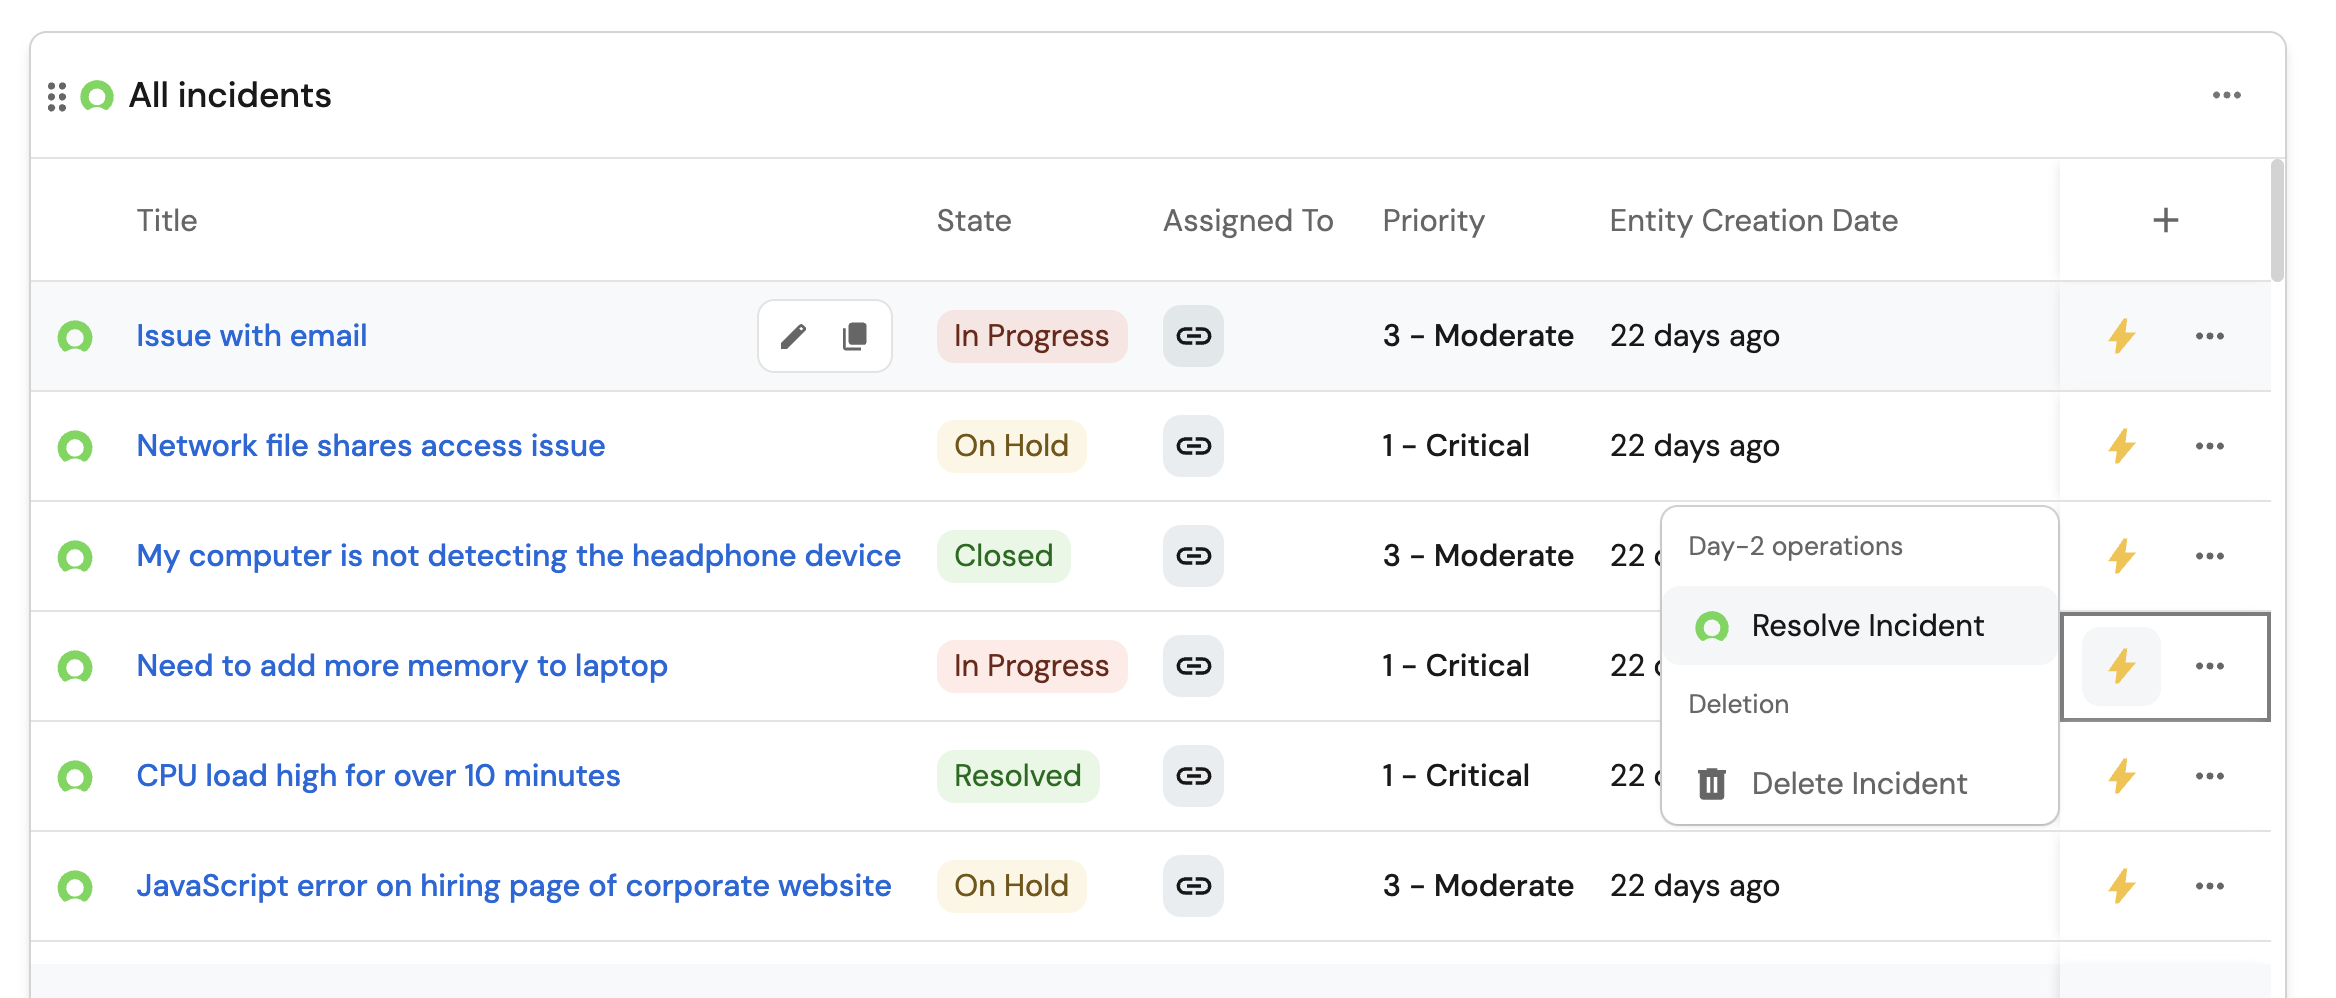
Common use cases
- Monitor the status and health of all ServiceNow incidents from a centralized dashboard.
- Empower platform teams to automate day-2 operations via Webhooks.
Prerequisites
This guide assumes the following:
- You have a Port account and have completed the onboarding process.
- Port's ServiceNow integration is installed in your account.
Set up self-service actions
We will create self-service actions in Port to directly interact with the ServiceNow Table API. These actions let users:
-
Create a new incident.
-
Resolve an existing incident.
-
Delete an incident.
Each action will be configured via JSON and triggered using synced webhooks secured with secrets. To implement these use-cases, follow the steps below:
Add Port secrets
To add a secret to your portal:
-
Click on the
...button in the top right corner of your Port application. -
Click on Credentials.
-
Click on the
Secretstab. -
Click on
+ Secretand add the following secret:-
SERVICENOW_API_TOKEN: A base64 encoded string of your ServiceNow credentials generated as:echo -n "your-instance-username:your-instance-password" | base64
-
Create a new incident
-
Go to the Self-service page of your portal.
-
Click on the
+ New Actionbutton. -
Click on the
{...} Edit JSONbutton. -
Copy and paste the following JSON configuration into the editor.
Create incident action (Click to expand)
Replace placeholderRemember to replace the
<SERVICENOW_INSTANCE_URL>placeholder with you actual ServiceNow instance such as https://example-id.service-now.com{
"identifier": "create_snow_incident",
"title": "Create Incident",
"icon": "Servicenow",
"description": "Create an incident in ServiceNow using webhook",
"trigger": {
"type": "self-service",
"operation": "CREATE",
"userInputs": {
"properties": {
"short_description": {
"icon": "DefaultProperty",
"title": "Short Description",
"description": "Description of the incident",
"type": "string"
},
"assigned_to": {
"icon": "DefaultProperty",
"title": "Assigned To",
"description": "User this incident is assigned to",
"type": "string"
},
"urgency": {
"title": "Urgency",
"icon": "DefaultProperty",
"type": "string",
"default": "2",
"enum": [
"1",
"2",
"3"
],
"enumColors": {
"1": "red",
"2": "yellow",
"3": "green"
}
},
"sysparm_display_value": {
"title": "Sysparm Display Value",
"description": "Determines the type of data returned",
"icon": "DefaultProperty",
"type": "string",
"default": "all",
"enum": [
"true",
"false",
"all"
]
},
"sysparm_input_display_value": {
"title": "Sysparm Input Display Value",
"description": "Flag that indicates whether to set field values using the display value or the actual value",
"type": "boolean",
"default": false
}
},
"required": [
"short_description",
"assigned_to"
],
"order": [
"short_description",
"assigned_to",
"urgency",
"sysparm_display_value",
"sysparm_input_display_value"
]
},
"blueprintIdentifier": "servicenowIncident"
},
"invocationMethod": {
"type": "WEBHOOK",
"url": "<SERVICENOW_INSTANCE_URL>/api/now/table/incident",
"agent": false,
"synchronized": true,
"method": "POST",
"headers": {
"Content-Type": "application/json",
"Accept": "application/json",
"Authorization": "Basic {{.secrets.SERVICENOW_API_TOKEN}}"
},
"body": {
"short_description": "{{.inputs.short_description}}",
"assigned_to": "{{.inputs.assigned_to}}",
"urgency": "{{.inputs.urgency}}",
"sysparm_display_value": "{{.inputs.sysparm_display_value}}",
"sysparm_input_display_value": "{{.inputs.sysparm_input_display_value}}"
}
},
"requiredApproval": false
} -
Click
Save.
Now you should see the Create Incident action in the self-service page. 🎉
Resolve an incident
-
Go to the Self-service page of your portal.
-
Click on the
+ New Actionbutton. -
Click on the
{...} Edit JSONbutton. -
Copy and paste the following JSON configuration into the editor.
Resolve incident action (Click to expand)
Replace placeholderRemember to replace the
<SERVICENOW_INSTANCE_URL>placeholder with you actual ServiceNow instance such as https://example-id.service-now.com{
"identifier": "resolve_snow_incident",
"title": "Resolve Incident",
"icon": "Servicenow",
"description": "Resolve an incident in the ServiceNow catalog",
"trigger": {
"type": "self-service",
"operation": "DAY-2",
"userInputs": {
"properties": {
"resolution_code": {
"type": "string",
"title": "Resolution Code",
"default": "Solution provided",
"enum": [
"Duplicate",
"Known error",
"No resolution provided",
"Resolved by caller",
"Resolved by change",
"Resolved by problem",
"Resolved by request",
"Solution provided",
"Workaround provided",
"User error"
],
"enumColors": {
"Duplicate": "lightGray",
"Known error": "lightGray",
"No resolution provided": "lightGray",
"Resolved by caller": "lightGray",
"Resolved by change": "lightGray",
"Resolved by problem": "lightGray",
"Resolved by request": "lightGray",
"Solution provided": "lightGray",
"Workaround provided": "lightGray",
"User error": "lightGray"
}
},
"resolution_note": {
"type": "string",
"title": "Resolution Note"
}
},
"required": [
"resolution_code",
"resolution_note"
],
"order": [
"resolution_code",
"resolution_note"
]
},
"blueprintIdentifier": "servicenowIncident"
},
"invocationMethod": {
"type": "WEBHOOK",
"url": "<SERVICENOW_INSTANCE_URL>/api/now/table/incident/{{.entity.identifier}}",
"agent": false,
"synchronized": true,
"method": "PATCH",
"headers": {
"RUN_ID": "{{ .run.id }}",
"Content-Type": "application/json",
"Accept": "application/json",
"Authorization": "Basic {{.secrets.SERVICENOW_API_TOKEN}}"
},
"body": {
"state": "6",
"close_code": "{{ .inputs.resolution_code }}",
"close_notes": "{{ .inputs.resolution_note }}"
}
},
"requiredApproval": false
} -
Click
Save.
Now you should see the Resolve Incident action in the self-service page. 🎉
Delete an incident
-
Go to the Self-service page of your portal.
-
Click on the
+ New Actionbutton. -
Click on the
{...} Edit JSONbutton. -
Copy and paste the following JSON configuration into the editor.
Delete incident action (Click to expand)
Replace placeholderRemember to replace the
<SERVICENOW_INSTANCE_URL>placeholder with you actual ServiceNow instance such as https://example-id.service-now.com{
"identifier": "delete_snow_incident",
"title": "Delete Incident",
"icon": "Servicenow",
"description": "Deletes an incident from the ServiceNow incident catalog",
"trigger": {
"type": "self-service",
"operation": "DELETE",
"userInputs": {
"properties": {},
"required": [],
"order": []
},
"blueprintIdentifier": "servicenowIncident"
},
"invocationMethod": {
"type": "WEBHOOK",
"url": "<SERVICENOW_INSTANCE_URL>/api/now/table/incident/{{.entity.identifier}}",
"agent": false,
"synchronized": true,
"method": "DELETE",
"headers": {
"RUN_ID": "{{ .run.id }}",
"Content-Type": "application/json",
"Accept": "application/json",
"Authorization": "Basic {{.secrets.SERVICENOW_API_TOKEN}}"
},
"body": {}
},
"requiredApproval": false
} -
Click
Save.
Now you should see the Delete Incident action in the self-service page. 🎉
Visualize metrics
With incidents ingested and actions configured, the next step is building a dashboard to monitor ServiceNow data directly in Port. We can visualize all incidents by state, priority, or severity using customizable widgets. In addition, we can trigger remediation workflows right from your dashboard.
Create a dashboard
- Navigate to the Catalog page of your portal.
- Click on the
+ Newbutton in the left sidebar. - Select New dashboard.
- Name the dashboard ServiceNow Incident Management.
- Input
Create, view and manage your incidentsunder Description. - Select the
Servicenowicon. - Click
Create.
We now have a blank dashboard where we can start adding widgets to visualize insights from our ServiceNow incidents.
Add widgets
In the new dashboard, create the following widgets:
Total incidents created in the last 3 months (click to expand)
-
Click
+ Widgetand select Number Chart. -
Title:
Total incidents(add theServicenowicon). -
Select
Count entitiesChart type and choose ServiceNow Incident as the Blueprint. -
Select
countfor the Function. -
Add this JSON to the Additional filters editor to filter incidents created in the last 3 months:
[
    {
        "combinator":"and",
        "rules":[
            {
                "property":"createdOn",
                "operator":"between",
                "value":{
                "preset":"last3Months"
                }
            }
        ]
    }
] -
Select
customas the Unit and inputincidentsas the Custom unit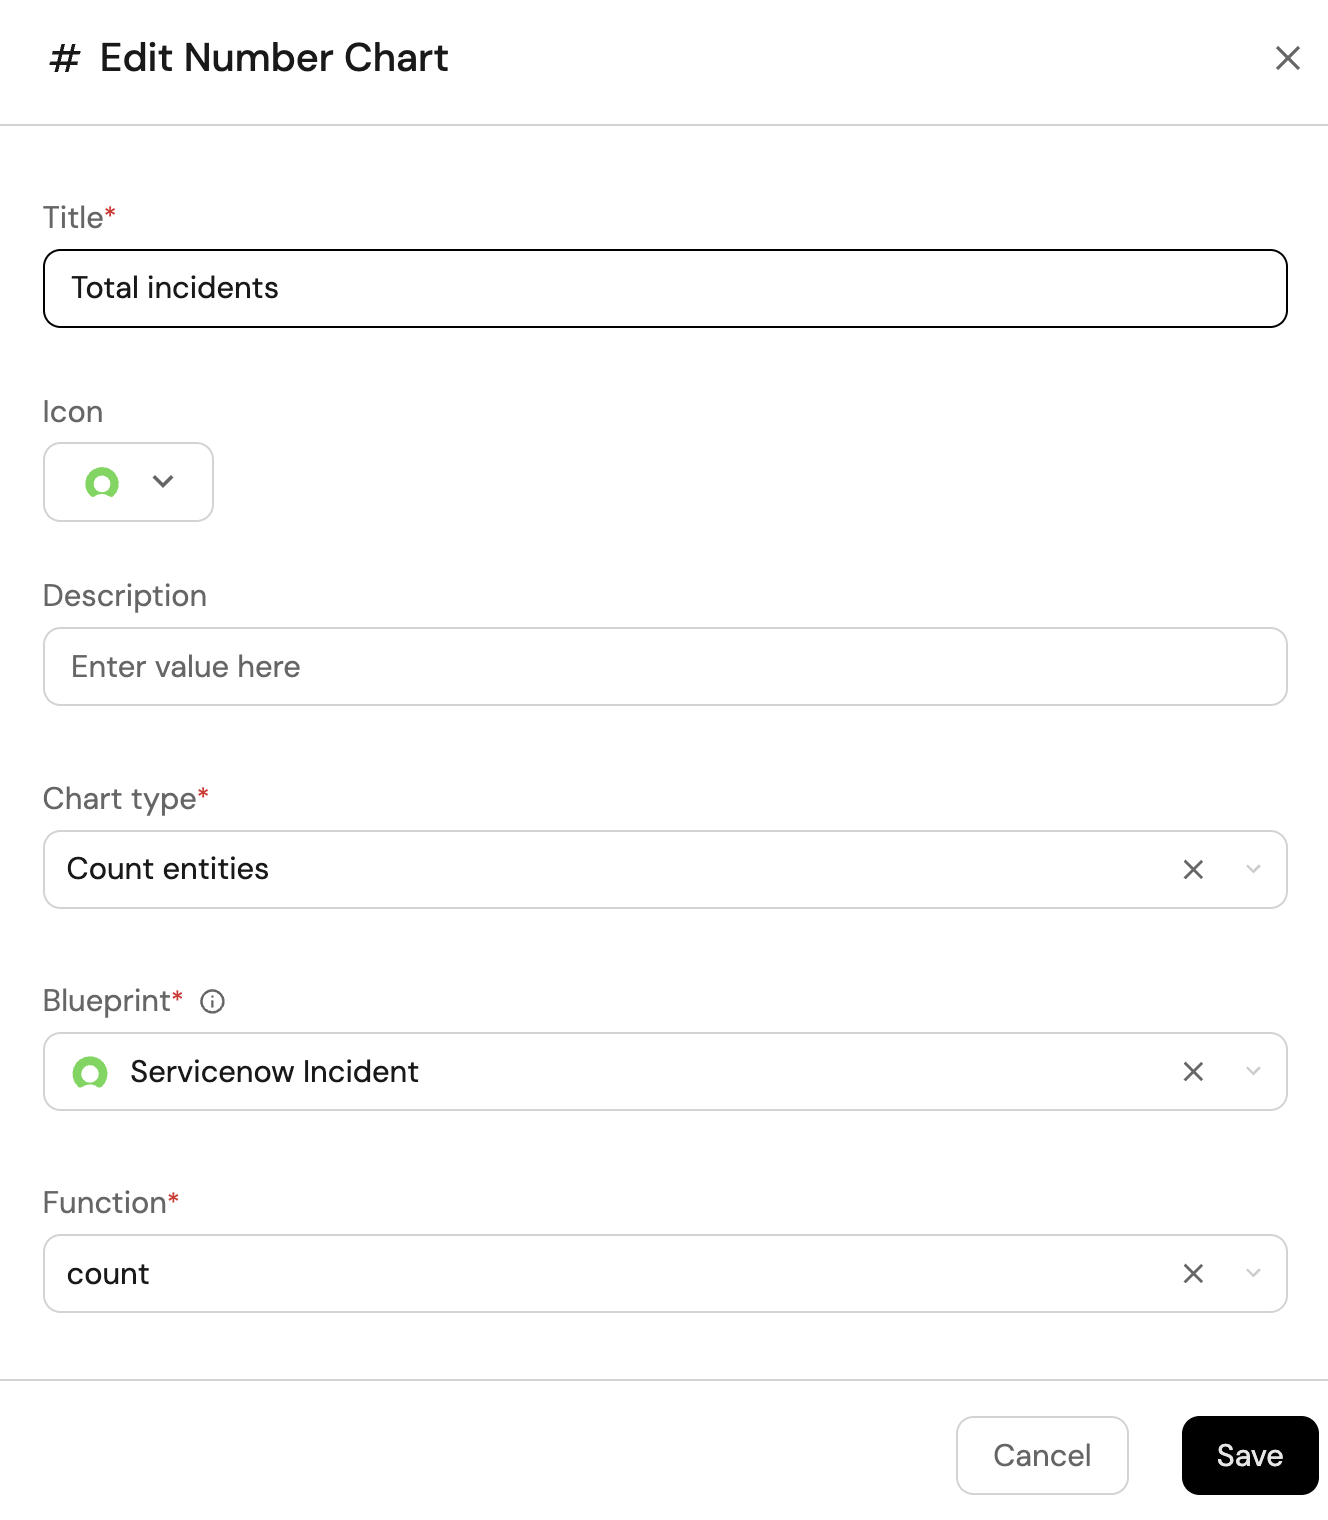
-
Click
Save.
Incident by state (click to expand)
-
Click
+ Widgetand select Pie chart. -
Title:
Incident by state(add theServicenowicon). -
Choose the ServiceNow Incident blueprint.
-
Under
Breakdown by property, select the State property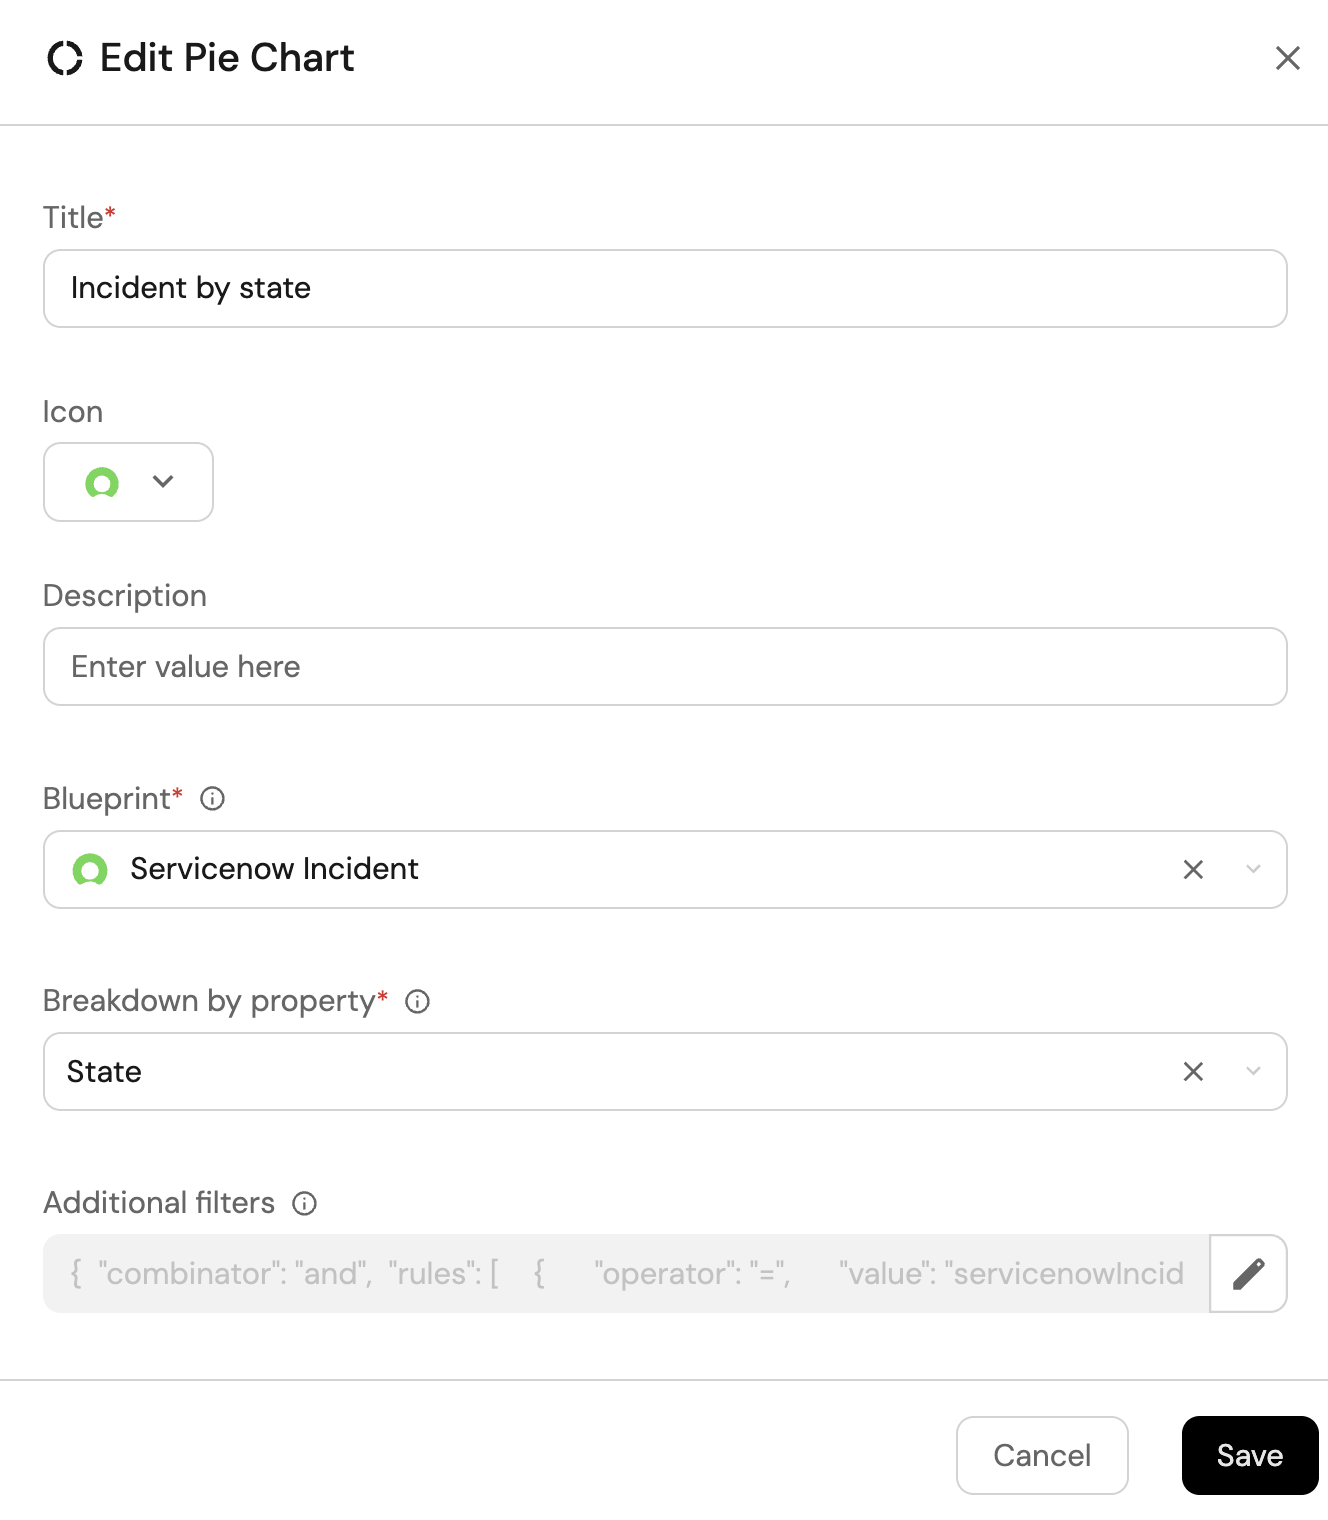
-
Click Save.
Incident by severity (click to expand)
-
Click
+ Widgetand select Pie chart. -
Title:
Incident by severity(add theServicenowicon). -
Choose the ServiceNow Incident blueprint.
-
Under
Breakdown by property, select the Severity property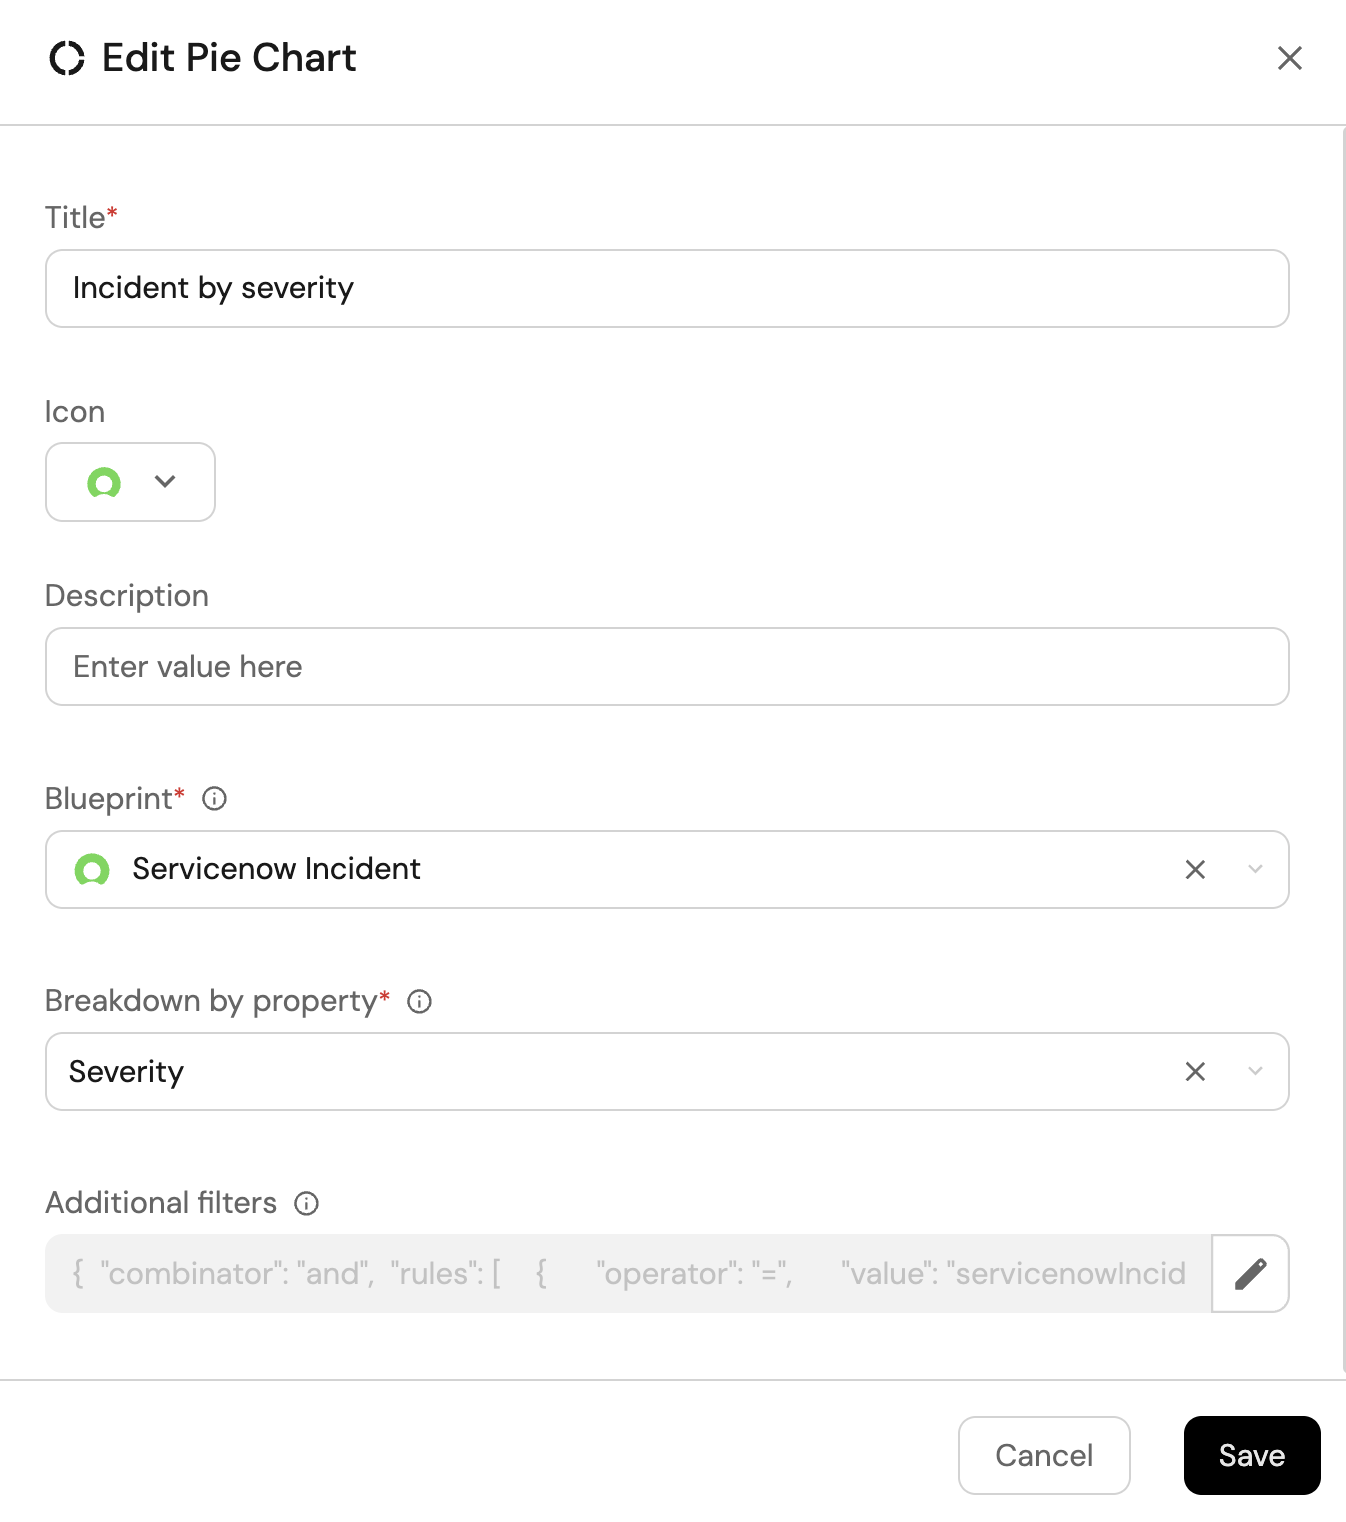
-
Click Save.
Create incident action (click to expand)
-
Click
+ Widgetand select Action card. -
Choose the Create Incident action we created in this guide
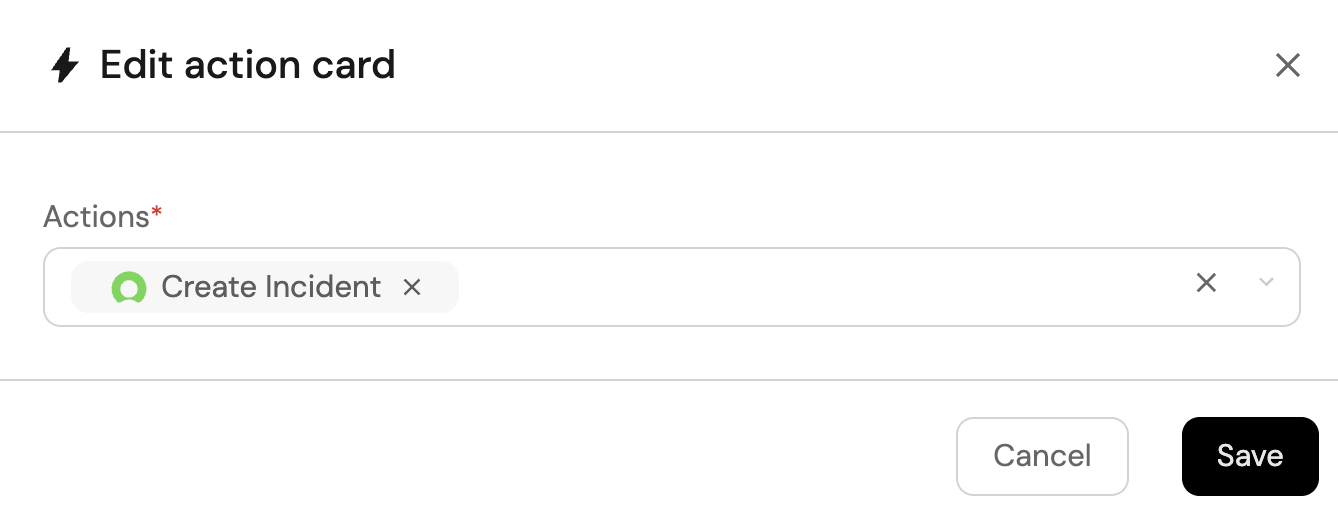
-
Click Save.
All Servicenow incidents view (click to expand)
-
Click
+ Widgetand select Table. -
Title the widget All Incidents.
-
Choose the ServiceNow Incident blueprint
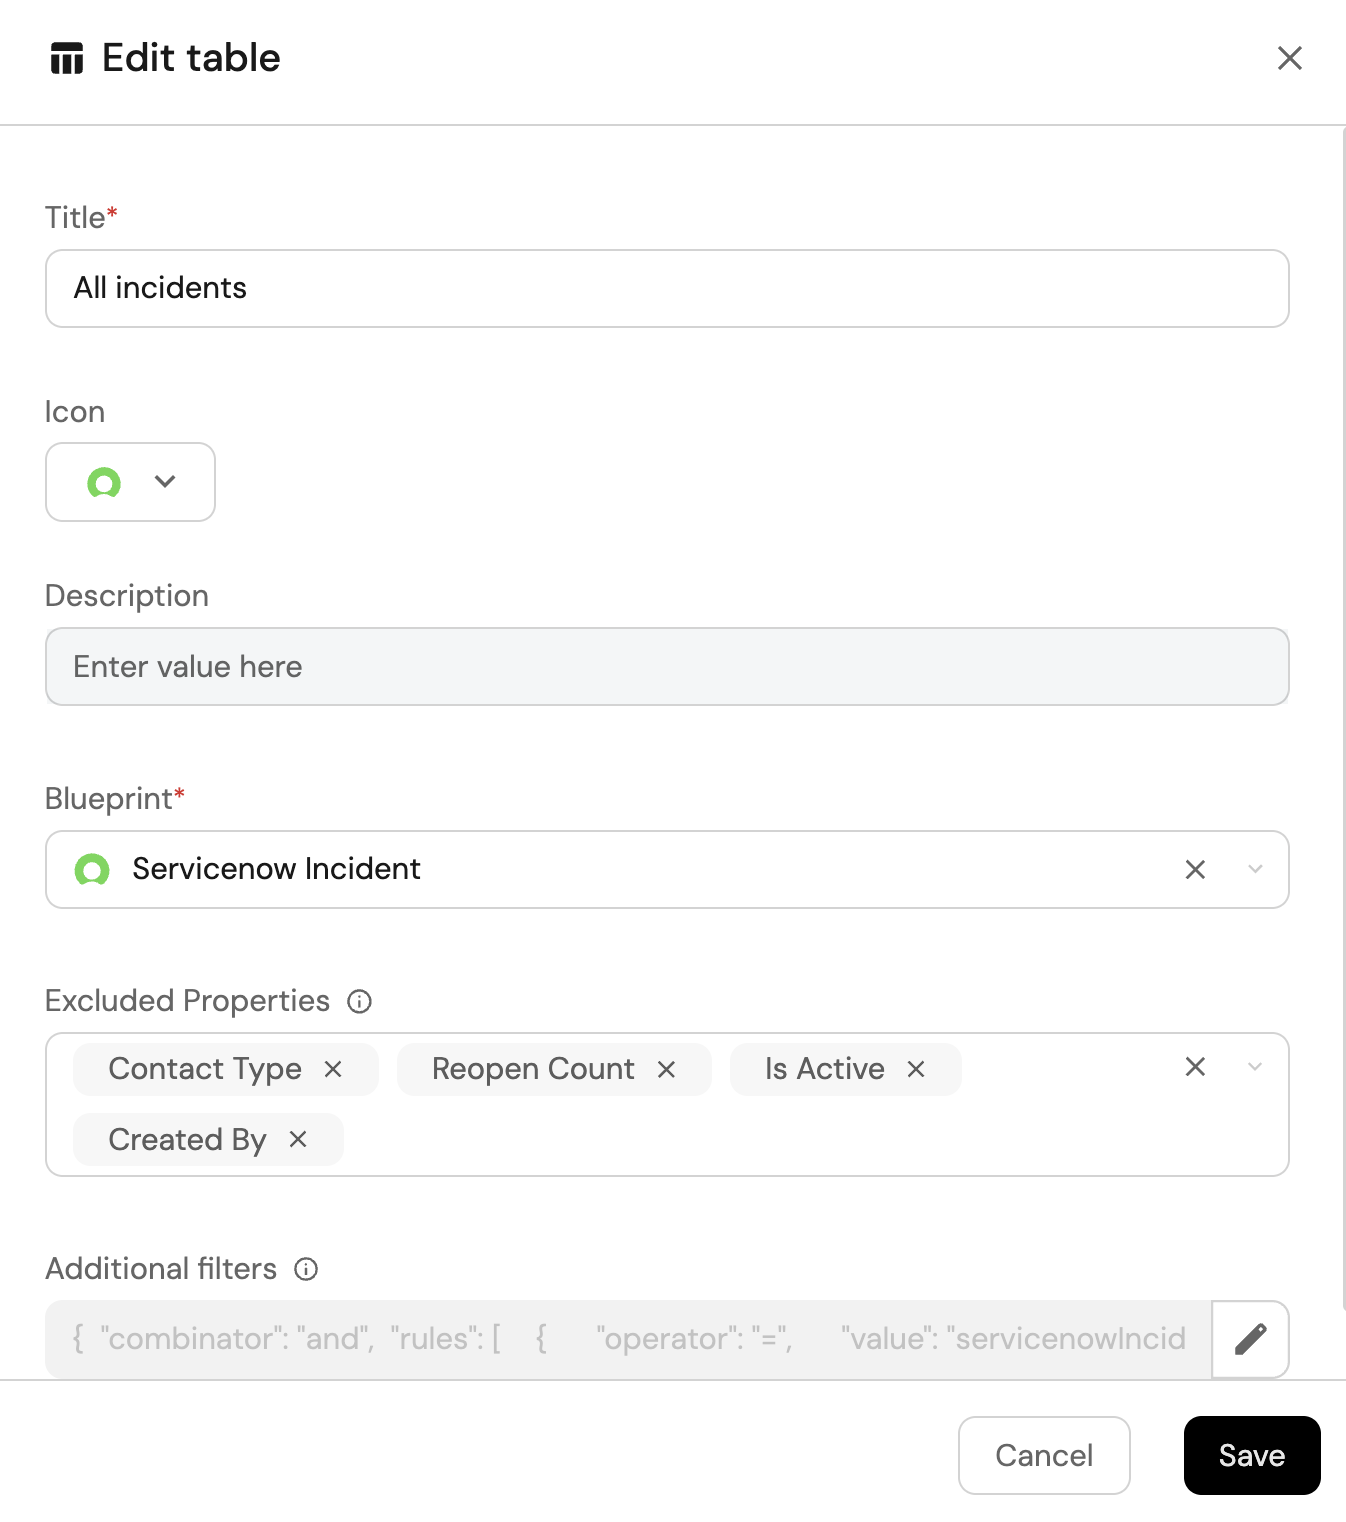
-
Click Save to add the widget to the dashboard.
-
Click on the
...button in the top right corner of the table and select Customize table. -
In the top right corner of the table, click on
Manage Propertiesand add the following properties:- State: The current state of the incident.
- Assigned To: The assignee of the incident.
- Priority: The incident priority.
- Entity Creation Date: The date the incident was created in Port.
-
Click on the save icon in the top right corner of the widget to save the customized table.