Visualize and manage Git deployments
Send this guide to your coding agent.
Prerequisite: Install Port MCP
Open plan mode. Implement this Port guide in my org via MCP:

https://docs.port.io/guides/all/visualize-and-manage-git-deployments

Goal: get the guide's core flow working end-to-end in my org; adapting it to fit my existing setup takes priority over matching the guide 1:1.

Plan:
1. Confirm MCP is connected, in the right org, with sufficient permissions.
2. Diff the guide's data model (blueprints, properties, relations, actions, agents, automations, integrations, secrets) against mine.
3. Propose adaptations for gaps, reusing existing blueprints/relations over guide-named duplicates.
4. Flag what needs a UI click, credential, or secret from me, testing MCP capability empirically before ruling anything out.
5. Stop on any blocker and give me options. Approving this plan authorizes the writes it lists; pause only for writes beyond what's listed.

Build:
- Extend blueprint schema additively when upserting; don't remove or overwrite existing properties, and treat type conflicts as a blocker, not an auto-fix.
- List any mock data in the plan, minimal and labeled mock; once approved, seed it without re-asking, and tell me what you seeded.
- For anything the guide writes downstream (e.g. a webhook target), use a real entity, not a mock.
- For pages/widgets, use the real page identifier from the app URL, not a guessed slug.
- When you hit a UI step confirmed (not assumed) unsupported via MCP, pause, give exact clicks, then resume via MCP.
- Validate and give links after each meaningful step (only a tool-returned URL, no guessed paths); don't proceed if the last run wasn't a success.

Done:
- Confirm the guide's expected output exists and runs in Port.
- Summarize adaptations, seeded data, what was mocked or skipped, remaining UI steps, and how to verify.
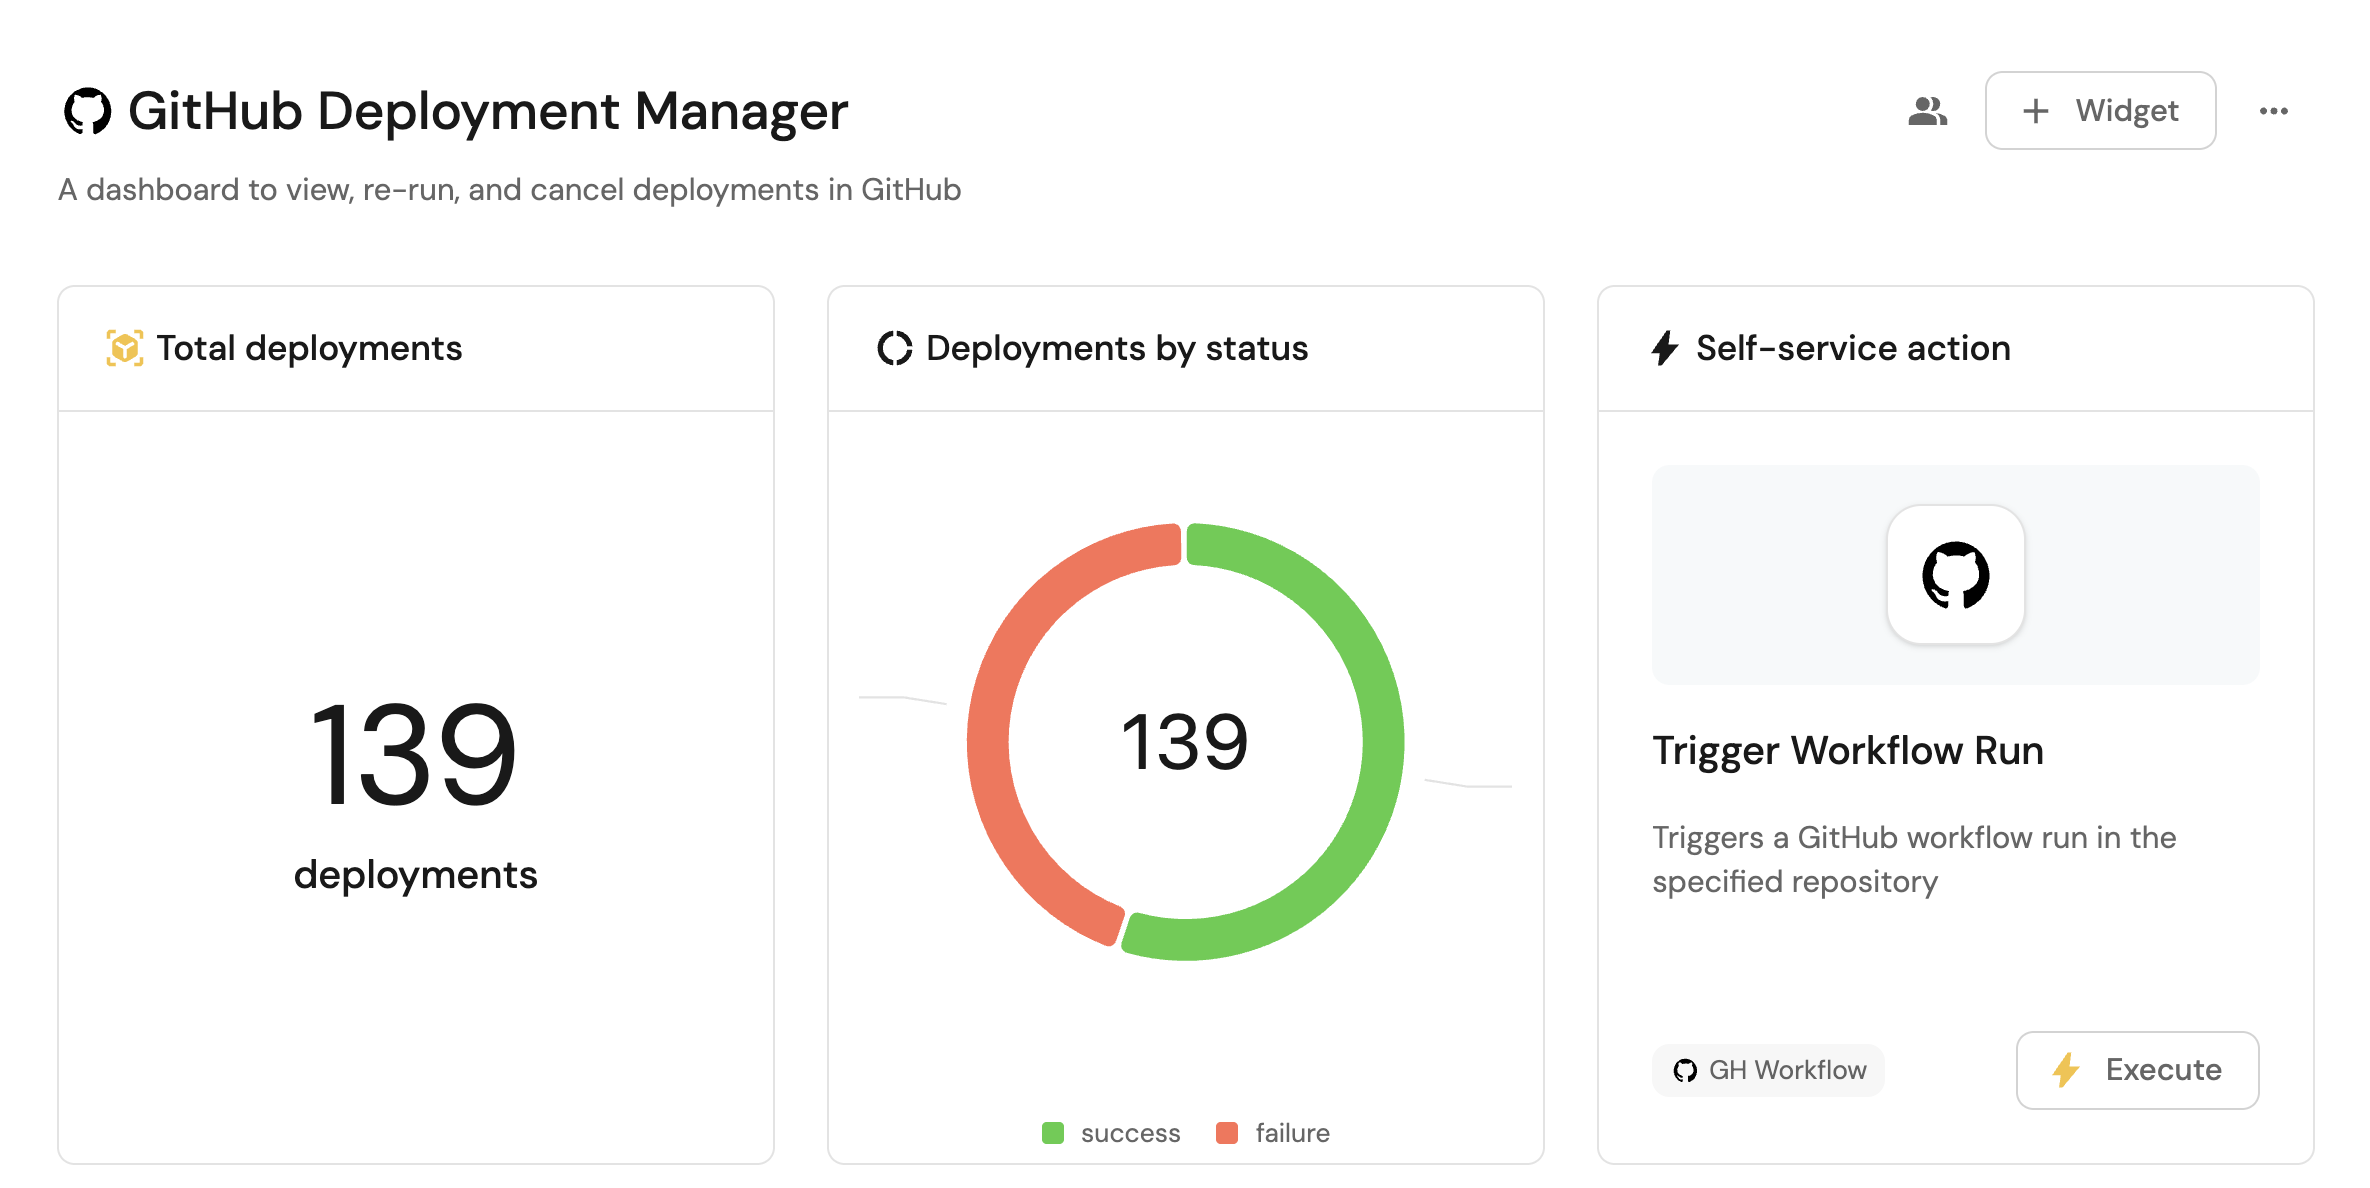
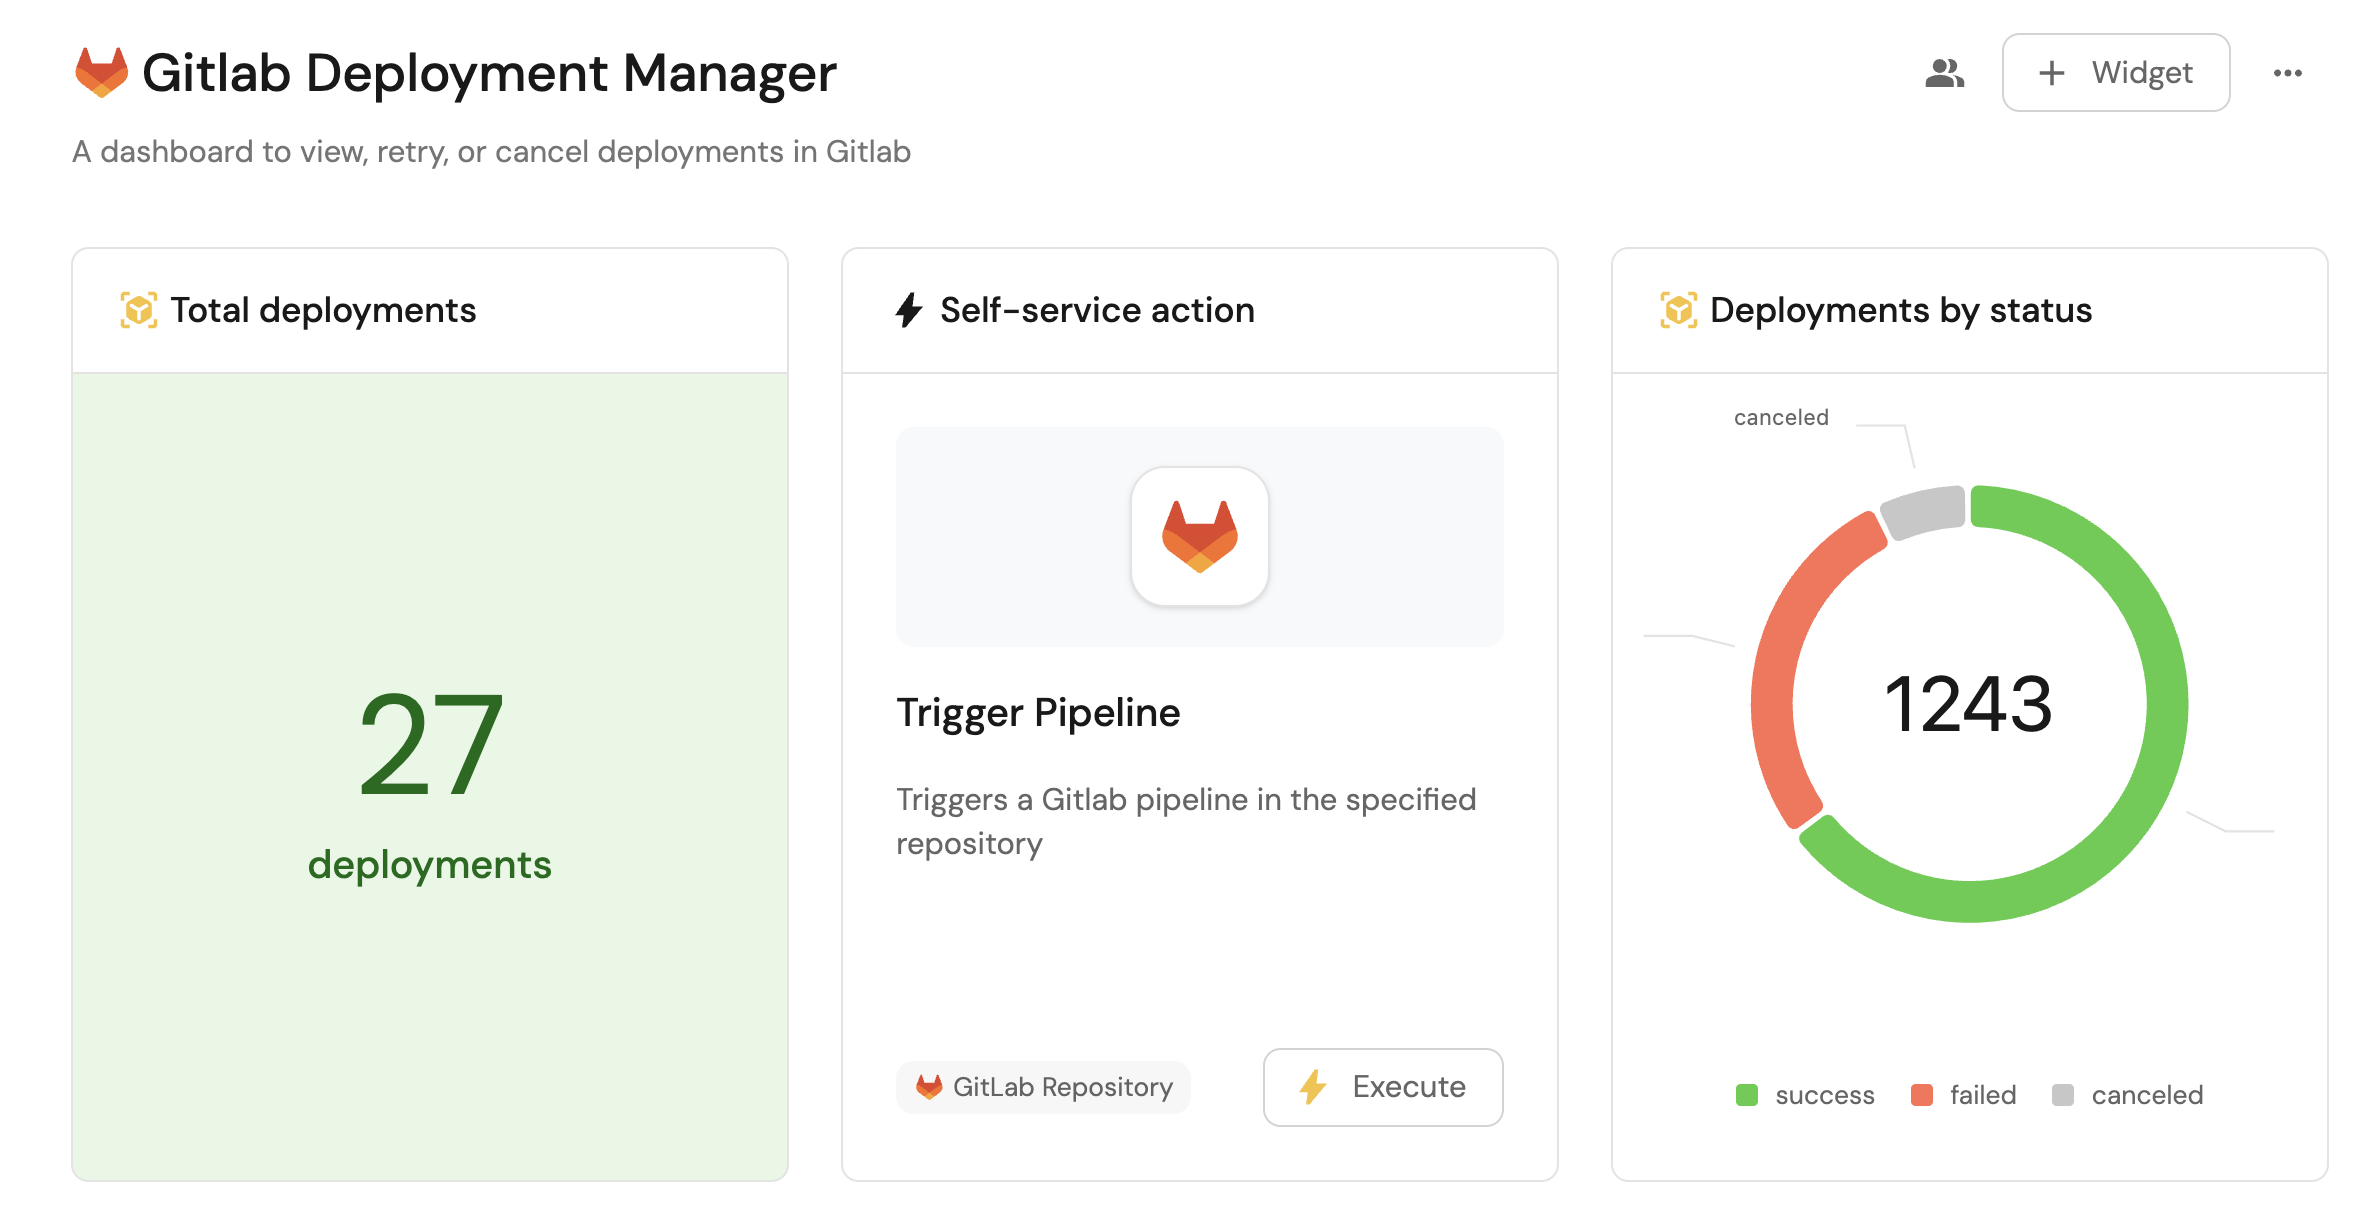
This guide demonstrates how to ingest, visualize, and manage GitHub and GitLab deployments in Port.
You will:
- Ingest GitHub workflow runs or GitLab pipelines into Port's software catalog.
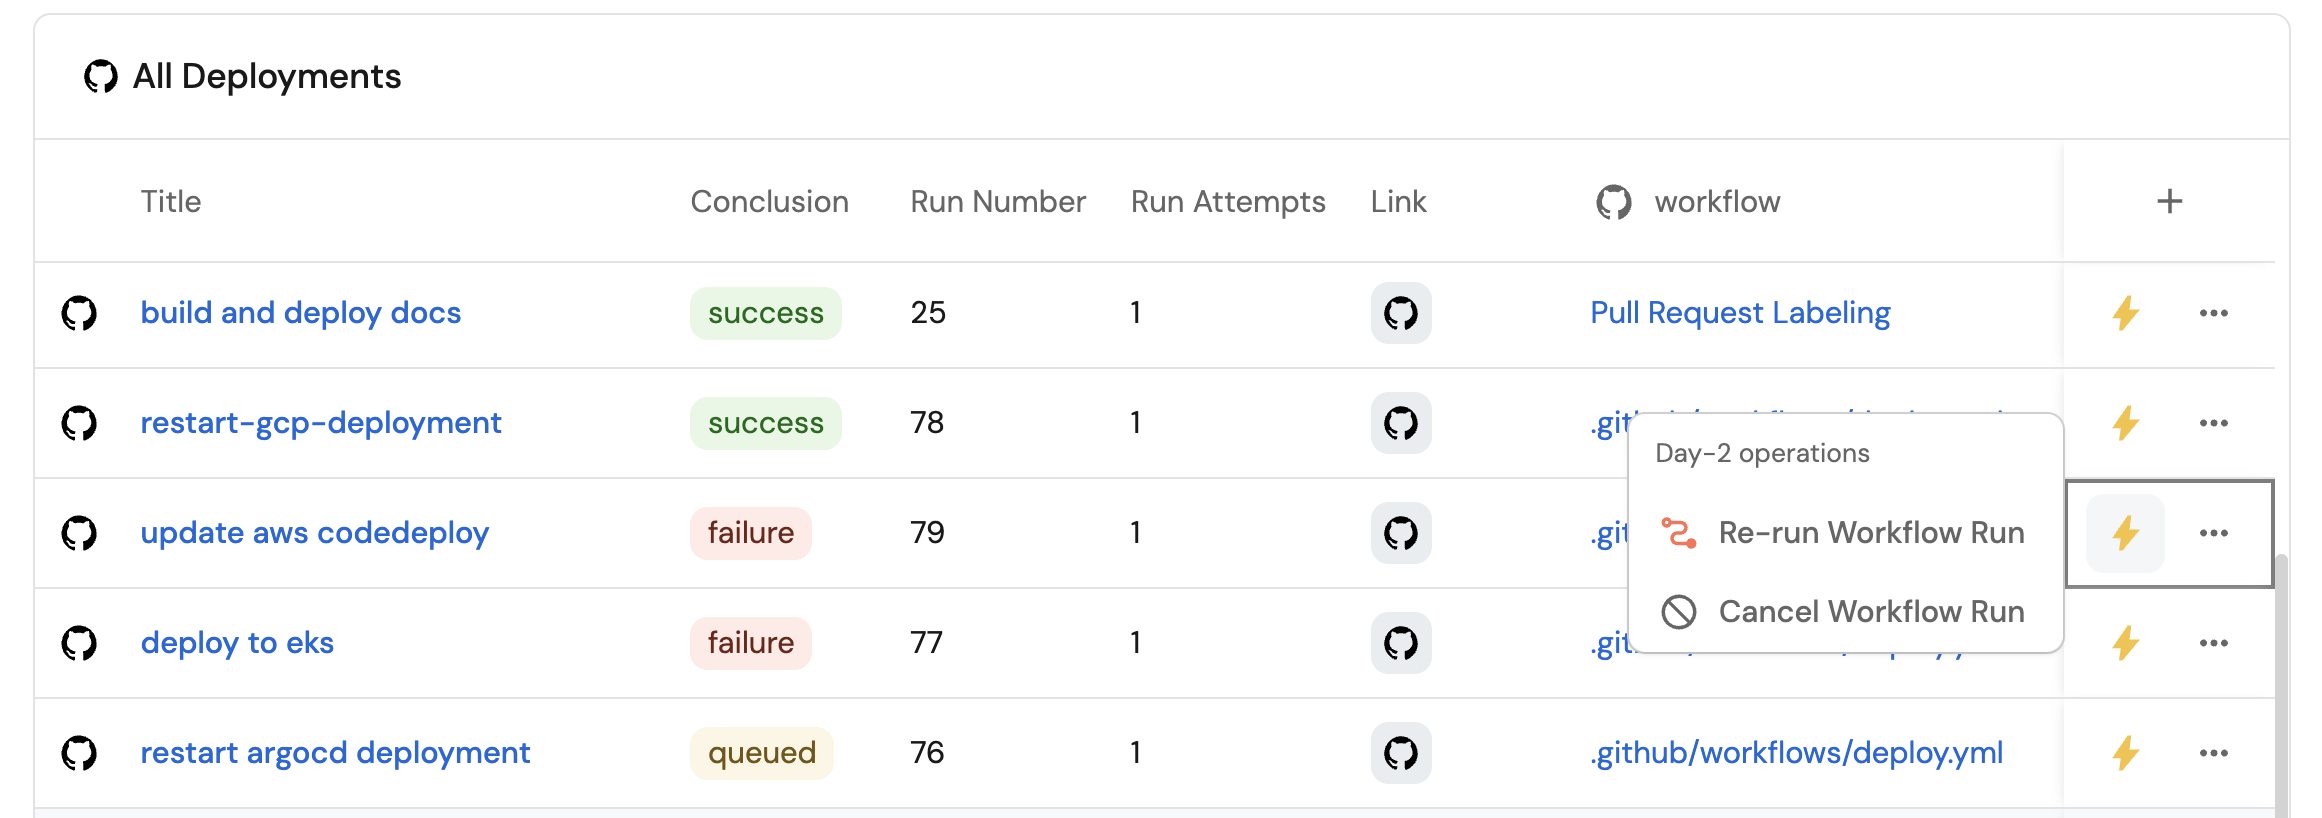
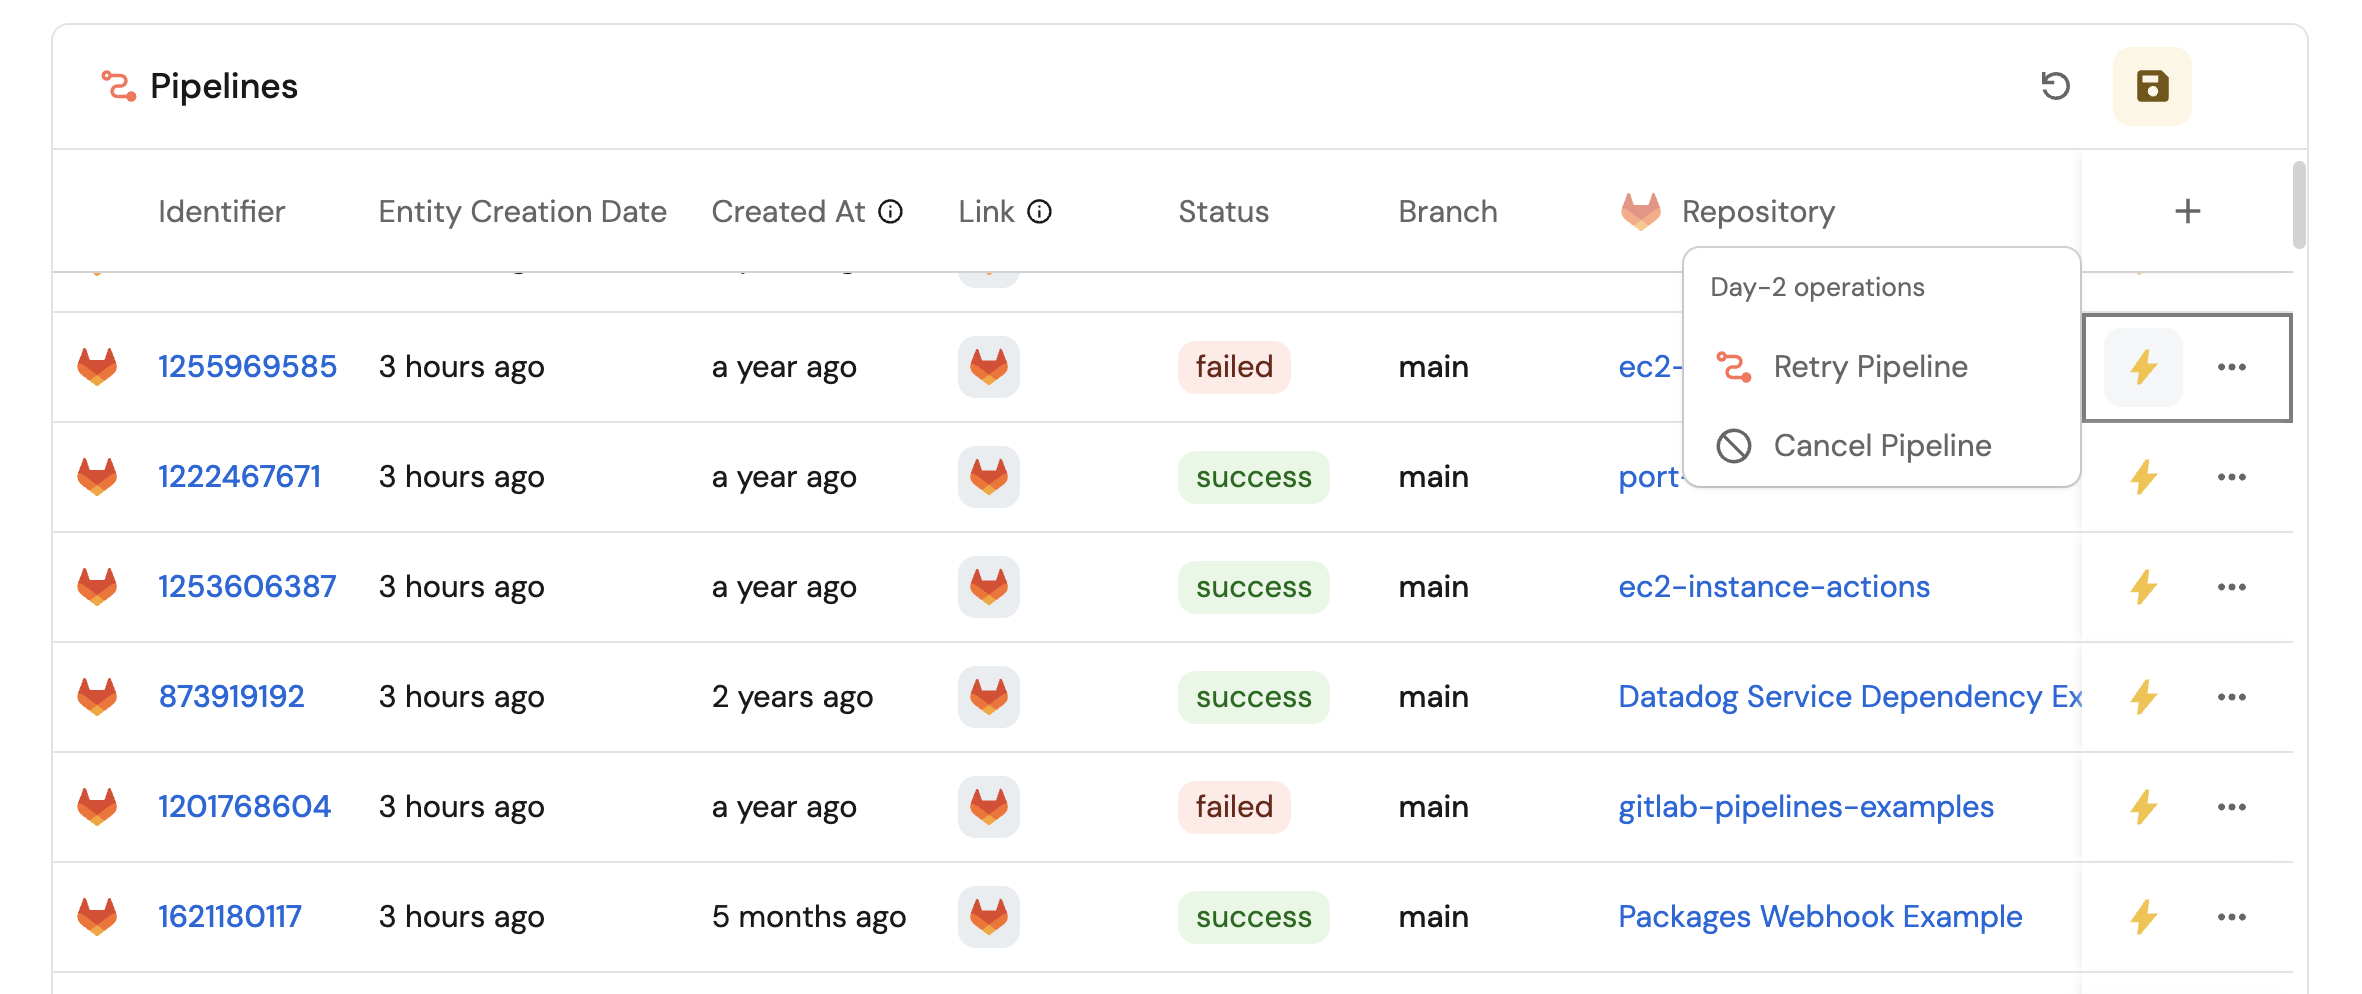
- Create self-service actions to trigger, retry, and cancel deployments.
- Build a dashboard to monitor deployments and run actions.
- GitHub
- GitLab
Common use cases
- Monitor deployment status and health across repositories from one dashboard.
- Let platform teams run deployment operations through governed self-service actions.
Prerequisites
- Complete the onboarding process.
- GitHub
- GitLab
- Install Port's GitHub integration.
- Install Port's GitLab integration.
Set up data model
The deployment blueprints are not created automatically when you install the GitHub or GitLab integration. Create the blueprints for your provider before updating its mapping.
- GitHub
- GitLab
Create the GitHub workflow blueprint
-
Go to the Builder page of your portal.
-
Click on + Blueprint.
-
Click on Edit JSON.
-
Copy and paste the following JSON configuration into the editor:
GitHub workflow blueprint (Click to expand)
{"identifier": "githubWorkflow","title": "Workflow","icon": "Github","schema": {"properties": {"path": {"title": "Path","type": "string"},"status": {"title": "Status","type": "string","enum": ["active","deleted","disabled_fork","disabled_inactivity","disabled_manually"],"enumColors": {"active": "green","deleted": "red"}},"createdAt": {"title": "Created at","type": "string","format": "date-time"},"updatedAt": {"title": "Updated at","type": "string","format": "date-time"},"deletedAt": {"title": "Deleted at","type": "string","format": "date-time"},"link": {"title": "Link","type": "string","format": "url"}},"required": []},"mirrorProperties": {},"calculationProperties": {},"relations": {"repository": {"title": "Repository","target": "service","required": false,"many": false}}} -
Click Save to create the blueprint.
Create the GitHub workflow run blueprint
-
Go to the Builder page of your portal.
-
Click on + Blueprint.
-
Click on Edit JSON.
-
Copy and paste the following JSON configuration into the editor:
GitHub workflow run blueprint (Click to expand)
{"identifier": "githubWorkflowRun","title": "Workflow Run","icon": "Github","schema": {"properties": {"name": {"title": "Name","type": "string"},"triggeringActor": {"title": "Triggering actor","type": "string"},"status": {"title": "Status","type": "string","enum": ["completed","action_required","cancelled","startup_failure","failure","neutral","skipped","stale","success","timed_out","in_progress","queued","requested","waiting"],"enumColors": {"queued": "yellow","in_progress": "yellow","success": "green","failure": "red"}},"conclusion": {"title": "Conclusion","type": "string","enum": ["completed","action_required","cancelled","startup_failure","failure","neutral","skipped","stale","success","timed_out","in_progress","queued","requested","waiting"],"enumColors": {"queued": "yellow","in_progress": "yellow","success": "green","failure": "red"}},"createdAt": {"title": "Created at","type": "string","format": "date-time"},"runStartedAt": {"title": "Run started at","type": "string","format": "date-time"},"updatedAt": {"title": "Updated at","type": "string","format": "date-time"},"runNumber": {"title": "Run number","type": "number"},"runAttempt": {"title": "Run attempts","type": "number"},"link": {"title": "Link","type": "string","format": "url"}},"required": []},"mirrorProperties": {},"calculationProperties": {},"relations": {"workflow": {"target": "githubWorkflow","required": true,"many": false}}} -
Click Save to create the blueprint.
Create the GitLab pipeline blueprint
-
Go to the Builder page of your portal.
-
Click on + Blueprint.
-
Click on Edit JSON.
-
Copy and paste the following JSON configuration into the editor:
GitLab pipeline blueprint (Click to expand)
{"identifier": "gitlabPipeline","title": "GitLab Pipeline","icon": "GitLab","schema": {"properties": {"createdAt": {"type": "string","title": "Created at","format": "date-time","description": "When the pipeline was created"},"updatedAt": {"type": "string","title": "Updated at","format": "date-time","description": "When the pipeline was last updated"},"link": {"type": "string","title": "Link","format": "url","description": "URL to the pipeline in GitLab"},"status": {"type": "string","title": "Status","enum": ["failed","success","canceled"],"enumColors": {"failed": "red","success": "green","canceled": "darkGray"}},"targetBranch": {"type": "string","title": "Branch"}},"required": []},"mirrorProperties": {},"calculationProperties": {},"aggregationProperties": {},"relations": {"project": {"title": "Project","target": "service","required": false,"many": false}}} -
Click Save to create the blueprint.
Update integration mapping
Configure your provider integration to ingest the deployment entities represented by the blueprints.
- GitHub
- GitLab
Update GitHub mapping
-
In your GitHub repository, create or update
port-app-config.yml. -
Add the following configuration to ingest repositories, workflows, and workflow runs:
GitHub integration configuration (Click to expand)
resources:- kind: repositoryselector:query: "true"includedFiles:- README.mdport:entity:mappings:identifier: .nametitle: .nameblueprint: '"service"'properties:readme: .__includedFiles["README.md"]url: .html_urldefaultBranch: .default_branch- kind: workflowselector:query: "true"port:entity:mappings:identifier: ".__repository + (.id | tostring)"title: .nameblueprint: '"githubWorkflow"'properties:path: .pathstatus: .statecreatedAt: .created_atupdatedAt: .updated_atlink: .html_urlrelations:repository: ".__repository"- kind: workflow-runselector:query: "true"port:entity:mappings:identifier: ".repository.name + \"/\" + (.id | tostring)"title: .display_titleblueprint: '"githubWorkflowRun"'properties:name: .nametriggeringActor: .triggering_actor.loginstatus: .statusconclusion: .conclusioncreatedAt: .created_atrunStartedAt: .run_started_atupdatedAt: .updated_atrunNumber: .run_numberrunAttempt: .run_attemptlink: .html_urlrelations:workflow: ".repository.name + (.workflow_id | tostring)" -
Commit and push
port-app-config.yml. The GitHub integration will sync the workflows and workflow runs automatically.
Update GitLab mapping
-
Go to the Data sources page of your portal.
-
Select your GitLab integration.
-
Add the following YAML block into the editor:
GitLab integration configuration (Click to expand)
deleteDependentEntities: truecreateMissingRelatedEntities: trueenableMergeEntity: trueresources:- kind: projectselector:query: "true"includeLanguages: trueport:entity:mappings:identifier: .id | tostringtitle: .nameblueprint: '"service"'properties:url: .web_urlreadme: file://README.mdlanguage: .__languages | to_entries | max_by(.value) | .key- kind: pipelineselector:query: "true"port:entity:mappings:identifier: .id | tostringtitle: (.project_id | tostring) + "-" + (.id | tostring)blueprint: '"gitlabPipeline"'properties:status: .statuscreatedAt: .created_atupdatedAt: .updated_attargetBranch: .reflink: .web_urlrelations:project: .project_id | tostring -
Click Save & Resync to apply the mapping.
Set up self-service actions
Create three synced-webhook actions for your provider: trigger a deployment, retry a failed deployment, and cancel a running deployment.
- GitHub
- GitLab
Add Port secret
Add a GitHub token that Port can use to call the GitHub Actions API:
-
In Port, click on your profile picture
 .
. -
Click on Credentials.
-
Click on the Secrets tab.
-
Click on + Secret and add
_GITHUB_TOKEN. Use a fine-grained personal access token with Actions: Read and write repository permission.
- Trigger
- Retry
- Cancel
Set up self-service action
This action starts the selected GitHub workflow on the main branch and passes the chosen environment as a workflow input.
-
Go to the Self-service page of your portal.
-
Click on the + New Action button.
-
Click on the
{...} Edit JSONbutton. -
Copy and paste the following JSON configuration into the editor:
Trigger a GitHub workflow run (Click to expand)
Replace the GitHub organizationReplace
<YOUR_GITHUB_ORG>in the webhook URL with your GitHub organization name.{"identifier": "trigger_workflow_run","title": "Trigger workflow run","icon": "Github","description": "Trigger a GitHub workflow run in the selected repository","trigger": {"type": "self-service","operation": "DAY-2","userInputs": {"properties": {"environment": {"icon": "DefaultProperty","title": "Environment","type": "string","default": "test","enum": ["test","staging","production"],"enumColors": {"test": "lightGray","staging": "lightGray","production": "lightGray"}}},"required": [],"order": ["environment"]},"blueprintIdentifier": "githubWorkflow"},"invocationMethod": {"type": "WEBHOOK","url": "https://api.github.com/repos/<YOUR_GITHUB_ORG>/{{ .entity.relations.repository }}/actions/workflows/{{ .entity.properties.path | split(\"/\")[-1] }}/dispatches","agent": false,"synchronized": true,"method": "POST","headers": {"Accept": "application/vnd.github+json","Authorization": "Bearer {{ .secrets._GITHUB_TOKEN }}","X-GitHub-Api-Version": "2022-11-28","Content-Type": "application/json"},"body": {"ref": "main","inputs": {"environment": "{{ .inputs.environment }}"}}},"requiredApproval": false} -
Click Save to create the action.
The Trigger workflow run action now appears for entities based on the GitHub Workflow blueprint.
Set up self-service action
This action retries the failed jobs in a GitHub workflow run whose conclusion is failure or cancelled.
-
Go to the Self-service page of your portal.
-
Click on the + New Action button.
-
Click on the
{...} Edit JSONbutton. -
Copy and paste the following JSON configuration into the editor:
Retry a GitHub workflow run (Click to expand)
Replace the GitHub organizationReplace
<YOUR_GITHUB_ORG>in the webhook URL with your GitHub organization name.{"identifier": "rerun_workflow_run","title": "Re-run workflow run","icon": "Pipeline","description": "Re-run failed or cancelled jobs in a GitHub workflow run","trigger": {"type": "self-service","operation": "DAY-2","userInputs": {"properties": {},"required": [],"order": []},"condition": {"type": "SEARCH","rules": [{"property": "conclusion","operator": "in","value": ["failure","cancelled"]}],"combinator": "and"},"blueprintIdentifier": "githubWorkflowRun"},"invocationMethod": {"type": "WEBHOOK","url": "https://api.github.com/repos/<YOUR_GITHUB_ORG>/{{ .entity.identifier | split(\"/\")[0] }}/actions/runs/{{ .entity.identifier | split(\"/\")[-1] }}/rerun-failed-jobs","agent": false,"synchronized": true,"method": "POST","headers": {"Accept": "application/vnd.github+json","Authorization": "Bearer {{ .secrets._GITHUB_TOKEN }}","X-GitHub-Api-Version": "2022-11-28"}},"requiredApproval": false} -
Click Save to create the action.
The Re-run workflow run action now appears on failed or cancelled GitHub Workflow Run entities.
Set up self-service action
This action cancels the selected GitHub workflow run.
-
Go to the Self-service page of your portal.
-
Click on the + New Action button.
-
Click on the
{...} Edit JSONbutton. -
Copy and paste the following JSON configuration into the editor:
Cancel a GitHub workflow run (Click to expand)
Replace the GitHub organizationReplace
<YOUR_GITHUB_ORG>in the webhook URL with your GitHub organization name.{"identifier": "cancel_workflow_run","title": "Cancel workflow run","icon": "Unavailable","description": "Cancel a running GitHub workflow run","trigger": {"type": "self-service","operation": "DAY-2","userInputs": {"properties": {},"required": [],"order": []},"blueprintIdentifier": "githubWorkflowRun"},"invocationMethod": {"type": "WEBHOOK","url": "https://api.github.com/repos/<YOUR_GITHUB_ORG>/{{ .entity.identifier | split(\"/\")[0] }}/actions/runs/{{ .entity.identifier | split(\"/\")[-1] }}/cancel","agent": false,"synchronized": true,"method": "POST","headers": {"Accept": "application/vnd.github+json","Authorization": "Bearer {{ .secrets._GITHUB_TOKEN }}","X-GitHub-Api-Version": "2022-11-28"}},"requiredApproval": false} -
Click Save to create the action.
The Cancel workflow run action now appears on GitHub Workflow Run entities.
Add Port secrets
Add the credentials that Port needs for the GitLab pipeline APIs:
-
In Port, click on your profile picture
. -
Click on Credentials.
-
Click on the Secrets tab.
-
Click on + Secret and add:
GITLAB_TRIGGER_TOKEN- A pipeline trigger token used to start pipelines.GITLAB_API_TOKEN- A GitLab access token with theapiscope, used to retry and cancel pipelines.
- Trigger
- Retry
- Cancel
Set up self-service action
This action starts a pipeline on the selected GitLab project's main branch and passes the chosen environment as a pipeline variable.
-
Go to the Self-service page of your portal.
-
Click on the + New Action button.
-
Click on the
{...} Edit JSONbutton. -
Copy and paste the following JSON configuration into the editor:
Trigger a GitLab pipeline (Click to expand)
{"identifier": "trigger_pipeline","title": "Trigger pipeline","icon": "GitLab","description": "Trigger a GitLab pipeline in the selected project","trigger": {"type": "self-service","operation": "DAY-2","userInputs": {"properties": {"environment": {"icon": "DefaultProperty","title": "Environment","type": "string","default": "test","enum": ["test","staging","production"],"enumColors": {"test": "lightGray","staging": "lightGray","production": "lightGray"}}},"required": [],"order": ["environment"]},"blueprintIdentifier": "service"},"invocationMethod": {"type": "WEBHOOK","url": "https://gitlab.com/api/v4/projects/{{ .entity.identifier }}/trigger/pipeline?token={{ .secrets.GITLAB_TRIGGER_TOKEN }}&ref=main","agent": false,"synchronized": true,"method": "POST","headers": {"RUN_ID": "{{ .run.id }}","Content-Type": "application/json"},"body": {"variables": {"environment": "{{ .inputs.environment }}"}}},"requiredApproval": false} -
Click Save to create the action.
The Trigger pipeline action now appears on entities based on the Service blueprint.
Set up self-service action
This action retries failed or canceled jobs in the selected GitLab pipeline.
-
Go to the Self-service page of your portal.
-
Click on the + New Action button.
-
Click on the
{...} Edit JSONbutton. -
Copy and paste the following JSON configuration into the editor:
Retry a GitLab pipeline (Click to expand)
{"identifier": "retry_pipeline","title": "Retry pipeline","icon": "Pipeline","description": "Retry failed or canceled jobs in a GitLab pipeline","trigger": {"type": "self-service","operation": "DAY-2","userInputs": {"properties": {},"required": [],"order": []},"condition": {"type": "SEARCH","rules": [{"property": "status","operator": "in","value": ["failed","canceled"]}],"combinator": "and"},"blueprintIdentifier": "gitlabPipeline"},"invocationMethod": {"type": "WEBHOOK","url": "https://gitlab.com/api/v4/projects/{{ .entity.relations.project }}/pipelines/{{ .entity.identifier }}/retry","agent": false,"synchronized": true,"method": "POST","headers": {"RUN_ID": "{{ .run.id }}","Content-Type": "application/json","PRIVATE-TOKEN": "{{ .secrets.GITLAB_API_TOKEN }}"}},"requiredApproval": false} -
Click Save to create the action.
The Retry pipeline action now appears on failed or canceled GitLab Pipeline entities.
Set up self-service action
This action cancels all running jobs in the selected GitLab pipeline.
-
Go to the Self-service page of your portal.
-
Click on the + New Action button.
-
Click on the
{...} Edit JSONbutton. -
Copy and paste the following JSON configuration into the editor:
Cancel a GitLab pipeline (Click to expand)
{"identifier": "cancel_pipeline","title": "Cancel pipeline","icon": "Unavailable","description": "Cancel all running jobs in a GitLab pipeline","trigger": {"type": "self-service","operation": "DAY-2","userInputs": {"properties": {},"required": [],"order": []},"blueprintIdentifier": "gitlabPipeline"},"invocationMethod": {"type": "WEBHOOK","url": "https://gitlab.com/api/v4/projects/{{ .entity.relations.project }}/pipelines/{{ .entity.identifier }}/cancel","agent": false,"synchronized": true,"method": "POST","headers": {"RUN_ID": "{{ .run.id }}","Content-Type": "application/json","PRIVATE-TOKEN": "{{ .secrets.GITLAB_API_TOKEN }}"}},"requiredApproval": false} -
Click Save to create the action.
The Cancel pipeline action now appears on GitLab Pipeline entities.
Visualize deployments
With deployment entities ingested and actions configured, create a dashboard to monitor deployment health and run remediation actions.
- GitHub
- GitLab
Create the GitHub dashboard
-
Navigate to your software catalog.
-
Click on the + button in the left sidebar.
-
Select New dashboard.
-
Name the dashboard GitHub Deployment Manager.
-
Enter
A dashboard to view, re-run, and cancel deployments in GitHubunder Description. -
Select the Github icon.
-
Click Create.
The dashboard is now ready for widgets that visualize GitHub workflow runs and expose the deployment actions.
This guide treats workflow runs as deployments when their titles contain deploy, CD, production, or staging. Adjust these filters to match your workflow naming conventions.
You can instead ingest GitHub's native deployment objects by mapping the deployment resource kind. See the GitHub deployment mapping example.
Add GitHub widgets
Add the following widgets to the dashboard: Click + Widget and select Number chart. Enter Select Count entities as the Chart type and GitHub Workflow Run as the Blueprint. Select Add the following JSON to the Additional filters editor: Select Click Save. Click + Widget and select Pie chart. Enter Select GitHub Workflow Run as the Blueprint. Select Conclusion under Breakdown by property. Add the following JSON to the Additional filters editor: Click Save. Click + Widget and select Action card. Select the Trigger workflow run action. Click Save. Click + Widget and select Table. Enter Select GitHub Workflow Run as the Blueprint. Add the following JSON to the Additional filters editor: Click Save to add the widget. Click on the ... button in the top-right corner of the table and select Customize table. Click Manage properties and add: Click the save icon to save the customized table.Total deployments created in the last three months (Click to expand)
Total deployments under Title and select the Deployment icon.count under Function.custom as the Unit and enter deployments as the Custom unit.Deployments by status (Click to expand)
Deployments by status under Title and select the Deployment icon.Trigger workflow run action (Click to expand)
All GitHub deployments (Click to expand)
All deployments under Title.
Create the GitLab dashboard
-
Navigate to your software catalog.
-
Click on the + button in the left sidebar.
-
Select New dashboard.
-
Name the dashboard GitLab Deployment Manager.
-
Enter
A dashboard to view, retry, and cancel deployments in GitLabunder Description. -
Select the GitLab icon.
-
Click Create.
The dashboard is now ready for widgets that visualize GitLab pipelines and expose the deployment actions. This guide treats pipelines created against the main branch as deployments.
Add GitLab widgets
Add the following widgets to the dashboard: Click + Widget and select Number chart. Enter Select Count entities as the Chart type and GitLab Pipeline as the Blueprint. Select Add the following JSON to the Additional filters editor: Select Click Save. Click + Widget and select Pie chart. Enter Select GitLab Pipeline as the Blueprint. Select Status under Breakdown by property. Add the following JSON to the Additional filters editor: Click Save. Click + Widget and select Action card. Select the Trigger pipeline action. Click Save. Click + Widget and select Table. Enter Select GitLab Pipeline as the Blueprint. Add the following JSON to the Additional filters editor: Click Save to add the widget. Click on the ... button in the top-right corner of the table and select Customize table. Click Manage properties and add: Click the save icon to save the customized table.Total deployments created in the last three months (Click to expand)
Total deployments under Title and select the Deployment icon.count under Function.custom as the Unit and enter deployments as the Custom unit.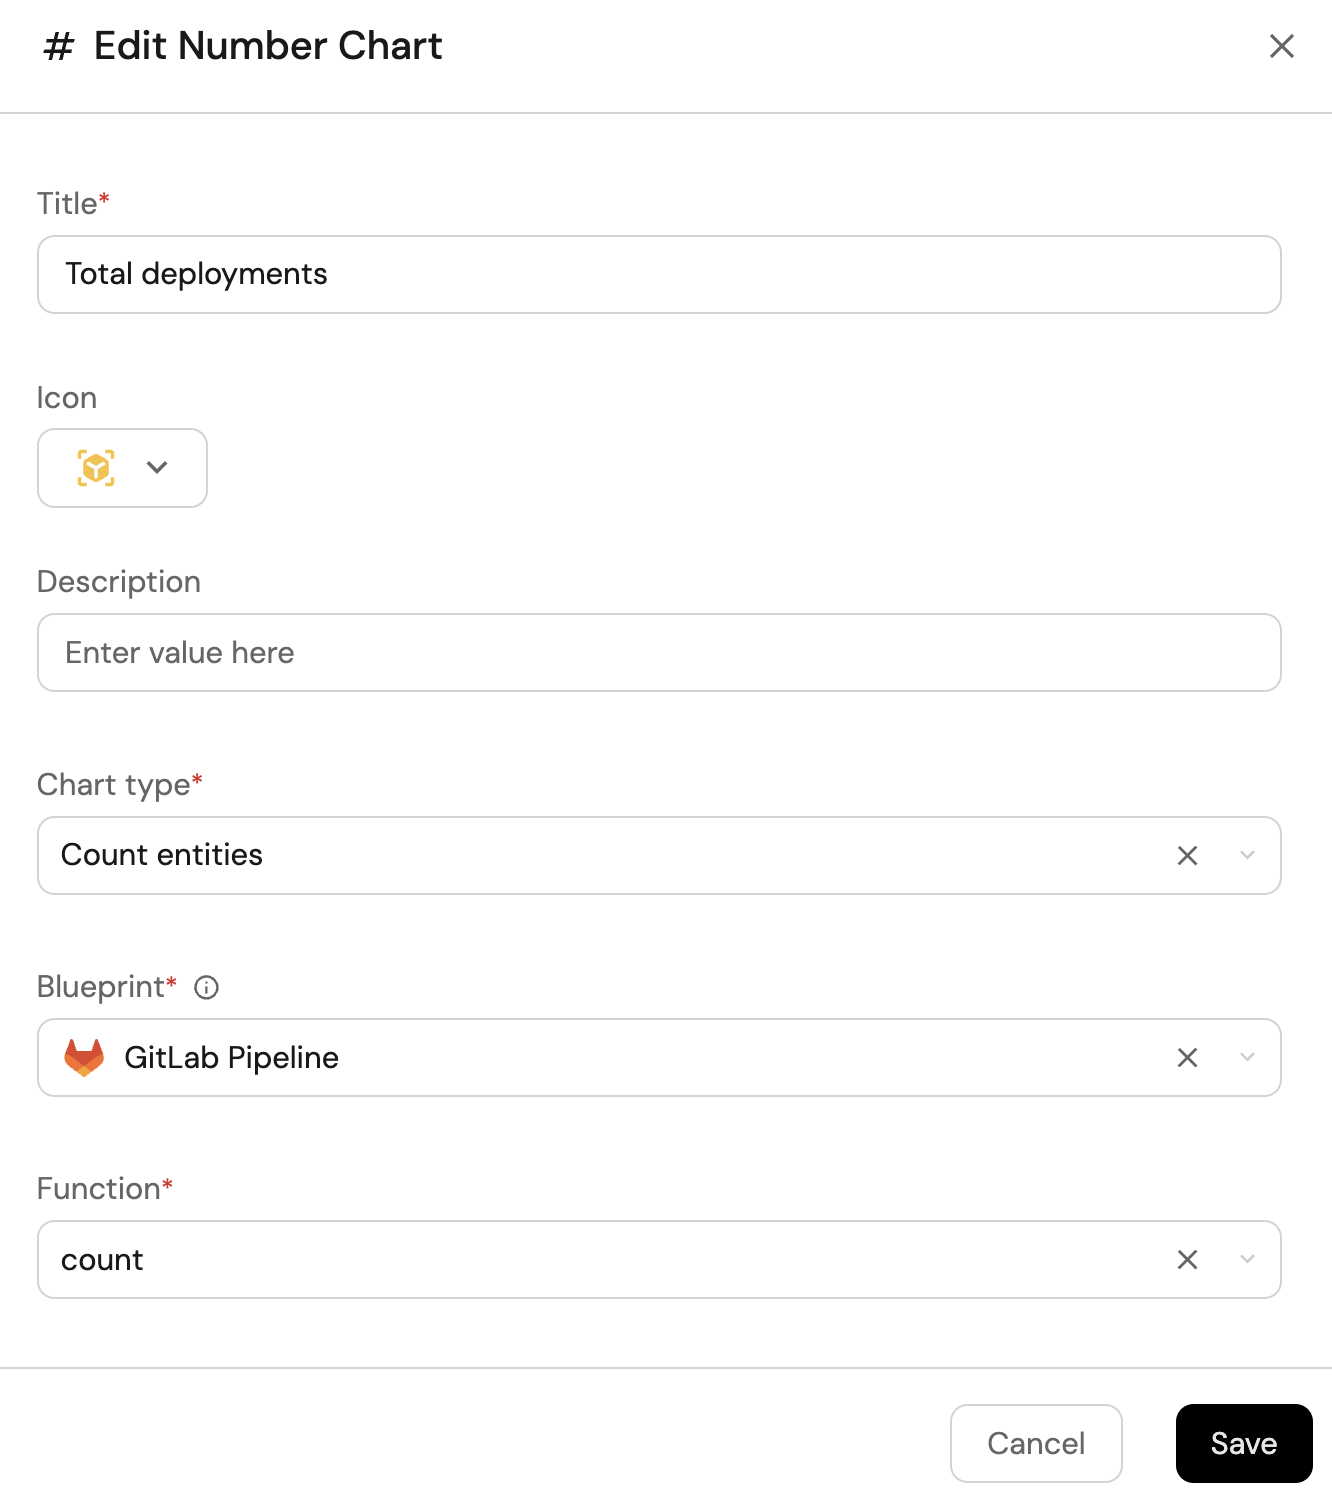
Deployments by status (Click to expand)
Deployments by state under Title and select the Deployment icon.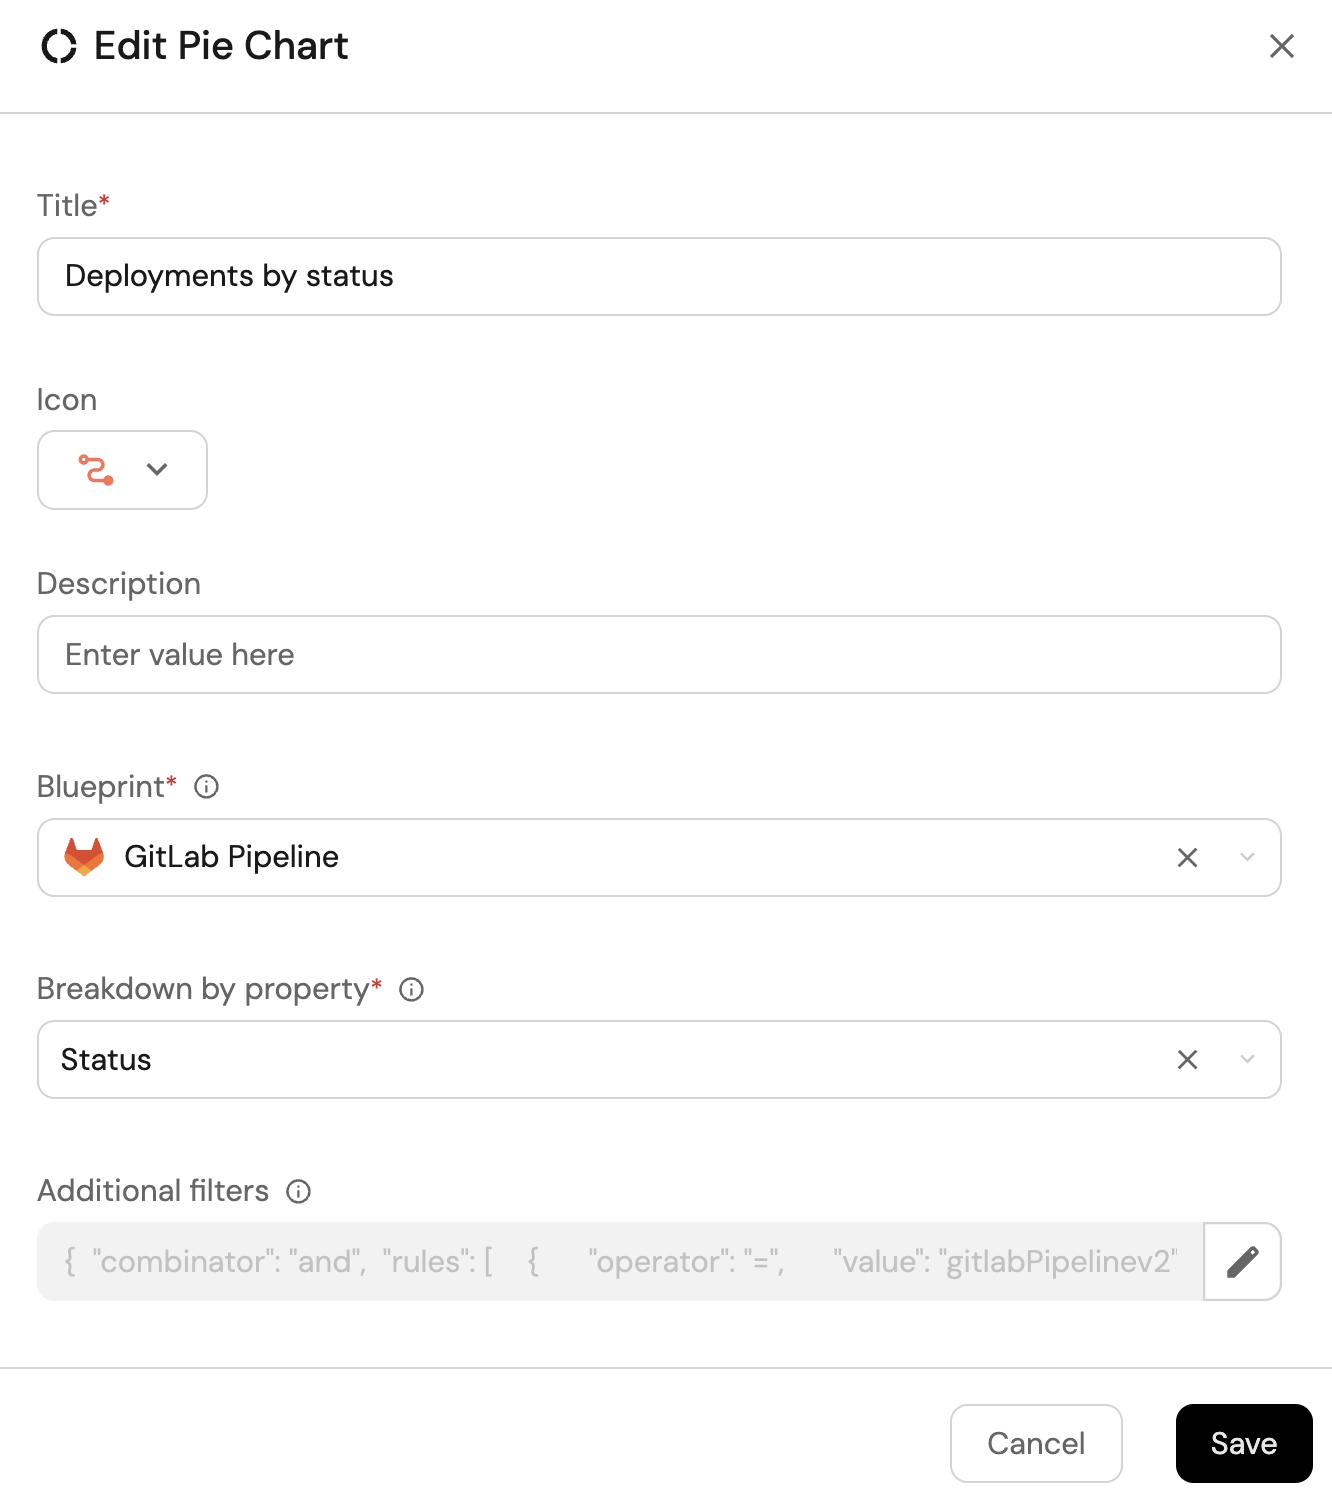
Trigger pipeline action (Click to expand)
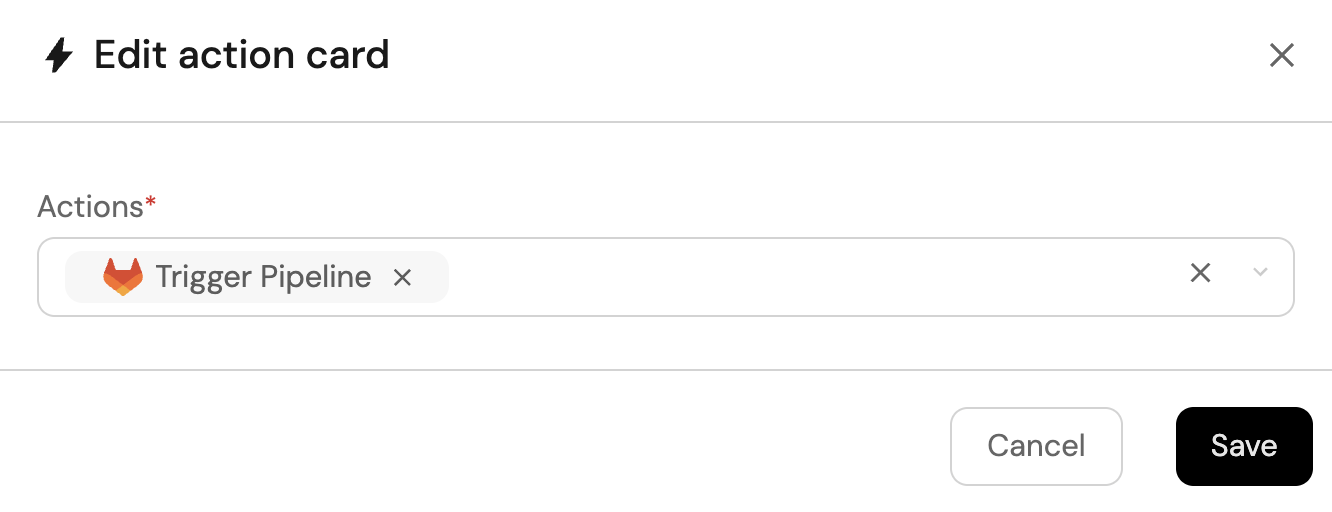
All GitLab deployments (Click to expand)
All deployments under Title.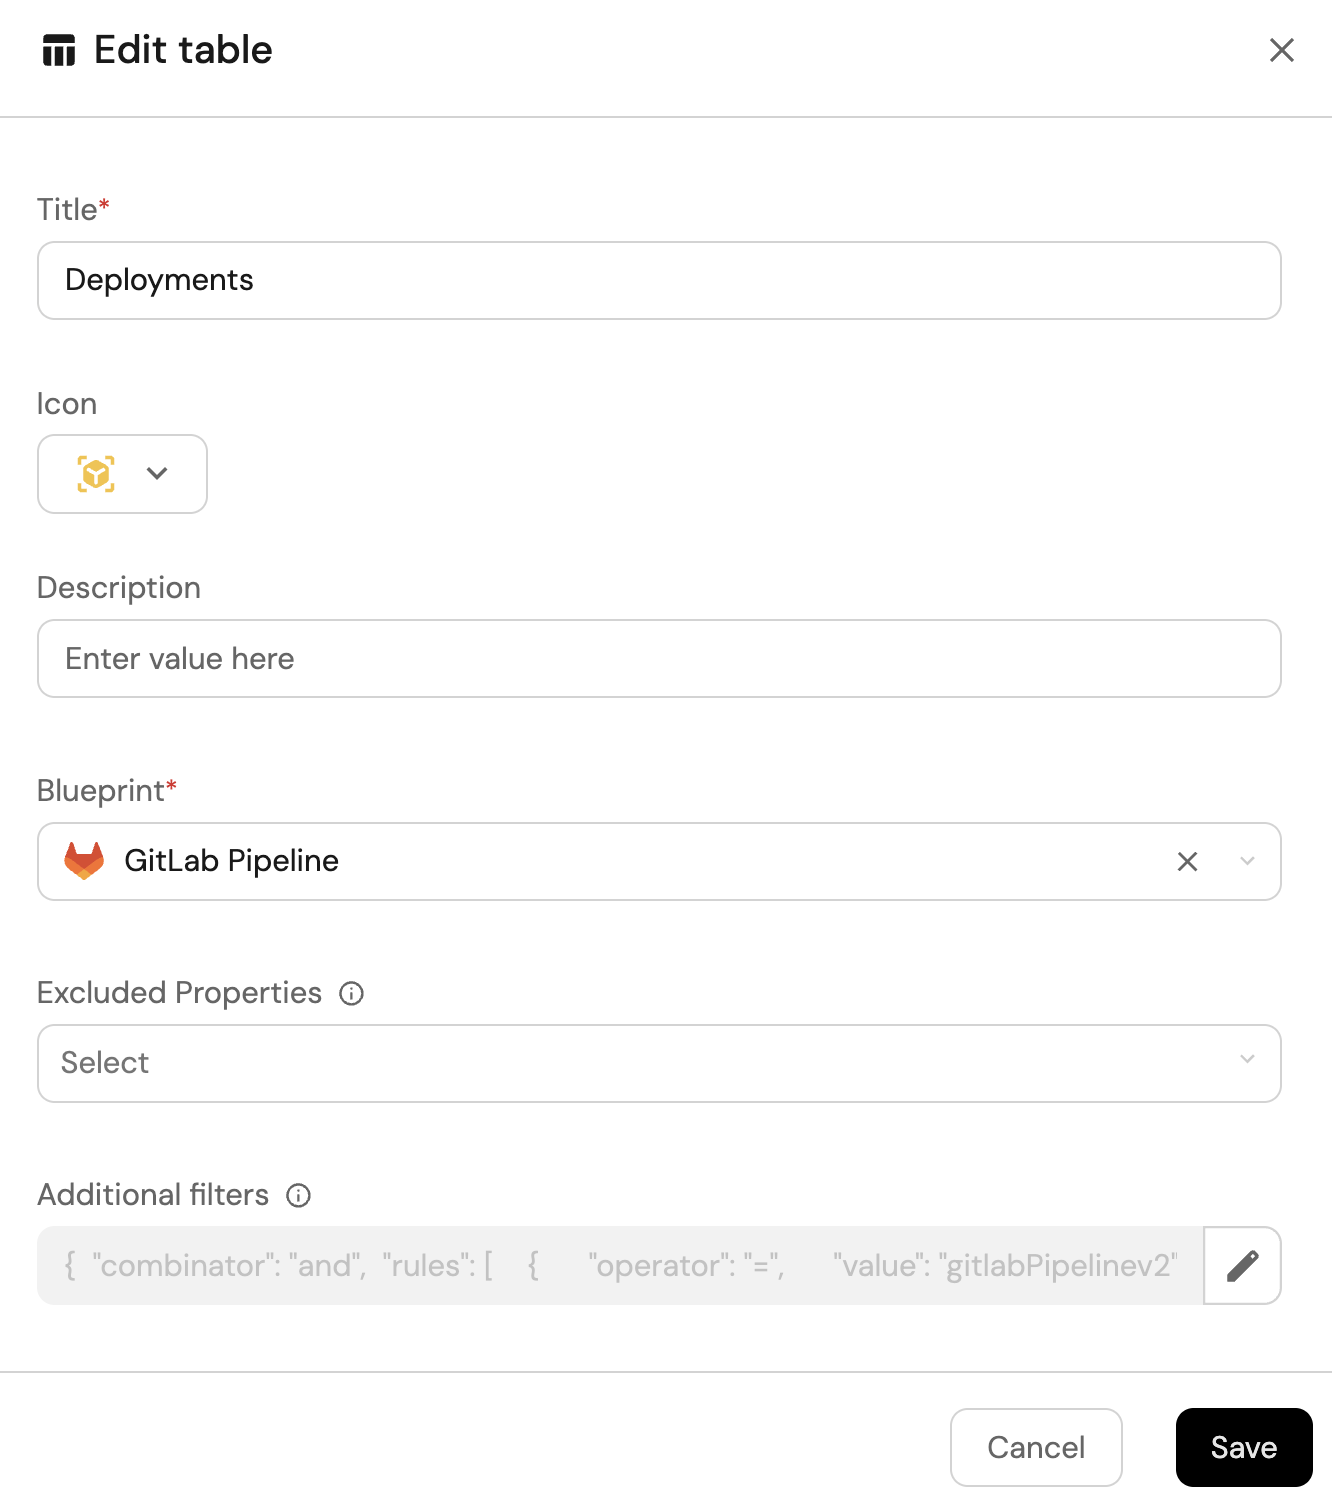
Let's test it!
- GitHub
- GitLab
-
Open the GitHub Deployment Manager dashboard.
-
Confirm that recent deployment workflow runs appear in the widgets.
-
Run the Trigger workflow run action and confirm that GitHub starts the workflow.
-
Open an eligible workflow run and test the Re-run workflow run or Cancel workflow run action.
-
Resync the GitHub integration and confirm that Port reflects the updated workflow run status.
-
Open the GitLab Deployment Manager dashboard.
-
Confirm that recent
mainbranch pipelines appear in the widgets. -
Run the Trigger pipeline action and confirm that GitLab starts the pipeline.
-
Open an eligible pipeline and test the Retry pipeline or Cancel pipeline action.
-
Resync the GitLab integration and confirm that Port reflects the updated pipeline status.