Trigger AI coding assistants from Port
This guide shows how to trigger AI coding assistants from Port through governed workflows. It covers GitHub Copilot, Claude Code, and Google Gemini Assistant so you can choose the right assistant for your workflow while keeping the request, execution, and pull request context visible in Port.
Use GitHub Copilot when you want Port to create GitHub issues and assign them to Copilot. Use Claude Code or Google Gemini Assistant when you want Port to dispatch GitHub workflows that run the assistant, create pull requests, and track execution details in the catalog.
Common use cases
- Create a governed entry point for developers to request AI coding work from Port.
- Assign GitHub issues to Copilot for code generation and pull request creation.
- Run Claude Code or Gemini Assistant from Port while tracking execution details.
- Connect AI coding work to services so teams can measure activity, cost, and outcomes.
How it works
Each assistant is triggered by a Port workflow that chains a small number of nodes:
- A self-service trigger node collects the request details (a prompt, a target service, or an issue) from the developer. For Copilot, an event trigger node can also assign issues automatically when they carry the
auto_assignlabel. - A GitHub integration action node dispatches the backend GitHub Actions workflow that runs the assistant, or a webhook node calls the GitHub API directly to create issues.
- The backend GitHub Actions workflow runs the assistant, opens a pull request when relevant, and writes execution details back to the Port catalog.
The backend GitHub Actions workflows continue to do the heavy lifting. The Port workflow replaces the self-service actions and automations that used to trigger them.
Prerequisites
This guide assumes the following:
- You have a Port account and have completed the onboarding process.
- Port's GitHub Ocean integration is installed in your account.
- For GitHub Copilot, GitHub Copilot is enabled in the repository.
- For Claude Code, you have an Anthropic API key.
- For Google Gemini Assistant, you have a Google Gemini API key.
- For Claude Code or Google Gemini Assistant, you have completed the Track AI-driven pull requests guide to enable AI agent tracking and visualization.
Choose an assistant
| Assistant | Use when | What you create |
|---|---|---|
| GitHub Copilot | You want Copilot assigned to GitHub issues created through Port. | A GitHub issue blueprint, an issue creation workflow, a Copilot assignment workflow, an auto-assign workflow, and a backend GitHub Actions workflow. |
| Claude Code | You want a workflow-backed assistant that can open pull requests and report token usage and cost. | A Claude Code execution blueprint, a Port workflow, and a backend GitHub Actions workflow. |
| Google Gemini Assistant | You want a workflow-backed assistant that can open pull requests and report execution details. | A Gemini Assistant execution blueprint, a Port workflow, and a backend GitHub Actions workflow. |
Set up your assistant
Select the AI coding assistant you want to trigger from Port. Each tab is a self-contained setup you can follow end to end.
- GitHub Copilot
- Claude Code
- Google Gemini Assistant
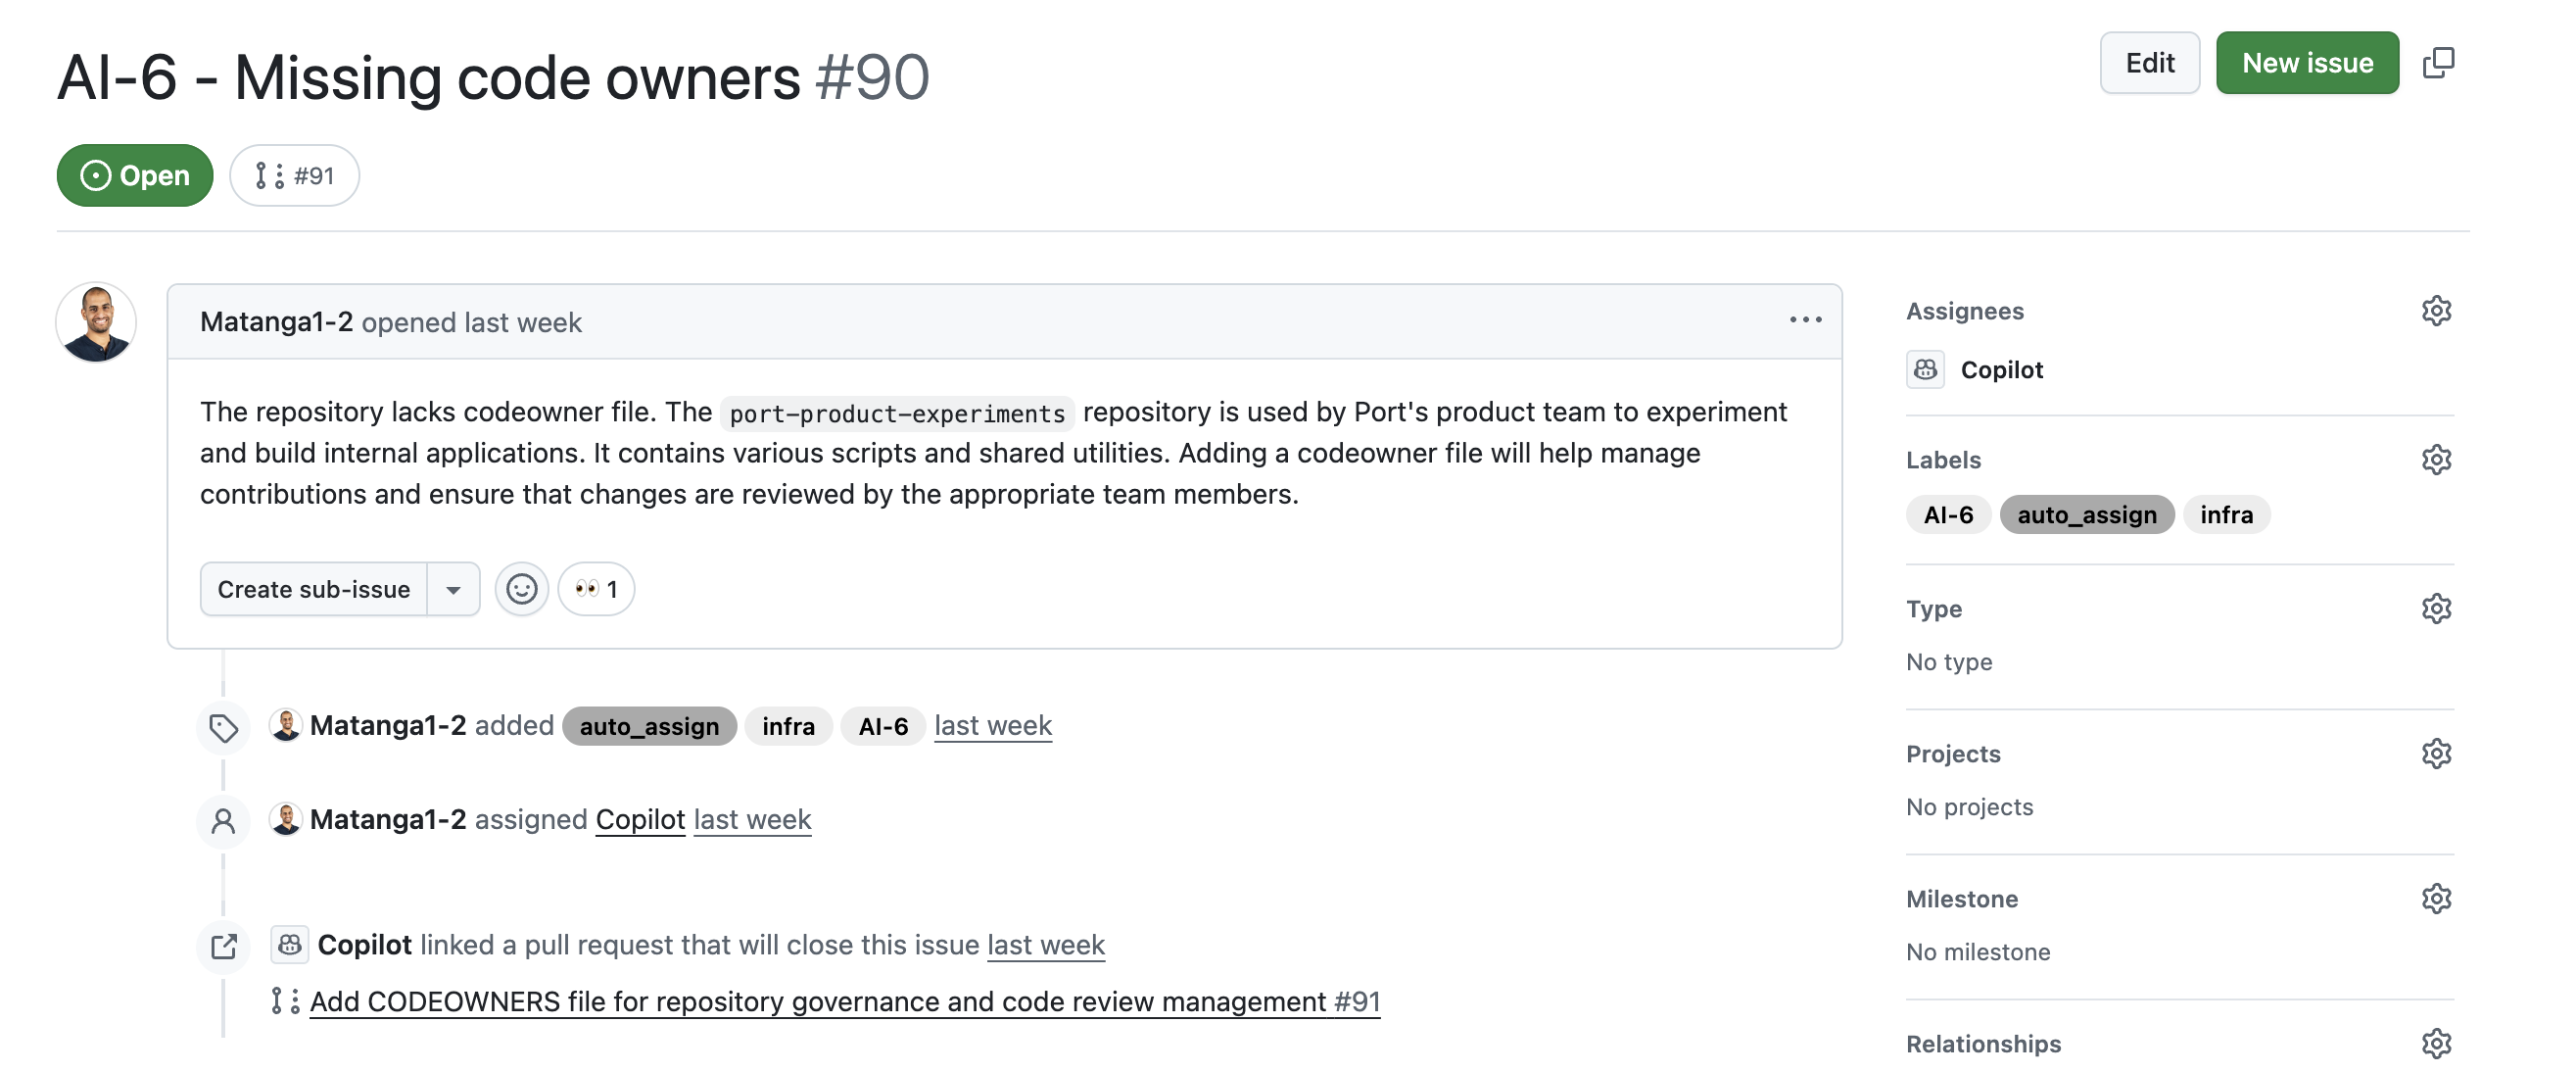
This setup creates GitHub issues from Port, adds an auto_assign label when requested, and assigns matching issues to GitHub Copilot.

Set up data model
We need to create a GitHub issue blueprint to support our Copilot workflow. This blueprint will be used to track issues that can be assigned to Copilot.
Create GitHub issue blueprint
When installing the GitHub Ocean integration, the pull request and repository blueprints are created by default. However, the GitHub issue blueprint needs to be created manually.
-
Go to the Data model page in Port.
-
Click + Blueprint.
-
Click the Edit JSON button.
-
Copy and paste the following JSON configuration:
GitHub issue blueprint (click to expand)
{"identifier": "githubIssue","title": "Issue","icon": "Github","schema": {"properties": {"creator": {"title": "Creator","type": "string"},"assignees": {"title": "Assignees","type": "array"},"labels": {"title": "Labels","type": "array"},"status": {"title": "Status","type": "string","enum": ["open","closed"],"enumColors": {"open": "green","closed": "purple"}},"createdAt": {"title": "Created At","type": "string","format": "date-time"},"closedAt": {"title": "Closed At","type": "string","format": "date-time"},"updatedAt": {"title": "Updated At","type": "string","format": "date-time"},"description": {"title": "Description","type": "string","format": "markdown"},"issueNumber": {"title": "Issue Number","type": "number"},"link": {"title": "Link","type": "string","format": "url"}},"required": []},"mirrorProperties": {},"calculationProperties": {},"aggregationProperties": {},"relations": {"repository": {"target": "githubRepository","required": true,"many": false}}} -
Click Create to save the blueprint.
Update GitHub integration mapping
Update the GitHub integration configuration to include the new githubIssue blueprint in your mapping. This ensures that GitHub issues are properly synced to Port with all the required properties and relationships.
-
Go to the connectors page in Port.
-
Find your GitHub integration and click on it.
-
Go to the
Mappingtab. -
Add the following YAML block to map issues to the
githubIssueblueprint:GitHub integration mapping (click to expand)
- kind: issueselector:query: .pull_request == nullport:entity:mappings:identifier: .repository.name + (.id|tostring)title: .titleblueprint: '"githubIssue"'properties:creator: .user.loginassignees: '[.assignees[].login]'labels: '[.labels[].name]'status: .statecreatedAt: .created_atclosedAt: .closed_atupdatedAt: .updated_atdescription: .bodyissueNumber: .numberlink: .html_urlrelations:repository: .user.login + "/" + .repo -
Click Save & Resync to apply the mapping.
Auto-assign issues to request creator
To ensure that issues created through Port are assigned to the user who initiated the request, follow these steps:
-
Ingest GitHub Users: Ensure GitHub users are imported into Port via the default integration.
-
Create Relations Between Users and GitHub Users: Use the
Onboard userself-service action to link each Port user to their GitHub username.
This linkage keeps users connected to the issues they create and improves accountability.
Add secrets
We will build workflows that create GitHub issues and assign them to Copilot. First, we need to add the necessary secrets to GitHub and to Port.
Add GitHub secrets
In your GitHub repository, go to Settings > Secrets and add the following secrets:
PORT_CLIENT_ID- Port Client ID learn more.PORT_CLIENT_SECRET- Port Client Secret learn more.PORT_GITHUB_TOKEN: A GitHub fine-grained personal access token is required. This token must have read and write permissions for the "Issues", "Metadata" and "Pull request" section of your repositories.
Add Port secrets
To add these secrets to Port:
-
Open the Credentials modal.
-
Click the Secrets tab.
-
Click + Secret and add the following secret:
GITHUB_TOKEN- A GitHub fine-grained personal access token is required. This token must have read and write permissions for the "Issues", "Metadata" and "Pull request" section of your repositories.
NoteThe
GITHUB_TOKENmentioned here is the same token that was created and added as a secret in GitHub in the previous steps.
Add the backend GitHub workflow
Create the file .github/workflows/assign_to_copilot.yml in the .github/workflows folder of your repository.
This workflow checks whether Copilot is enabled for the repository and returns its unique ID. It also handles the assignment of the issue to Copilot and the triggering author. The Port workflows you build in the next section dispatch this backend workflow, and the GitHub integration action reports its status back to Port automatically.GitHub workflow for Copilot assignment (click to expand)
Build the workflows
We will create three workflows for the Copilot flow:
- Create GitHub issue - a self-service workflow that opens a GitHub issue and optionally adds the
auto_assignlabel. - Assign issue to Copilot - a self-service workflow that assigns an existing issue to Copilot on demand.
- Auto-assign issues to Copilot - an event-triggered workflow that assigns issues to Copilot automatically when they carry the
auto_assignlabel.
The last two workflows dispatch the assign_to_copilot.yml backend you added above.
To create each workflow:
- Go to the workflows page in Port.
- Click + Workflow.
- Fill out the Create new workflow form. For Name, enter the workflow name from the matching section below, then click Confirm.
- Click the
{...}button to open the JSON editor and paste the workflow JSON below: - Click Apply changes.
Create GitHub issue workflow
This workflow lets a developer open a GitHub issue in a selected repository. When Auto-assign to Copilot is enabled, it adds the auto_assign label so the auto-assign workflow picks it up.Create GitHub issue workflow (click to expand)
By default, Copilot uses the repository's default branch as the base for its work. Use the optional Base Branch input to specify a different branch.
Assign issue to Copilot workflow
This workflow lets a developer assign an existing issue to Copilot on demand. It fetches the selected issue from the catalog to resolve its number and repository, then dispatches the assign_to_copilot.yml backend workflow.
<YOUR_GITHUB_OCEAN_INTEGRATION_ID>- your GitHub Ocean integration installation ID.<GITHUB-ORG>- your GitHub organization or user name.<GITHUB-REPO>- the repository where theassign_to_copilot.ymlworkflow file is stored.
Assign issue to Copilot workflow (click to expand)
{
  "identifier": "assign_issue_to_copilot",
  "title": "Assign issue to Copilot",
  "icon": "Github",
  "description": "Assign an existing GitHub issue to the Copilot coding agent",
  "allowAnyoneToViewRuns": true,
  "nodes": [
    {
      "identifier": "trigger",
      "title": "Select issue",
      "config": {
        "type": "SELF_SERVE_TRIGGER",
        "userInputs": {
          "properties": {
            "issue": {
              "type": "string",
              "format": "entity",
              "blueprint": "githubIssue",
              "title": "Issue",
              "description": "The GitHub issue to assign to Copilot"
            }
          },
          "required": ["issue"],
          "order": ["issue"]
        }
      }
    },
    {
      "identifier": "fetch_issue",
      "title": "Fetch issue details",
      "config": {
        "type": "WEBHOOK",
        "url": "https://api.port.io/v1/blueprints/githubIssue/entities/{{ .outputs.trigger.issue }}",
        "method": "GET",
        "headers": {
          "Content-Type": "application/json"
        }
      },
      "variables": {
        "issueNumber": "{{ .result.response.data.entity.properties.issueNumber }}",
        "repository": "{{ .result.response.data.entity.relations.repository }}"
      }
    },
    {
      "identifier": "assign",
      "title": "Assign to Copilot",
      "config": {
        "type": "INTEGRATION_ACTION",
        "installationId": "<YOUR_GITHUB_OCEAN_INTEGRATION_ID>",
        "integrationProvider": "github-ocean",
        "integrationInvocationType": "dispatch_workflow",
        "integrationActionExecutionProperties": {
          "org": "<GITHUB-ORG>",
          "repo": "<GITHUB-REPO>",
          "workflow": "assign_to_copilot.yml",
          "workflowInputs": {
            "issue_number": "{{ .outputs.fetch_issue.issueNumber | tostring }}",
            "repository_owner": "{{ .outputs.fetch_issue.repository | split(\"/\") | .[0] }}",
            "repository_name": "{{ .outputs.fetch_issue.repository | split(\"/\") | .[1] }}",
            "trigger_user_email": "{{ .workflowRun.trigger.by.email }}"
          },
          "reportWorkflowStatus": true
        }
      }
    }
  ],
  "connections": [
    {
      "sourceIdentifier": "trigger",
      "targetIdentifier": "fetch_issue"
    },
    {
      "sourceIdentifier": "fetch_issue",
      "targetIdentifier": "assign"
    }
  ]
}
Auto-assign issues to Copilot workflow
This workflow replaces the automation from the original guide. It listens for GitHub issues that carry the auto_assign label and are not yet assigned to Copilot, then dispatches the assign_to_copilot.yml backend workflow. The event trigger exposes the issue's properties and relations directly, so no fetch step is needed.
<YOUR_GITHUB_OCEAN_INTEGRATION_ID>- your GitHub Ocean integration installation ID.<GITHUB-ORG>- your GitHub organization or user name.<GITHUB-REPO>- the repository where theassign_to_copilot.ymlworkflow file is stored.
Auto-assign issues to Copilot workflow (click to expand)
{
  "identifier": "auto_assign_issue_to_copilot",
  "title": "Auto-assign issues to Copilot",
  "icon": "GithubCopilot",
  "description": "Assign GitHub issues to Copilot automatically when they carry the auto_assign label",
  "allowAnyoneToViewRuns": true,
  "nodes": [
    {
      "identifier": "trigger",
      "title": "On issue labeled auto_assign",
      "config": {
        "type": "EVENT_TRIGGER",
        "event": {
          "type": "ENTITY_UPDATED",
          "blueprintIdentifier": "githubIssue"
        },
        "condition": {
          "type": "JQ",
          "expressions": [
            ".diff.after.properties.labels | index(\"auto_assign\") != null",
            ".diff.after.properties.assignees | index(\"Copilot\") == null"
          ],
          "combinator": "and"
        },
        "published": true
      }
    },
    {
      "identifier": "assign",
      "title": "Assign to Copilot",
      "config": {
        "type": "INTEGRATION_ACTION",
        "installationId": "<YOUR_GITHUB_OCEAN_INTEGRATION_ID>",
        "integrationProvider": "github-ocean",
        "integrationInvocationType": "dispatch_workflow",
        "integrationActionExecutionProperties": {
          "org": "<GITHUB-ORG>",
          "repo": "<GITHUB-REPO>",
          "workflow": "assign_to_copilot.yml",
          "workflowInputs": {
            "issue_number": "{{ .outputs.trigger.diff.after.properties.issueNumber | tostring }}",
            "repository_owner": "{{ .outputs.trigger.diff.after.relations.repository | split(\"/\") | .[0] }}",
            "repository_name": "{{ .outputs.trigger.diff.after.relations.repository | split(\"/\") | .[1] }}"
          },
          "reportWorkflowStatus": true
        }
      }
    }
  ],
  "connections": [
    {
      "sourceIdentifier": "trigger",
      "targetIdentifier": "assign"
    }
  ]
}
Test the workflow
Now let's test the complete flow to ensure everything works correctly.
Run the workflow
- Go to the self-service page and run the Create GitHub Issue workflow.
- Select a repository, fill in the title and body, and toggle Auto-assign to Copilot on.
- Open the workflow runs tab and confirm the Auto-assign issues to Copilot workflow was triggered once the issue synced with the
auto_assignlabel. - Go to the issue in GitHub and verify that Copilot is assigned.
- Check that a pull request is opened for the issue.
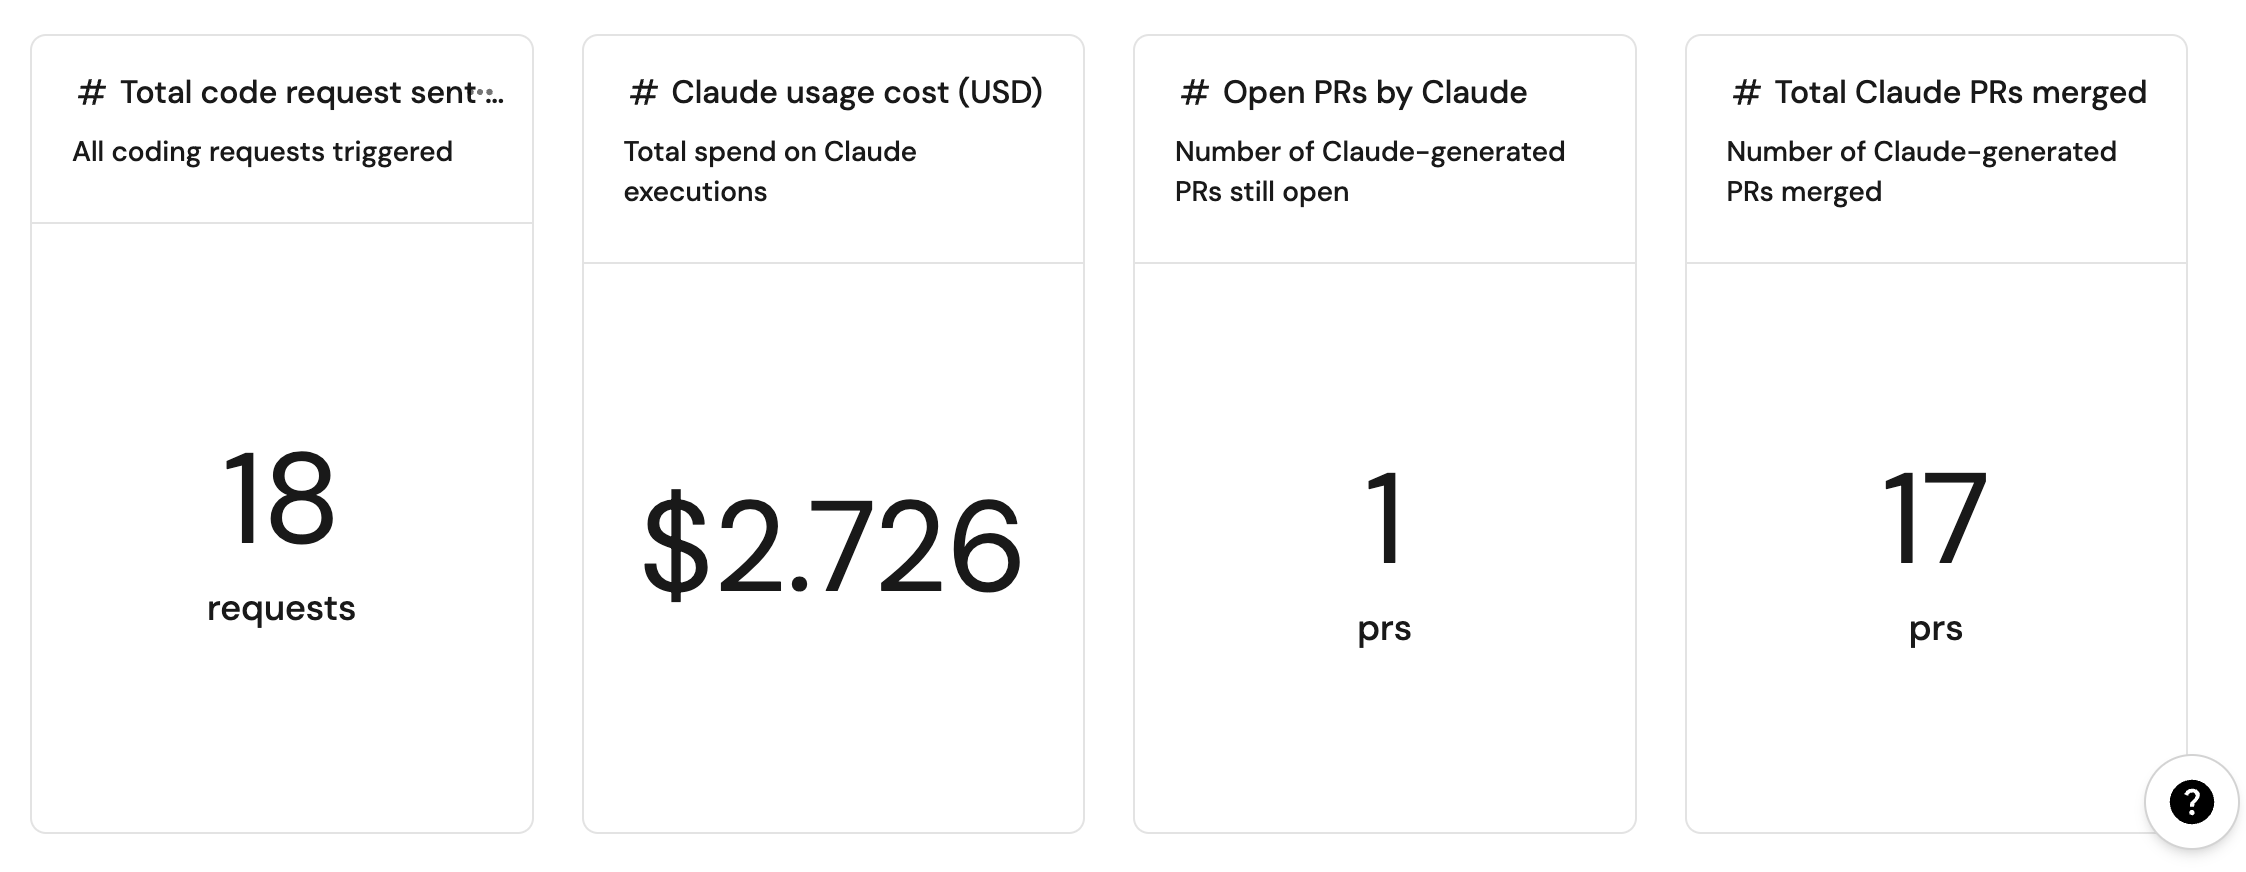
This setup dispatches a GitHub workflow that runs Claude Code, opens a pull request when relevant, and writes execution metrics back to Port.

Set up data model
We need to create blueprints to support our Claude Code workflow. These blueprints will be used to track Claude Code executions and their usage metrics.
Create Claude Code execution blueprint
This blueprint will track Claude Code executions, including token usage, costs, and execution details.
-
Go to the Data model page in Port.
-
Click + Blueprint.
-
Click the Edit JSON button.
-
Copy and paste the following JSON configuration:
Claude Code Execution blueprint (click to expand)
{"identifier": "claudeCodeExecution","title": "Claude Code Execution","icon": "Code","schema": {"properties": {"prompt": {"title": "Prompt","type": "string","format": "markdown","description": "The prompt that was sent to Claude Code"},"status": {"title": "Status","type": "string","enum": ["pending","running","success","failed"],"enumColors": {"pending": "blue","running": "yellow","success": "green","failed": "red"}},"executionTime": {"title": "Execution Time (ms)","type": "number","description": "Total execution time in milliseconds"},"inputTokens": {"title": "Input Tokens","type": "number","description": "Number of input tokens consumed"},"outputTokens": {"title": "Output Tokens","type": "number","description": "Number of output tokens generated"},"totalCost": {"title": "Total Cost (USD)","type": "number","description": "Total cost of the Claude Code execution"},"repository": {"title": "Repository","type": "string","description": "The repository where Claude Code was executed"},"claudeResponse": {"type": "string","title": "Response","format": "markdown"}},"required": ["prompt","status"]},"mirrorProperties": {},"calculationProperties": {},"aggregationProperties": {},"relations": {"repository": {"title": "Repository","target": "service","required": false,"many": false},"ai_coding_agent": {"title": "AI Coding Agent","target": "ai_coding_agent","required": false,"many": false}}} -
Click Create to save the blueprint.
Add secrets
We will build a workflow that dispatches Claude Code. First, add the necessary secrets to your GitHub repository.
Add GitHub secrets
In your GitHub repository, go to Settings > Secrets and add the following secrets:
PORT_CLIENT_ID- Port Client ID learn more.PORT_CLIENT_SECRET- Port Client Secret learn more.PORT_GITHUB_TOKEN: A GitHub fine-grained personal access token is required. This token must have read and write permissions for the "Contents", "Issues", "Metadata" and "Pull request" section of your repositories.ANTHROPIC_API_KEY: Your Anthropic API key for Claude Code access.
Add the backend GitHub workflow
We recommend creating a dedicated repository for the workflows that are used by Port. Create the file .github/workflows/claude-backend.yaml in this repository to allow Claude Code to be triggered from all associated repositories.
This workflow will execute Claude Code with the provided prompt, track execution progress, and report back to Port with usage metrics including token consumption, costs, and execution details. We recommend creating a GitHub machine user for automated tasks. Update the GitHub workflow for Claude Code execution (click to expand)
<GIT USERNAME> and <GIT USER EMAIL> fields with the machine user's credentials to ensure proper commit attribution.
Build the workflow
This workflow lets a developer run Claude Code against a selected service. It collects a prompt and service, then dispatches the claude-backend.yaml workflow through the GitHub integration action.
- Go to the workflows page in Port.
- Click + Workflow.
- Fill out the Create new workflow form. For Name, enter
Run Claude Code, then click Confirm. - Click the
{...}button to open the JSON editor and paste the workflow JSON below:
<GITHUB_ORG>- your GitHub organization or user name.<GITHUB_REPO>- the repository where theclaude-backend.yamlworkflow file is stored.<YOUR_GITHUB_OCEAN_INTEGRATION_ID>- your GitHub Ocean integration installation ID.
Run Claude Code workflow (click to expand)
{
  "identifier": "run_claude_code",
  "title": "Run Claude Code",
  "icon": "Code",
  "description": "Open a Claude Code pull request on a given repository",
  "allowAnyoneToViewRuns": true,
  "nodes": [
    {
      "identifier": "trigger",
      "title": "Claude Code request",
      "config": {
        "type": "SELF_SERVE_TRIGGER",
        "userInputs": {
          "properties": {
            "prompt": {
              "type": "string",
              "format": "multi-line",
              "title": "Prompt",
              "description": "The prompt to pass to Claude Code"
            },
            "service": {
              "type": "string",
              "format": "entity",
              "blueprint": "service",
              "title": "Service",
              "description": "The service associated with the Claude Code implementation"
            }
          },
          "required": ["prompt", "service"],
          "order": ["prompt", "service"]
        }
      }
    },
    {
      "identifier": "run_claude",
      "title": "Dispatch Claude Code",
      "config": {
        "type": "INTEGRATION_ACTION",
        "installationId": "<YOUR_GITHUB_OCEAN_INTEGRATION_ID>",
        "integrationProvider": "github-ocean",
        "integrationInvocationType": "dispatch_workflow",
        "integrationActionExecutionProperties": {
          "org": "<GITHUB_ORG>",
          "repo": "<GITHUB_REPO>",
          "workflow": "claude-backend.yaml",
          "workflowInputs": {
            "command": "{{ .outputs.trigger.prompt }}",
            "repo_name": "{{ .outputs.trigger.service }}"
          },
          "reportWorkflowStatus": true
        }
      }
    }
  ],
  "connections": [
    {
      "sourceIdentifier": "trigger",
      "targetIdentifier": "run_claude"
    }
  ]
}
- Click Apply changes.
Test the workflow
Now let's test the complete flow to ensure everything works correctly.
Run the workflow
- Go to the self-service page in Port.
- Run the Run Claude Code workflow.
- Fill in the fields:
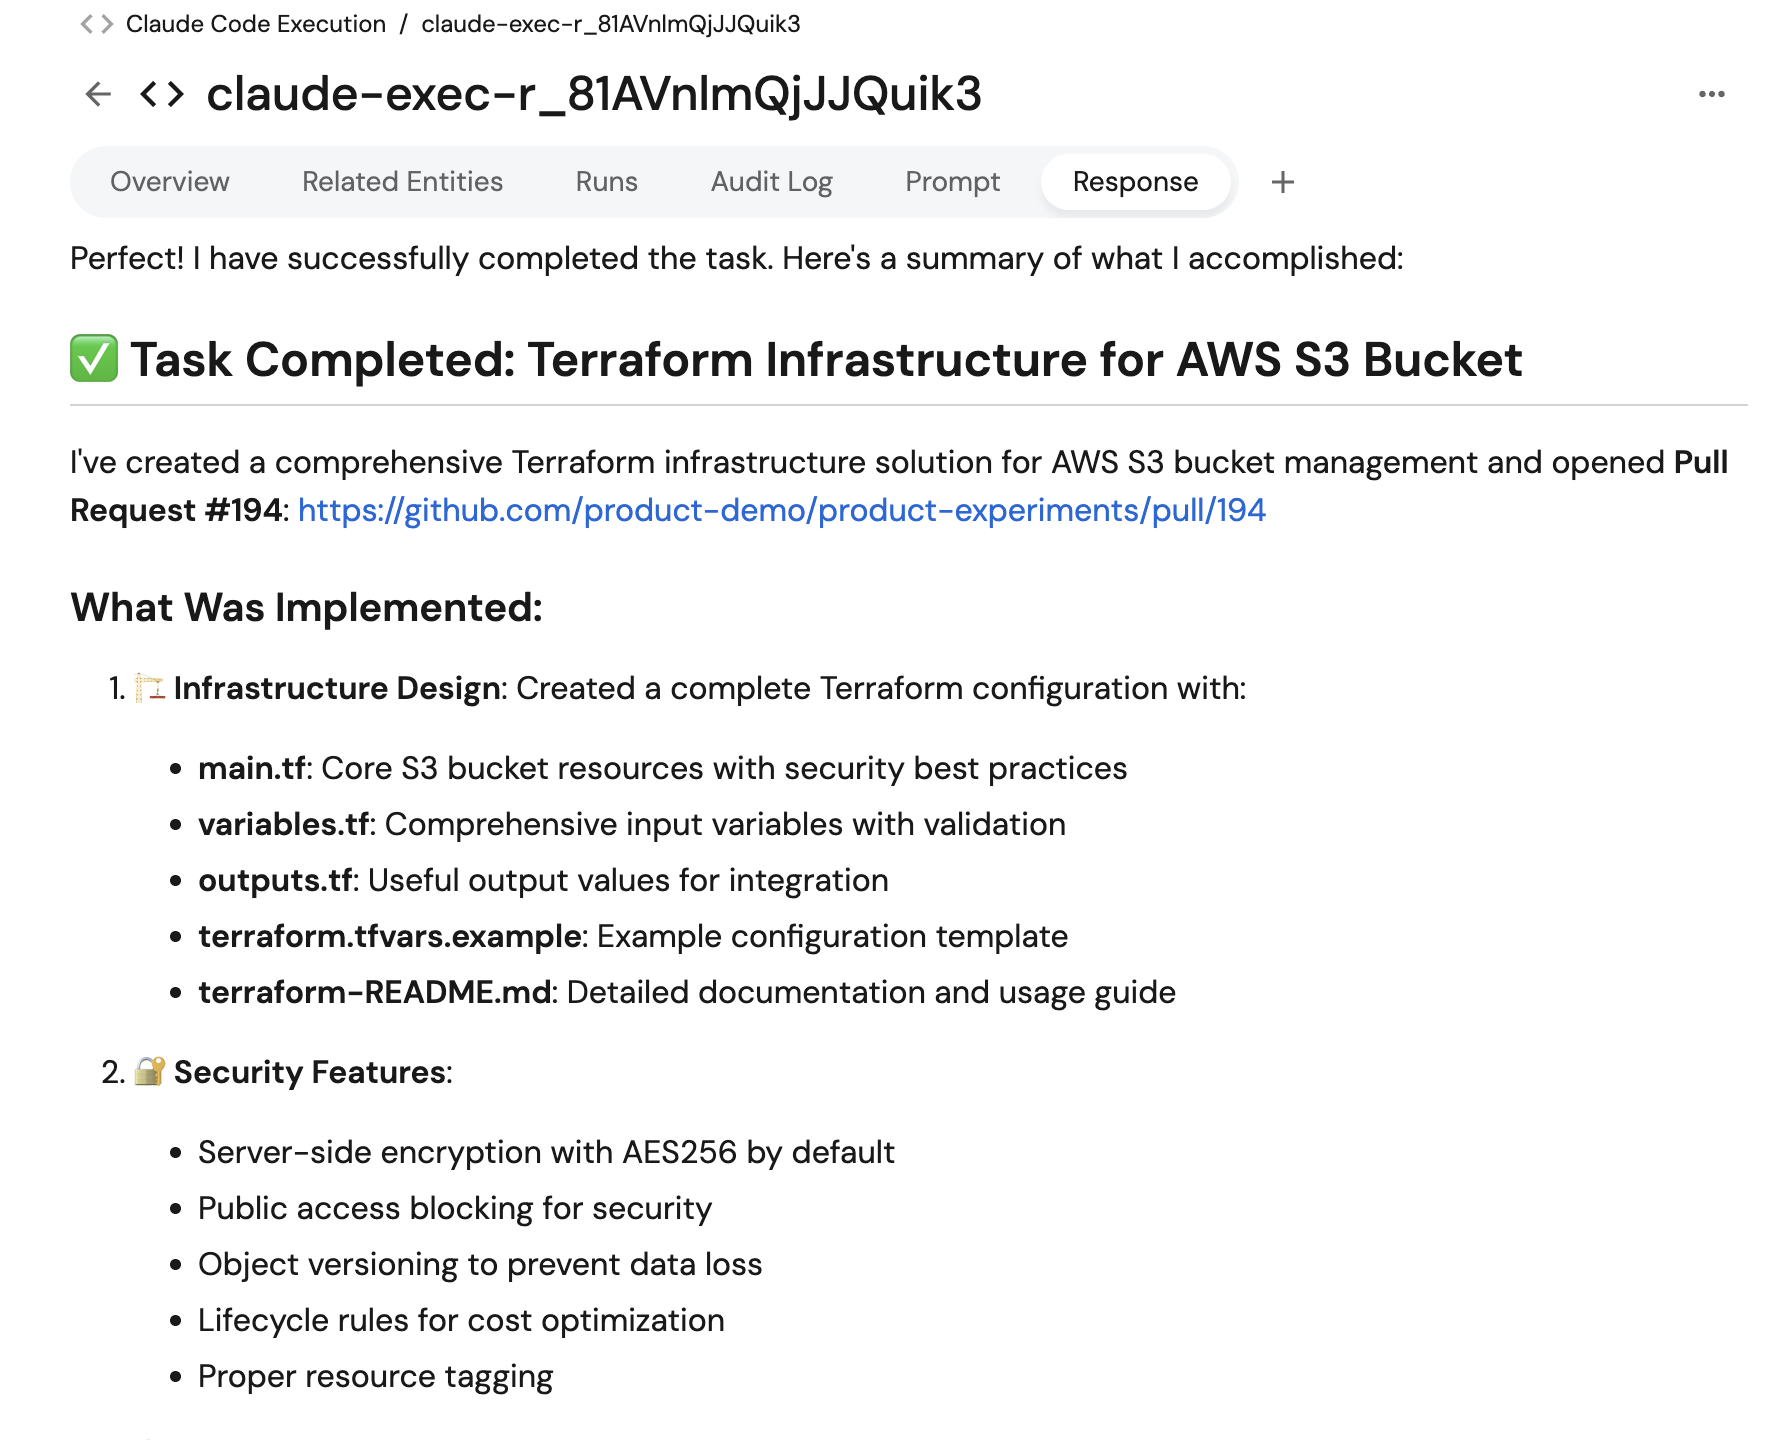
- Prompt - what you want Claude Code to do (e.g., "Generate Terraform modules for creating an AWS S3 bucket").
- Service - the related service.
- Click Execute, then open the workflow runs tab and confirm a pull request is created in your repository.
Verify execution tracking
- Open the Context lake.
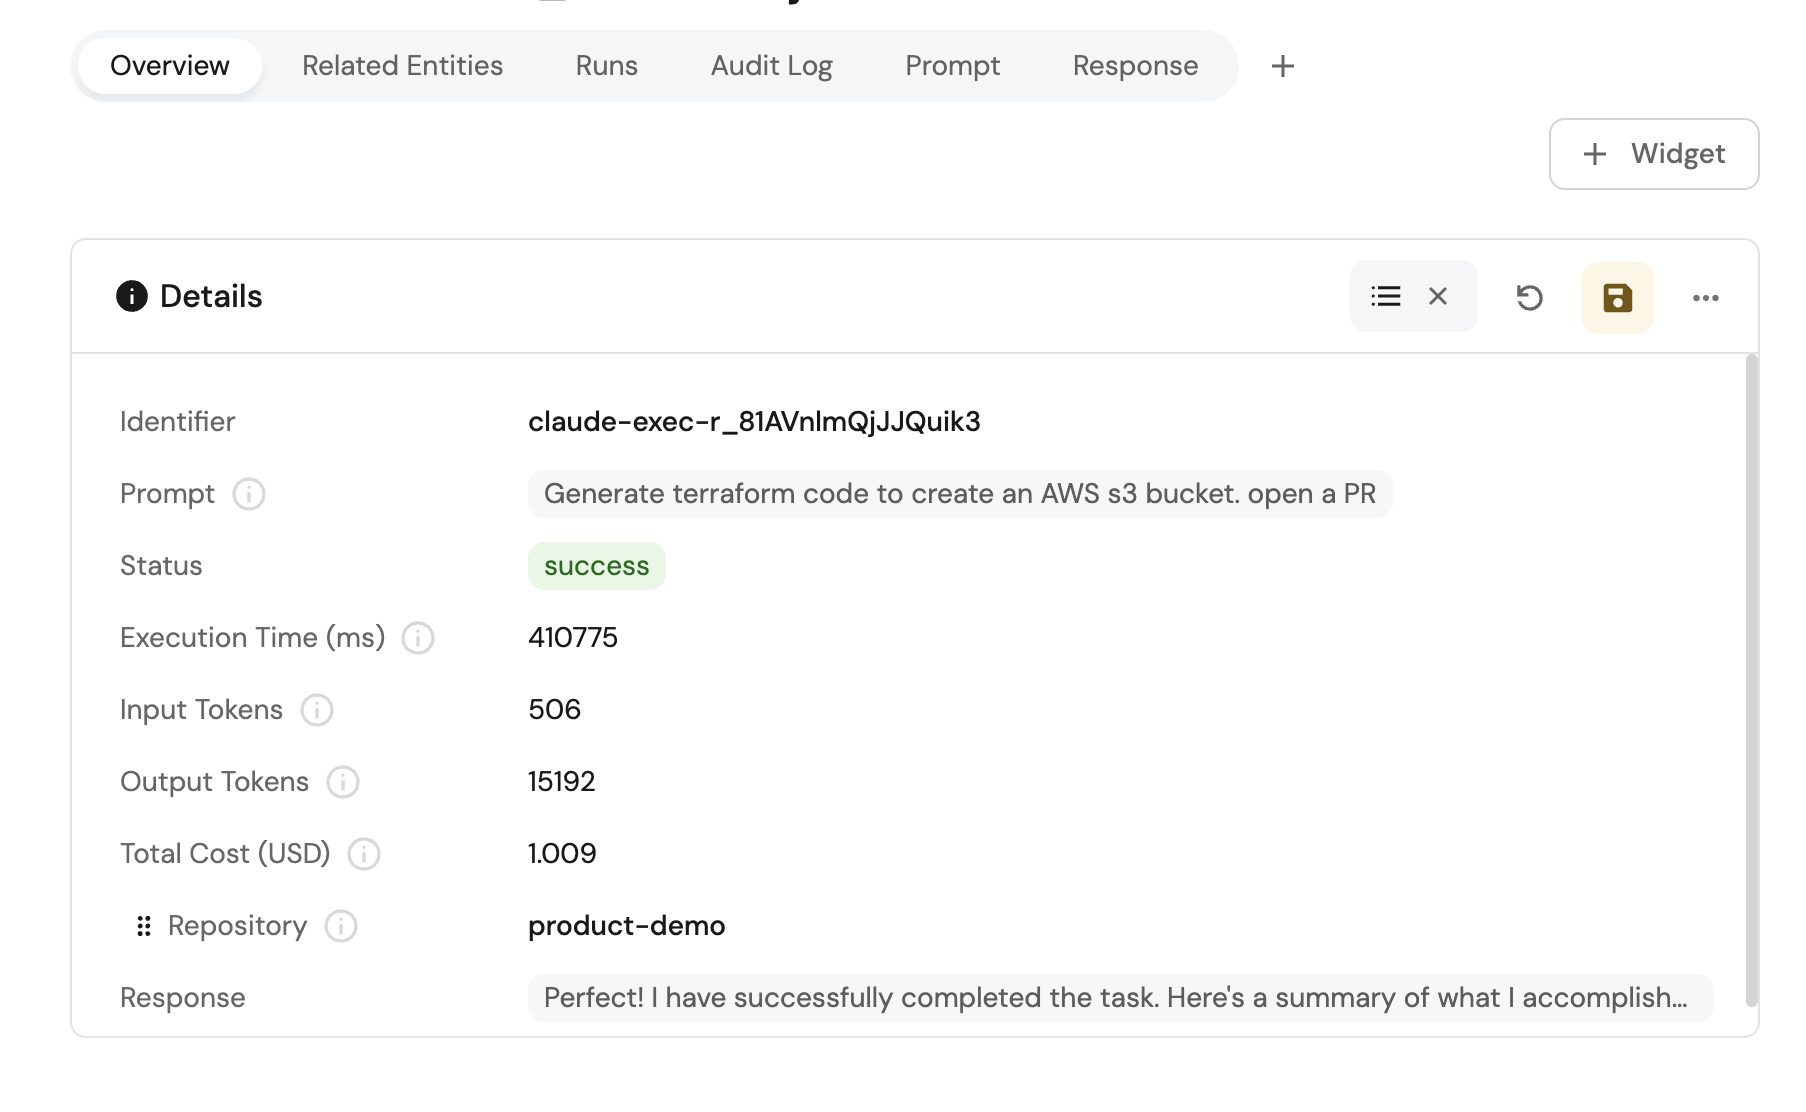
- Check the Claude Code Execution entity for the new record.
This setup dispatches a GitHub workflow that runs Google Gemini Assistant, opens a pull request when relevant, and writes execution details back to Port.

Set up data model
We need to create blueprints to support our Gemini Assistant workflow. These blueprints will be used to track Gemini Assistant executions and their execution details.
Create Gemini Assistant blueprint
This blueprint will track Gemini Assistant executions and their execution details.
-
Go to the Data model page in Port.
-
Click + Blueprint.
-
Click the Edit JSON button.
-
Copy and paste the following JSON configuration:
Gemini Assistant Execution blueprint (click to expand)
{"identifier": "geminiAssistantExecution","title": "Gemini Assistant Execution","icon": "Code","schema": {"properties": {"prompt": {"title": "Prompt","type": "string","format": "markdown","description": "The prompt that was sent to Gemini Assistant"},"status": {"title": "Status","type": "string","enum": ["pending","running","success","failed"],"enumColors": {"pending": "blue","running": "yellow","success": "green","failed": "red"}},"executionTime": {"title": "Execution Time (ms)","type": "number","description": "Total execution time in milliseconds"},"geminiResponse": {"type": "string","title": "Response","format": "markdown"}},"required": ["prompt","status"]},"mirrorProperties": {},"calculationProperties": {},"aggregationProperties": {},"relations": {"repository": {"title": "Repository","target": "service","required": false,"many": false},"ai_coding_agent": {"title": "AI Coding Agent","target": "ai_coding_agent","required": false,"many": false}}} -
Click Create to save the blueprint.
Add secrets
We will build a workflow that dispatches Gemini Assistant. First, add the necessary secrets to your GitHub repository.
Add GitHub secrets
In your GitHub repository, go to Settings > Secrets and add the following secrets:
PORT_CLIENT_ID- Port Client ID learn more.PORT_CLIENT_SECRET- Port Client Secret learn more.PORT_GITHUB_TOKEN: A GitHub fine-grained personal access token is required. This token must have read and write permissions for the "Contents", "Issues", "Metadata" and "Pull request" section of your repositories.GEMINI_API_KEY: Your Google Gemini API key for Gemini Assistant access.
Add the backend GitHub workflow
We recommend creating a dedicated repository for the workflows that are used by Port. Create the file .github/workflows/gemini-backend.yaml in this repository to allow Gemini Assistant to be triggered from all associated repositories.
This workflow will execute Gemini Assistant with the provided prompt, track execution progress, and report back to Port with execution details. We recommend creating a GitHub machine user for automated tasks. Update the GitHub workflow for Gemini Assistant execution (click to expand)
<GIT USERNAME> and <GIT USER EMAIL> fields with the machine user's credentials to ensure proper commit attribution.
Build the workflow
This workflow lets a developer run Gemini Assistant against a selected service. It collects a prompt and service, then dispatches the gemini-backend.yaml workflow through the GitHub integration action.
- Go to the workflows page in Port.
- Click + Workflow.
- Fill out the Create new workflow form. For Name, enter
Trigger Gemini Assistant, then click Confirm. - Click the
{...}button to open the JSON editor and paste the workflow JSON below:
<GITHUB_ORG>- your GitHub organization or user name.<GITHUB_REPO>- the repository where thegemini-backend.yamlworkflow file is stored.<YOUR_GITHUB_OCEAN_INTEGRATION_ID>- your GitHub Ocean integration installation ID.
Trigger Gemini Assistant workflow (click to expand)
{
  "identifier": "trigger_gemini_assistant",
  "title": "Trigger Gemini Assistant",
  "icon": "Code",
  "description": "Open a Gemini Assistant pull request on a given repository",
  "allowAnyoneToViewRuns": true,
  "nodes": [
    {
      "identifier": "trigger",
      "title": "Gemini Assistant request",
      "config": {
        "type": "SELF_SERVE_TRIGGER",
        "userInputs": {
          "properties": {
            "prompt": {
              "type": "string",
              "format": "multi-line",
              "title": "Prompt",
              "description": "The prompt to pass to Gemini Assistant"
            },
            "service": {
              "type": "string",
              "format": "entity",
              "blueprint": "service",
              "title": "Service",
              "description": "The service associated with the Gemini Assistant implementation"
            }
          },
          "required": ["prompt", "service"],
          "order": ["prompt", "service"]
        }
      }
    },
    {
      "identifier": "run_gemini",
      "title": "Dispatch Gemini Assistant",
      "config": {
        "type": "INTEGRATION_ACTION",
        "installationId": "<YOUR_GITHUB_OCEAN_INTEGRATION_ID>",
        "integrationProvider": "github-ocean",
        "integrationInvocationType": "dispatch_workflow",
        "integrationActionExecutionProperties": {
          "org": "<GITHUB_ORG>",
          "repo": "<GITHUB_REPO>",
          "workflow": "gemini-backend.yaml",
          "workflowInputs": {
            "prompt": "{{ .outputs.trigger.prompt }}",
            "repo_name": "{{ .outputs.trigger.service }}"
          },
          "reportWorkflowStatus": true
        }
      }
    }
  ],
  "connections": [
    {
      "sourceIdentifier": "trigger",
      "targetIdentifier": "run_gemini"
    }
  ]
}
- Click Apply changes.
Test the workflow
Now let's test the complete flow to ensure everything works correctly.
Run the workflow
- Go to the self-service page in Port.
- Run the Trigger Gemini Assistant workflow.
- Fill in the fields:
- Prompt - what you want Gemini Assistant to do (e.g., "Refactor the
retry_http_requestfunction insrc/main.pyto improve readability"). - Service - the related service.
- Prompt - what you want Gemini Assistant to do (e.g., "Refactor the
- Click Execute, then open the workflow runs tab and confirm a pull request is created in your repository.
Verify execution tracking
- Open the Context lake.
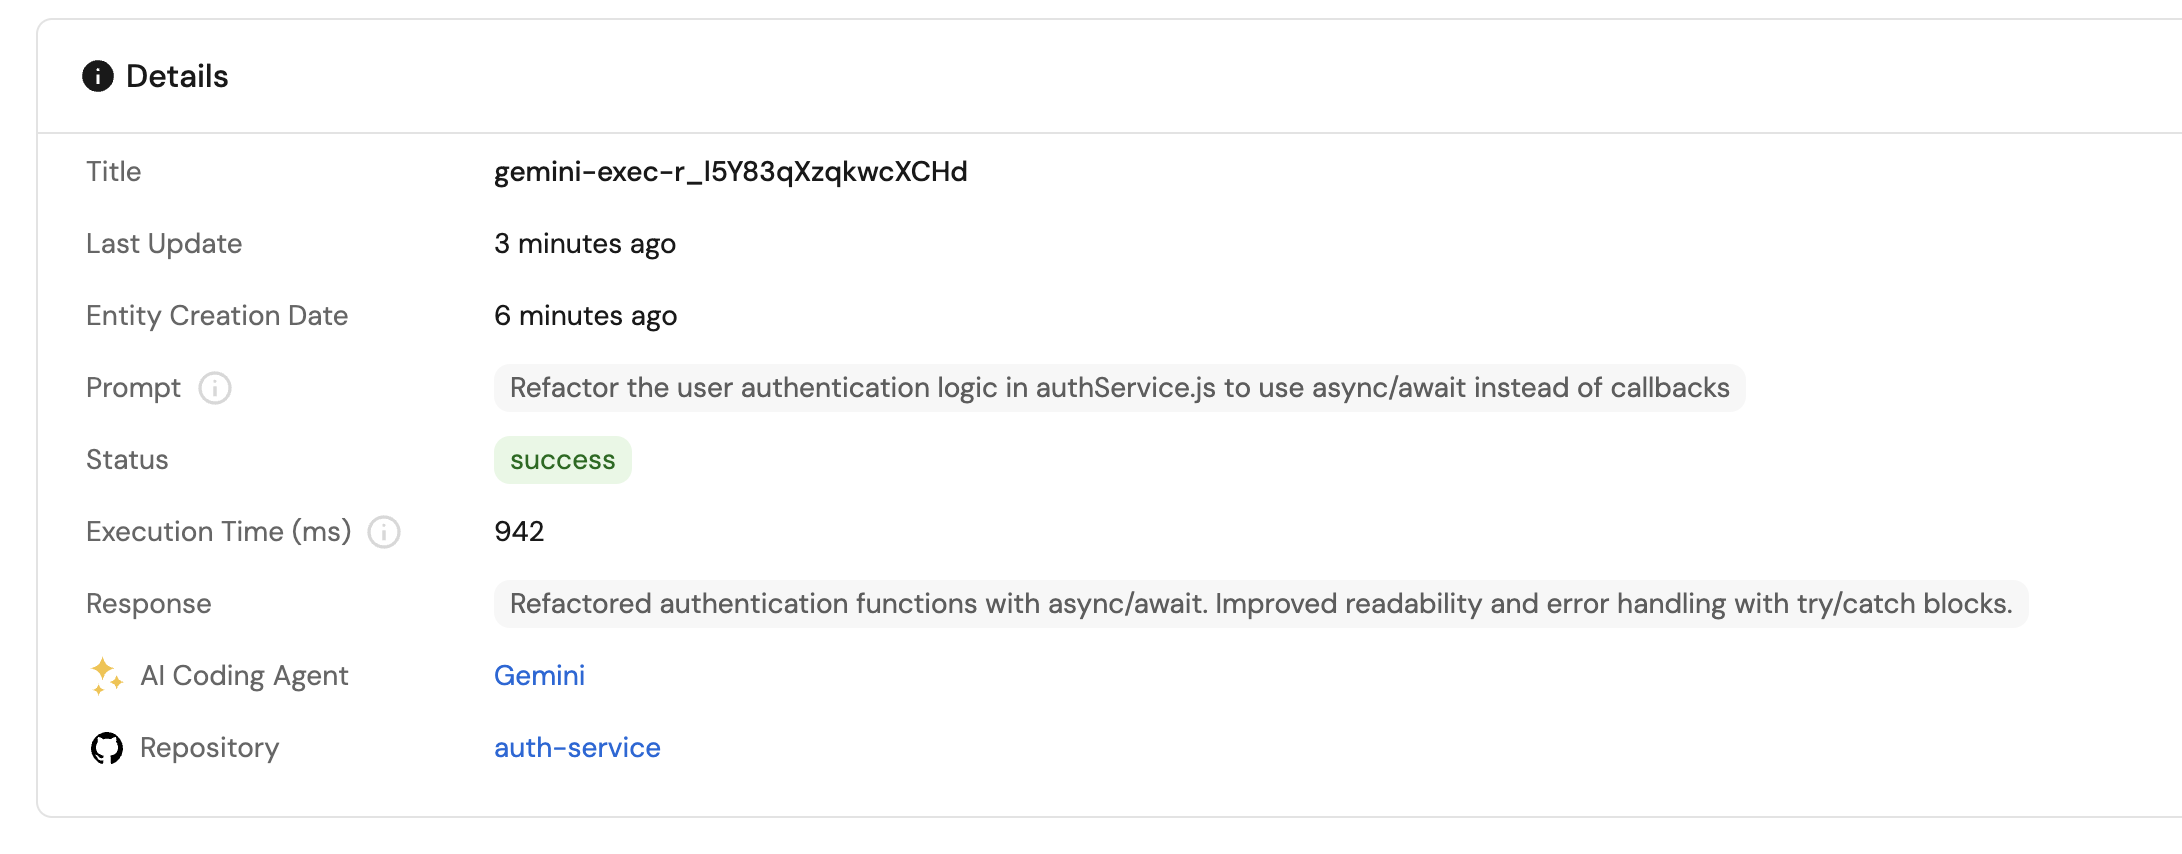
- Check the Gemini Assistant Execution entity for the new record.
Related guides
- Automatically resolve tickets with Port - Connect ticket intake, coding agents, GitHub issues, and pull requests.
- Triage work items for coding agents - Evaluate tickets and prepare well-defined tasks for coding agents.
- Track AI-driven pull requests - Track AI-generated pull requests and quality signals.
- Standardize AI coding rules across repositories - Author rules in git, provision them with Port, and score compliance.
- Set up the Task Manager AI agent - Create an AI agent to manage and prioritize development tasks.