Set up the Task Assistant AI agent
Overview
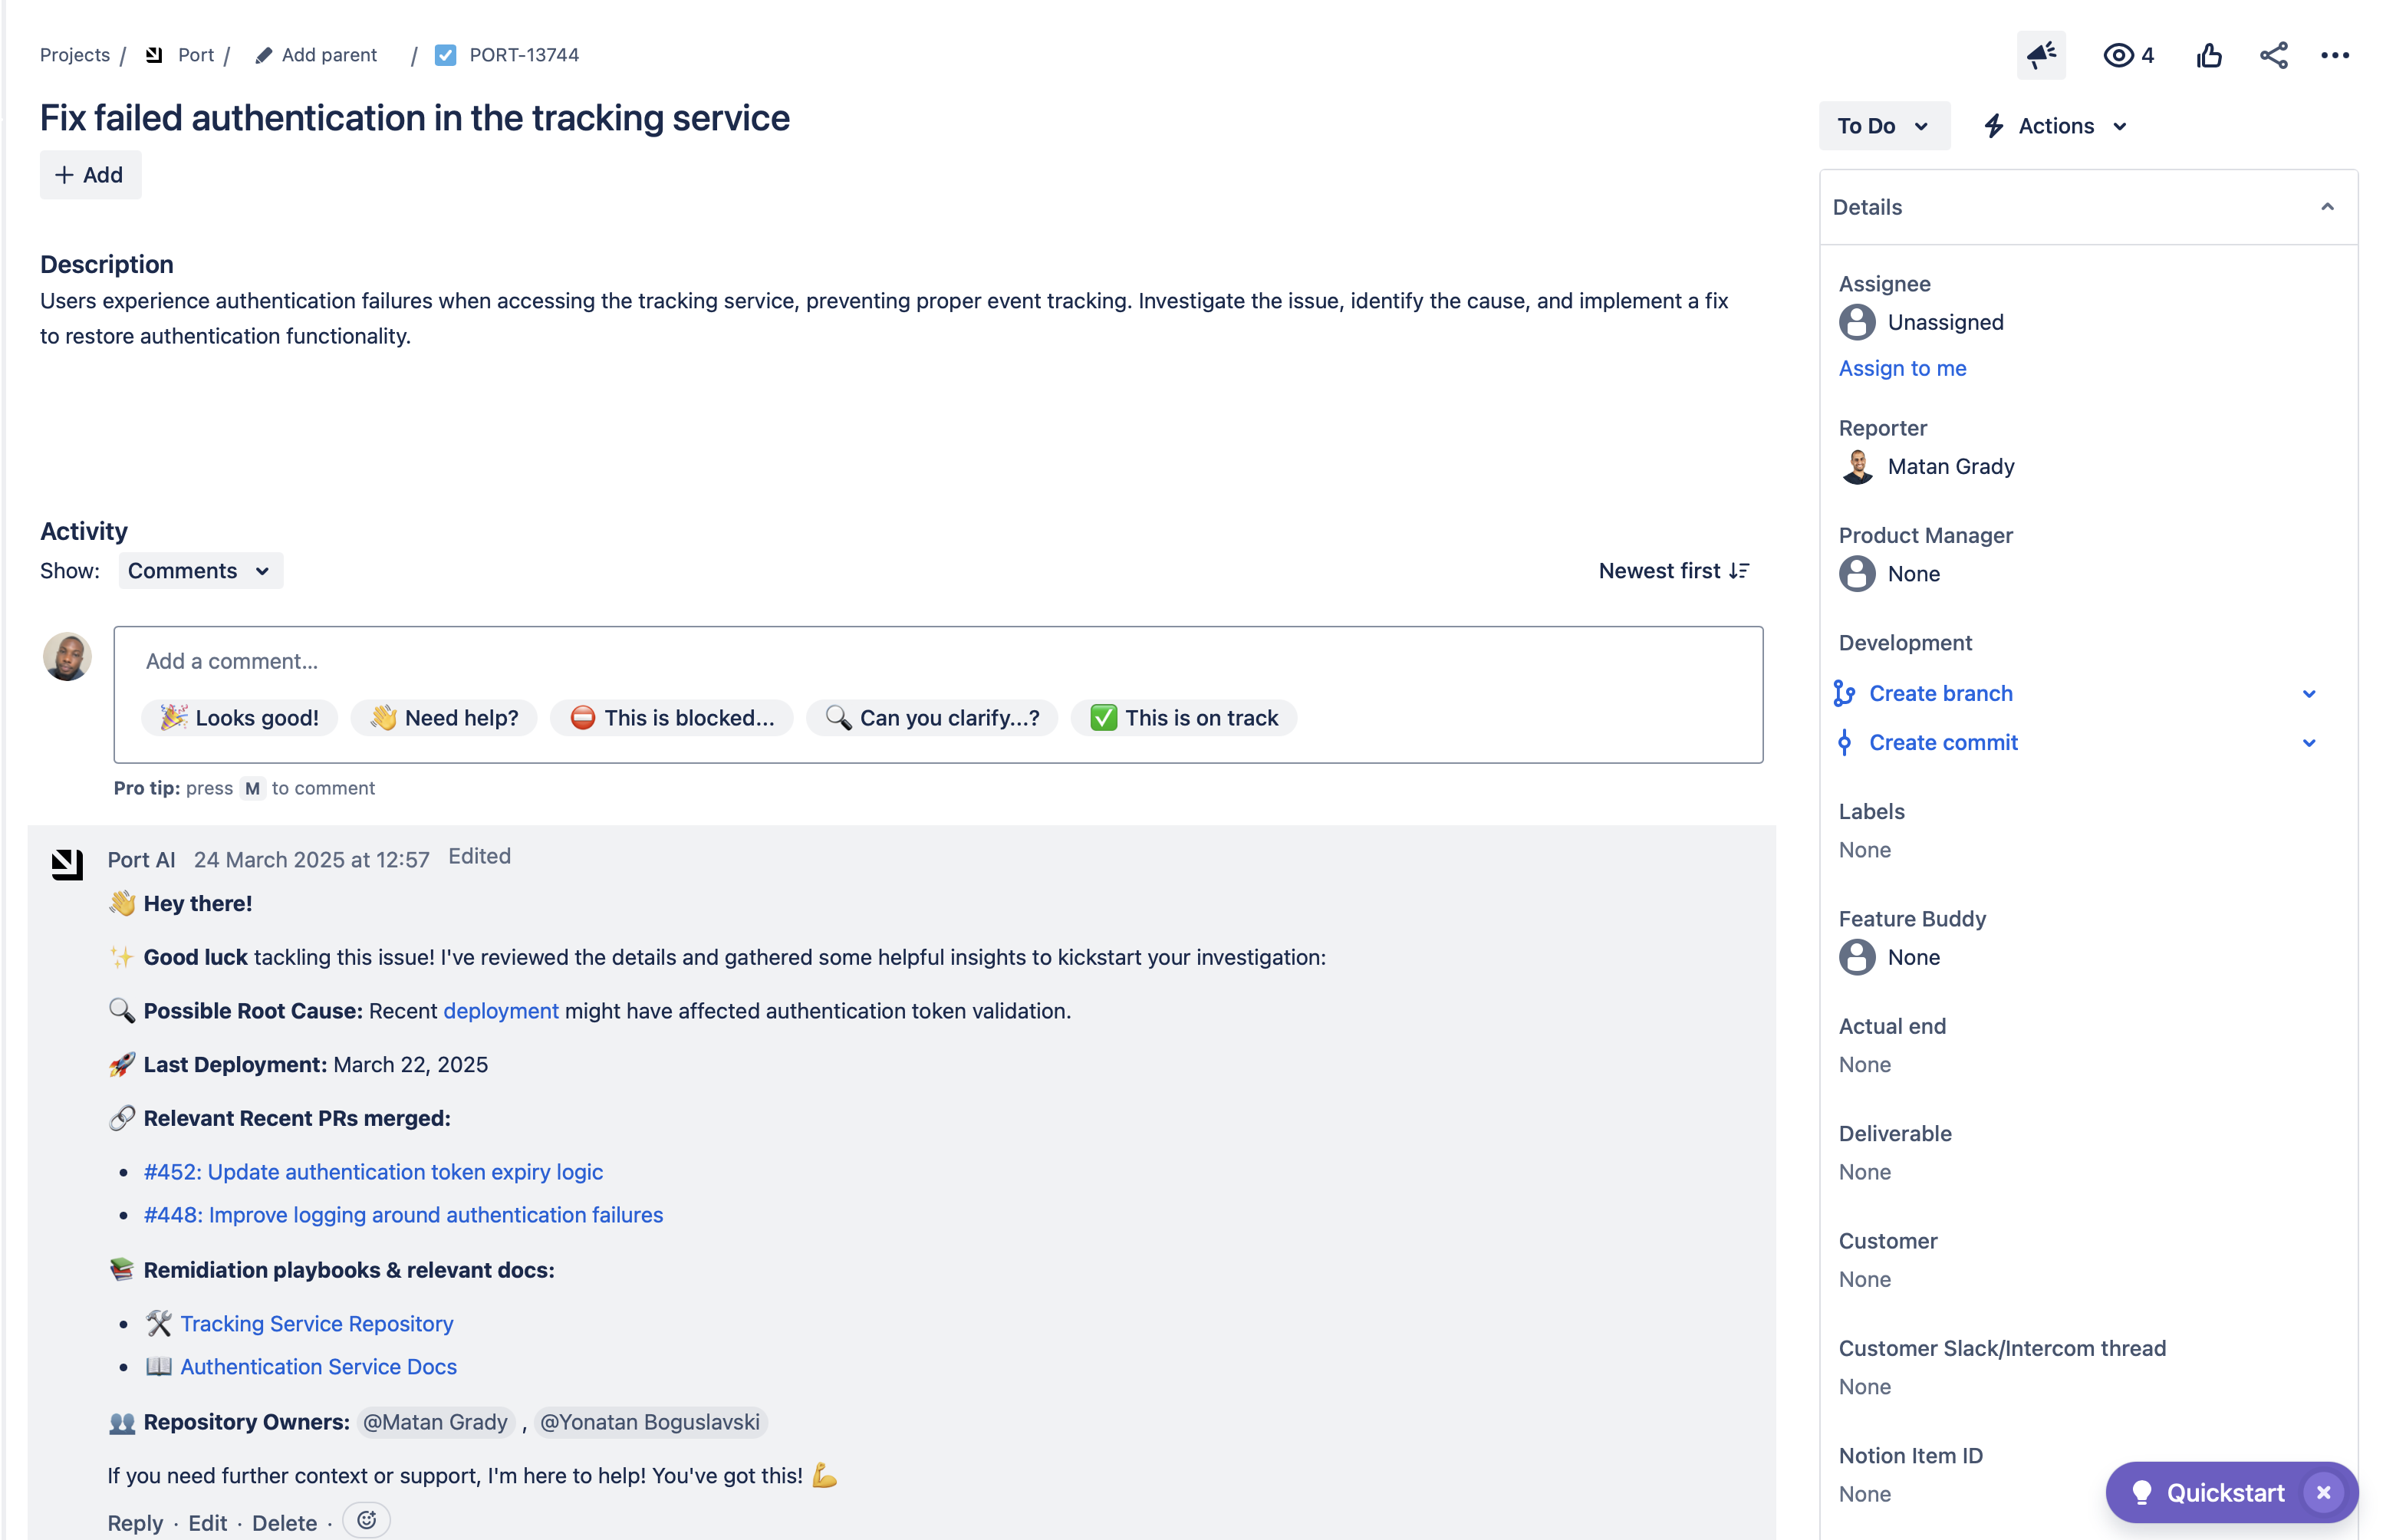
This guide will walk you through setting up a "Task Assistant" AI agent in Port.
By the end of this guide, your developers will receive automated, contextual insights when they start working on tasks, including related issues, pull requests, and potential collaborators.
Common use cases
- Automatically provide context when developers start working on tasks.
- Identify related issues and pull requests.
- Suggest potential collaborators based on task context.
- Enable easy commenting on Jira issues through Port.
Prerequisites
This guide assumes you have:
- A Port account with the AI agents feature enabled.
- Appropriate permissions to create and configure AI agents.
- Jira integration configured in your Port instance.
- GitHub integration configured in your Port instance.
Set up data model
To create an Task Assistant AI agent in Port, we'll need to configure the following components as described in our Build an AI agent guide:
- The data sources it will use to answer questions about tasks and their related issues and collaborators.
- The agent configuration that defines its capabilities and conversation starters.
- An automation to analyze the task and trigger the agent.
- A self-service action to comment on the Jira issue.
Configure data source access
For this guide, we will be using Jira as our primary data source to provide comprehensive task management capabilities. This integration will automatically create and configure all the necessary resources needed by the Task Assistant AI agent.
Install the following integration to have access to these data sources:
-
Port's Jira integration for projects, tasks and issues.
Optional toolsWhile this guide uses Jira, you can choose tools that best fit your organization's needs. For example, GitHub or ServiceNow.
Create the agent configuration
-
Go to the AI Agents page.
-
Click on
+ AI Agent. -
Toggle
Json modeon. -
Copy and paste the following JSON schema:
Task Assistant AI agent configuration (Click to expand)
{
  "identifier": "task_assistant_ai_agent",
  "title": "Task Assistant AI Agent",
  "icon": "Airflow",
  "properties": {
    "status": "active",
    "allowed_blueprints": [
      "service",
      "githubRepository",
      "_user",
      "githubPullRequest",
      "jiraIssue",
      "jiraProject",
      "githubUser",
      "_team",
      "jiraUser"
    ],
    "allowed_actions": [
      "comment_on_jira_issue"
    ],
    "executionMode": "Automatic",
    "prompt": "# Task\nWhen a user starts a task, automatically send a greeting using their first name and explain this is an automatic message. Then share three sections with emojis for helpful context.\n\n## Message Format\n\nHey there [User’s First Name], it’s Clarity :crystal_ball: - the Port AI agent!\nI noticed you just started working on a new task: [link to assigned issue].\nHere’s some context to help you get started :blobdance:\n\n:male-technologist: Devs who might have input:\nList up to 3 developers (excluding the user), explain briefly why each is relevant. If none, write a meaningful explanation.\n\n:jira: Similar Jira Issues:\nList up to 3 Jira issues (not assigned to the user), mention the assigned person and why it’s relevant. If none, explain why.\n\n:github_on_fire: Similar Pull Requests:\nList up to 3 pull requests (not assigned to the user), mention the creator and why it’s relevant. If none, explain why.\n\n## Guidelines\n- Each section can have fewer than 3 items. Always explain if empty.",
    "allowed_tools": [
      "Entities Search",
      "Entities Similarity Search",
      "Entities Group"
    ]
  },
  "relations": {}
} -
Click on
Createto save the agent.
Set up the automation trigger
Now that we have created the Task Assistant AI agent, we need to set up an automation that will be triggered automatically whenever a task is assigned or the status is changed to "In Progress".
Follow the steps below to set up the automation:
-
Go to the Automations page.
-
Click on
+ Automation. -
Copy and paste the following JSON schema:
Send context to task assignee automation (Click to expand)
{
  "identifier": "send_context_to_task_assignee",
  "title": "Send context to task assignee",
  "description": "Triggers on Jira task status change to In Progress or assignee",
  "trigger": {
    "type": "automation",
    "event": {
      "type": "ENTITY_UPDATED",
      "blueprintIdentifier": "jiraIssue"
    },
    "condition": {
      "type": "JQ",
      "expressions": [
        ".diff.after.relations.assignee != null",
        ".diff.after.properties.status == \"In Progress\"",
        ".diff.before.properties.status == \"To Do\" or .diff.before.relations.assignee != .diff.after.relations.assignee"
      ],
      "combinator": "and"
    }
  },
  "invocationMethod": {
    "type": "WEBHOOK",
    "url": "https://api.getport.io/v1/agent/task_assistant_ai_agent/invoke",
    "synchronized": true,
    "body": {
      "prompt": "User's email: \"{{.event.diff.after.relations.assignee}}\" . Task title: \"{{.event.diff.after.title}}\". Task identifier: \"{{.event.diff.after.identifier}}\".",
      "labels": {
        "source": "Automation"
      }
    }
  },
  "publish": true
} -
Click on
Createto save the automation.
Configure the self-service action
The value {{cloudId}} in the URL is your Jira Cloud ID. If you've recently installed Jira and have a "create a Jira issue" action, you can copy it from there. Otherwise, you can find your Jira Cloud ID by following this guide.
We need to configure a self-service action which can be triggered by the agent or manually by the user to comment on issues directly from Port.
-
Go to the Self Service Actions page.
-
Click on
+ Action. -
Copy and paste the following JSON schema:
Comment on Jira issue action (Click to expand)
{
  "identifier": "comment_on_jira_issue",
  "title": "Comment on a Jira issue",
  "icon": "Jira",
  "description": "Comments on an existing Jira issue",
  "trigger": {
    "type": "self-service",
    "operation": "DAY-2",
    "userInputs": {
      "properties": {
        "assignee": {
          "title": "Assignee",
          "icon": "DefaultProperty",
          "type": "string",
          "blueprint": "_user",
          "format": "entity",
          "dataset": {
            "combinator": "and",
            "rules": [
              {
                "property": "jira_user_id",
                "operator": "isNotEmpty"
              }
            ]
          }
        },
        "comment": {
          "title": "Comment",
          "icon": "DefaultProperty",
          "type": "string",
          "format": "markdown"
        }
      },
      "required": [],
      "order": [
        "comment",
        "assignee"
      ]
    },
    "blueprintIdentifier": "jiraIssue"
  },
  "invocationMethod": {
    "type": "WEBHOOK",
    "url": "https://api.atlassian.com/ex/jira/{{cloudId}}/rest/api/3/issue/{{ .entity.identifier }}/comment",
    "agent": false,
    "synchronized": true,
    "method": "POST",
    "headers": {
      "Authorization": "Bearer {{ .secrets.__JIRA_JIRA_ATLASSIAN_USER_TOKEN }}",
      "Content-Type": "application/json"
    },
    "body": {
      "body": {
        "content": [
          {
            "content": [
              {
                "text": "{{ .inputs.comment }}",
                "type": "text"
              }
            ],
            "type": "paragraph"
          }
        ],
        "type": "doc",
        "version": 1
      },
      "visibility": {
        "identifier": "Administrators",
        "type": "role",
        "value": "Administrators"
      }
    }
  },
  "requiredApproval": false
} -
Click on
Createto save the action
Best practices
To get the most out of your Task Assistant agent:
-
Monitor responses: Review the agent's messages to ensure they provide valuable context.
-
Refine the prompt: Adjust the agent's prompt based on your team's needs and feedback.
-
Test thoroughly: Create test issues to verify both automated messages and manual comments work as expected.
Possible enhancements
You can further enhance the Task Assistant setup by:
-
Integration expansion: Add more data sources like Confluence or ServiceNow for broader context.
-
Custom triggers: Configure additional automation triggers based on other task events.