Report a bug
Send this guide to your coding agent.
Prerequisite: Install Port MCP
Open plan mode if your tool supports it; otherwise present the plan below filled in and wait for my approval. Implement this Port guide in my org via MCP:

https://docs.port.io/guides/all/report-a-bug

Read the raw markdown version at https://docs.port.io/guides/all/report-a-bug.md - it contains every tab and code block without page markup.

Goal: get the guide's core flow working end-to-end in my org; adapting it to fit my existing setup takes priority over matching the guide 1:1.

Plan:
1. Confirm MCP is connected, in the right org, with sufficient permissions.
2. If the guide offers alternative implementation paths (tabs), pick the one matching my installed integrations and tools, confirm it with me, and implement only that path.
3. Diff the guide's data model (blueprints, properties, relations, workflows, actions, agents, automations, integrations, webhook data sources, secrets) against mine.
4. Propose adaptations for gaps, reusing existing blueprints/relations over guide-named duplicates.
5. Flag what needs a UI click, credential, or secret from me, testing MCP capability empirically before ruling anything out. If the guide has a "Set up via API" section, use it for anything MCP can't do before treating a step as UI-only.
6. Stop on any blocker and give me options. Approving this plan authorizes the writes it lists; pause only for writes beyond what's listed.

Build:
- Extend blueprint schema additively when upserting; don't remove or overwrite existing properties, and treat type conflicts as a blocker, not an auto-fix.
- Never print secret values into the chat or logs; ask me to set them in Port, or write them via the secrets API without echoing them back.
- List any mock data in the plan, minimal and labeled mock; once approved, seed it without re-asking, and tell me what you seeded.
- For anything the guide writes downstream (e.g. a webhook target), use a real entity, not a mock.
- For pages/widgets, use the real page identifier from the app URL, not a guessed slug.
- When you hit a UI step confirmed (not assumed) unsupported via MCP and not covered by the guide's API sections, pause, give exact clicks, then resume via MCP.
- Validate and give links after each meaningful step (only a tool-returned URL, no guessed paths); don't proceed if the last run wasn't a success.

Done:
- Run the guide's "Let's test it" steps where possible (e.g. execute a workflow test run) and confirm the expected output exists in Port.
- Summarize adaptations, seeded data, what was mocked or skipped, remaining UI steps, and how to verify.
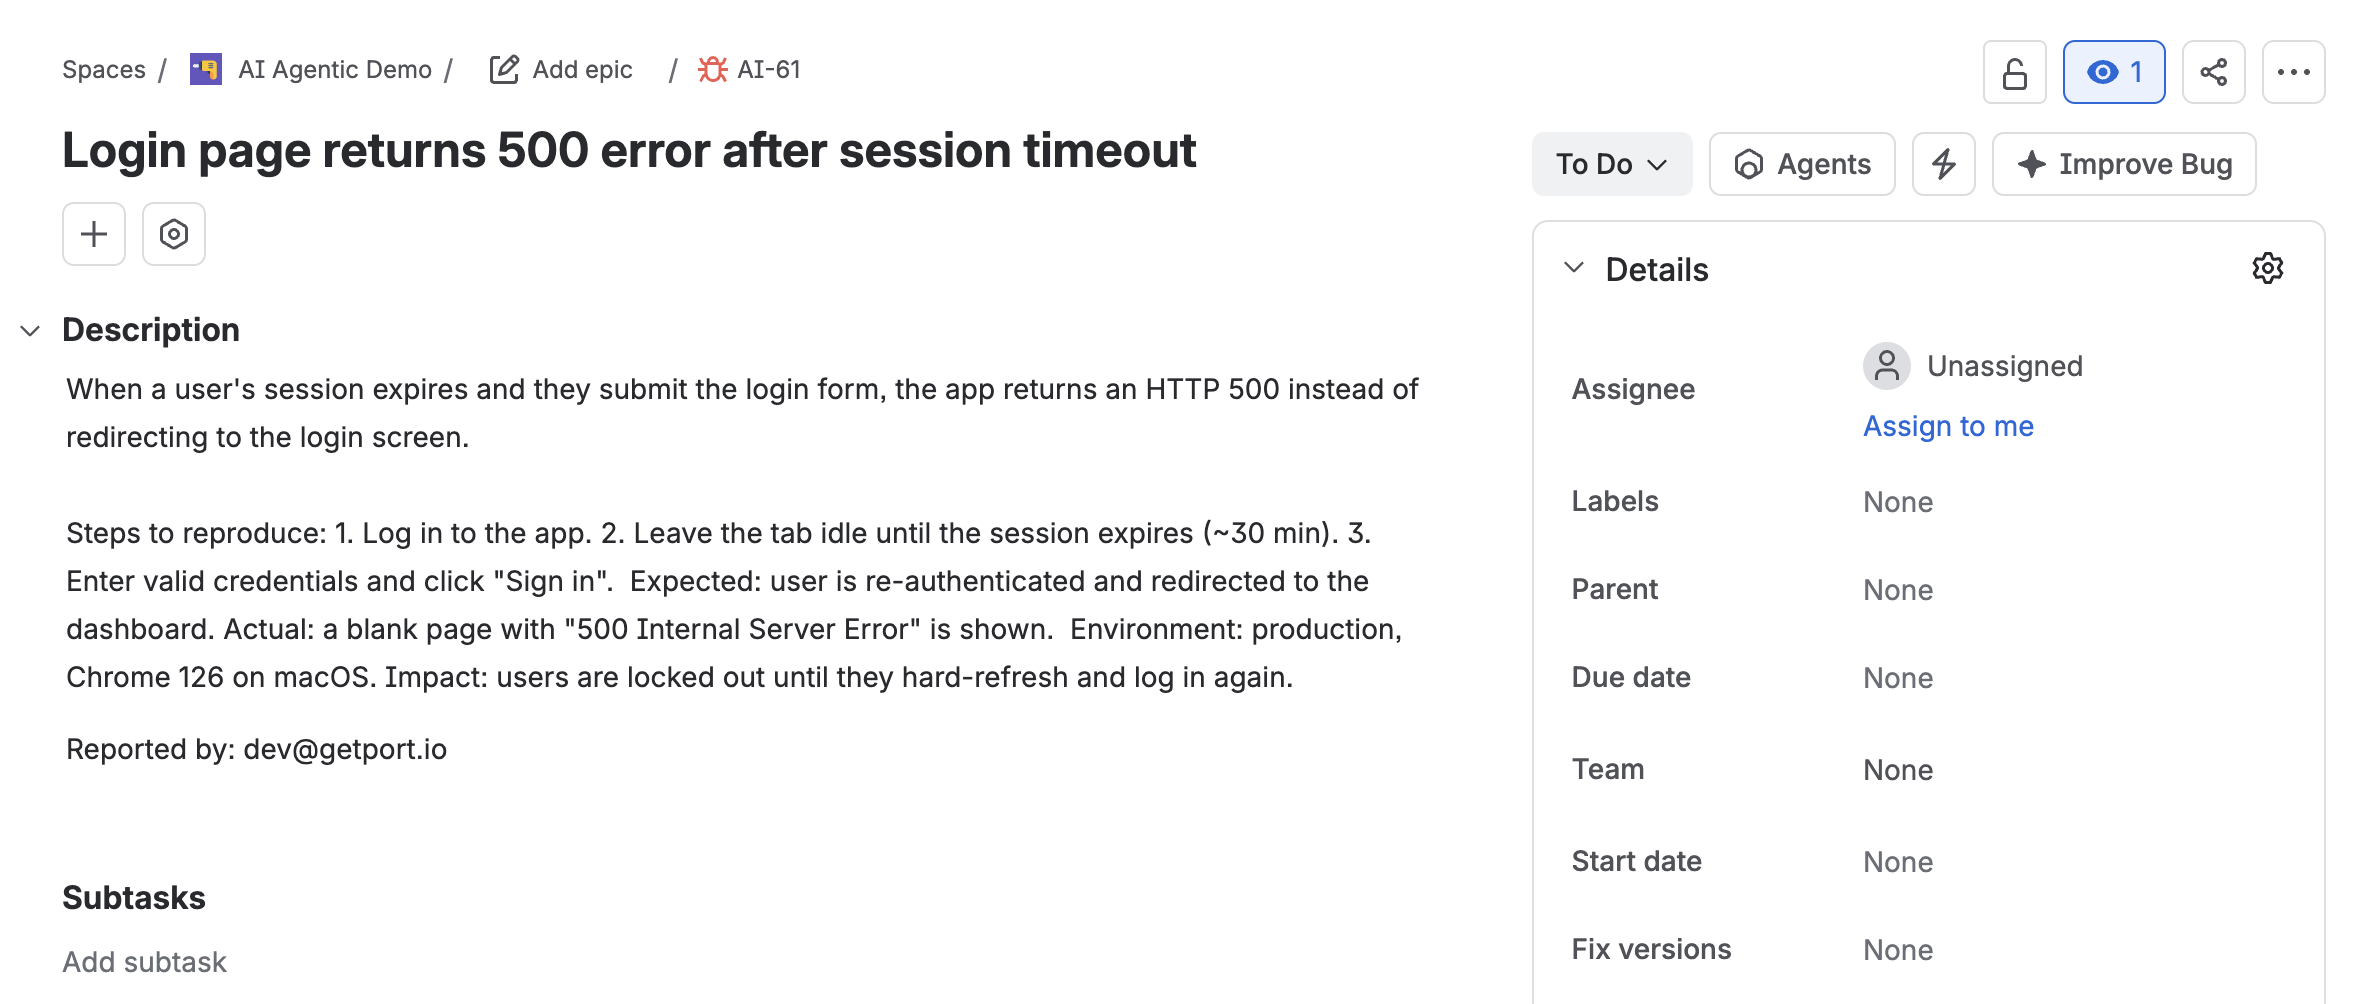
This guide demonstrates how to implement a Port workflow that reports bugs in Jira, ensuring prompt issue resolution and improving overall platform reliability. The workflow uses a webhook node to call Jira's API directly from Port, so everything runs natively in Port with no external CI pipeline required.
Common use cases
- Give developers and agents a governed, one-click way to file Jira bugs from Port.
- Capture the reporting user automatically so issues stay accountable.
- Standardize bug intake so every report includes a project, title, and description.
Prerequisites
- Complete the onboarding process.
- Access to your Jira organization with permissions to create issues.
- A Jira API token with permissions to create new issues.
Set up data model
If you haven't installed the Jira integration, you'll need to create a blueprint for Jira issues. However we highly recommend you install the Jira integration to have these automatically set up for you.
Create the Jira issue blueprint
-
Go to your Builder page.
-
Click on
+ Blueprint. -
Click on the
{...}button in the top right corner, and choose "Edit JSON". -
Add this JSON schema:
Jira issue blueprint (Click to expand)
{"identifier": "jiraIssue","title": "Jira Issue","icon": "Jira","schema": {"properties": {"url": {"title": "Issue URL","type": "string","format": "url","description": "URL to the issue in Jira"},"status": {"title": "Status","type": "string","description": "The status of the issue"},"issueType": {"title": "Type","type": "string","description": "The type of the issue"},"components": {"title": "Components","type": "array","description": "The components related to this issue"},"assignee": {"title": "Assignee","type": "string","format": "user","description": "The user assigned to the issue"},"reporter": {"title": "Reporter","type": "string","description": "The user that reported to the issue","format": "user"},"priority": {"title": "Priority","type": "string","description": "The priority of the issue"},"created": {"title": "Created At","type": "string","description": "The created datetime of the issue","format": "date-time"},"updated": {"title": "Updated At","type": "string","description": "The updated datetime of the issue","format": "date-time"}}},"calculationProperties": {},"relations": {}} -
Click "Save" to create the blueprint.
Set up the workflow
You can create Jira bugs by leveraging Port's workflows and secrets to interact with Jira's API directly through a webhook node. This method handles everything within Port, with no external pipeline to maintain.
Add Port secret
If you have already installed Port's Jira integration, these secrets should already exist in Port. To view your existing secrets:
- Open the Credentials modal.
- Click on the
Secretstab.
To add the secret to Port:
-
Open the Credentials modal.
-
Click on the
Secretstab. -
Click on
+ Secretand add the following secret:-
JIRA_AUTH- Base64 encoded string of your Jira credentials. Generate this by running:echo -n "your-email@domain.com:your-api-token" | base64Replace
your-email@domain.comwith your Jira email andyour-api-tokenwith your Jira API token.One time generationThe base64 encoded string only needs to be generated once and will work for all webhook calls until you change your API token.
-
Build the workflow
The workflow has three nodes:
- Trigger - a self-service trigger that collects the Jira project, a short title, and a description from the reporter.
- Create Jira issue - a webhook node that calls Jira's API to create the bug with the reporting user attached.
- Upsert Jira issue entity - an upsert entity node that creates a matching
Jira issueentity in your catalog from the Jira API response.
To create the workflow:
-
Go to the Workflows page of your portal.
-
Click on the + Workflow button in the top-right corner.
-
In the Name field, enter
Report a Bug, then click Confirm. -
On the editor page, click the see workflow JSON button (the code icon) to open the JSON editor.
-
Copy and paste the workflow JSON below to replace the example workflow:
Configure your Jira urlReplace
<JIRA_ORGANIZATION_URL>in the webhook URL with your Jira organization URL (e.g.,example.atlassian.net).Report a bug workflow (Click to expand)
{"identifier": "report_a_bug","title": "Report a bug","icon": "Jira","description": "Report a bug in Port to our product team.","allowAnyoneToViewRuns": true,"nodes": [{"identifier": "trigger","title": "Bug details","config": {"type": "SELF_SERVE_TRIGGER","userInputs": {"properties": {"project": {"title": "Project","description": "The Jira project where the bug will be created","icon": "Jira","type": "string","format": "entity","blueprint": "jiraProject"},"short_title": {"icon": "DefaultProperty","title": "Short title","type": "string"},"description": {"icon": "DefaultProperty","title": "Description","type": "string"}},"required": ["project", "short_title", "description"],"order": ["project", "short_title", "description"]}}},{"identifier": "create_jira_issue","title": "Create Jira issue","config": {"type": "WEBHOOK","url": "https://<JIRA_ORGANIZATION_URL>/rest/api/3/issue","method": "POST","synchronized": true,"headers": {"Authorization": "Basic {{ .secrets.JIRA_AUTH }}","Content-Type": "application/json"},"body": {"fields": {"project": {"key": "{{ .outputs.trigger.project }}"},"summary": "{{ .outputs.trigger.short_title }}","description": {"version": 1,"type": "doc","content": [{"type": "paragraph","content": [{"type": "text","text": "{{ .outputs.trigger.description }}"}]},{"type": "paragraph","content": [{"type": "text","text": "Reported by: {{ .workflowRun.trigger.by.email }}"}]}]},"issuetype": {"name": "Bug"}}}}},{"identifier": "upsert_jira_issue","title": "Upsert Jira issue entity","config": {"type": "UPSERT_ENTITY","blueprintIdentifier": "jiraIssue","mapping": {"identifier": "{{ .outputs.create_jira_issue.response.data.key }}","title": "{{ .outputs.trigger.short_title }}","properties": {"url": "{{ .outputs.create_jira_issue.response.data.self | split(\"/rest/\") | .[0] }}/browse/{{ .outputs.create_jira_issue.response.data.key }}","status": "Open","issueType": "Bug","reporter": "{{ .workflowRun.trigger.by.email }}","created": "{{ now | todateiso8601 }}","updated": "{{ now | todateiso8601 }}"}}}}],"connections": [{"sourceIdentifier": "trigger","targetIdentifier": "create_jira_issue"},{"sourceIdentifier": "create_jira_issue","targetIdentifier": "upsert_jira_issue"}]} -
Click
Saveto save the workflow.
Now you should see the Report a bug workflow in the self-service page. 🎉
Let's test it!
-
Go to the Self-service page in Port.
-
Click on the Report a bug workflow.
-
Fill in the bug details:
- Select the Jira project where the bug will be created.
- Enter a short title for the bug.
- Enter the bug description.
-
Click Execute.
-
Open the workflow runs tab, then confirm the run completed, the new bug appears in the selected Jira project, and a matching
Jira issueentity was created in your catalog.