Manage and visualize cloud resources
Send this guide to your coding agent.
Prerequisite: Install Port MCP
Open plan mode. Implement this Port guide in my org via MCP:

https://docs.port.io/guides/all/manage-and-visualize-cloud-resources

Goal: get the guide's core flow working end-to-end in my org; adapting it to fit my existing setup takes priority over matching the guide 1:1.

Plan:
1. Confirm MCP is connected, in the right org, with sufficient permissions.
2. Diff the guide's data model (blueprints, properties, relations, actions, agents, automations, integrations, secrets) against mine.
3. Propose adaptations for gaps, reusing existing blueprints/relations over guide-named duplicates.
4. Flag what needs a UI click, credential, or secret from me, testing MCP capability empirically before ruling anything out.
5. Stop on any blocker and give me options. Approving this plan authorizes the writes it lists; pause only for writes beyond what's listed.

Build:
- Extend blueprint schema additively when upserting; don't remove or overwrite existing properties, and treat type conflicts as a blocker, not an auto-fix.
- List any mock data in the plan, minimal and labeled mock; once approved, seed it without re-asking, and tell me what you seeded.
- For anything the guide writes downstream (e.g. a webhook target), use a real entity, not a mock.
- For pages/widgets, use the real page identifier from the app URL, not a guessed slug.
- When you hit a UI step confirmed (not assumed) unsupported via MCP, pause, give exact clicks, then resume via MCP.
- Validate and give links after each meaningful step (only a tool-returned URL, no guessed paths); don't proceed if the last run wasn't a success.

Done:
- Confirm the guide's expected output exists and runs in Port.
- Summarize adaptations, seeded data, what was mocked or skipped, remaining UI steps, and how to verify.
This guide demonstrates how to manage and visualize AWS, Azure, and GCP cloud resources in Port using cloud integrations, self-service actions, GitHub workflows, and dashboards.
Use this guide as the consolidated entry point for common cloud resource day-2 operations. Each resource section includes the relevant data model, integration mapping, self-service actions, workflow examples, and visualization setup from the original resource-specific guide.
Common use cases
- Monitor cloud resources across AWS, Azure, and GCP from Port dashboards.
- Trigger day-2 actions such as start, stop, restart, scale, purge, redrive, renew, delete, and rollback from Port.
- Give platform teams a consistent self-service experience for cloud operations.
- Surface security and operational signals such as encryption, public access, health status, certificate expiration, and deletion protection.
Prerequisites
This guide assumes the following:
- You have a Port account and have completed the onboarding process.
- The relevant cloud integration is installed for the resource you want to manage:
- A GitHub integration is installed for workflow-backed self-service actions:
- You have access to a GitHub repository for storing the workflow files used by the self-service actions.
Select a cloud resource
- AWS
- GCP
- Azure
| Resource | What you can manage |
|---|---|
| AWS ACM certificates | Monitor certificate status and expiration, request new certificates, renew certificates, and delete unused certificates. |
| AWS Auto Scaling Groups | Monitor capacity and scaling configuration, then scale Auto Scaling Groups through self-service. |
| AWS SQS queues | Monitor queue health, purge queues, redrive dead-letter queues, and delete queues. |
| AWS ECS services | Monitor ECS services, scale services, restart services, update task definitions, run health checks, roll back deployments, and delete services. |
| AWS EC2 instances | Monitor EC2 instances and run start, reboot, terminate, and related Auto Scaling Group resize actions. |
| AWS S3 buckets and RDS instances | Monitor S3 and RDS security posture, reboot RDS instances, and delete RDS instances. |
| Resource | What you can manage |
|---|---|
| GCP Compute Engine instances | Monitor Compute Engine instances and run start and stop actions. |
| Resource | What you can manage |
|---|---|
| Azure Virtual Machines | Monitor Azure Virtual Machines and run start, deallocate, and restart actions. |
| Azure web apps | Monitor Azure web apps and run start, stop, and restart actions. |
AWS ACM certificates
Use this section to bring your AWS ACM certificate management experience into Port.
In this section, you will:
- Ingest ACM certificate data into Port's software catalog using Port's AWS integration.
- Set up self-service actions to manage ACM certificates (request new certificates, renew certificates, and delete certificates).
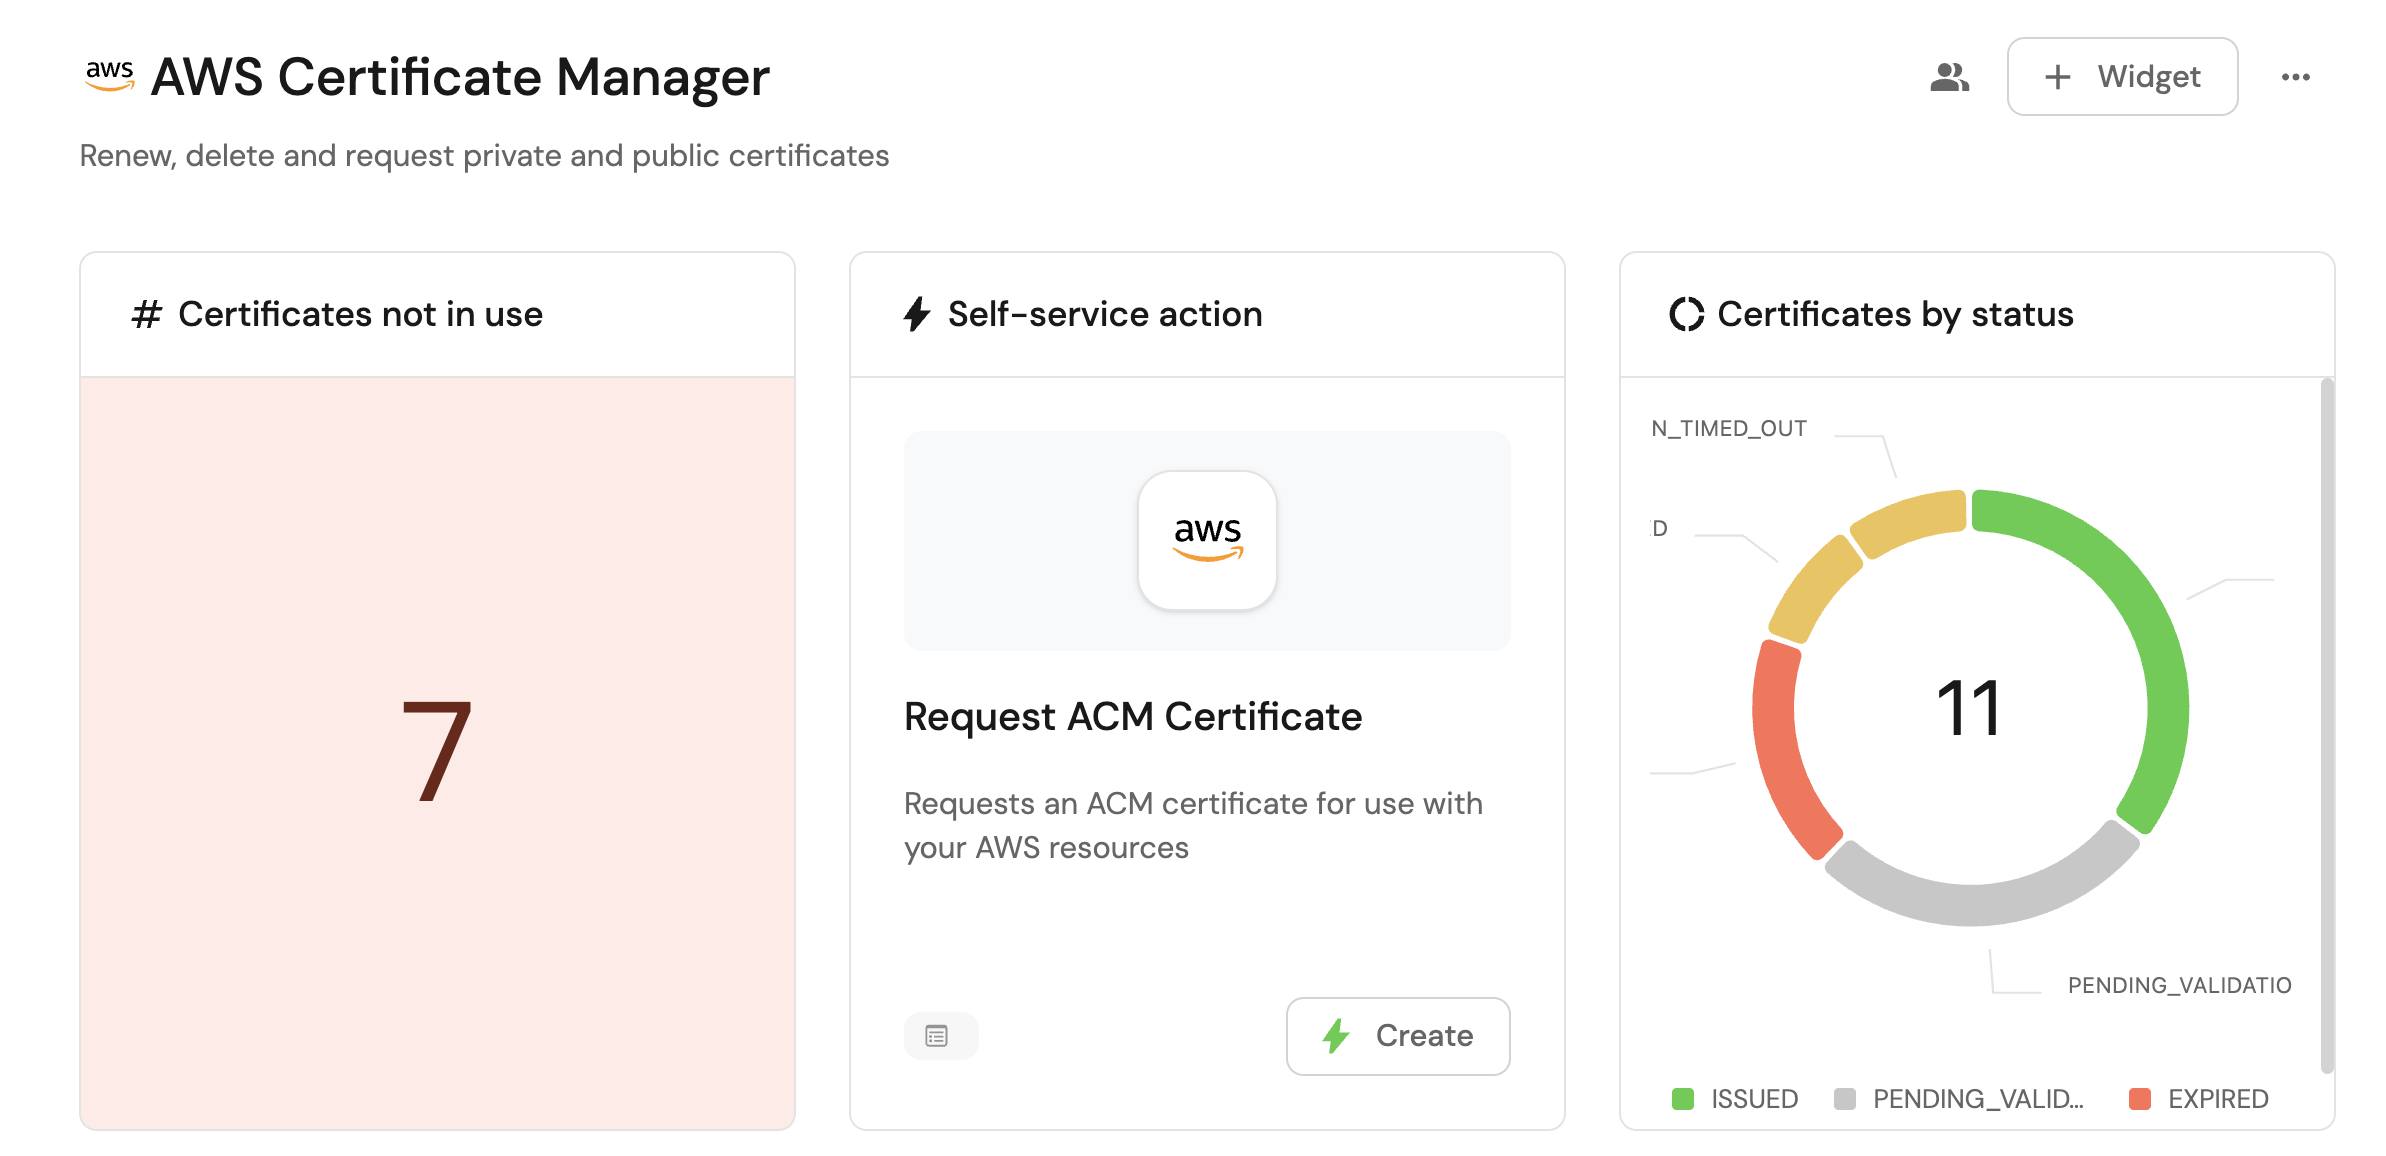
- Build dashboards in Port to monitor and take action on your ACM resources.
Prerequisites
This section assumes the following:
-
You have a Port account and have completed the onboarding process.
-
Port's AWS integration is installed in your account.
-
Install the GitHub integration relevant to you:
Install GitHub Ocean.
Set up data model
When installing the AWS integration in Port, the AWS Account blueprint is created by default.
However, the ACM Certificate blueprint is not created automatically so we will need to create it manually.
Create the ACM certificate blueprint
-
Go to the Builder page of your portal.
-
Click on
+ Blueprint. -
Click on the
{...}button in the top right corner, and chooseEdit JSON. -
Add this JSON schema:
AWS ACM Certificate blueprint (Click to expand)
{"identifier": "acmCertificate","description": "This blueprint represents an SSL/TLS certificates for your Amazon Web Services-based websites and applications","title": "ACM Certificate","icon": "AWS","schema": {"properties": {"createdAt": {"icon": "DefaultProperty","type": "string","title": "Created At","format": "date-time"},"inUse": {"icon": "DefaultProperty","type": "boolean","title": "In Use"},"keyAlgorithm": {"icon": "DefaultProperty","type": "string","title": "Key Algorithm"},"expirationDate": {"type": "string","title": "Expiration Date","format": "date-time"},"renewalEligibility": {"icon": "DefaultProperty","title": "Renewal Eligibility","type": "string","enum": ["ELIGIBLE","INELIGIBLE"],"enumColors": {"ELIGIBLE": "green","INELIGIBLE": "red"}},"status": {"icon": "DefaultProperty","title": "Status","type": "string","enum": ["ISSUED","EXPIRED","PENDING_VALIDATION","INACTIVE","FAILED","REVOKED","VALIDATION_TIMED_OUT"],"enumColors": {"ISSUED": "green","EXPIRED": "red","PENDING_VALIDATION": "lightGray","INACTIVE": "red","FAILED": "red","REVOKED": "gold","VALIDATION_TIMED_OUT": "gold"}},"type": {"icon": "DefaultProperty","type": "string","title": "Type"},"arn": {"type": "string","title": "Arn"}},"required": []},"mirrorProperties": {},"calculationProperties": {},"aggregationProperties": {},"relations": {"account": {"title": "Account","target": "awsAccount","required": false,"many": false}}} -
Click
Saveto create the blueprint.
Update the integration mapping
-
Go to the Data Sources page of your portal.
-
Select the AWS integration.
-
Add the following YAML block into the editor to ingest ACM certificates from your AWS account:
AWS integration configuration (Click to expand)
deleteDependentEntities: truecreateMissingRelatedEntities: trueenableMergeEntity: trueresources:- kind: AWS::Organizations::Accountselector:query: 'true'port:entity:mappings:identifier: .Idtitle: .Nameblueprint: '"awsAccount"'properties:arn: .Arnemail: .Emailstatus: .Statusjoined_method: .JoinedMethodjoined_timestamp: .JoinedTimestamp | sub(" "; "T")- kind: AWS::ACM::Certificateselector:query: 'true'port:entity:mappings:identifier: .CertificateArntitle: .DomainNameblueprint: '"acmCertificate"'properties:status: .Statustype: .Typearn: .CertificateArnrenewalEligibility: .RenewalEligibilitykeyAlgorithm: .KeyAlgorithminUse: .InUsecreatedAt: .CreatedAtexpirationDate: .NotAfterrelations:account: .__AccountId -
Click
Save & Resyncto apply the mapping.
Set up self-service actions
Now let us create self-service actions to manage your ACM certificates directly from Port using GitHub Actions. You will implement workflows to:
-
Request a new ACM certificate.
-
Renew an eligible ACM certificate.
-
Delete an ACM certificate.
To implement these use-cases, follow the steps below:
Add GitHub secrets
In your GitHub repository, go to Settings > Secrets and add the following secrets:
PORT_CLIENT_ID- Port Client ID learn more.PORT_CLIENT_SECRET- Port Client Secret learn more.AWS_ACCESS_KEY_ID- AWS IAM user's access key.AWS_SECRET_ACCESS_KEY- AWS IAM user's secret access key.AWS_REGION- AWS region (e.g.,us-east-1).
The AWS IAM user must have the following permissions to manage ACM certificates:
acm:RequestCertificateacm:RenewCertificateacm:DeleteCertificate
Request a new ACM certificate
To request a new ACM certificate from Port, first add a GitHub workflow that requests the certificate in AWS. Then create a Port self-service action that triggers the workflow.
Add GitHub workflow
Create the file .github/workflows/request-acm-cert.yaml in the .github/workflows folder of your repository.
Request ACM Certificate GitHub workflow (Click to expand)
name: Request ACM Certificate

on:
  workflow_dispatch:
    inputs:
      domain_name:
        required: true
        description: 'The fully qualified domain name (FQDN) that you want to secure with an ACM certificate'
        type: string
      validation_method:
        required: true
        description: 'The method you want to use to validate that you own or control domain'
        type: string
      port_context:
        required: true
        description: 'Action and general context (blueprint, entity, run id, etc...)'
        type: string

jobs:
  request-acm:
    runs-on: ubuntu-latest
    steps:
      - name: Inform Port of workflow start
        uses: port-labs/port-github-action@v1
        with:
          clientId: ${{ secrets.PORT_CLIENT_ID }}
          clientSecret: ${{ secrets.PORT_CLIENT_SECRET }}
          baseUrl: https://api.port.io
          operation: PATCH_RUN
          runId: ${{fromJson(inputs.port_context).runId}}
          logMessage: Configuring AWS credentials to request public ACM cert with domain name ${{ inputs.domain_name }}

      - name: Configure AWS credentials
        uses: aws-actions/configure-aws-credentials@v4
        with:
          aws-access-key-id: ${{ secrets.AWS_ACCESS_KEY_ID }}
          aws-secret-access-key: ${{ secrets.AWS_SECRET_ACCESS_KEY }}
          aws-region: ${{ secrets.AWS_REGION }}

      - name: Request ACM certificate
        run: aws acm request-certificate --domain-name ${{ inputs.domain_name }} --validation-method ${{ inputs.validation_method }}

      - name: Inform Port about ACM certificate success
        if: success()
        uses: port-labs/port-github-action@v1
        with:
          clientId: ${{ secrets.PORT_CLIENT_ID }}
          clientSecret: ${{ secrets.PORT_CLIENT_SECRET }}
          baseUrl: https://api.port.io
          operation: PATCH_RUN
          runId: ${{ fromJson(inputs.port_context).runId }}
          status: 'SUCCESS'
          logMessage: ✅ ACM certificate for domain ${{ inputs.domain_name }} requested successfully
          summary: ACM certificate requested successfully

      - name: Inform Port about ACM certificate failure
        if: failure()
        uses: port-labs/port-github-action@v1
        with:
          clientId: ${{ secrets.PORT_CLIENT_ID }}
          clientSecret: ${{ secrets.PORT_CLIENT_SECRET }}
          baseUrl: https://api.port.io
          operation: PATCH_RUN
          runId: ${{ fromJson(inputs.port_context).runId }}
          status: 'FAILURE'
          logMessage: ❌ Failed to request ACM certificate for domain ${{ inputs.domain_name }}
          summary: ACM certificate request failed
Create Port action
-
Go to the Self-service page of your portal.
-
Click on the
+ New Actionbutton. -
Click on the
{...} Edit JSONbutton. -
Copy and paste the following JSON configuration into the editor.
Request ACM Certificate action (Click to expand)
Replace the variables<GITHUB-ORG>- your GitHub organization or user name.<GITHUB-REPO>- your GitHub repository name.<YOUR_GITHUB_OCEAN_INTEGRATION_ID>- your GitHub Ocean integration installation ID.
{"identifier": "request_acm_certificate","title": "Request ACM Certificate","icon": "AWS","description": "Requests an ACM certificate for use with other Amazon Web Services services","trigger": {"type": "self-service","operation": "CREATE","userInputs": {"properties": {"domain_name": {"icon": "DefaultProperty","type": "string","title": "Domain Name","description": "The fully qualified domain name (FQDN), such as www.example.com, that you want to secure with an ACM certificate"},"validation_method": {"icon": "DefaultProperty","title": "Validation Method","description": "The method you want to use if you are requesting a public certificate to validate that you own or control domain","type": "string","default": "DNS","enum": ["EMAIL","DNS"],"enumColors": {"EMAIL": "lightGray","DNS": "lightGray"}}},"required": ["domain_name","validation_method"],"order": ["domain_name","validation_method"]}},"invocationMethod": {"type": "INTEGRATION_ACTION","installationId": "<YOUR_GITHUB_OCEAN_INTEGRATION_ID>","integrationActionType": "dispatch_workflow","integrationActionExecutionProperties": {"org": "<GITHUB-ORG>","repo": "<GITHUB-REPO>","workflow": "request-acm-cert.yaml","workflowInputs": {"{{ spreadValue() }}": "{{ .inputs }}","port_context": {"runId": "{{ .run.id }}"}},"reportWorkflowStatus": true}},"requiredApproval": false} -
Click
Save.
Now you should see the Request ACM Certificate action in the self-service page. 🎉
Renew an ACM certificate
To renew an ACM certificate from Port, first add a GitHub workflow that renews eligible certificates in AWS. Then create a Port self-service action that triggers the workflow.
Add GitHub workflow
Create the file .github/workflows/renew-acm-cert.yaml in the .github/workflows folder of your repository.
Renew ACM Certificate GitHub workflow (Click to expand)
name: Renew ACM Certificate

on:
  workflow_dispatch:
    inputs:
      port_context:
        required: true
        description: 'Action and general context (blueprint, entity, run id, etc...)'
        type: string

jobs:
  renew-acm-cert:
    runs-on: ubuntu-latest
    steps:
      - name: Inform Port of workflow start
        uses: port-labs/port-github-action@v1
        with:
          clientId: ${{ secrets.PORT_CLIENT_ID }}
          clientSecret: ${{ secrets.PORT_CLIENT_SECRET }}
          baseUrl: https://api.port.io
          operation: PATCH_RUN
          runId: ${{fromJson(inputs.port_context).runId}}
          logMessage: Configuring AWS credentials to Renew ACM certificate with domain ${{ fromJson(inputs.port_context).entity.title }}

      - name: Configure AWS credentials
        uses: aws-actions/configure-aws-credentials@v4
        with:
          aws-access-key-id: ${{ secrets.AWS_ACCESS_KEY_ID }}
          aws-secret-access-key: ${{ secrets.AWS_SECRET_ACCESS_KEY }}
          aws-region: ${{ secrets.AWS_REGION }}

      - name: Renew ACM certificate
        run: aws acm renew-certificate --certificate-arn ${{ fromJson(inputs.port_context).entity.properties.arn }}

      - name: Inform Port about ACM certificate renewal success
        if: success()
        uses: port-labs/port-github-action@v1
        with:
          clientId: ${{ secrets.PORT_CLIENT_ID }}
          clientSecret: ${{ secrets.PORT_CLIENT_SECRET }}
          baseUrl: https://api.port.io
          operation: PATCH_RUN
          runId: ${{ fromJson(inputs.port_context).runId }}
          status: 'SUCCESS'
          logMessage: ✅ ACM certificate with domain name ${{ fromJson(inputs.port_context).entity.title }} renewed successfully
          summary: ACM certificate renewal completed successfully

      - name: Inform Port about ACM certificate renewal failure
        if: failure()
        uses: port-labs/port-github-action@v1
        with:
          clientId: ${{ secrets.PORT_CLIENT_ID }}
          clientSecret: ${{ secrets.PORT_CLIENT_SECRET }}
          baseUrl: https://api.port.io
          operation: PATCH_RUN
          runId: ${{ fromJson(inputs.port_context).runId }}
          status: 'FAILURE'
          logMessage: ❌ Failed to Renew ACM certificate with domain name ${{ fromJson(inputs.port_context).entity.title }}
          summary: ACM certificate renewal failed
Create Port action
-
Go to the Self-service page of your portal.
-
Click on the
+ New Actionbutton. -
Click on the
{...} Edit JSONbutton. -
Copy and paste the following JSON configuration into the editor.
Renew ACM Certificate action (Click to expand)
Replace the variables<GITHUB-ORG>- your GitHub organization or user name.<GITHUB-REPO>- your GitHub repository name.<YOUR_GITHUB_OCEAN_INTEGRATION_ID>- your GitHub Ocean integration installation ID.
{"identifier": "renew_acm_certificate","title": "Renew ACM Certificate","icon": "AWS","description": "Renews an eligible ACM certificate","trigger": {"type": "self-service","operation": "DAY-2","userInputs": {"properties": {},"required": [],"order": []},"condition": {"type": "SEARCH","rules": [{"property": "renewalEligibility","operator": "=","value": "ELIGIBLE"}],"combinator": "and"},"blueprintIdentifier": "acmCertificate"},"invocationMethod": {"type": "INTEGRATION_ACTION","installationId": "<YOUR_GITHUB_OCEAN_INTEGRATION_ID>","integrationActionType": "dispatch_workflow","integrationActionExecutionProperties": {"org": "<GITHUB-ORG>","repo": "<GITHUB-REPO>","workflow": "renew-acm-cert.yaml","workflowInputs": {"port_context": {"runId": "{{ .run.id }}","entity": "{{ .entity }}"}},"reportWorkflowStatus": true}},"requiredApproval": false} -
Click
Save.
Now you should see the Renew ACM Certificate action in the self-service page. 🎉
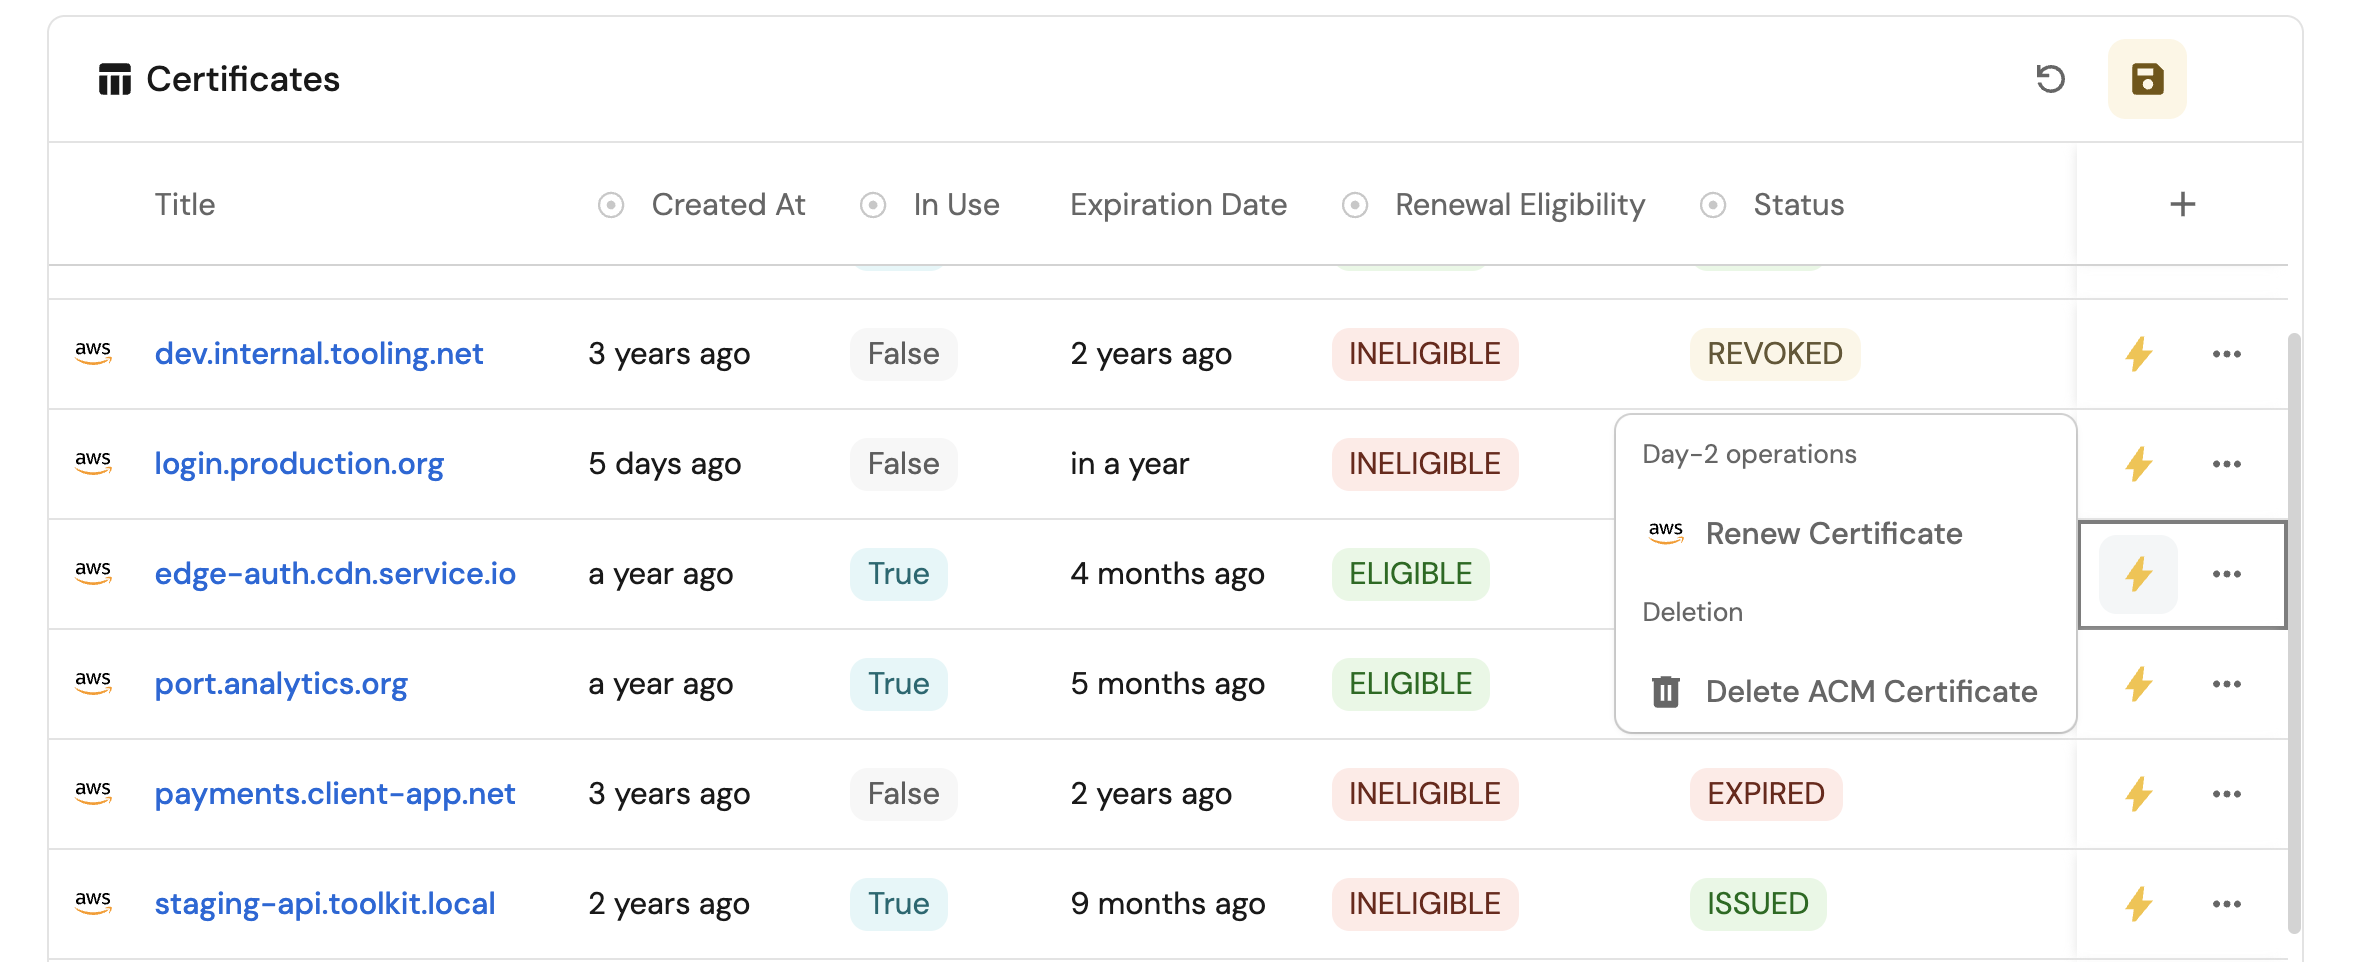
The renew action will only be visible for certificates that have renewalEligibility set to ELIGIBLE. This ensures users can only renew certificates that are actually eligible for renewal.
Delete an ACM certificate
To delete an ACM certificate from Port, first add a GitHub workflow that deletes the certificate in AWS. Then create a Port self-service action that triggers the workflow.
Add GitHub workflow
Create the file .github/workflows/delete-acm-cert.yaml in the .github/workflows folder of your repository.
Delete ACM Certificate GitHub workflow (Click to expand)
name: Delete ACM Certificate

on:
  workflow_dispatch:
    inputs:
      port_context:
        required: true
        description: 'Action and general context (blueprint, entity, run id, etc...)'
        type: string

jobs:
  delete-acm-cert:
    runs-on: ubuntu-latest
    steps:
      - name: Inform Port of workflow start
        uses: port-labs/port-github-action@v1
        with:
          clientId: ${{ secrets.PORT_CLIENT_ID }}
          clientSecret: ${{ secrets.PORT_CLIENT_SECRET }}
          baseUrl: https://api.port.io
          operation: PATCH_RUN
          runId: ${{fromJson(inputs.port_context).runId}}
          logMessage: Configuring AWS credentials to delete ACM certificate with domain ${{ fromJson(inputs.port_context).entity.title }}

      - name: Configure AWS credentials
        uses: aws-actions/configure-aws-credentials@v4
        with:
          aws-access-key-id: ${{ secrets.AWS_ACCESS_KEY_ID }}
          aws-secret-access-key: ${{ secrets.AWS_SECRET_ACCESS_KEY }}
          aws-region: ${{ secrets.AWS_REGION }}

      - name: Delete ACM certificate
        run: aws acm delete-certificate --certificate-arn ${{ fromJson(inputs.port_context).entity.properties.arn }}

      - name: Inform Port about ACM certificate deletion success
        if: success()
        uses: port-labs/port-github-action@v1
        with:
          clientId: ${{ secrets.PORT_CLIENT_ID }}
          clientSecret: ${{ secrets.PORT_CLIENT_SECRET }}
          baseUrl: https://api.port.io
          operation: PATCH_RUN
          runId: ${{ fromJson(inputs.port_context).runId }}
          status: 'SUCCESS'
          logMessage: ✅ ACM certificate with domain name ${{ fromJson(inputs.port_context).entity.title }} deleted successfully
          summary: ACM certificate deletion completed successfully

      - name: Inform Port about ACM certificate deletion failure
        if: failure()
        uses: port-labs/port-github-action@v1
        with:
          clientId: ${{ secrets.PORT_CLIENT_ID }}
          clientSecret: ${{ secrets.PORT_CLIENT_SECRET }}
          baseUrl: https://api.port.io
          operation: PATCH_RUN
          runId: ${{ fromJson(inputs.port_context).runId }}
          status: 'FAILURE'
          logMessage: ❌ Failed to delete ACM certificate with domain name ${{ fromJson(inputs.port_context).entity.title }}
          summary: ACM certificate deletion failed
Create Port action
-
Go to the Self-service page of your portal.
-
Click on the
+ New Actionbutton. -
Click on the
{...} Edit JSONbutton. -
Copy and paste the following JSON configuration into the editor.
Delete ACM Certificate action (Click to expand)
Replace the variables<GITHUB-ORG>- your GitHub organization or user name.<GITHUB-REPO>- your GitHub repository name.<YOUR_GITHUB_OCEAN_INTEGRATION_ID>- your GitHub Ocean integration installation ID.
{"identifier": "delete_acm_certification","title": "Delete ACM Certification","icon": "AWS","description": "Deletes a certificate and its associated private key.","trigger": {"type": "self-service","operation": "DELETE","userInputs": {"properties": {},"required": [],"order": []},"blueprintIdentifier": "acmCertificate"},"invocationMethod": {"type": "INTEGRATION_ACTION","installationId": "<YOUR_GITHUB_OCEAN_INTEGRATION_ID>","integrationActionType": "dispatch_workflow","integrationActionExecutionProperties": {"org": "<GITHUB-ORG>","repo": "<GITHUB-REPO>","workflow": "delete-acm-cert.yaml","workflowInputs": {"port_context": {"runId": "{{ .run.id }}","entity": "{{ .entity }}"}},"reportWorkflowStatus": true}},"requiredApproval": false} -
Click
Save.
Now you should see the Delete ACM Certification action in the self-service page. 🎉
The delete action permanently removes the certificate and its associated private key. This operation cannot be undone, so use it carefully.
Visualize certificate metrics
With your data and actions in place, we can create a dedicated dashboard in Port to visualize all ACM certificates by status, usage, and expiration. In addition, we can trigger actions (request new certificate, renew, delete) directly from the dashboard.
Create a dashboard
-
Go to your software catalog.
-
Click on the
+button in the left sidebar. -
Select New dashboard.
-
Name the dashboard ACM Certificate Management.
-
Input
Monitor and manage your AWS ACM certificatesunder Description. -
Select the
AWSicon. -
Click
Create.
We now have a blank dashboard where we can start adding widgets to visualize insights from our AWS ACM certificates.
Add widgets
In the new dashboard, create the following widgets:
Certificates not in use (Click to expand)
-
Click
+ Widgetand select Number Chart. -
Title:
Certificates not in use(add theAWSicon). -
Select
Count entitiesChart type and choose ACM Certificate as the Blueprint. -
Select
countfor the Function. -
Add this JSON to the Additional filters editor to filter certificates not in use:
[{"combinator":"and","rules":[{"property":"inUse","operator":"=","value": false}]}] -
Select
customas the Unit and inputcertificatesas the Custom unit. -
Click Save.
Certificates by status (Click to expand)
-
Click
+ Widgetand select Pie chart. -
Title:
Certificates by status(add theAWSicon). -
Choose the ACM Certificate blueprint.
-
Under
Breakdown by property, select the Status property. -
Click Save.
Expired certificates table (Click to expand)
-
Click
+ Widgetand select Table. -
Title:
Expired certificates(add theAWSicon). -
Choose the ACM Certificate blueprint.
-
Add this JSON to the Additional filters editor to filter expired certificates:
{"combinator":"and","rules":[{"operator":"=","value":"acmCertificate","property":"$blueprint"},{"operator":"=","value":"EXPIRED","property":"status"}]} -
Click Save to add the widget to the dashboard.
-
Click on the
...button in the top right corner of the table and select Customize table. -
In the top right corner of the table, click on
Manage Propertiesand add the following properties:- Title: The certificate domain name.
- Status: The current status of the certificate.
- Expiration Date: When the certificate expired.
- Account: The name of each related AWS account.
- In Use: Whether the certificate is currently in use.
-
Click on the save icon in the top right corner of the widget to save the customized table.
Request new certificate action (Click to expand)
-
Click
+ Widgetand select Action card. -
Choose the Request ACM Certificate action we created in this guide.
-
Click Save.
AWS Auto Scaling Groups
Use this section to bring your AWS Auto Scaling Group management experience into Port.
In this section, you will:
- Ingest Auto Scaling Group data into Port's software catalog using Port's AWS integration.
- Set up self-service action to manage Auto Scaling Groups (scale up/down by changing desired capacity).
Prerequisites
This section assumes the following:
-
You have a Port account and have completed the onboarding process.
-
Port's AWS integration is installed in your account.
-
Install the GitHub integration relevant to you:
Install GitHub Ocean.
Set up data model
When installing the AWS integration in Port, the AWS Account blueprint is created by default.
However, the Auto Scaling Group blueprint is not created automatically so we will need to create it manually.
Create the Auto Scaling Group blueprint
-
Go to the Builder page of your portal.
-
Click on
+ Blueprint. -
Click on the
{...}button in the top right corner, and chooseEdit JSON. -
Add this JSON schema:
AWS Auto Scaling Group blueprint (Click to expand)
{"identifier": "autoScalingGroup","description": "This blueprint represents an AWS Auto Scaling Group in our software catalog","title": "Auto Scaling Group","icon": "AWS","schema": {"properties": {"link": {"type": "string","format": "url","title": "Link"},"desiredCapacity": {"type": "number","title": "Desired Capacity"},"minSize": {"type": "number","title": "Minimum Size"},"maxSize": {"type": "number","title": "Maximum Size"},"arn": {"type": "string","title": "ARN"},"role": {"type": "string","format": "url","title": "Service Linked Role ARN"},"tags": {"items": {"type": "object"},"type": "array","title": "Tags"},"region": {"type": "string","title": "Region"}},"required": []},"mirrorProperties": {},"calculationProperties": {},"aggregationProperties": {},"relations": {"account": {"title": "Account","target": "awsAccount","required": true,"many": false}}} -
Click
Saveto create the blueprint.
Update the integration mapping
-
Go to the Data Sources page of your portal.
-
Select the AWS integration.
-
Add the following YAML block into the editor to ingest Auto Scaling Groups from your AWS account:
AWS integration configuration (Click to expand)
deleteDependentEntities: truecreateMissingRelatedEntities: trueenableMergeEntity: trueresources:- kind: AWS::Organizations::Accountselector:query: 'true'port:entity:mappings:identifier: .Idtitle: .Nameblueprint: '"awsAccount"'properties:arn: .Arnemail: .Emailstatus: .Statusjoined_method: .JoinedMethodjoined_timestamp: .JoinedTimestamp | sub(" "; "T")- kind: AWS::AutoScaling::AutoScalingGroupselector:query: 'true'useGetResourceAPI: 'true'port:entity:mappings:identifier: .Identifiertitle: .Properties.AutoScalingGroupNameblueprint: '"autoScalingGroup"'properties:link: ("https://console.aws.amazon.com/ec2/home?region=" + .__Region + "#AutoScalingGroupDetails:id=" + .Properties.AutoScalingGroupName + ";view=details" | tostring)desiredCapacity: .Properties.DesiredCapacityminSize: .Properties.MinSizemaxSize: .Properties.MaxSizearn: .Properties.AutoScalingGroupARNrole: ("https://console.aws.amazon.com/go/view?arn=" + .Properties.ServiceLinkedRoleARN | tostring)tags: .Properties.Tagsregion: .__Regionrelations:account: .__AccountId -
Click
Save & Resyncto apply the mapping.
Set up self-service action
Now let us create a self-service action to manage your Auto Scaling Groups directly from Port using GitHub Actions. You will implement a workflow that provides predefined scaling operations based on the Auto Scaling Group's current configuration.
To implement this use-case, follow the steps below:
Add GitHub secrets
In your GitHub repository, go to Settings > Secrets and add the following secrets:
PORT_CLIENT_ID- Port Client ID learn more.PORT_CLIENT_SECRET- Port Client Secret learn more.AWS_ACCESS_KEY_ID- AWS IAM user's access key.AWS_SECRET_ACCESS_KEY- AWS IAM user's secret access key.AWS_REGION- AWS region (e.g.,us-east-1).
The AWS IAM user must have the following permissions to manage Auto Scaling Groups:
autoscaling:UpdateAutoScalingGroupautoscaling:DescribeScalingPlans
Scale an Auto Scaling Group
To scale an Auto Scaling Group from Port, first add a GitHub workflow that updates the desired capacity in AWS. Then create a Port self-service action that triggers the workflow.
Add GitHub workflow
Create the file .github/workflows/scale-autoscaling-group.yaml in the .github/workflows folder of your repository.
Scale Auto Scaling Group GitHub workflow (Click to expand)
name: Scale Auto Scaling Group

on:
  workflow_dispatch:
    inputs:
      operation:
        required: true
        description: 'The scaling operation to perform'
        type: string
      port_context:
        required: true
        description: 'Action and general context (blueprint, entity, run id, etc...)'
        type: string

jobs:
  scale-autoscaling-group:
    runs-on: ubuntu-latest
    steps:
      - name: Inform Port of workflow start
        uses: port-labs/port-github-action@v1
        with:
          clientId: ${{ secrets.PORT_CLIENT_ID }}
          clientSecret: ${{ secrets.PORT_CLIENT_SECRET }}
          baseUrl: https://api.port.io
          operation: PATCH_RUN
          runId: ${{fromJson(inputs.port_context).runId}}
          logMessage: Configuring AWS credentials to perform ${{ inputs.operation }} operation on Auto Scaling Group ${{ fromJson(inputs.port_context).entity.title }}

      - name: Configure AWS credentials
        uses: aws-actions/configure-aws-credentials@v4
        with:
          aws-access-key-id: ${{ secrets.AWS_ACCESS_KEY_ID }}
          aws-secret-access-key: ${{ secrets.AWS_SECRET_ACCESS_KEY }}
          aws-region: ${{ secrets.AWS_REGION }}

      - name: Calculate new desired capacity
        run: |
          CURRENT_DESIRED=${{ fromJson(inputs.port_context).entity.properties.desiredCapacity }}
          MIN_SIZE=${{ fromJson(inputs.port_context).entity.properties.minSize }}
          MAX_SIZE=${{ fromJson(inputs.port_context).entity.properties.maxSize }}
          OPERATION="${{ inputs.operation }}"

          case $OPERATION in
            "scale up")
              NEW_DESIRED=$((CURRENT_DESIRED + 1))
              echo "📈 Scaling up from $CURRENT_DESIRED to $NEW_DESIRED"
              ;;
            "scale down")
              NEW_DESIRED=$((CURRENT_DESIRED - 1))
              echo "📉 Scaling down from $CURRENT_DESIRED to $NEW_DESIRED"
              ;;
            "scale to max")
              NEW_DESIRED=$MAX_SIZE
              echo "🚀 Scaling to maximum capacity: $NEW_DESIRED"
              ;;
            "scale to min")
              NEW_DESIRED=$MIN_SIZE
              echo "📉 Scaling to minimum capacity: $NEW_DESIRED"
              ;;
            *)
              echo "❌ Unknown operation: $OPERATION"
              exit 1
              ;;
          esac

          # Validate the new desired capacity
          if [ "$NEW_DESIRED" -lt "$MIN_SIZE" ]; then
            echo "❌ Cannot scale down below minimum size $MIN_SIZE"
            exit 1
          fi

          echo "NEW_DESIRED=$NEW_DESIRED" >> $GITHUB_ENV
          echo "MAX_SIZE=$MAX_SIZE" >> $GITHUB_ENV
          echo "✅ New desired capacity calculated: $NEW_DESIRED"

      - name: Scale Auto Scaling Group
        run: |

          # Convert to integers for comparison
          NEW_DESIRED_INT=$(echo "$NEW_DESIRED" | bc)
          MAX_SIZE_INT=$(echo "$MAX_SIZE" | bc)

          # If desired capacity exceeds max size, update both desired and max
          if [ "$NEW_DESIRED_INT" -gt "$MAX_SIZE_INT" ]; then
            echo "📈 Desired capacity $NEW_DESIRED_INT exceeds max size $MAX_SIZE_INT. Updating both values..."
            aws autoscaling update-auto-scaling-group \
              --auto-scaling-group-name ${{ fromJson(inputs.port_context).entity.title }} \
              --desired-capacity $NEW_DESIRED \
              --max-size $NEW_DESIRED
          else
            echo "📊 Updating desired capacity to $NEW_DESIRED..."
            aws autoscaling update-auto-scaling-group \
              --auto-scaling-group-name ${{ fromJson(inputs.port_context).entity.title }} \
              --desired-capacity $NEW_DESIRED
          fi

      - name: Inform Port about Auto Scaling Group scaling success
        if: success()
        uses: port-labs/port-github-action@v1
        with:
          clientId: ${{ secrets.PORT_CLIENT_ID }}
          clientSecret: ${{ secrets.PORT_CLIENT_SECRET }}
          baseUrl: https://api.port.io
          operation: PATCH_RUN
          runId: ${{ fromJson(inputs.port_context).runId }}
          status: 'SUCCESS'
          logMessage: ✅ Auto Scaling Group ${{ fromJson(inputs.port_context).entity.title }} ${{ inputs.operation }} operation completed successfully
          summary: Auto Scaling Group scaling completed successfully

      - name: Inform Port about Auto Scaling Group scaling failure
        if: failure()
        uses: port-labs/port-github-action@v1
        with:
          clientId: ${{ secrets.PORT_CLIENT_ID }}
          clientSecret: ${{ secrets.PORT_CLIENT_SECRET }}
          baseUrl: https://api.port.io
          operation: PATCH_RUN
          runId: ${{ fromJson(inputs.port_context).runId }}
          status: 'FAILURE'
          logMessage: ❌ Failed to perform ${{ inputs.operation }} operation on Auto Scaling Group ${{ fromJson(inputs.port_context).entity.title }}
          summary: Auto Scaling Group scaling failed
Create Port action
-
Go to the Self-service page of your portal.
-
Click on the
+ New Actionbutton. -
Click on the
{...} Edit JSONbutton. -
Copy and paste the following JSON configuration into the editor.
Scale Auto Scaling Group action (Click to expand)
Replace the variables<GITHUB-ORG>- your GitHub organization or user name.<GITHUB-REPO>- your GitHub repository name.<YOUR_GITHUB_OCEAN_INTEGRATION_ID>- your GitHub Ocean integration installation ID.
{"identifier": "scale_auto_scaling_group","title": "Scale Auto Scaling Group","icon": "AWS","description": "Set the size of the specified Auto Scaling group","trigger": {"type": "self-service","operation": "DAY-2","userInputs": {"properties": {"operation": {"type": "string","title": "Operation","enum": ["scale up","scale down","scale to max","scale to min"],"enumColors": {"scale up": "lightGray","scale down": "lightGray","scale to max": "lightGray","scale to min": "lightGray"}}},"required": [],"order": ["operation"]},"blueprintIdentifier": "autoScalingGroup"},"invocationMethod": {"type": "INTEGRATION_ACTION","installationId": "<YOUR_GITHUB_OCEAN_INTEGRATION_ID>","integrationActionType": "dispatch_workflow","integrationActionExecutionProperties": {"org": "<GITHUB-ORG>","repo": "<GITHUB-REPO>","workflow": "scale-autoscaling-group.yaml","workflowInputs": {"{{ spreadValue() }}": "{{ .inputs }}","port_context": {"runId": "{{ .run.id }}","entity": "{{ .entity }}"}},"reportWorkflowStatus": true}},"requiredApproval": false} -
Click
Save.
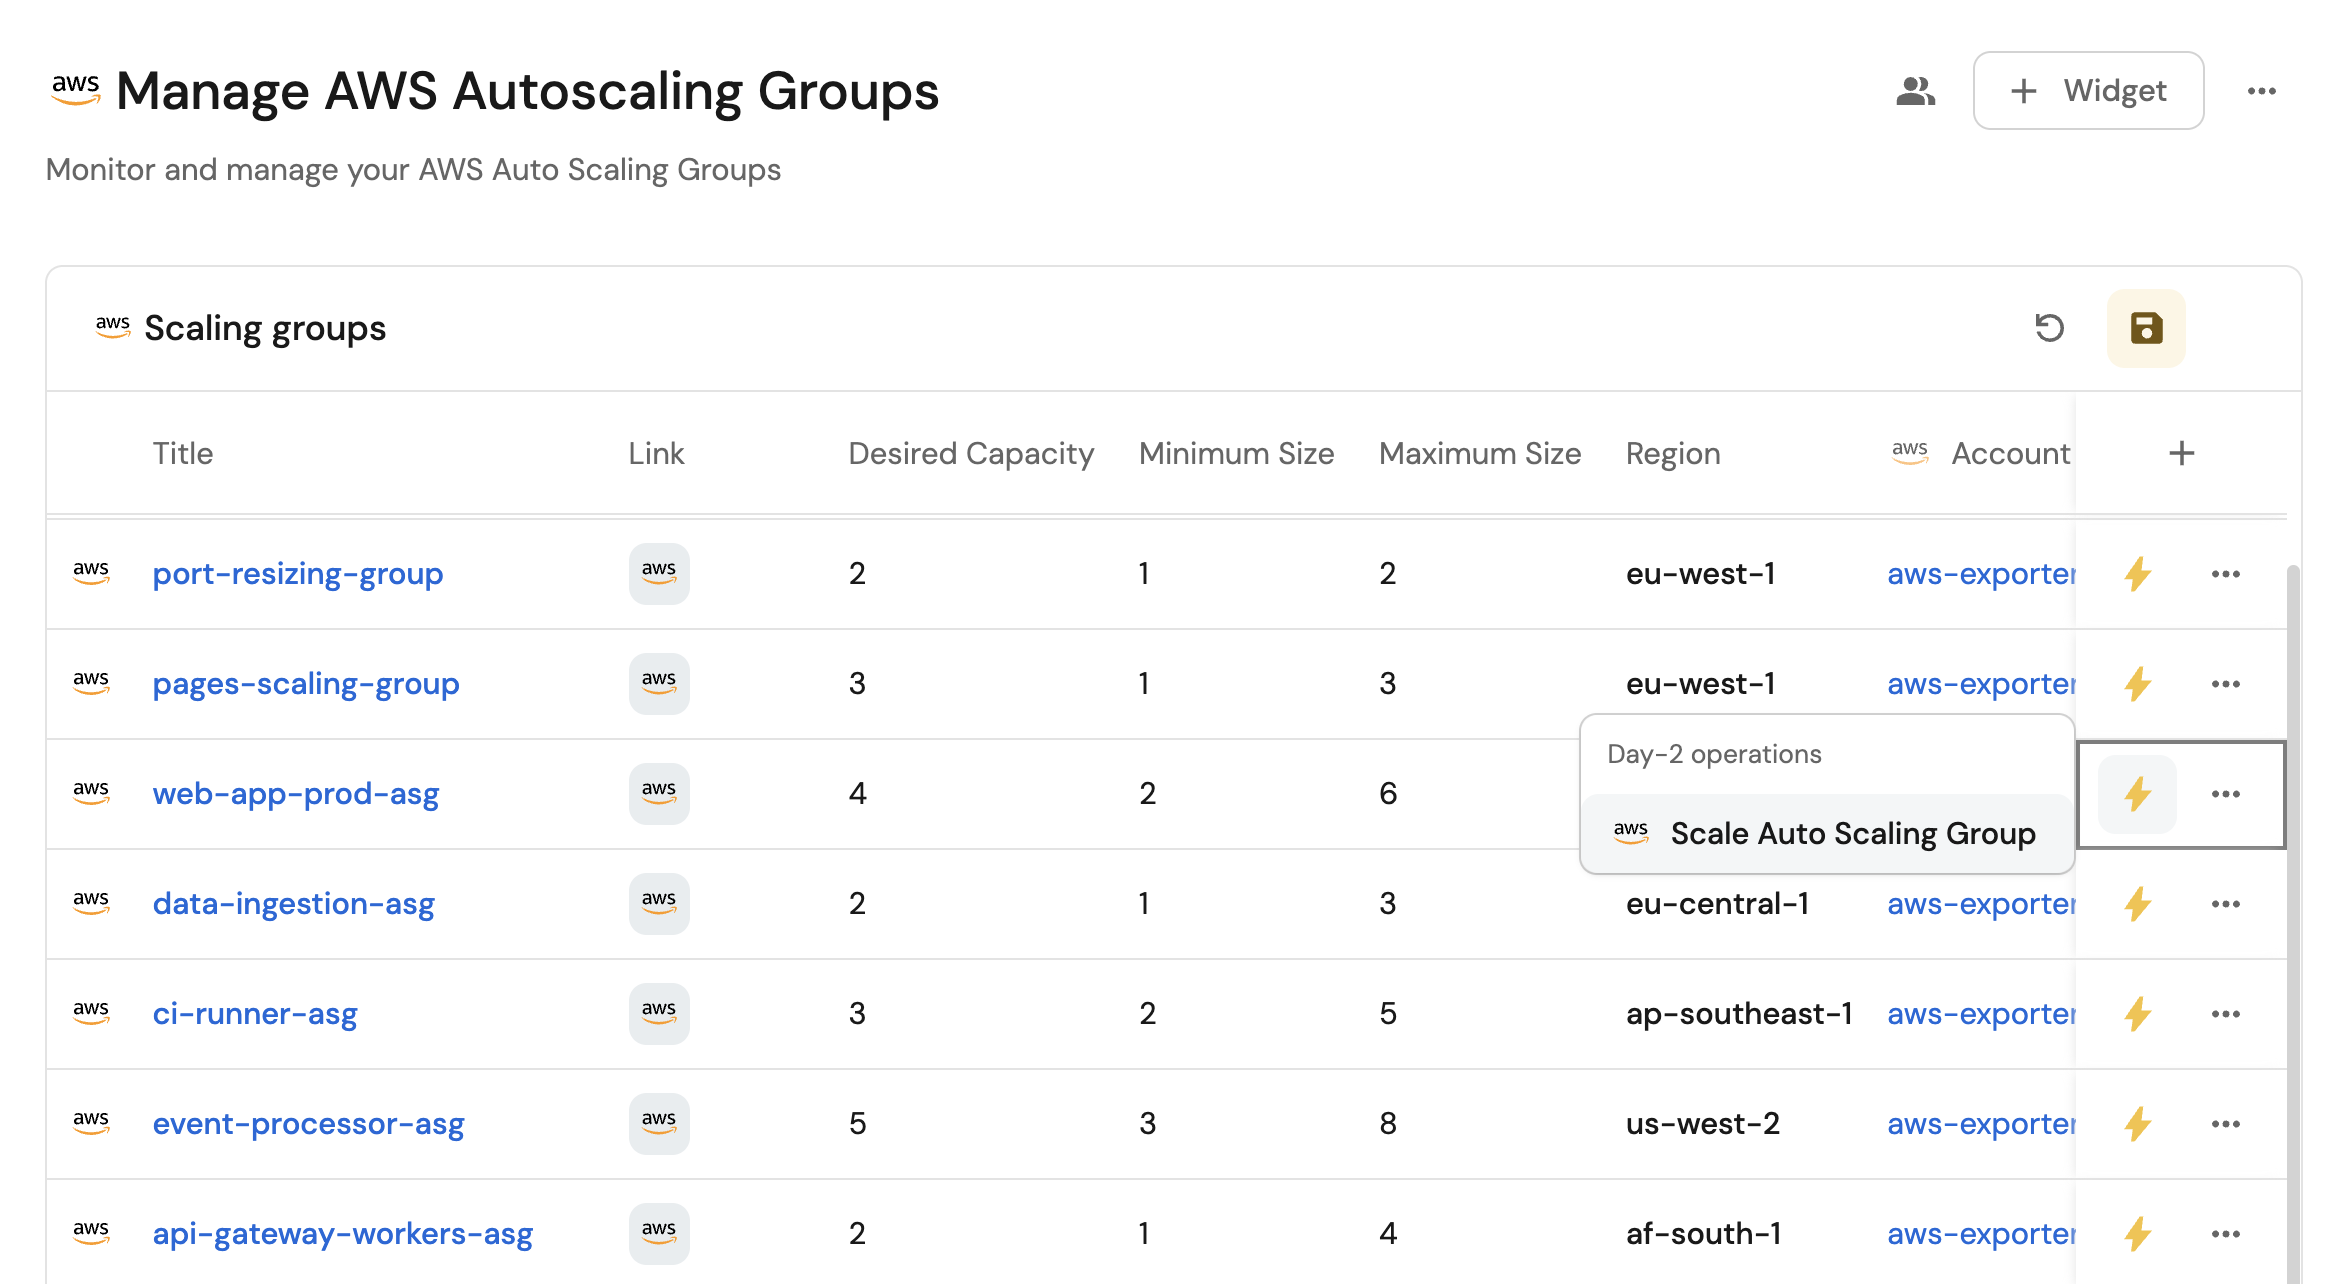
Now you should see the Scale Auto Scaling Groups action in the self-service page. 🎉
The action provides four simple scaling operations that automatically calculate the appropriate desired capacity based on the Auto Scaling Group's current configuration and limits.
More relevant guides
AWS SQS queues
Use this section to bring your AWS SQS management experience into Port.
In this section, you will:
- Ingest SQS queue data into Port's software catalog using Port's AWS integration.
- Set up self-service actions to manage SQS queues (purge, redrive, and delete).
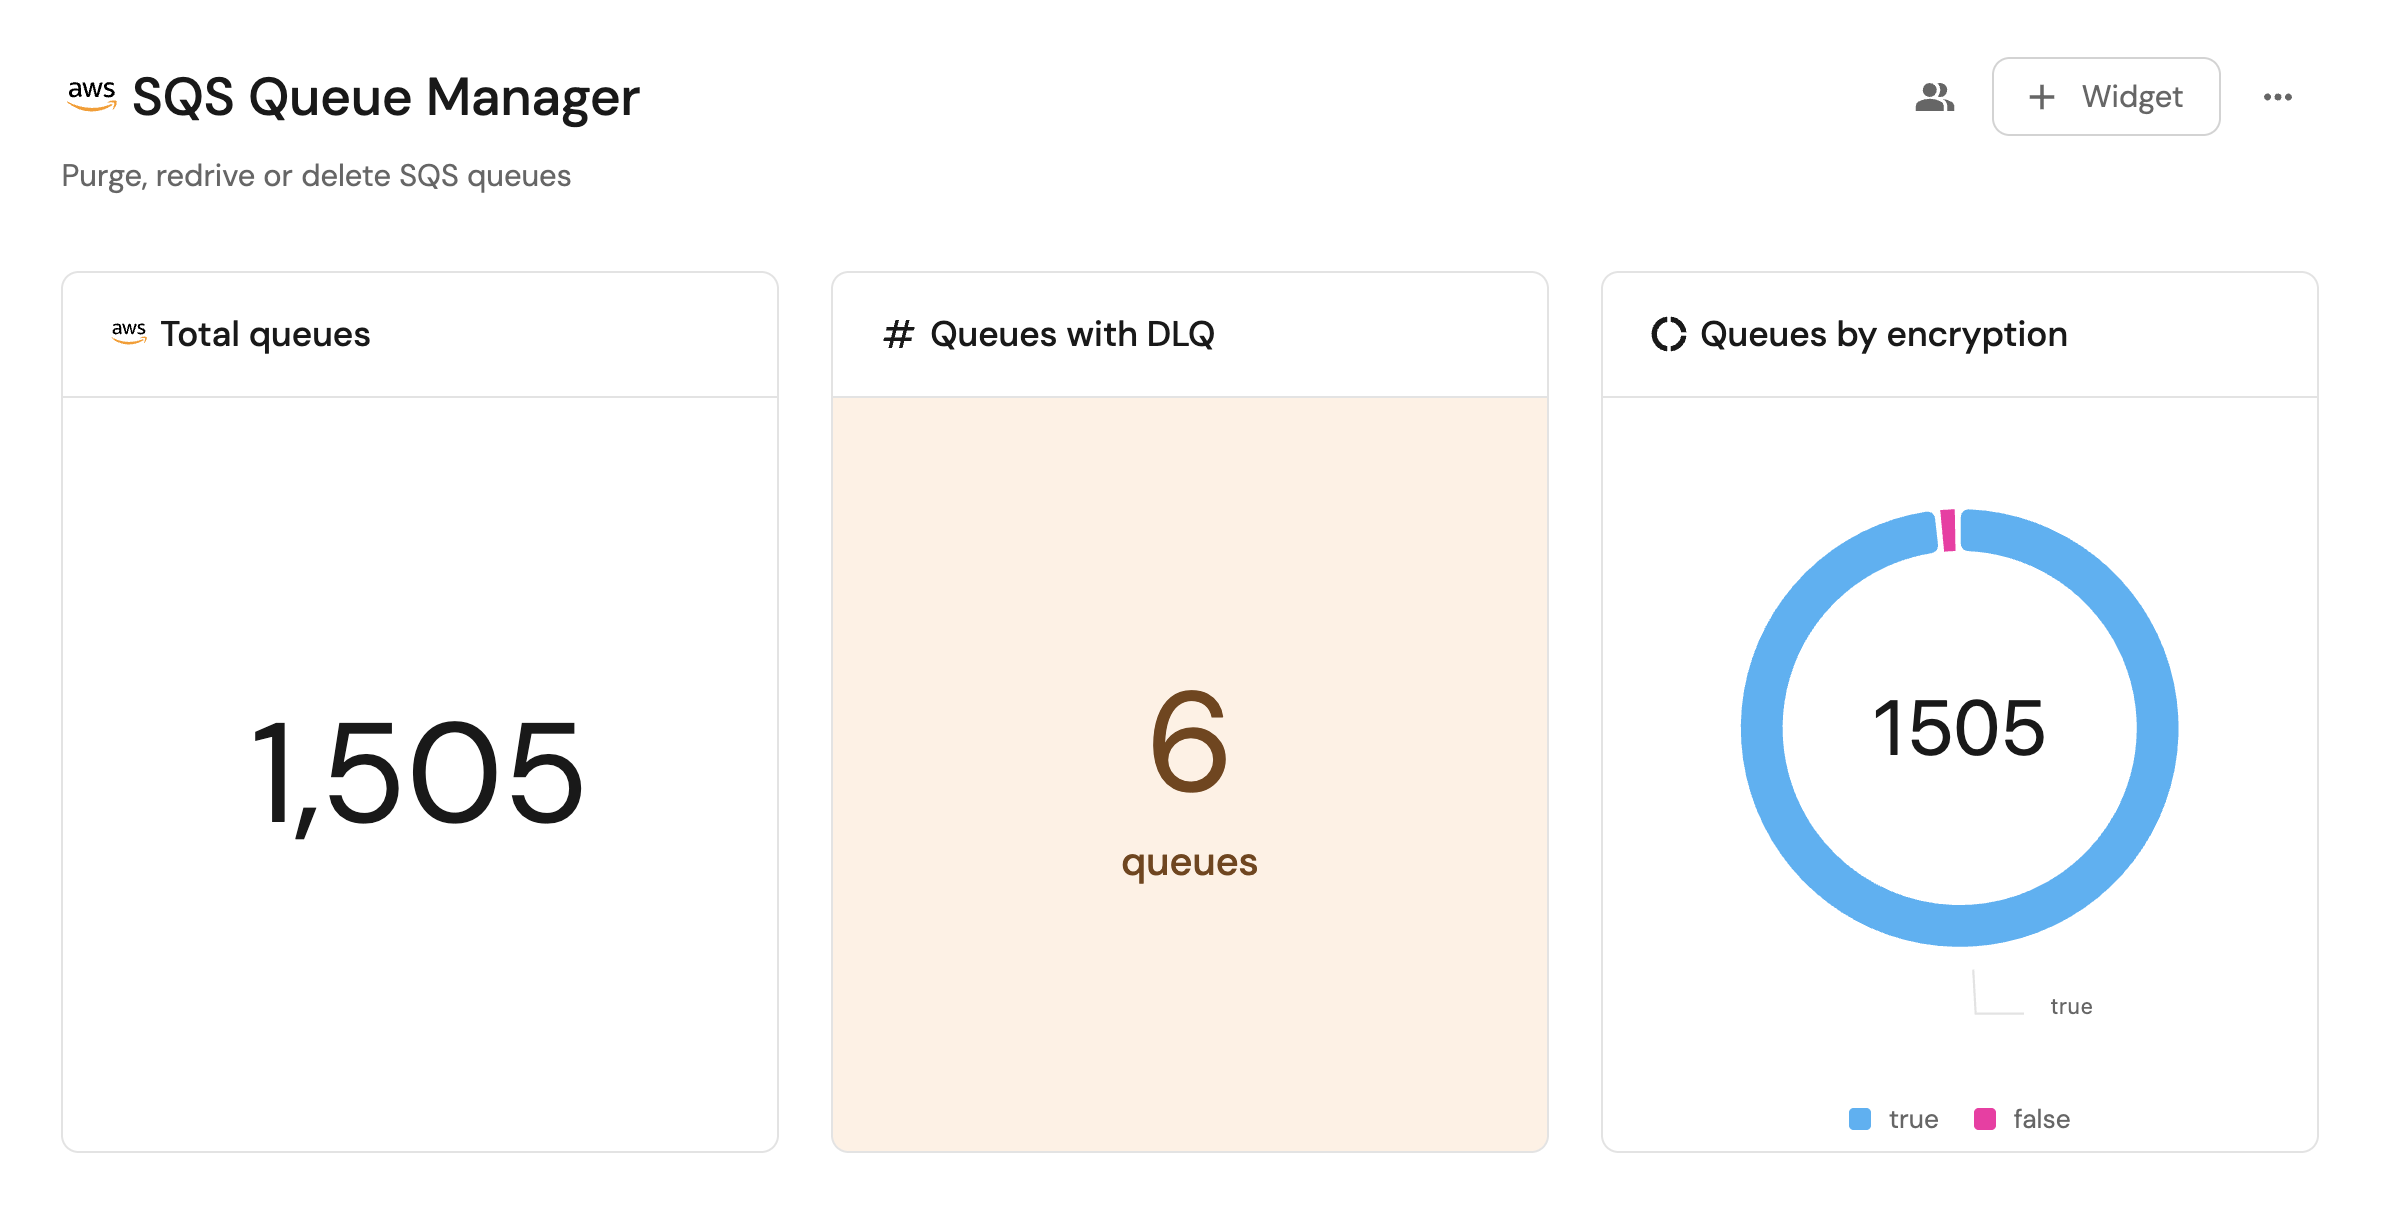
- Build dashboards in Port to monitor and take action on your SQS resources.
Prerequisites
This section assumes the following:
-
You have a Port account and have completed the onboarding process.
-
Port's AWS integration is installed in your account.
-
Install the GitHub integration relevant to you:
Install GitHub Ocean.
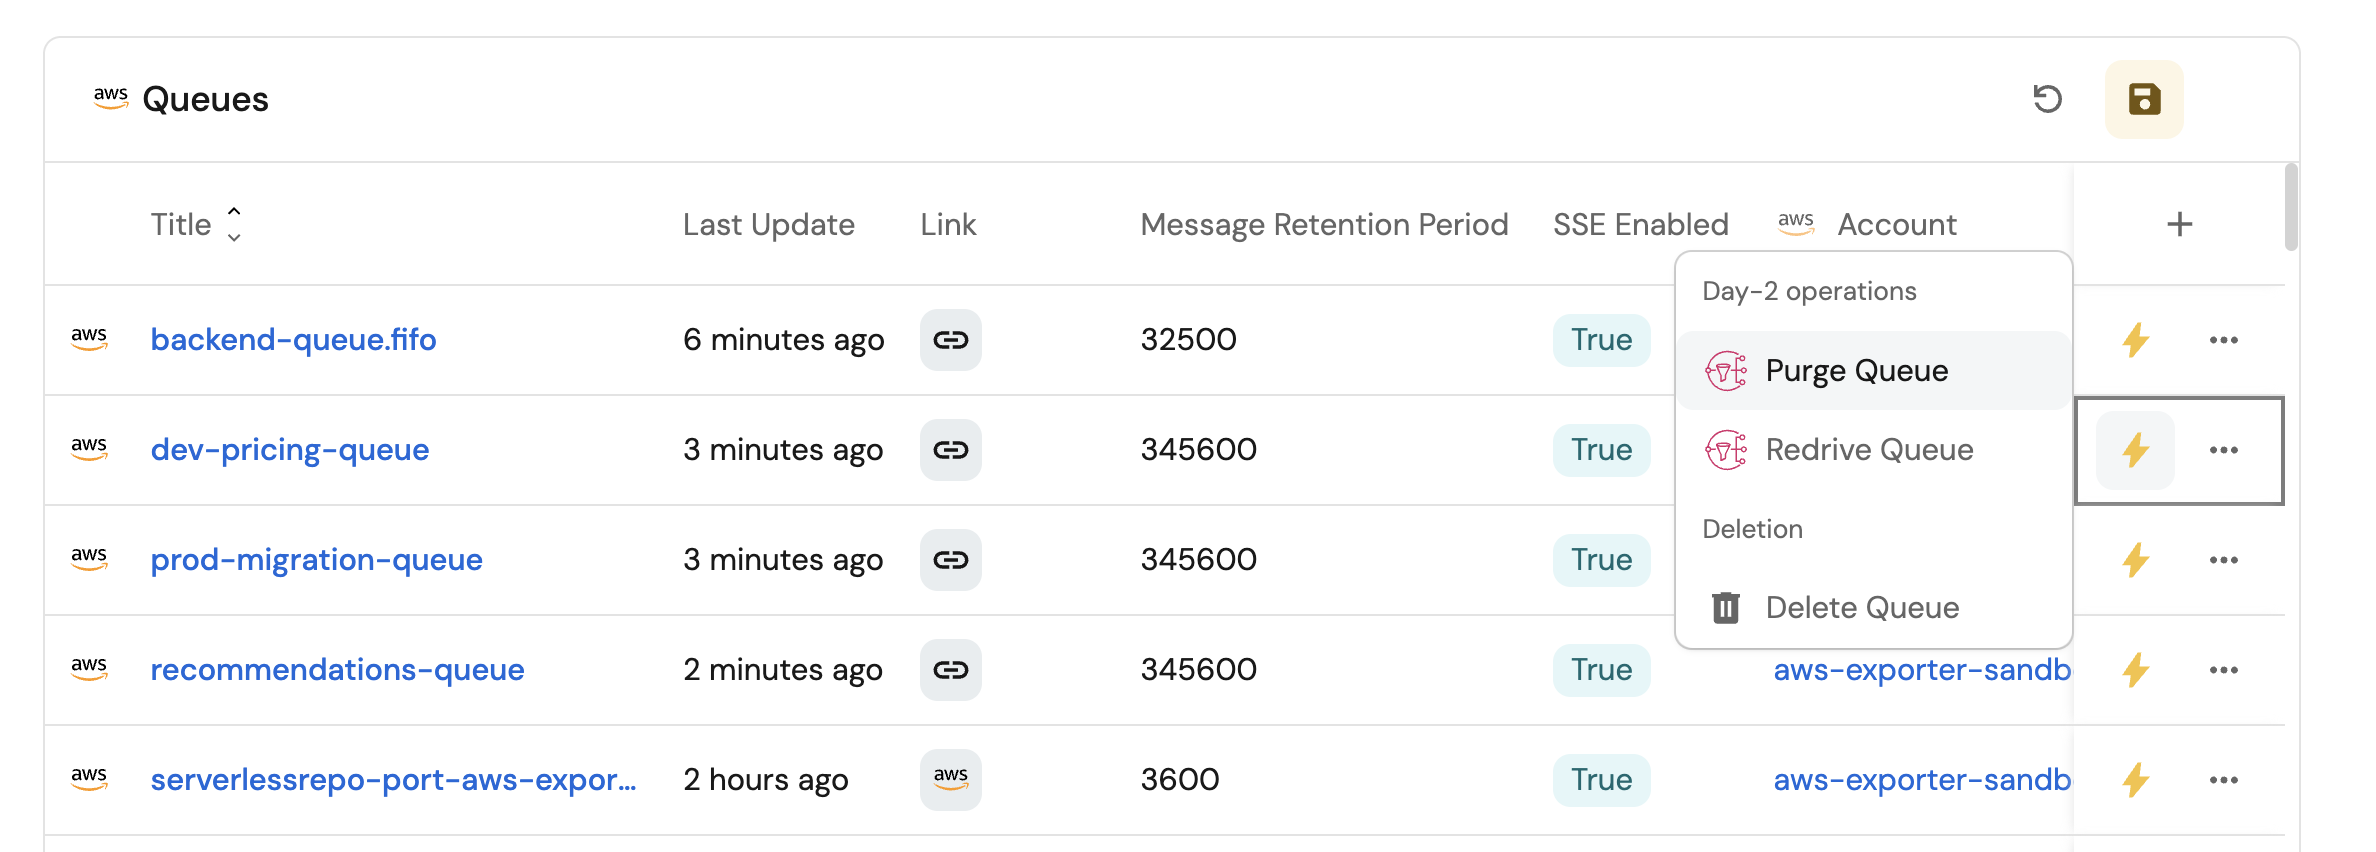
Set up data model
When installing the AWS integration in Port, the AWS Account blueprint is created by default.
However, the SQS Queue blueprint is not created automatically so we will need to create it manually.
Create the SQS queue blueprint
-
Go to the Builder page of your portal.
-
Click on
+ Blueprint. -
Click on the
{...}button in the top right corner, and chooseEdit JSON. -
Add this JSON schema:
AWS SQS Queue blueprint (Click to expand)
{"identifier": "sqs","description": "This blueprint represents an AWS SQS service in our software catalog","title": "SQS Queue","icon": "AWS","schema": {"properties": {"link": {"type": "string","format": "url","title": "Link"},"visibilityTimeout": {"type": "number","title": "Visibility Timeout"},"messageRetentionPeriod": {"type": "number","title": "Message Retention Period"},"maximumMessageSize": {"type": "number","title": "Maximum Message Size"},"receiveMessageWaitTimeSeconds": {"type": "number","title": "Receive Message Wait Time"},"delaySeconds": {"type": "number","title": "Delay Seconds"},"tags": {"type": "array","title": "Tags"},"arn": {"type": "string","title": "ARN"},"sseEnabled": {"type": "boolean","title": "SSE Enabled"},"dlqRedrivePolicy": {"icon": "DefaultProperty","type": "object","title": "Dead Letter Queue Policy"}},"required": []},"mirrorProperties": {},"calculationProperties": {},"aggregationProperties": {},"relations": {"account": {"title": "Account","target": "awsAccount","required": true,"many": false}}} -
Click
Saveto create the blueprint.
Update the integration mapping
-
Go to the Data Sources page of your portal.
-
Select the AWS integration.
-
Add the following YAML block into the editor to ingest SQS queues from your AWS account:
AWS integration configuration (Click to expand)
deleteDependentEntities: truecreateMissingRelatedEntities: trueenableMergeEntity: trueresources:- kind: AWS::Organizations::Accountselector:query: 'true'port:entity:mappings:identifier: .Idtitle: .Nameblueprint: '"awsAccount"'properties:arn: .Arnemail: .Emailstatus: .Statusjoined_method: .JoinedMethodjoined_timestamp: .JoinedTimestamp | sub(" "; "T")- kind: AWS::SQS::Queueselector:query: 'true'port:entity:mappings:identifier: .__Region + "-" + .__AccountId + "-" + .Properties.QueueNametitle: .Properties.QueueNameblueprint: '"sqs"'properties:link: .Properties.QueueUrlvisibilityTimeout: .Properties.VisibilityTimeoutmessageRetentionPeriod: .Properties.MessageRetentionPeriodmaximumMessageSize: .Properties.MaximumMessageSizereceiveMessageWaitTimeSeconds: .Properties.ReceiveMessageWaitTimeSecondsdelaySeconds: .Properties.DelaySecondstags: .Properties.Tagsarn: .Properties.ArnsseEnabled: .Properties.SqsManagedSseEnableddlqRedrivePolicy: .Properties.RedrivePolicyrelations:account: .__AccountId -
Click
Save & Resyncto apply the mapping.
Set up self-service actions
Now let us create self-service actions to manage your SQS queues directly from Port using GitHub Actions. You will implement workflows to:
-
Purge an SQS queue.
-
Redrive messages from a Dead Letter Queue (DLQ).
-
Delete an SQS queue.
To implement these use-cases, follow the steps below:
Add GitHub secrets
In your GitHub repository, go to Settings > Secrets and add the following secrets:
PORT_CLIENT_ID- Port Client ID learn more.PORT_CLIENT_SECRET- Port Client Secret learn more.AWS_ACCESS_KEY_ID- AWS IAM user's access key.AWS_SECRET_ACCESS_KEY- AWS IAM user's secret access key.AWS_REGION- AWS region (e.g.,us-east-1).
Purge an SQS queue
To purge an SQS queue from Port, first add a GitHub workflow that purges the queue in AWS. Then create a Port self-service action that triggers the workflow.
Add GitHub workflow
Create the file .github/workflows/purge-queue.yaml in the .github/workflows folder of your repository.
Purge SQS Queue GitHub workflow (Click to expand)
name: Purge SQS Queue

on:
  workflow_dispatch:
    inputs:
      port_context:
        required: true
        description: 'Action and general context (blueprint, entity, run id, etc...)'
        type: string

jobs:
  purge-queue:
    runs-on: ubuntu-latest
    steps:
      - name: Inform Port of workflow start
        uses: port-labs/port-github-action@v1
        with:
          clientId: ${{ secrets.PORT_CLIENT_ID }}
          clientSecret: ${{ secrets.PORT_CLIENT_SECRET }}
          baseUrl: https://api.port.io
          operation: PATCH_RUN
          runId: ${{fromJson(inputs.port_context).runId}}
          logMessage: Configuring AWS credentials to purge SQS queue with URL ${{ fromJson(inputs.port_context).entity.properties.link }}

      - name: Configure AWS credentials
        uses: aws-actions/configure-aws-credentials@v4
        with:
          aws-access-key-id: ${{ secrets.AWS_ACCESS_KEY_ID }}
          aws-secret-access-key: ${{ secrets.AWS_SECRET_ACCESS_KEY }}
          aws-region: ${{ secrets.AWS_REGION }}

      - name: Purge SQS queue
        run: aws sqs purge-queue --queue-url ${{ fromJson(inputs.port_context).entity.properties.link }}

      - name: Inform Port about SQS queue purge success
        if: success()
        uses: port-labs/port-github-action@v1
        with:
          clientId: ${{ secrets.PORT_CLIENT_ID }}
          clientSecret: ${{ secrets.PORT_CLIENT_SECRET }}
          baseUrl: https://api.port.io
          operation: PATCH_RUN
          runId: ${{ fromJson(inputs.port_context).runId }}
          status: 'SUCCESS'
          logMessage: ✅ SQS queue with URL ${{ fromJson(inputs.port_context).entity.properties.link }} purged successfully
          summary: SQS queue purge completed successfully

      - name: Inform Port about SQS queue purge failure
        if: failure()
        uses: port-labs/port-github-action@v1
        with:
          clientId: ${{ secrets.PORT_CLIENT_ID }}
          clientSecret: ${{ secrets.PORT_CLIENT_SECRET }}
          baseUrl: https://api.port.io
          operation: PATCH_RUN
          runId: ${{ fromJson(inputs.port_context).runId }}
          status: 'FAILURE'
          logMessage: ❌ Failed to purge SQS queue with URL ${{ fromJson(inputs.port_context).entity.properties.link }}
          summary: SQS queue purge failed
Create Port action
-
Go to the Self-service page of your portal.
-
Click on the
+ New Actionbutton. -
Click on the
{...} Edit JSONbutton. -
Copy and paste the following JSON configuration into the editor.
Purge SQS queue action (Click to expand)
Replace the variables<GITHUB-ORG>- your GitHub organization or user name.<GITHUB-REPO>- your GitHub repository name.<YOUR_GITHUB_OCEAN_INTEGRATION_ID>- your GitHub Ocean integration installation ID.
{"identifier": "purge_sqs_queue","title": "Purge Queue","icon": "SNS","description": "Delete available messages in an SQS queue","trigger": {"type": "self-service","operation": "DAY-2","userInputs": {"properties": {},"required": []},"blueprintIdentifier": "sqs"},"invocationMethod": {"type": "INTEGRATION_ACTION","installationId": "<YOUR_GITHUB_OCEAN_INTEGRATION_ID>","integrationActionType": "dispatch_workflow","integrationActionExecutionProperties": {"org": "<GITHUB-ORG>","repo": "<GITHUB-REPO>","workflow": "purge-queue.yaml","workflowInputs": {"port_context": {"entity": "{{ .entity }}","runId": "{{ .run.id }}"}},"reportWorkflowStatus": true}},"requiredApproval": false} -
Click
Save.
Now you should see the Purge SQS Queue action in the self-service page. 🎉
Redrive messages from a DLQ
To redrive messages from a dead-letter queue from Port, first add a GitHub workflow that starts the redrive operation in AWS. Then create a Port self-service action that triggers the workflow.
Add GitHub workflow
Create the file .github/workflows/redrive-queue.yaml in the .github/workflows folder of your repository.
Redrive DLQ GitHub workflow (Click to expand)
name: Redrive DLQ Messages

on:
  workflow_dispatch:
    inputs:
      port_context:
        required: true
        description: 'Action and general context (blueprint, entity, run id, etc...)'
        type: string
      source_queue:
        description: 'The source queue'
        required: true
        type: string
      destination_queue:
        description: 'The destination queque'
        required: true
        type: string
      max_messages_per_second:
        description: 'Max number of messages per second'
        required: true
        type: string

jobs:
  redrive-queue:
    runs-on: ubuntu-latest
    steps:
      - name: Inform Port of workflow start
        uses: port-labs/port-github-action@v1
        with:
          clientId: ${{ secrets.PORT_CLIENT_ID }}
          clientSecret: ${{ secrets.PORT_CLIENT_SECRET }}
          baseUrl: https://api.port.io
          operation: PATCH_RUN
          runId: ${{fromJson(inputs.port_context).runId}}
          logMessage: Configuring AWS credentials to redrive SQS queue from ${{ inputs.source_queue }} to ${{ inputs.destination_queue }}

      - name: Configure AWS credentials
        uses: aws-actions/configure-aws-credentials@v4
        with:
          aws-access-key-id: ${{ secrets.AWS_ACCESS_KEY_ID }}
          aws-secret-access-key: ${{ secrets.AWS_SECRET_ACCESS_KEY }}
          aws-region: ${{ secrets.AWS_REGION }}

      - name: Redrive DLQ messages
        run: aws sqs start-message-move-task --source-arn ${{ inputs.source_queue }} --destination-arn ${{ inputs.destination_queue }} --max-number-of-messages-per-second ${{ inputs.max_messages_per_second }}

      - name: Inform Port about SQS redrive success
        if: success()
        uses: port-labs/port-github-action@v1
        with:
          clientId: ${{ secrets.PORT_CLIENT_ID }}
          clientSecret: ${{ secrets.PORT_CLIENT_SECRET }}
          baseUrl: https://api.port.io
          operation: PATCH_RUN
          runId: ${{ fromJson(inputs.port_context).runId }}
          status: 'SUCCESS'
          logMessage: ✅ SQS queue with ARN ${{ inputs.source_queue }} redrived successfully
          summary: SQS queue redrive completed successfully

      - name: Inform Port about SQS queue redrive failure
        if: failure()
        uses: port-labs/port-github-action@v1
        with:
          clientId: ${{ secrets.PORT_CLIENT_ID }}
          clientSecret: ${{ secrets.PORT_CLIENT_SECRET }}
          baseUrl: https://api.port.io
          operation: PATCH_RUN
          runId: ${{ fromJson(inputs.port_context).runId }}
          status: 'FAILURE'
          logMessage: ❌ Failed to redrive SQS queue with ARN ${{ inputs.source_queue }}
          summary: SQS queue redrive failed
Create Port action
-
Go to the Self-service page of your portal.
-
Click on the
+ New Actionbutton. -
Click on the
{...} Edit JSONbutton. -
Copy and paste the following JSON configuration into the editor.
Redrive DLQ messages action (Click to expand)
Replace the variables<GITHUB-ORG>- your GitHub organization or user name.<GITHUB-REPO>- your GitHub repository name.<YOUR_GITHUB_OCEAN_INTEGRATION_ID>- your GitHub Ocean integration installation ID.
{"identifier": "redrive_queue","title": "Redrive Queue","icon": "SNS","description": "Start an asynchronous task to move messages from a source queue to a destination queue","trigger": {"type": "self-service","operation": "DAY-2","userInputs": {"properties": {"destination_queue": {"type": "string","title": "Destination Queue","blueprint": "sqs","format": "entity"},"max_messages_per_second": {"type": "number","title": "Max Messages Per Second","default": 100,"maximum": 500}},"required": [],"order": ["destination_queue","max_messages_per_second"]},"blueprintIdentifier": "sqs"},"invocationMethod": {"type": "INTEGRATION_ACTION","installationId": "<YOUR_GITHUB_OCEAN_INTEGRATION_ID>","integrationActionType": "dispatch_workflow","integrationActionExecutionProperties": {"org": "<GITHUB-ORG>","repo": "<GITHUB-REPO>","workflow": "redrive-queue.yaml","workflowInputs": {"port_context": {"runId": "{{ .run.id }}"},"source_queue": "{{ .entity.properties.arn }}","destination_queue": "{{ .inputs.destination_queue.properties.arn }}","max_messages_per_second": "{{ .inputs.max_messages_per_second }}"},"reportWorkflowStatus": true}},"requiredApproval": false} -
Click
Save.
Now you should see the Redrive DLQ Messages action in the self-service page. 🎉
Delete an SQS queue
To delete an SQS queue from Port, first add a GitHub workflow that deletes the queue in AWS. Then create a Port self-service action that triggers the workflow.
Add GitHub workflow
Create the file .github/workflows/delete-queue.yaml in the .github/workflows folder of your repository.
Delete SQS Queue GitHub workflow (Click to expand)
name: Delete SQS Queue

on:
  workflow_dispatch:
    inputs:
      port_context:
        required: true
        description: 'Action and general context (blueprint, entity, run id, etc...)'
        type: string

jobs:
  delete-queue:
    runs-on: ubuntu-latest
    steps:
      - name: Inform Port of workflow start
        uses: port-labs/port-github-action@v1
        with:
          clientId: ${{ secrets.PORT_CLIENT_ID }}
          clientSecret: ${{ secrets.PORT_CLIENT_SECRET }}
          baseUrl: https://api.port.io
          operation: PATCH_RUN
          runId: ${{fromJson(inputs.port_context).runId}}
          logMessage: Configuring AWS credentials to delete SQS queue with Name ${{ fromJson(inputs.port_context).entity.title }}

      - name: Configure AWS credentials
        uses: aws-actions/configure-aws-credentials@v4
        with:
          aws-access-key-id: ${{ secrets.AWS_ACCESS_KEY_ID }}
          aws-secret-access-key: ${{ secrets.AWS_SECRET_ACCESS_KEY }}
          aws-region: ${{ secrets.AWS_REGION }}

      - name: delete SQS queue
        run: aws sqs delete-queue --queue-url ${{ fromJson(inputs.port_context).entity.properties.link }}

      - name: Inform Port about SQS queue delete success
        if: success()
        uses: port-labs/port-github-action@v1
        with:
          clientId: ${{ secrets.PORT_CLIENT_ID }}
          clientSecret: ${{ secrets.PORT_CLIENT_SECRET }}
          baseUrl: https://api.port.io
          operation: PATCH_RUN
          runId: ${{ fromJson(inputs.port_context).runId }}
          status: 'SUCCESS'
          logMessage: ✅ SQS queue with URL ${{ fromJson(inputs.port_context).entity.properties.link }} deleted successfully
          summary: SQS queue delete completed successfully

      - name: Inform Port about SQS queue delete failure
        if: failure()
        uses: port-labs/port-github-action@v1
        with:
          clientId: ${{ secrets.PORT_CLIENT_ID }}
          clientSecret: ${{ secrets.PORT_CLIENT_SECRET }}
          baseUrl: https://api.port.io
          operation: PATCH_RUN
          runId: ${{ fromJson(inputs.port_context).runId }}
          status: 'FAILURE'
          logMessage: ❌ Failed to delete SQS queue with URL ${{ fromJson(inputs.port_context).entity.properties.link }}
          summary: SQS queue delete failed
Create Port action
-
Go to the Self-service page of your portal.
-
Click on the
+ New Actionbutton. -
Click on the
{...} Edit JSONbutton. -
Copy and paste the following JSON configuration into the editor.
Delete SQS queue action (Click to expand)
Replace the variables<GITHUB-ORG>- your GitHub organization or user name.<GITHUB-REPO>- your GitHub repository name.<YOUR_GITHUB_OCEAN_INTEGRATION_ID>- your GitHub Ocean integration installation ID.
{"identifier": "delete_queue","title": "Delete Queue","icon": "SNS","description": "Delete an SQS queue","trigger": {"type": "self-service","operation": "DELETE","userInputs": {"properties": {},"required": [],"order": []},"blueprintIdentifier": "sqs"},"invocationMethod": {"type": "INTEGRATION_ACTION","installationId": "<YOUR_GITHUB_OCEAN_INTEGRATION_ID>","integrationActionType": "dispatch_workflow","integrationActionExecutionProperties": {"org": "<GITHUB-ORG>","repo": "<GITHUB-REPO>","workflow": "delete-queue.yaml","workflowInputs": {"{{ spreadValue() }}": "{{ .inputs }}","port_context": {"runId": "{{ .run.id }}","entity": "{{ .entity }}"}},"reportWorkflowStatus": true}},"requiredApproval": false} -
Click
Save.
Now you should see the Delete SQS Queue action in the self-service page. 🎉
Visualize metrics
With your data and actions in place, we can create a dedicated dashboard in Port to visualize all SQS queues by type, encryption, or DLQ status using customizable widgets. In addition, we can trigger actions (purge, redrive, delete) directly from the dashboard.
Create a dashboard
-
Navigate to your software catalog.
-
Click on the
+button in the left sidebar. -
Select New dashboard.
-
Name the dashboard SQS Management.
-
Input
Purge, redrive or delete SQS queuesunder Description. -
Select the
AWSicon. -
Click
Create.
We now have a blank dashboard where we can start adding widgets to visualize insights from our AWS SQS queues.
Add widgets
In the new dashboard, create the following widgets:
Total queues (Click to expand)
-
Click
+ Widgetand select Number Chart. -
Title:
Total queues(add theAWSicon). -
Select
Count entitiesChart type and choose SQS Queue as the Blueprint. -
Select
countfor the Function. -
Select
customas the Unit and inputqueuesas the Custom unit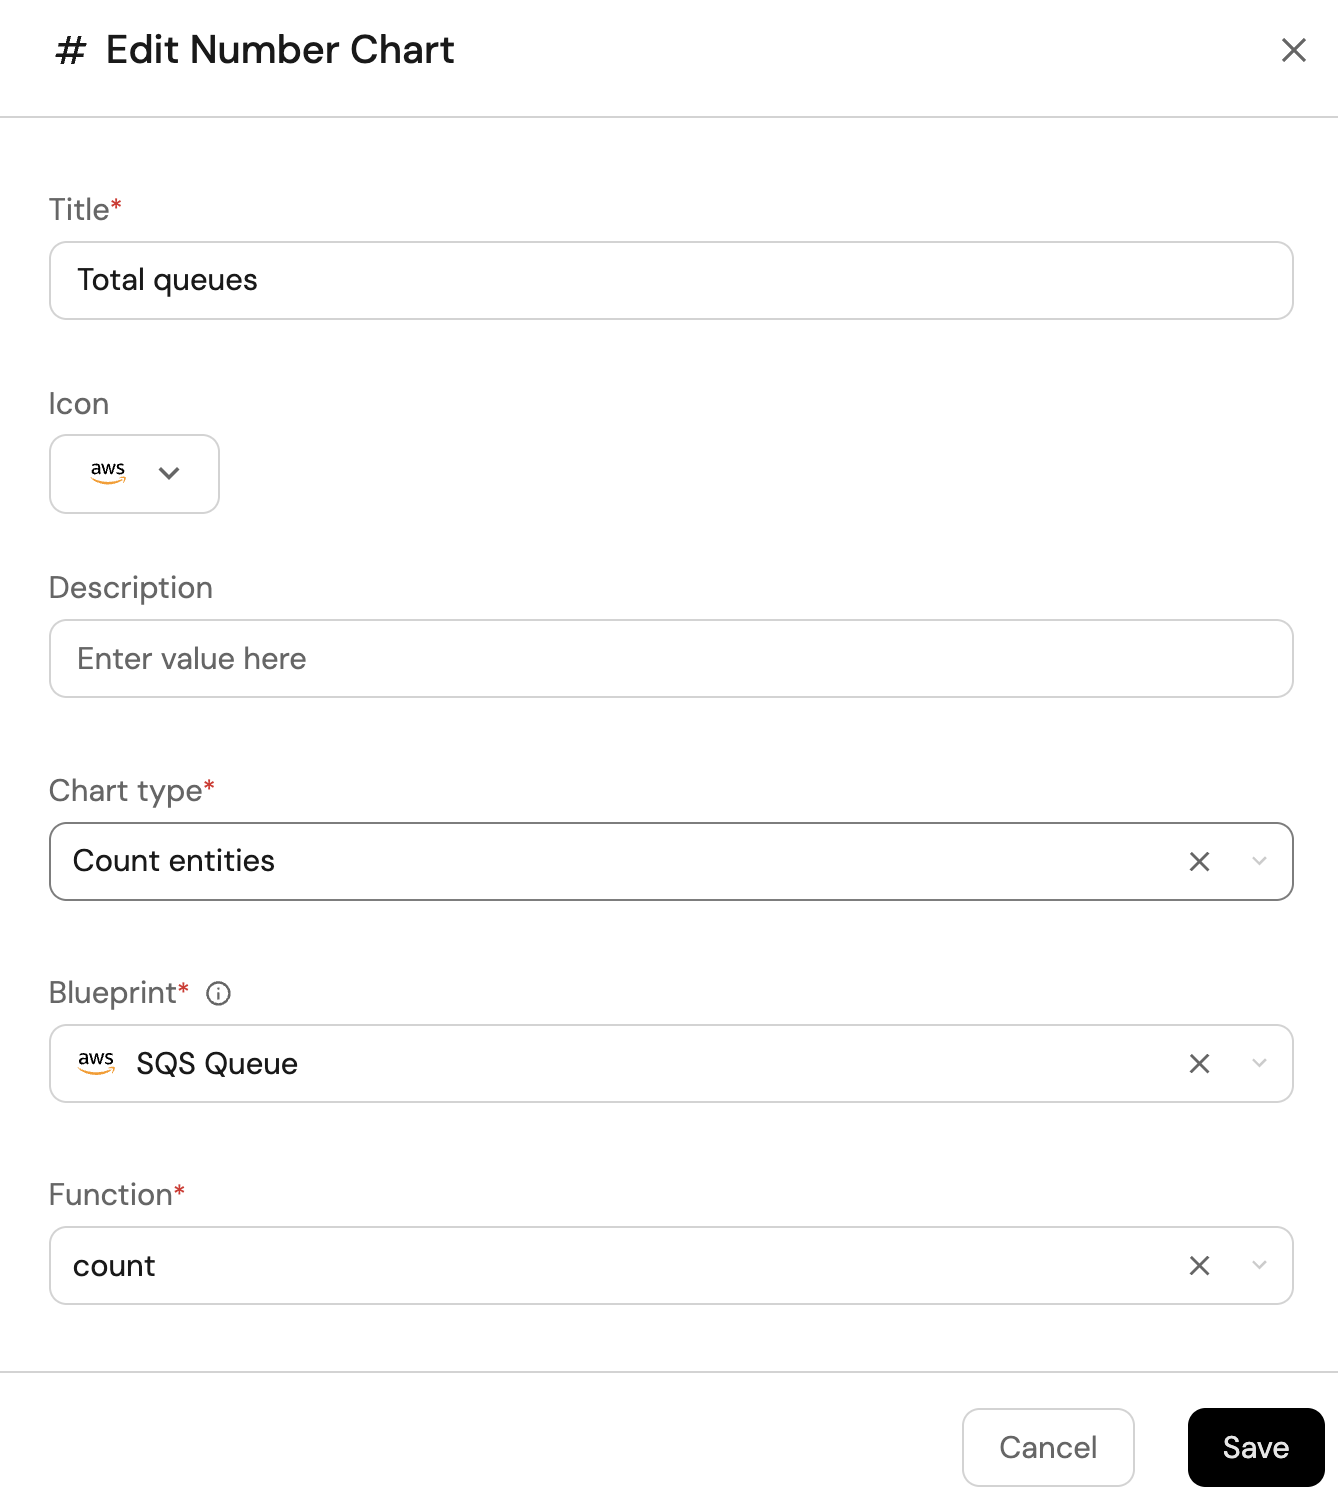
-
Click
Save.
Queues with DLQ (Click to expand)
-
Click
+ Widgetand select Number Chart. -
Title:
Queues with DLQ. -
Select
Count entitiesChart type and choose SQS Queue as the Blueprint. -
Select
countfor the Function. -
Add this JSON to the Additional filters editor to filter queues with DLQ configuration:
[{"combinator":"and","rules":[{"property":"dlqRedrivePolicy","operator":"isNotEmpty"}]}] -
Select
customas the Unit and inputqueuesas the Custom unit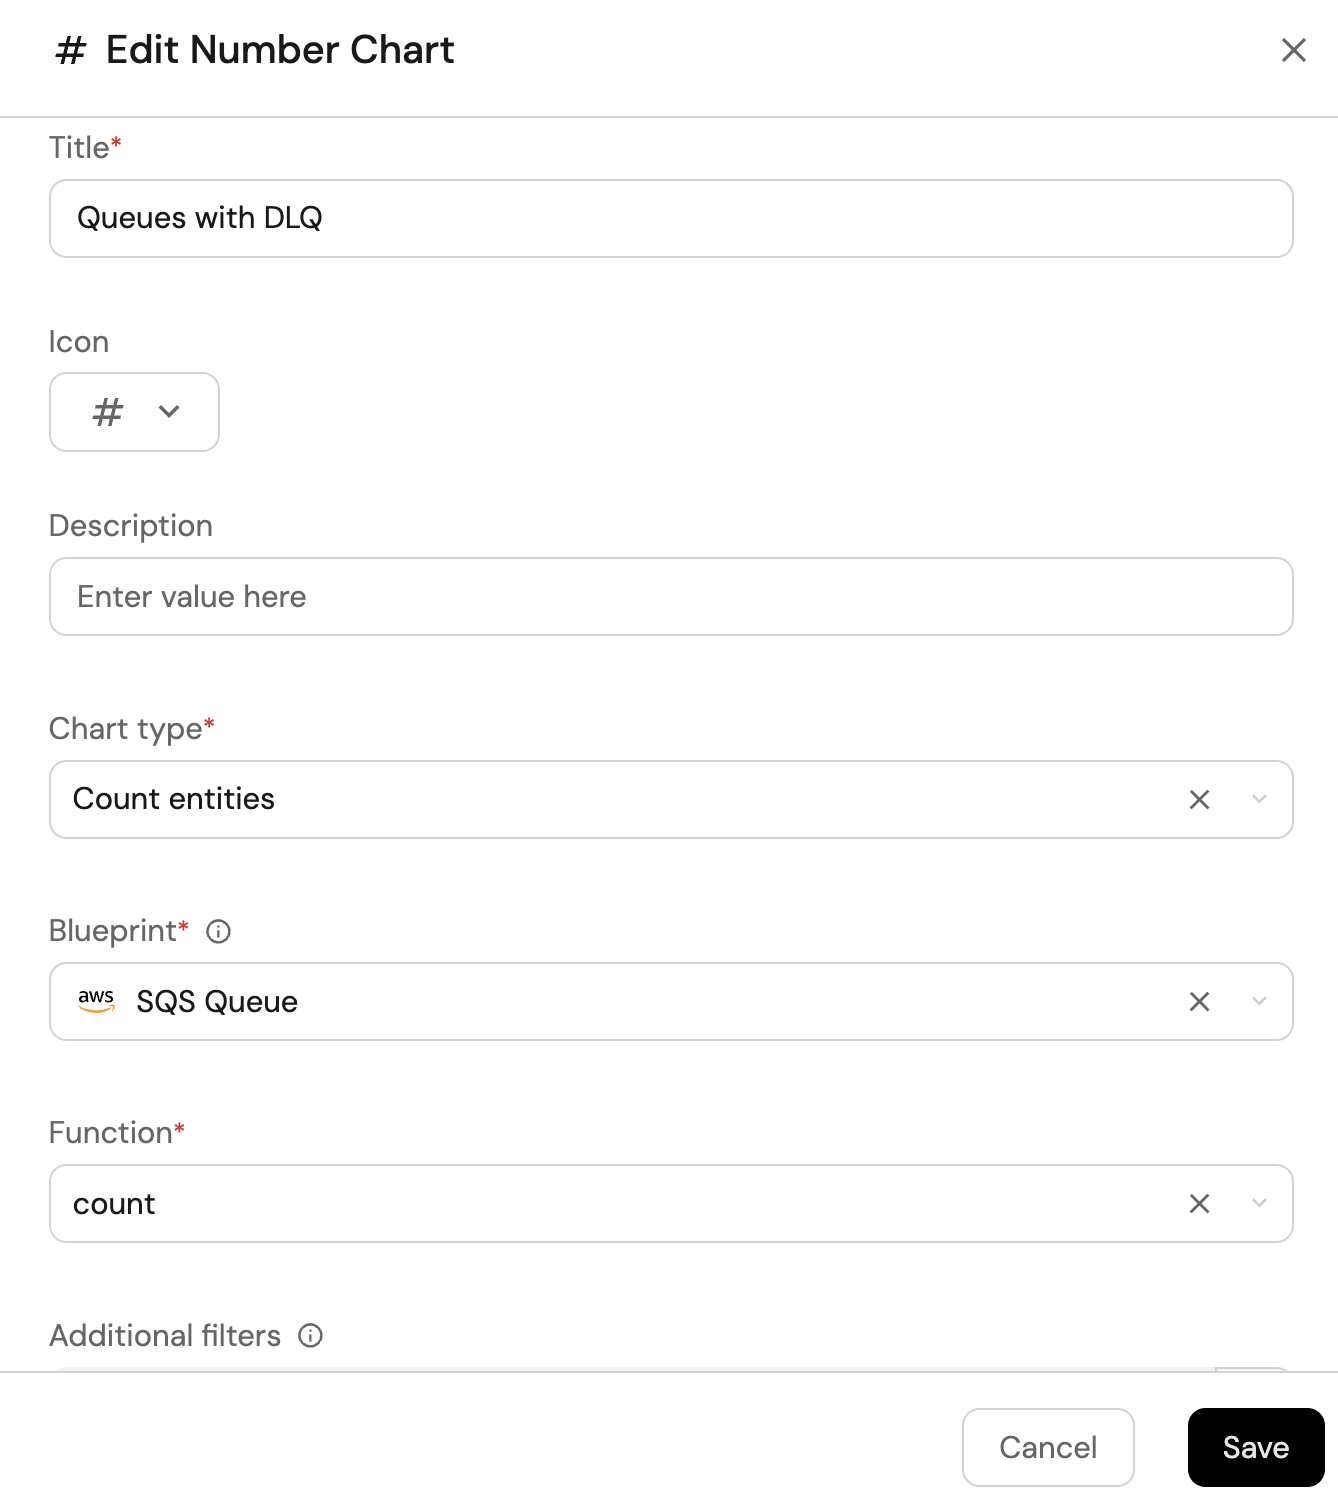
-
Click
Save.
Queues by encryption (Click to expand)
-
Click
+ Widgetand select Pie chart. -
Title:
Queues by encryption(add thePieicon). -
Choose the SQS Queue blueprint.
-
Under
Breakdown by property, select the SSE Enabled property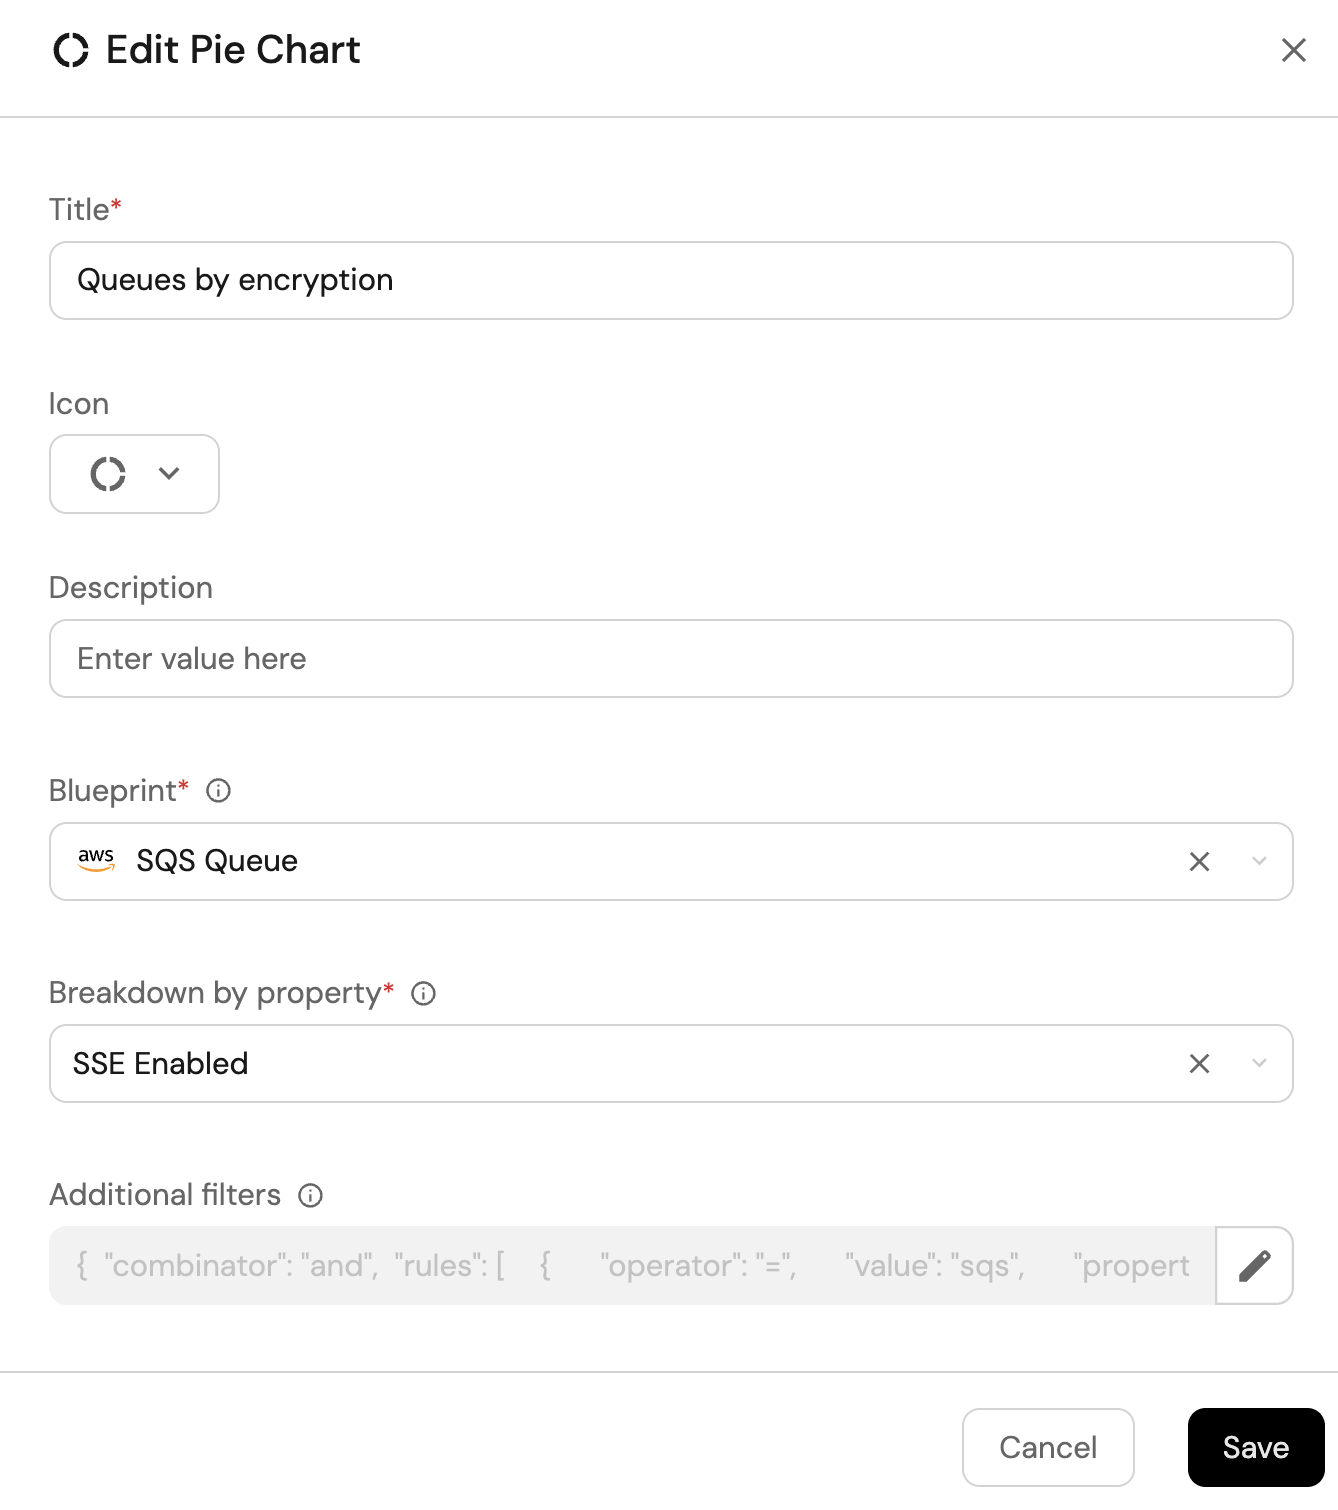
-
Click Save.
SQS queues view (Click to expand)
-
Click
+ Widgetand select Table. -
Title the widget All Queues.
-
Choose the SQS Queue blueprint
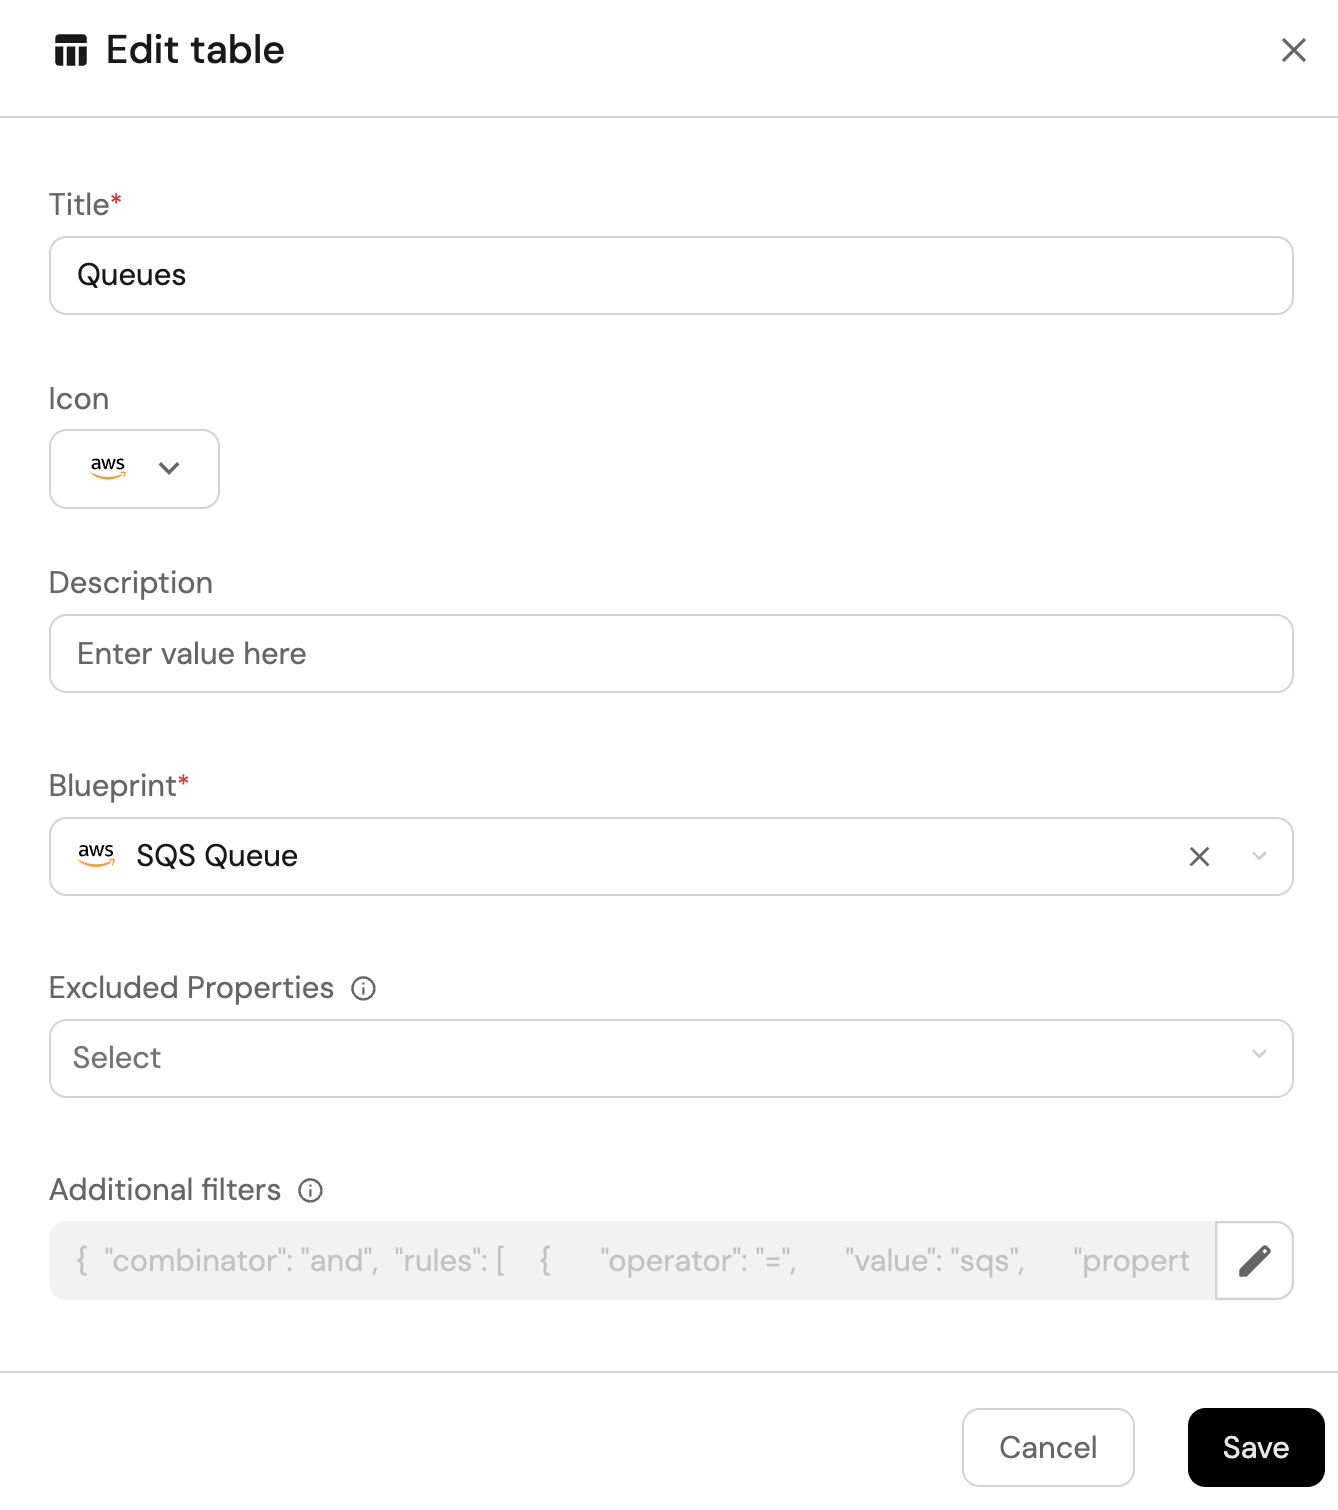
-
Click Save to add the widget to the dashboard.
-
Click on the
...button in the top right corner of the table and select Customize table. -
In the top right corner of the table, click on
Manage Propertiesand add the following properties:- Link: The link to the queue.
- SSE Enabled: Whether or not the queue has server side encryption (SSE) enabled.
- Message Rention Period: The message rention period of the queue.
- Account: The name of each related AWS account.
-
Click on the save icon in the top right corner of the widget to save the customized table.
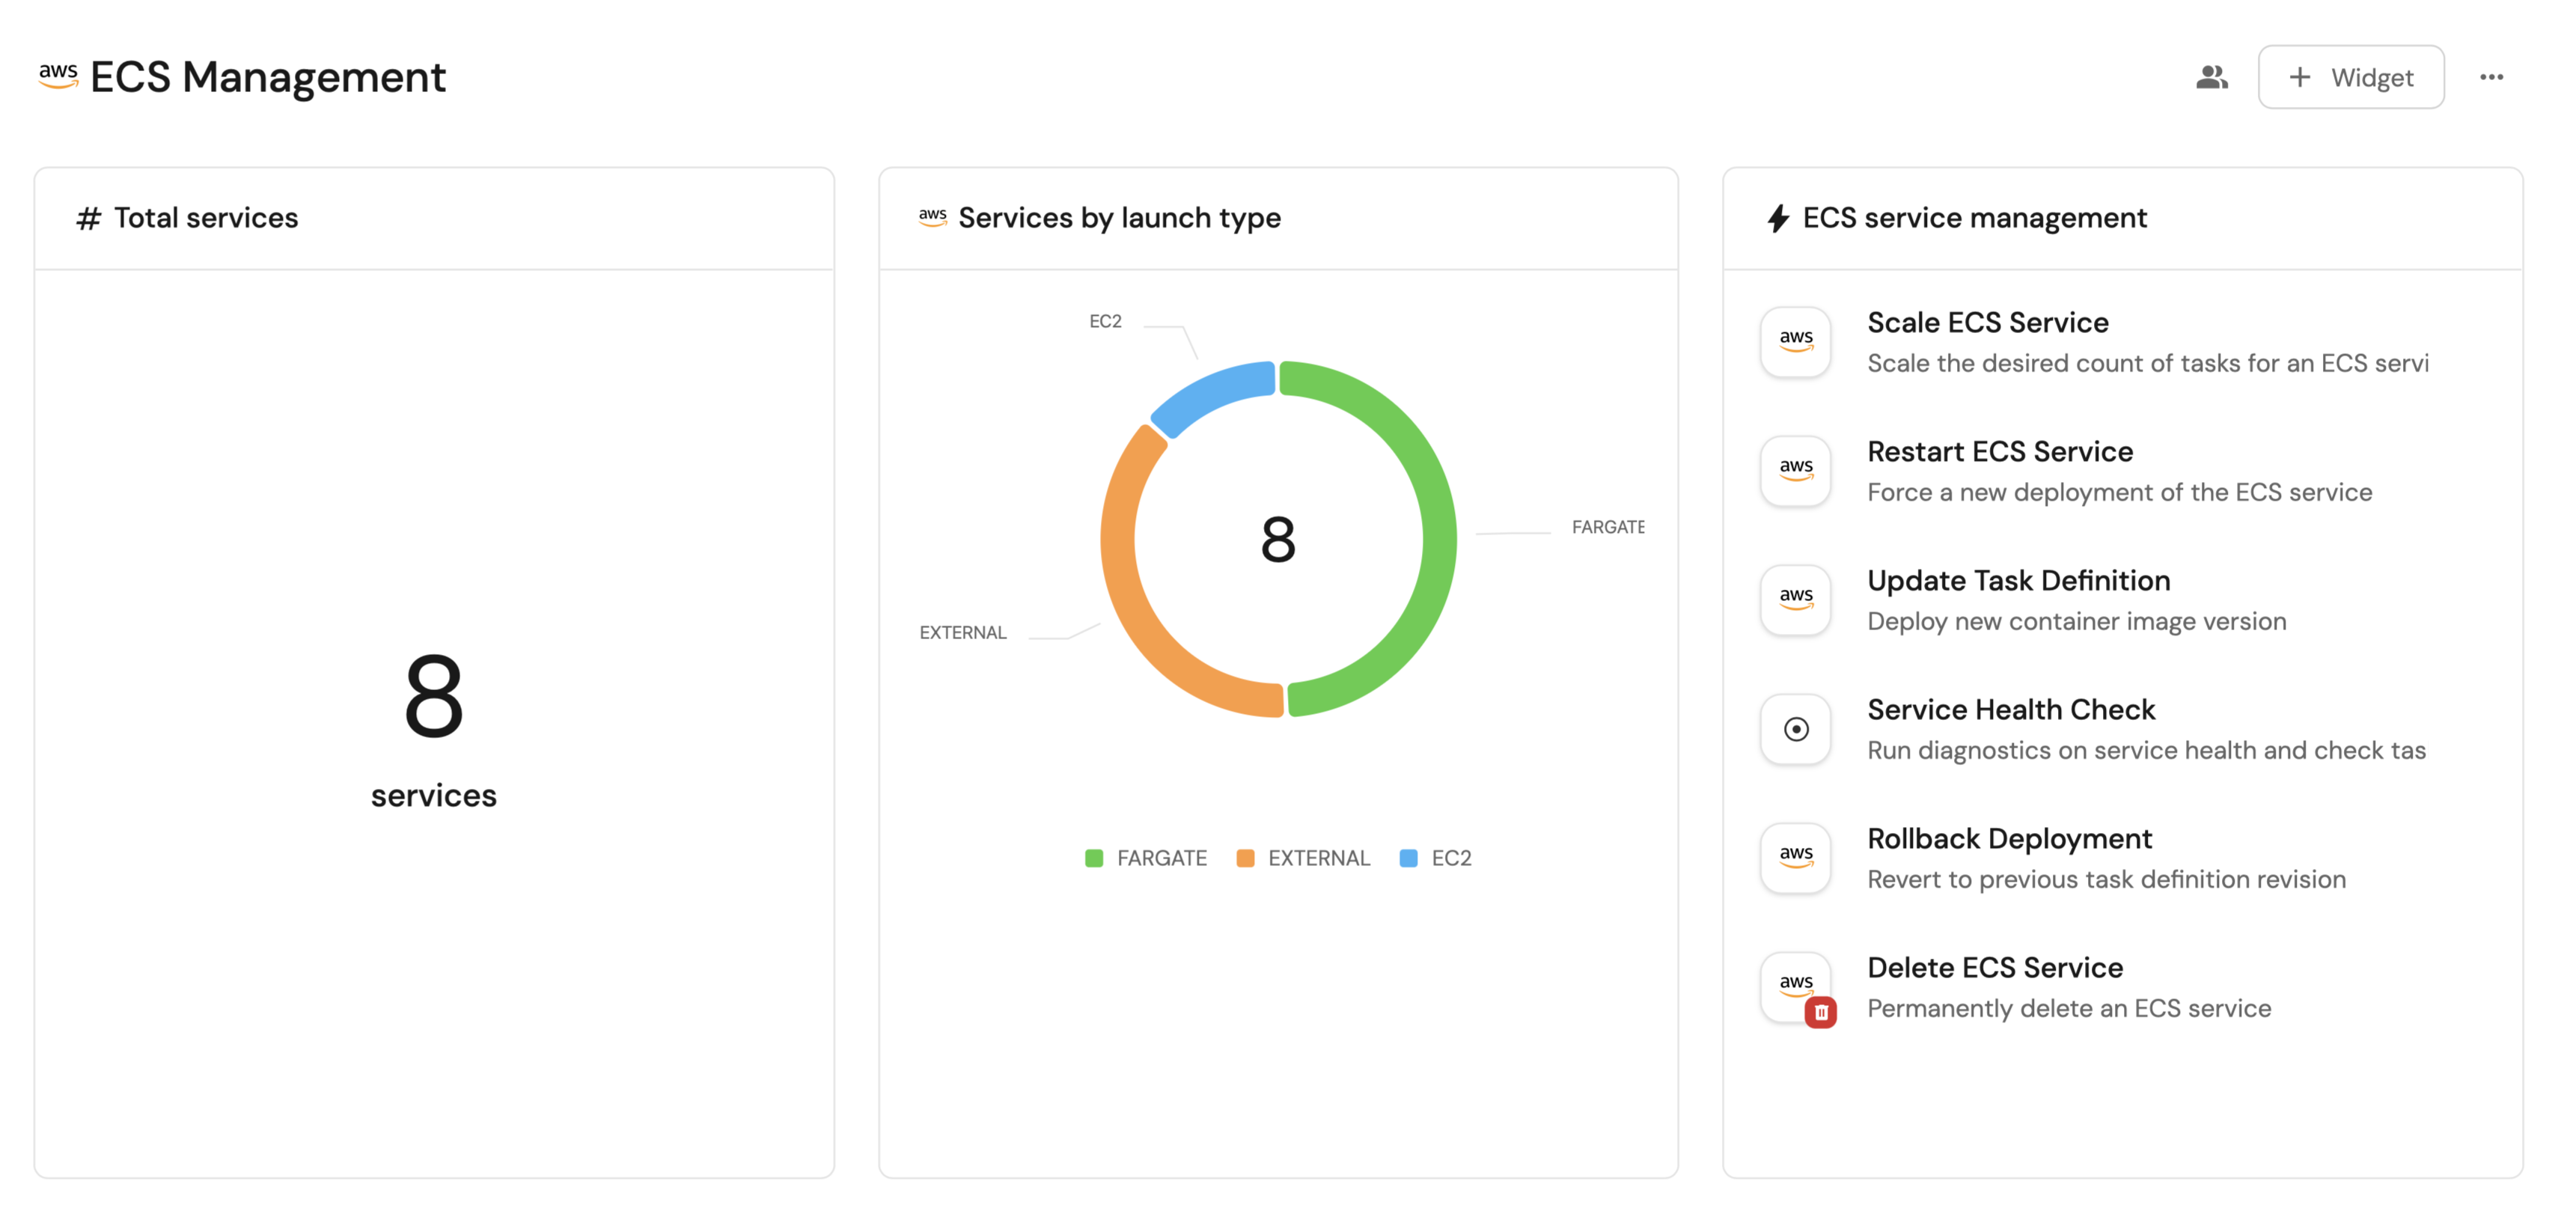
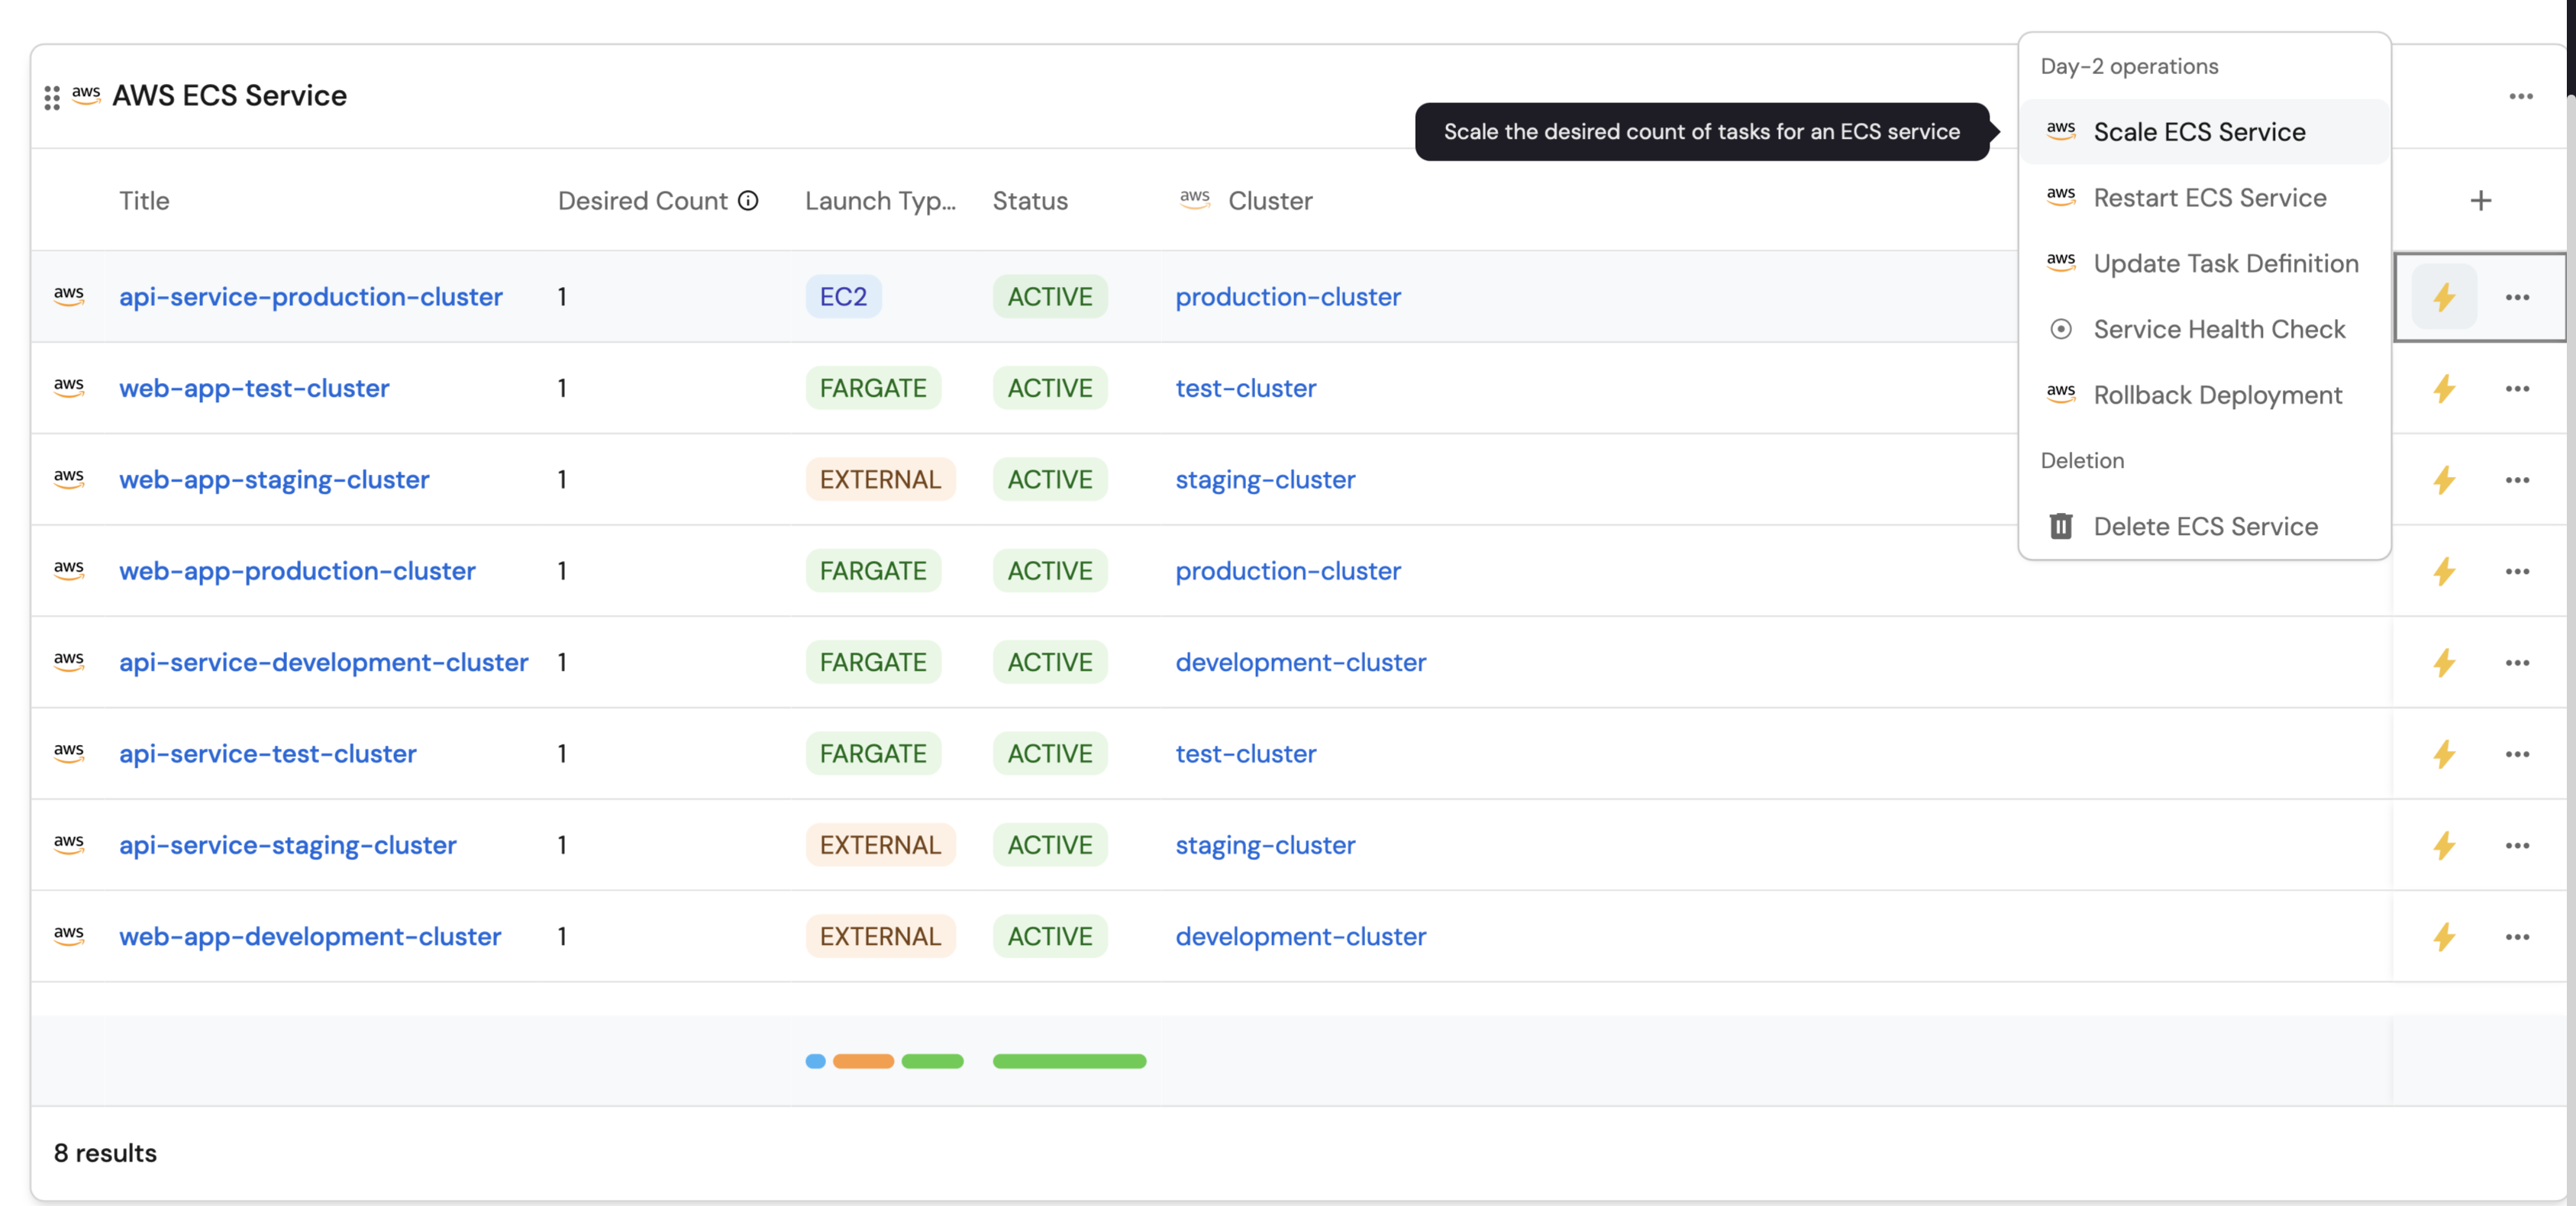
AWS ECS services
Use this section to bring your AWS ECS management experience into Port.
In this section, you will:
- Ingest ECS cluster and service data into Port's software catalog using Port's AWS integration.
- Set up self-service actions to manage ECS services (scale, restart, deploy, health check, rollback, and delete).
- Build dashboards in Port to monitor and take action on your ECS deployments.
Prerequisites
This section assumes the following:
-
You have a Port account and have completed the onboarding process.
-
Port's AWS integration is installed in your account.
-
You have ECS clusters and services running in your AWS account.
-
You have a GitHub integration for running workflows:
-
GitHub Ocean is installed.
Set up data model
When installing the AWS integration in Port, the AWS Account blueprint is created by default.
However, the ECS Cluster and ECS Service blueprints are not created automatically so we will need to create them manually.
Create the AWS ECS Cluster blueprint
-
Go to the Builder page of your portal.
-
Click on
+ Blueprint. -
Click on the
{...}button in the top right corner, and chooseEdit JSON. -
Add this JSON schema:
AWS ECS Cluster blueprint (Click to expand)
{"identifier": "awsEcsCluster","title": "AWS ECS Cluster","icon": "AWS","schema": {"properties": {"link": {"type": "string","title": "Link","format": "url","description": "AWS Console link to the cluster"},"capacityProviders": {"type": "array","title": "Capacity Providers","description": "List of capacity providers for the cluster"},"activeServicesCount": {"type": "number","title": "Active Services","description": "Number of active services in the cluster"},"runningTasksCount": {"type": "number","title": "Running Tasks","description": "Number of currently running tasks"},"pendingTasksCount": {"type": "number","title": "Pending Tasks","description": "Number of pending tasks"},"tags": {"type": "array","title": "Tags"},"arn": {"type": "string","title": "ARN"}},"required": []},"mirrorProperties": {},"calculationProperties": {},"aggregationProperties": {},"relations": {}} -
Click
Saveto create the blueprint.
Create the AWS ECS Service blueprint
-
Click on
+ Blueprintagain. -
Click on the
{...}button in the top right corner, and chooseEdit JSON. -
Add this JSON schema:
AWS ECS Service blueprint (Click to expand)
{"identifier": "awsEcsService","title": "AWS ECS Service","icon": "AWS","schema": {"properties": {"link": {"type": "string","title": "Link","format": "url","description": "AWS Console link to the service"},"desiredCount": {"type": "number","title": "Desired Count","description": "Desired number of tasks for the service"},"runningCount": {"type": "number","title": "Running Count","description": "Number of tasks currently running"},"pendingCount": {"type": "number","title": "Pending Count","description": "Number of tasks pending"},"taskDefinition": {"type": "string","title": "Task Definition","description": "Task definition used by the service"},"launchType": {"type": "string","title": "Launch Type","enum": ["EC2", "FARGATE", "EXTERNAL"],"enumColors": {"EC2": "blue","FARGATE": "green","EXTERNAL": "orange"}},"status": {"type": "string","title": "Status","enum": ["ACTIVE", "DRAINING", "INACTIVE"],"enumColors": {"ACTIVE": "green","DRAINING": "yellow","INACTIVE": "red"}},"schedulingStrategy": {"type": "string","title": "Scheduling Strategy","enum": ["REPLICA", "DAEMON"]},"platformVersion": {"type": "string","title": "Platform Version"},"loadBalancers": {"type": "array","title": "Load Balancers"},"arn": {"type": "string","title": "ARN"},"enableExecuteCommand": {"type": "boolean","title": "Enable Execute Command"},"healthCheckGracePeriod": {"type": "number","title": "Health Check Grace Prd in sec"},"deploymentStrategy": {"type": "string","title": "Deployment Strategy"},"maximumPercent": {"type": "number","title": "Maximum Percent"},"minimumHealthyPercent": {"type": "number","title": "Minimum Healthy Percent"}},"required": []},"mirrorProperties": {},"calculationProperties": {"healthStatus": {"title": "Health Status","icon": "DefaultProperty","calculation": ".properties.runningCount == .properties.desiredCount","type": "boolean","colorized": true,"colors": {"true": "green","false": "red"}}},"aggregationProperties": {},"relations": {"cluster": {"title": "Cluster","target": "awsEcsCluster","required": false,"many": false}}} -
Click
Saveto create the blueprint.
Update the mapping configuration
-
Go to the Data Sources page of your portal.
-
Select your AWS integration.
-
Add the following YAML block into the editor to ingest ECS clusters and services:
AWS integration configuration (Click to expand)
- kind: AWS::ECS::Clusterselector:query: 'true'useGetResourceAPI: trueport:entity:mappings:identifier: .Properties.Arntitle: .Identifierblueprint: '"awsEcsCluster"'properties:link: '"https://console.aws.amazon.com/go/view?arn=" + .Properties.Arn'arn: .Properties.Arntags: .Properties.Tags- kind: AWS::ECS::Serviceselector:query: 'true'port:entity:mappings:identifier: .Properties.ServiceArntitle: .Properties.ServiceNameblueprint: '"awsEcsService"'properties:link: '"https://" + .__Region + ".console.aws.amazon.com/ecs/home?region=" + .__Region + "#/clusters/" + .Properties.Cluster + "/services/" + .Properties.ServiceName + "/details"'desiredCount: .Properties.DesiredCountrunningCount: .Properties.RunningCount // 0pendingCount: .Properties.PendingCount // 0taskDefinition: .Properties.TaskDefinitionlaunchType: .Properties.LaunchTypestatus: .Properties.Status // "ACTIVE"schedulingStrategy: .Properties.SchedulingStrategyplatformVersion: .Properties.PlatformVersionloadBalancers: .Properties.LoadBalancers // []arn: .Properties.ServiceArnenableExecuteCommand: .Properties.EnableExecuteCommandhealthCheckGracePeriod: .Properties.HealthCheckGracePeriodSecondsdeploymentStrategy: .Properties.DeploymentConfiguration.StrategymaximumPercent: .Properties.DeploymentConfiguration.MaximumPercentminimumHealthyPercent: .Properties.DeploymentConfiguration.MinimumHealthyPercentrelations:cluster: .Properties.Cluster -
Click
Save & Resyncto apply the mapping.
Set up self-service actions
Now let us create self-service actions to manage your ECS services directly from Port using GitHub Actions. You will implement workflows to:
-
Scale ECS service tasks up or down.
-
Restart an ECS service.
-
Update task definitions with new container images.
-
Run comprehensive health checks and diagnostics.
-
Rollback deployments to previous versions.
-
Safely delete ECS services.
To implement these use-cases, follow the steps below:
Add GitHub secrets
In your GitHub repository, go to Settings > Secrets and add the following secrets:
PORT_CLIENT_ID- Port Client ID learn more.PORT_CLIENT_SECRET- Port Client Secret learn more.AWS_ACCESS_KEY_ID- AWS IAM user's access key.AWS_SECRET_ACCESS_KEY- AWS IAM user's secret access key.AWS_REGION- AWS region (e.g.,us-east-1).
Ensure your AWS credentials have the permissions to ecs:UpdateService, ecs:DescribeServices, ecs:ListServices, and ecs:DescribeClusters.
Scale ECS service
To scale an ECS service from Port, first add a GitHub workflow that updates the desired task count in AWS. Then create a Port self-service action that triggers the workflow.
Add GitHub workflow
Create the file .github/workflows/scale-ecs-service.yml in the .github/workflows folder of your repository.
We recommend creating a dedicated repository for the workflows that are used by Port actions.
Scale ECS Service GitHub workflow (Click to expand)
name: Scale ECS Service

on:
  workflow_dispatch:
    inputs:
      desired_count:
        description: 'New desired task count'
        required: true
        type: number
      port_context:
        required: true
        description: 'Action and general context (blueprint, run id, etc...)'
        type: string

jobs:
  scale-ecs-service:
    runs-on: ubuntu-latest
    steps:
      - name: Inform Port about workflow start
        uses: port-labs/port-github-action@v1
        with:
          clientId: ${{ secrets.PORT_CLIENT_ID }}
          clientSecret: ${{ secrets.PORT_CLIENT_SECRET }}
          baseUrl: https://api.port.io
          operation: PATCH_RUN
          runId: ${{fromJson(inputs.port_context).runId}}
          logMessage: Configuring AWS credentials and scaling ECS service

      - name: Configure AWS credentials
        uses: aws-actions/configure-aws-credentials@v4
        with:
          aws-access-key-id: ${{ secrets.AWS_ACCESS_KEY_ID }}
          aws-secret-access-key: ${{ secrets.AWS_SECRET_ACCESS_KEY }}
          aws-region: ${{ secrets.AWS_REGION }}

      - name: Scale ECS Service
        run: |
          CLUSTER_NAME="${{ fromJson(inputs.port_context).entity.relations.cluster }}"
          SERVICE_ARN="${{ fromJson(inputs.port_context).entity.identifier }}"

          echo "Scaling ECS service $SERVICE_ARN in cluster $CLUSTER_NAME to ${{ github.event.inputs.desired_count }} tasks"

          aws ecs update-service \
            --cluster "$CLUSTER_NAME" \
            --service "$SERVICE_ARN" \
            --desired-count "${{ github.event.inputs.desired_count }}"

      - name: Wait for service to stabilize
        run: |
          CLUSTER_NAME="${{ fromJson(inputs.port_context).entity.relations.cluster }}"
          SERVICE_ARN="${{ fromJson(inputs.port_context).entity.identifier }}"

          echo "Waiting for service to reach stable state..."
          aws ecs wait services-stable \
            --cluster "$CLUSTER_NAME" \
            --services "$SERVICE_ARN"

      - name: Inform Port about successful scaling
        if: success()
        uses: port-labs/port-github-action@v1
        with:
          clientId: ${{ secrets.PORT_CLIENT_ID }}
          clientSecret: ${{ secrets.PORT_CLIENT_SECRET }}
          baseUrl: https://api.port.io
          operation: PATCH_RUN
          status: 'SUCCESS'
          runId: ${{fromJson(inputs.port_context).runId}}
          logMessage: ✅ Successfully scaled ECS service ${{ fromJson(inputs.port_context).entity.identifier }} to ${{ github.event.inputs.desired_count }} tasks

      - name: Inform Port about failed scaling
        if: failure()
        uses: port-labs/port-github-action@v1
        with:
          clientId: ${{ secrets.PORT_CLIENT_ID }}
          clientSecret: ${{ secrets.PORT_CLIENT_SECRET }}
          baseUrl: https://api.port.io
          operation: PATCH_RUN
          status: 'FAILURE'
          runId: ${{fromJson(inputs.port_context).runId}}
          logMessage: ❌ Failed to scale ECS service ${{ fromJson(inputs.port_context).entity.identifier }}
Create Port action
-
Go to the Self-service page of your portal.
-
Click on the
+ New Actionbutton. -
Click on the
{...} Edit JSONbutton. -
Copy and paste the following JSON configuration into the editor.
Scale ECS Service action (Click to expand)
Replace the variables<GITHUB-ORG>- your GitHub organization or user name.<GITHUB-REPO>- your GitHub repository name.<YOUR_GITHUB_OCEAN_INTEGRATION_ID>- your GitHub Ocean integration installation ID.
{"identifier": "scale_ecs_service","title": "Scale ECS Service","icon": "AWS","description": "Scale the desired count of tasks for an ECS service","trigger": {"type": "self-service","operation": "DAY-2","userInputs": {"properties": {"desired_count": {"title": "Desired Count","type": "number","description": "Number of tasks to run","minimum": 0,"maximum": 100,"default": 1}},"required": ["desired_count"],"order": ["desired_count"]},"blueprintIdentifier": "awsEcsService"},"invocationMethod": {"type": "INTEGRATION_ACTION","installationId": "<YOUR_GITHUB_OCEAN_INTEGRATION_ID>","integrationActionType": "dispatch_workflow","integrationActionExecutionProperties": {"org": "<GITHUB-ORG>","repo": "<GITHUB-REPO>","workflow": "scale-ecs-service.yml","workflowInputs": {"desired_count": "{{.inputs.\"desired_count\"}}","port_context": {"entity": "{{ .entity }}","blueprint": "{{ .action.blueprint }}","runId": "{{ .run.id }}","trigger": "{{ .trigger }}"}},"reportWorkflowStatus": true}},"requiredApproval": false} -
Click
Save.
Now you should see the Scale ECS Service action in the self-service page. 🎉
Restart ECS service
To restart an ECS service from Port, first add a GitHub workflow that forces a new deployment in AWS. Then create a Port self-service action that triggers the workflow.
Add GitHub workflow
Create the file .github/workflows/restart-ecs-service.yml in the .github/workflows folder of your repository.
We recommend creating a dedicated repository for the workflows that are used by Port actions.
Restart ECS Service GitHub workflow (Click to expand)
name: Restart ECS Service

on:
  workflow_dispatch:
    inputs:
      port_context:
        required: true
        description: 'Action and general context (blueprint, run id, etc...)'
        type: string

jobs:
  restart-ecs-service:
    runs-on: ubuntu-latest
    steps:
      - name: Inform Port about workflow start
        uses: port-labs/port-github-action@v1
        with:
          clientId: ${{ secrets.PORT_CLIENT_ID }}
          clientSecret: ${{ secrets.PORT_CLIENT_SECRET }}
          baseUrl: https://api.port.io
          operation: PATCH_RUN
          runId: ${{fromJson(inputs.port_context).runId}}
          logMessage: Configuring AWS credentials and restarting ECS service

      - name: Configure AWS credentials
        uses: aws-actions/configure-aws-credentials@v4
        with:
          aws-access-key-id: ${{ secrets.AWS_ACCESS_KEY_ID }}
          aws-secret-access-key: ${{ secrets.AWS_SECRET_ACCESS_KEY }}
          aws-region: ${{ secrets.AWS_REGION }}

      - name: Force new deployment
        run: |
          CLUSTER_NAME="${{ fromJson(inputs.port_context).entity.relations.cluster }}"
          SERVICE_ARN="${{ fromJson(inputs.port_context).entity.identifier }}"

          echo "Forcing new deployment for ECS service $SERVICE_ARN in cluster $CLUSTER_NAME"

          aws ecs update-service \
            --cluster "$CLUSTER_NAME" \
            --service "$SERVICE_ARN" \
            --force-new-deployment

      - name: Wait for deployment to complete
        run: |
          CLUSTER_NAME="${{ fromJson(inputs.port_context).entity.relations.cluster }}"
          SERVICE_ARN="${{ fromJson(inputs.port_context).entity.identifier }}"

          echo "Waiting for deployment to complete..."
          aws ecs wait services-stable \
            --cluster "$CLUSTER_NAME" \
            --services "$SERVICE_ARN"

      - name: Inform Port about successful restart
        if: success()
        uses: port-labs/port-github-action@v1
        with:
          clientId: ${{ secrets.PORT_CLIENT_ID }}
          clientSecret: ${{ secrets.PORT_CLIENT_SECRET }}
          baseUrl: https://api.port.io
          operation: PATCH_RUN
          status: 'SUCCESS'
          runId: ${{fromJson(inputs.port_context).runId}}
          logMessage: ✅ Successfully restarted ECS service ${{ fromJson(inputs.port_context).entity.identifier }}

      - name: Inform Port about failed restart
        if: failure()
        uses: port-labs/port-github-action@v1
        with:
          clientId: ${{ secrets.PORT_CLIENT_ID }}
          clientSecret: ${{ secrets.PORT_CLIENT_SECRET }}
          baseUrl: https://api.port.io
          operation: PATCH_RUN
          status: 'FAILURE'
          runId: ${{fromJson(inputs.port_context).runId}}
          logMessage: ❌ Failed to restart ECS service ${{ fromJson(inputs.port_context).entity.identifier }}
Create Port action
-
Go to the Self-service page of your portal.
-
Click on the
+ New Actionbutton. -
Click on the
{...} Edit JSONbutton. -
Copy and paste the following JSON configuration into the editor.
Restart ECS Service action (Click to expand)
Replace the variables<GITHUB-ORG>- your GitHub organization or user name.<GITHUB-REPO>- your GitHub repository name.<YOUR_GITHUB_OCEAN_INTEGRATION_ID>- your GitHub Ocean integration installation ID.
{"identifier": "restart_ecs_service","title": "Restart ECS Service","icon": "AWS","description": "Force a new deployment of the ECS service","trigger": {"type": "self-service","operation": "DAY-2","userInputs": {"properties": {},"required": [],"order": []},"blueprintIdentifier": "awsEcsService"},"invocationMethod": {"type": "INTEGRATION_ACTION","installationId": "<YOUR_GITHUB_OCEAN_INTEGRATION_ID>","integrationActionType": "dispatch_workflow","integrationActionExecutionProperties": {"org": "<GITHUB-ORG>","repo": "<GITHUB-REPO>","workflow": "restart-ecs-service.yml","workflowInputs": {"port_context": {"entity": "{{ .entity }}","blueprint": "{{ .action.blueprint }}","runId": "{{ .run.id }}","trigger": "{{ .trigger }}"}},"reportWorkflowStatus": true}},"requiredApproval": false} -
Click
Save.
Now you should see the Restart ECS Service action in the self-service page. 🎉
Update task definition
To update an ECS task definition from Port, first add a GitHub workflow that registers the new task definition and updates the service. Then create a Port self-service action that triggers the workflow.
Add GitHub workflow
Create the file .github/workflows/update-task-definition.yml in the .github/workflows folder of your repository.
We recommend creating a dedicated repository for the workflows that are used by Port actions.
Update Task Definition GitHub workflow (Click to expand)
name: Update ECS Task Definition

on:
  workflow_dispatch:
    inputs:
      image_uri:
        description: 'New container image URI'
        required: true
        type: string
      port_context:
        required: true
        description: 'Action and general context (blueprint, run id, etc...)'
        type: string

jobs:
  update-task-definition:
    runs-on: ubuntu-latest
    steps:
      - name: Inform Port about workflow start
        uses: port-labs/port-github-action@v1
        with:
          clientId: ${{ secrets.PORT_CLIENT_ID }}
          clientSecret: ${{ secrets.PORT_CLIENT_SECRET }}
          baseUrl: https://api.port.io
          operation: PATCH_RUN
          runId: ${{fromJson(inputs.port_context).runId}}
          logMessage: Configuring AWS credentials and updating task definition

      - name: Configure AWS credentials
        uses: aws-actions/configure-aws-credentials@v4
        with:
          aws-access-key-id: ${{ secrets.AWS_ACCESS_KEY_ID }}
          aws-secret-access-key: ${{ secrets.AWS_SECRET_ACCESS_KEY }}
          aws-region: ${{ secrets.AWS_REGION }}

      - name: Get current task definition
        id: current-task-def
        run: |
          CLUSTER_NAME="${{ fromJson(inputs.port_context).entity.relations.cluster }}"
          SERVICE_ARN="${{ fromJson(inputs.port_context).entity.identifier }}"

          # Get current task definition ARN
          TASK_DEF_ARN=$(aws ecs describe-services \
            --cluster "$CLUSTER_NAME" \
            --services "$SERVICE_ARN" \
            --query 'services[0].taskDefinition' \
            --output text)

          echo "current_task_def_arn=$TASK_DEF_ARN" >> $GITHUB_OUTPUT

          # Get task definition details
          aws ecs describe-task-definition \
            --task-definition "$TASK_DEF_ARN" \
            --query 'taskDefinition' > current-task-def.json

      - name: Update task definition with new image
        id: new-task-def
        run: |
          # Update the image URI in the task definition
          jq --arg new_image "${{ github.event.inputs.image_uri }}" \
            '.containerDefinitions[0].image = $new_image |
              del(.taskDefinitionArn, .revision, .status, .requiresAttributes, .placementConstraints, .compatibilities, .registeredAt, .registeredBy)' \
            current-task-def.json > new-task-def.json

          # Register new task definition
          NEW_TASK_DEF_ARN=$(aws ecs register-task-definition \
            --cli-input-json file://new-task-def.json \
            --query 'taskDefinition.taskDefinitionArn' \
            --output text)

          echo "new_task_def_arn=$NEW_TASK_DEF_ARN" >> $GITHUB_OUTPUT
          echo "📝 Registered new task definition: $NEW_TASK_DEF_ARN"

      - name: Update service with new task definition
        run: |
          CLUSTER_NAME="${{ fromJson(inputs.port_context).entity.relations.cluster }}"
          SERVICE_ARN="${{ fromJson(inputs.port_context).entity.identifier }}"
          NEW_TASK_DEF_ARN="${{ steps.new-task-def.outputs.new_task_def_arn }}"

          echo "🚀 Updating service with new task definition..."

          aws ecs update-service \
            --cluster "$CLUSTER_NAME" \
            --service "$SERVICE_ARN" \
            --task-definition "$NEW_TASK_DEF_ARN"

      - name: Wait for deployment to complete
        run: |
          CLUSTER_NAME="${{ fromJson(inputs.port_context).entity.relations.cluster }}"
          SERVICE_ARN="${{ fromJson(inputs.port_context).entity.identifier }}"

          echo "⏳ Waiting for deployment to complete..."
          aws ecs wait services-stable \
            --cluster "$CLUSTER_NAME" \
            --services "$SERVICE_ARN"

      - name: Inform Port about successful update
        if: success()
        uses: port-labs/port-github-action@v1
        with:
          clientId: ${{ secrets.PORT_CLIENT_ID }}
          clientSecret: ${{ secrets.PORT_CLIENT_SECRET }}
          baseUrl: https://api.port.io
          operation: PATCH_RUN
          status: 'SUCCESS'
          runId: ${{fromJson(inputs.port_context).runId}}
          logMessage: ✅ Successfully updated ECS service ${{ fromJson(inputs.port_context).entity.identifier }} with new image ${{ github.event.inputs.image_uri }}

      - name: Inform Port about failed update
        if: failure()
        uses: port-labs/port-github-action@v1
        with:
          clientId: ${{ secrets.PORT_CLIENT_ID }}
          clientSecret: ${{ secrets.PORT_CLIENT_SECRET }}
          baseUrl: https://api.port.io
          operation: PATCH_RUN
          status: 'FAILURE'
          runId: ${{fromJson(inputs.port_context).runId}}
          logMessage: ❌ Failed to update ECS service ${{ fromJson(inputs.port_context).entity.identifier }}
Create Port action
-
Go to the Self-service page of your portal.
-
Click on the
+ New Actionbutton. -
Click on the
{...} Edit JSONbutton. -
Copy and paste the following JSON configuration into the editor.
Update Task Definition action (Click to expand)
Replace the variables<GITHUB-ORG>- your GitHub organization or user name.<GITHUB-REPO>- your GitHub repository name.<YOUR_GITHUB_OCEAN_INTEGRATION_ID>- your GitHub Ocean integration installation ID.
{"identifier": "update_task_definition","title": "Update Task Definition","icon": "AWS","description": "Deploy new container image version","trigger": {"type": "self-service","operation": "DAY-2","userInputs": {"properties": {"image_uri": {"title": "Container Image URI","type": "string","description": "Full URI of the new container image (e.g., account.dkr.ecr.region.amazonaws.com/repo:tag)","pattern": "^.+:.+$"}},"required": ["image_uri"],"order": ["image_uri"]},"blueprintIdentifier": "awsEcsService"},"invocationMethod": {"type": "INTEGRATION_ACTION","installationId": "<YOUR_GITHUB_OCEAN_INTEGRATION_ID>","integrationActionType": "dispatch_workflow","integrationActionExecutionProperties": {"org": "<GITHUB-ORG>","repo": "<GITHUB-REPO>","workflow": "update-task-definition.yml","workflowInputs": {"image_uri": "{{.inputs.\"image_uri\"}}","port_context": {"entity": "{{ .entity }}","blueprint": "{{ .action.blueprint }}","runId": "{{ .run.id }}","trigger": "{{ .trigger }}"}},"reportWorkflowStatus": true}},"requiredApproval": false} -
Click
Save.
Now you should see the Update Task Definition action in the self-service page. 🎉
Run service health check
To run an ECS service health check from Port, first add a GitHub workflow that gathers the service diagnostics from AWS. Then create a Port self-service action that triggers the workflow.
Add GitHub workflow
Create the file .github/workflows/service-health-check.yml in the .github/workflows folder of your repository.
We recommend creating a dedicated repository for the workflows that are used by Port actions.
Service Health Check GitHub workflow (Click to expand)
name: ECS Service Health Check

on:
  workflow_dispatch:
    inputs:
      port_context:
        required: true
        description: 'Action and general context (blueprint, run id, etc...)'
        type: string

jobs:
  health-check:
    runs-on: ubuntu-latest
    steps:
      - name: Inform Port about workflow start
        uses: port-labs/port-github-action@v1
        with:
          clientId: ${{ secrets.PORT_CLIENT_ID }}
          clientSecret: ${{ secrets.PORT_CLIENT_SECRET }}
          baseUrl: https://api.port.io
          operation: PATCH_RUN
          runId: ${{fromJson(inputs.port_context).runId}}
          logMessage: Running health check on ECS service

      - name: Configure AWS credentials
        uses: aws-actions/configure-aws-credentials@v4
        with:
          aws-access-key-id: ${{ secrets.AWS_ACCESS_KEY_ID }}
          aws-secret-access-key: ${{ secrets.AWS_SECRET_ACCESS_KEY }}
          aws-region: ${{ secrets.AWS_REGION }}

      - name: Get service details
        id: service-details
        run: |
          CLUSTER_NAME="${{ fromJson(inputs.port_context).entity.relations.cluster }}"
          SERVICE_ARN="${{ fromJson(inputs.port_context).entity.identifier }}"

          echo "🔍 Checking service health for $SERVICE_ARN in cluster $CLUSTER_NAME"

          # Get service details
          aws ecs describe-services \
            --cluster "$CLUSTER_NAME" \
            --services "$SERVICE_ARN" \
            --output table

          # Store service status for later use
          SERVICE_STATUS=$(aws ecs describe-services \
            --cluster "$CLUSTER_NAME" \
            --services "$SERVICE_ARN" \
            --query 'services[0].status' \
            --output text)

          RUNNING_COUNT=$(aws ecs describe-services \
            --cluster "$CLUSTER_NAME" \
            --services "$SERVICE_ARN" \
            --query 'services[0].runningCount' \
            --output text)

          DESIRED_COUNT=$(aws ecs describe-services \
            --cluster "$CLUSTER_NAME" \
            --services "$SERVICE_ARN" \
            --query 'services[0].desiredCount' \
            --output text)

          echo "service_status=$SERVICE_STATUS" >> $GITHUB_OUTPUT
          echo "running_count=$RUNNING_COUNT" >> $GITHUB_OUTPUT
          echo "desired_count=$DESIRED_COUNT" >> $GITHUB_OUTPUT

      - name: Check running tasks
        run: |
          CLUSTER_NAME="${{ fromJson(inputs.port_context).entity.relations.cluster }}"
          SERVICE_ARN="${{ fromJson(inputs.port_context).entity.identifier }}"

          echo "📋 Listing running tasks..."

          # List tasks for the service
          aws ecs list-tasks \
            --cluster "$CLUSTER_NAME" \
            --service-name "$SERVICE_ARN" \
            --output table

          # Get task details if tasks exist
          TASK_ARNS=$(aws ecs list-tasks \
            --cluster "$CLUSTER_NAME" \
            --service-name "$SERVICE_ARN" \
            --query 'taskArns' \
            --output text)

          if [ "$TASK_ARNS" != "None" ] && [ -n "$TASK_ARNS" ]; then
            echo "🔍 Task details:"
            aws ecs describe-tasks \
              --cluster "$CLUSTER_NAME" \
              --tasks $TASK_ARNS \
              --output table
          else
            echo "⚠️ No running tasks found"
          fi

      - name: Check service events
        run: |
          CLUSTER_NAME="${{ fromJson(inputs.port_context).entity.relations.cluster }}"
          SERVICE_ARN="${{ fromJson(inputs.port_context).entity.identifier }}"

          echo "📅 Recent service events:"

          aws ecs describe-services \
            --cluster "$CLUSTER_NAME" \
            --services "$SERVICE_ARN" \
            --query 'services[0].events[:10]' \
            --output table

      - name: Health summary
        run: |
          SERVICE_STATUS="${{ steps.service-details.outputs.service_status }}"
          RUNNING_COUNT="${{ steps.service-details.outputs.running_count }}"
          DESIRED_COUNT="${{ steps.service-details.outputs.desired_count }}"

          echo "📊 Health Summary:"
          echo "==================="
          echo "Service Status: $SERVICE_STATUS"
          echo "Running Tasks: $RUNNING_COUNT"
          echo "Desired Tasks: $DESIRED_COUNT"

          if [ "$SERVICE_STATUS" = "ACTIVE" ] && [ "$RUNNING_COUNT" = "$DESIRED_COUNT" ]; then
            echo "✅ Service is healthy"
            HEALTH_STATUS="HEALTHY"
          else
            echo "⚠️ Service needs attention"
            HEALTH_STATUS="UNHEALTHY"
          fi

          echo "health_status=$HEALTH_STATUS" >> $GITHUB_OUTPUT

      - name: Inform Port about health check results
        uses: port-labs/port-github-action@v1
        with:
          clientId: ${{ secrets.PORT_CLIENT_ID }}
          clientSecret: ${{ secrets.PORT_CLIENT_SECRET }}
          baseUrl: https://api.port.io
          operation: PATCH_RUN
          status: 'SUCCESS'
          runId: ${{fromJson(inputs.port_context).runId}}
          logMessage: |
            🏥 Health Check Complete
            Status: ${{ steps.service-details.outputs.service_status }}
            Running: ${{ steps.service-details.outputs.running_count }}/${{ steps.service-details.outputs.desired_count }} tasks

      - name: Inform Port about health check failure
        if: failure()
        uses: port-labs/port-github-action@v1
        with:
          clientId: ${{ secrets.PORT_CLIENT_ID }}
          clientSecret: ${{ secrets.PORT_CLIENT_SECRET }}
          baseUrl: https://api.port.io
          operation: PATCH_RUN
          status: 'FAILURE'
          runId: ${{fromJson(inputs.port_context).runId}}
          logMessage: ❌ Health check failed for ECS service ${{ fromJson(inputs.port_context).entity.identifier }}
Create Port action
-
Go to the Self-service page of your portal.
-
Click on the
+ New Actionbutton. -
Click on the
{...} Edit JSONbutton. -
Copy and paste the following JSON configuration into the editor.
Service Health Check action (Click to expand)
Replace the variables<GITHUB-ORG>- your GitHub organization or user name.<GITHUB-REPO>- your GitHub repository name.<YOUR_GITHUB_OCEAN_INTEGRATION_ID>- your GitHub Ocean integration installation ID.
{"identifier": "service_health_check","title": "Service Health Check","icon": "DefaultProperty","description": "Run diagnostics on service health and check task status","trigger": {"type": "self-service","operation": "DAY-2","userInputs": {"properties": {},"required": [],"order": []},"blueprintIdentifier": "awsEcsService"},"invocationMethod": {"type": "INTEGRATION_ACTION","installationId": "<YOUR_GITHUB_OCEAN_INTEGRATION_ID>","integrationActionType": "dispatch_workflow","integrationActionExecutionProperties": {"org": "<GITHUB-ORG>","repo": "<GITHUB-REPO>","workflow": "service-health-check.yml","workflowInputs": {"port_context": {"entity": "{{ .entity }}","blueprint": "{{ .action.blueprint }}","runId": "{{ .run.id }}","trigger": "{{ .trigger }}"}},"reportWorkflowStatus": true}},"requiredApproval": false} -
Click
Save.
Now you should see the Service Health Check action in the self-service page. 🎉
Roll back deployment
To roll back an ECS deployment from Port, first add a GitHub workflow that restores the previous task definition. Then create a Port self-service action that triggers the workflow.
Add GitHub workflow
Create the file .github/workflows/rollback-deployment.yml in the .github/workflows folder of your repository.
We recommend creating a dedicated repository for the workflows that are used by Port actions.
Rollback Deployment GitHub workflow (Click to expand)
name: Rollback ECS Deployment

on:
  workflow_dispatch:
    inputs:
      port_context:
        required: true
        description: 'Action and general context (blueprint, run id, etc...)'
        type: string

jobs:
  rollback-deployment:
    runs-on: ubuntu-latest
    steps:
      - name: Inform Port about workflow start
        uses: port-labs/port-github-action@v1
        with:
          clientId: ${{ secrets.PORT_CLIENT_ID }}
          clientSecret: ${{ secrets.PORT_CLIENT_SECRET }}
          baseUrl: https://api.port.io
          operation: PATCH_RUN
          runId: ${{fromJson(inputs.port_context).runId}}
          logMessage: Initiating rollback for ECS service

      - name: Configure AWS credentials
        uses: aws-actions/configure-aws-credentials@v4
        with:
          aws-access-key-id: ${{ secrets.AWS_ACCESS_KEY_ID }}
          aws-secret-access-key: ${{ secrets.AWS_SECRET_ACCESS_KEY }}
          aws-region: ${{ secrets.AWS_REGION }}

      - name: Get current and previous task definitions
        id: task-definitions
        run: |
          CLUSTER_NAME="${{ fromJson(inputs.port_context).entity.relations.cluster }}"
          SERVICE_ARN="${{ fromJson(inputs.port_context).entity.identifier }}"

          # Get current task definition
          CURRENT_TASK_DEF=$(aws ecs describe-services \
            --cluster "$CLUSTER_NAME" \
            --services "$SERVICE_ARN" \
            --query 'services[0].taskDefinition' \
            --output text)

          echo "current_task_def=$CURRENT_TASK_DEF" >> $GITHUB_OUTPUT
          echo "📋 Current task definition: $CURRENT_TASK_DEF"

          # Extract family name and current revision
          FAMILY_NAME=$(echo $CURRENT_TASK_DEF | sed 's/.*task-definition\/\([^:]*\):.*/\1/')
          CURRENT_REVISION=$(echo $CURRENT_TASK_DEF | sed 's/.*://')

          echo "family_name=$FAMILY_NAME" >> $GITHUB_OUTPUT
          echo "current_revision=$CURRENT_REVISION" >> $GITHUB_OUTPUT

          # Calculate previous revision
          PREVIOUS_REVISION=$((CURRENT_REVISION - 1))

          if [ $PREVIOUS_REVISION -lt 1 ]; then
            echo "❌ No previous revision available to rollback to"
            exit 1
          fi

          PREVIOUS_TASK_DEF="$FAMILY_NAME:$PREVIOUS_REVISION"
          echo "previous_task_def=$PREVIOUS_TASK_DEF" >> $GITHUB_OUTPUT
          echo "🔄 Will rollback to: $PREVIOUS_TASK_DEF"

          # Verify previous task definition exists
          if ! aws ecs describe-task-definition --task-definition "$PREVIOUS_TASK_DEF" > /dev/null 2>&1; then
            echo "❌ Previous task definition $PREVIOUS_TASK_DEF does not exist"
            exit 1
          fi

      - name: Perform rollback
        run: |
          CLUSTER_NAME="${{ fromJson(inputs.port_context).entity.relations.cluster }}"
          SERVICE_ARN="${{ fromJson(inputs.port_context).entity.identifier }}"
          PREVIOUS_TASK_DEF="${{ steps.task-definitions.outputs.previous_task_def }}"

          echo "🔄 Rolling back service to previous task definition..."

          aws ecs update-service \
            --cluster "$CLUSTER_NAME" \
            --service "$SERVICE_ARN" \
            --task-definition "$PREVIOUS_TASK_DEF"

          echo "✅ Rollback initiated"

      - name: Wait for rollback to complete
        run: |
          CLUSTER_NAME="${{ fromJson(inputs.port_context).entity.relations.cluster }}"
          SERVICE_ARN="${{ fromJson(inputs.port_context).entity.identifier }}"

          echo "⏳ Waiting for rollback deployment to stabilize..."

          # Wait for service to become stable
          aws ecs wait services-stable \
            --cluster "$CLUSTER_NAME" \
            --services "$SERVICE_ARN"

          echo "✅ Rollback completed successfully"

      - name: Verify rollback
        run: |
          CLUSTER_NAME="${{ fromJson(inputs.port_context).entity.relations.cluster }}"
          SERVICE_ARN="${{ fromJson(inputs.port_context).entity.identifier }}"
          EXPECTED_TASK_DEF="${{ steps.task-definitions.outputs.previous_task_def }}"

          # Verify the service is now using the previous task definition
          CURRENT_TASK_DEF=$(aws ecs describe-services \
            --cluster "$CLUSTER_NAME" \
            --services "$SERVICE_ARN" \
            --query 'services[0].taskDefinition' \
            --output text)

          CURRENT_FAMILY_REV=$(echo $CURRENT_TASK_DEF | sed 's/.*task-definition\/\(.*\)/\1/')

          if [[ "$CURRENT_FAMILY_REV" == "$EXPECTED_TASK_DEF" ]]; then
            echo "✅ Rollback verification successful"
            echo "Service is now running: $CURRENT_TASK_DEF"
          else
            echo "❌ Rollback verification failed"
            echo "Expected: $EXPECTED_TASK_DEF"
            echo "Actual: $CURRENT_FAMILY_REV"
            exit 1
          fi

      - name: Inform Port about successful rollback
        if: success()
        uses: port-labs/port-github-action@v1
        with:
          clientId: ${{ secrets.PORT_CLIENT_ID }}
          clientSecret: ${{ secrets.PORT_CLIENT_SECRET }}
          baseUrl: https://api.port.io
          operation: PATCH_RUN
          status: 'SUCCESS'
          runId: ${{fromJson(inputs.port_context).runId}}
          logMessage: |
            ✅ Rollback completed successfully
            Rolled back from: ${{ steps.task-definitions.outputs.current_task_def }}
            Rolled back to: ${{ steps.task-definitions.outputs.previous_task_def }}

      - name: Inform Port about failed rollback
        if: failure()
        uses: port-labs/port-github-action@v1
        with:
          clientId: ${{ secrets.PORT_CLIENT_ID }}
          clientSecret: ${{ secrets.PORT_CLIENT_SECRET }}
          baseUrl: https://api.port.io
          operation: PATCH_RUN
          status: 'FAILURE'
          runId: ${{fromJson(inputs.port_context).runId}}
          logMessage: ❌ Failed to rollback ECS service ${{ fromJson(inputs.port_context).entity.identifier }}
Create Port action
-
Go to the Self-service page of your portal.
-
Click on the
+ New Actionbutton. -
Click on the
{...} Edit JSONbutton. -
Copy and paste the following JSON configuration into the editor.
Rollback Deployment action (Click to expand)
Replace the variables<GITHUB-ORG>- your GitHub organization or user name.<GITHUB-REPO>- your GitHub repository name.<YOUR_GITHUB_OCEAN_INTEGRATION_ID>- your GitHub Ocean integration installation ID.
{"identifier": "rollback_deployment","title": "Rollback Deployment","icon": "AWS","description": "Revert to previous task definition revision","trigger": {"type": "self-service","operation": "DAY-2","userInputs": {"properties": {},"required": [],"order": []},"blueprintIdentifier": "awsEcsService"},"invocationMethod": {"type": "INTEGRATION_ACTION","installationId": "<YOUR_GITHUB_OCEAN_INTEGRATION_ID>","integrationActionType": "dispatch_workflow","integrationActionExecutionProperties": {"org": "<GITHUB-ORG>","repo": "<GITHUB-REPO>","workflow": "rollback-deployment.yml","workflowInputs": {"port_context": {"entity": "{{ .entity }}","blueprint": "{{ .action.blueprint }}","runId": "{{ .run.id }}","trigger": "{{ .trigger }}"}},"reportWorkflowStatus": true}},"requiredApproval": true} -
Click
Save.
Now you should see the Rollback Deployment action in the self-service page. 🎉
Note that the rollback action has requiredApproval: true set for safety, as rollbacks can have significant impact on production services.
Delete ECS service
To delete an ECS service from Port, first add a GitHub workflow that deletes the service in AWS. Then create a Port self-service action that triggers the workflow.
Add GitHub workflow
Create the file .github/workflows/delete-ecs-service.yml in the .github/workflows folder of your repository.
We recommend creating a dedicated repository for the workflows that are used by Port actions.
Delete ECS Service GitHub workflow (Click to expand)
name: Delete ECS Service

on:
  workflow_dispatch:
    inputs:
      confirmation:
        description: 'Type DELETE to confirm service deletion'
        required: true
        type: string
      port_context:
        required: true
        description: 'Action and general context (blueprint, run id, etc...)'
        type: string

jobs:
  delete-ecs-service:
    runs-on: ubuntu-latest
    steps:
      - name: Validate confirmation
        run: |
          if [ "${{ github.event.inputs.confirmation }}" != "DELETE" ]; then
            echo "❌ Confirmation failed. You must type 'DELETE' exactly to proceed."
            exit 1
          fi
          echo "✅ Confirmation validated"

      - name: Inform Port about workflow start
        uses: port-labs/port-github-action@v1
        with:
          clientId: ${{ secrets.PORT_CLIENT_ID }}
          clientSecret: ${{ secrets.PORT_CLIENT_SECRET }}
          baseUrl: https://api.port.io
          operation: PATCH_RUN
          runId: ${{fromJson(inputs.port_context).runId}}
          logMessage: ⚠️ Initiating ECS service deletion

      - name: Configure AWS credentials
        uses: aws-actions/configure-aws-credentials@v4
        with:
          aws-access-key-id: ${{ secrets.AWS_ACCESS_KEY_ID }}
          aws-secret-access-key: ${{ secrets.AWS_SECRET_ACCESS_KEY }}
          aws-region: ${{ secrets.AWS_REGION }}

      - name: Get service information
        id: service-info
        run: |
          CLUSTER_NAME="${{ fromJson(inputs.port_context).entity.relations.cluster }}"
          SERVICE_ARN="${{ fromJson(inputs.port_context).entity.identifier }}"

          echo "🔍 Getting service information..."

          # Get service details before deletion
          SERVICE_NAME=$(aws ecs describe-services \
            --cluster "$CLUSTER_NAME" \
            --services "$SERVICE_ARN" \
            --query 'services[0].serviceName' \
            --output text)

          DESIRED_COUNT=$(aws ecs describe-services \
            --cluster "$CLUSTER_NAME" \
            --services "$SERVICE_ARN" \
            --query 'services[0].desiredCount' \
            --output text)

          RUNNING_COUNT=$(aws ecs describe-services \
            --cluster "$CLUSTER_NAME" \
            --services "$SERVICE_ARN" \
            --query 'services[0].runningCount' \
            --output text)

          TASK_DEFINITION=$(aws ecs describe-services \
            --cluster "$CLUSTER_NAME" \
            --services "$SERVICE_ARN" \
            --query 'services[0].taskDefinition' \
            --output text)

          echo "service_name=$SERVICE_NAME" >> $GITHUB_OUTPUT
          echo "desired_count=$DESIRED_COUNT" >> $GITHUB_OUTPUT
          echo "running_count=$RUNNING_COUNT" >> $GITHUB_OUTPUT
          echo "task_definition=$TASK_DEFINITION" >> $GITHUB_OUTPUT

          echo "📋 Service Details:"
          echo "  Name: $SERVICE_NAME"
          echo "  Desired Count: $DESIRED_COUNT"
          echo "  Running Count: $RUNNING_COUNT"
          echo "  Task Definition: $TASK_DEFINITION"

      - name: Scale service to zero
        run: |
          CLUSTER_NAME="${{ fromJson(inputs.port_context).entity.relations.cluster }}"
          SERVICE_ARN="${{ fromJson(inputs.port_context).entity.identifier }}"

          echo "⬇️ Scaling service to 0 tasks before deletion..."

          aws ecs update-service \
            --cluster "$CLUSTER_NAME" \
            --service "$SERVICE_ARN" \
            --desired-count 0

          echo "✅ Service scaled to 0 tasks"

      - name: Wait for tasks to stop
        run: |
          CLUSTER_NAME="${{ fromJson(inputs.port_context).entity.relations.cluster }}"
          SERVICE_ARN="${{ fromJson(inputs.port_context).entity.identifier }}"

          echo "⏳ Waiting for all tasks to stop..."

          # Wait for service to become stable with 0 running tasks
          aws ecs wait services-stable \
            --cluster "$CLUSTER_NAME" \
            --services "$SERVICE_ARN"

          # Verify no tasks are running
          RUNNING_COUNT=$(aws ecs describe-services \
            --cluster "$CLUSTER_NAME" \
            --services "$SERVICE_ARN" \
            --query 'services[0].runningCount' \
            --output text)

          if [ "$RUNNING_COUNT" -eq 0 ]; then
            echo "✅ All tasks have stopped"
          else
            echo "⚠️ Warning: $RUNNING_COUNT tasks still running"
          fi

      - name: Delete the service
        run: |
          CLUSTER_NAME="${{ fromJson(inputs.port_context).entity.relations.cluster }}"
          SERVICE_ARN="${{ fromJson(inputs.port_context).entity.identifier }}"

          echo "🗑️ Deleting ECS service..."

          aws ecs delete-service \
            --cluster "$CLUSTER_NAME" \
            --service "$SERVICE_ARN" \
            --force

          echo "✅ Service deletion initiated"

      - name: Wait for service deletion
        run: |
          CLUSTER_NAME="${{ fromJson(inputs.port_context).entity.relations.cluster }}"
          SERVICE_ARN="${{ fromJson(inputs.port_context).entity.identifier }}"

          echo "⏳ Waiting for service deletion to complete..."

          # Wait for service to be deleted (this can take a few minutes)
          aws ecs wait services-inactive \
            --cluster "$CLUSTER_NAME" \
            --services "$SERVICE_ARN"

          echo "✅ Service successfully deleted"

      - name: Verify deletion
        run: |
          CLUSTER_NAME="${{ fromJson(inputs.port_context).entity.relations.cluster }}"
          SERVICE_ARN="${{ fromJson(inputs.port_context).entity.identifier }}"

          echo "🔍 Verifying service deletion..."

          # Check if service still exists
          SERVICE_STATUS=$(aws ecs describe-services \
            --cluster "$CLUSTER_NAME" \
            --services "$SERVICE_ARN" \
            --query 'services[0].status' \
            --output text 2>/dev/null || echo "NOT_FOUND")

          if [ "$SERVICE_STATUS" = "INACTIVE" ] || [ "$SERVICE_STATUS" = "NOT_FOUND" ]; then
            echo "✅ Service deletion verified"
          else
            echo "❌ Service deletion verification failed. Status: $SERVICE_STATUS"
            exit 1
          fi

      - name: Delete Port entity
        run: |
          SERVICE_ARN="${{ fromJson(inputs.port_context).entity.identifier }}"

          echo "🗑️ Deleting corresponding Port entity..."

          curl -X DELETE \
            -H "Authorization: Bearer $(curl -X POST \
              -H "Content-Type: application/json" \
              -d '{"clientId": "${{ secrets.PORT_CLIENT_ID }}", "clientSecret": "${{ secrets.PORT_CLIENT_SECRET }}"}' \
              https://api.port.io/v1/auth/access_token | jq -r '.accessToken')" \
            "https://api.port.io/v1/blueprints/awsEcsService/entities/$(echo '$SERVICE_ARN' | sed 's/[\/:]/%2F/g')"

          echo "✅ Port entity deletion requested"

      - name: Inform Port about successful deletion
        if: success()
        uses: port-labs/port-github-action@v1
        with:
          clientId: ${{ secrets.PORT_CLIENT_ID }}
          clientSecret: ${{ secrets.PORT_CLIENT_SECRET }}
          baseUrl: https://api.port.io
          operation: PATCH_RUN
          status: 'SUCCESS'
          runId: ${{fromJson(inputs.port_context).runId}}
          logMessage: |
            ✅ ECS Service Successfully Deleted
            Service: ${{ steps.service-info.outputs.service_name }}
            Previous Desired Count: ${{ steps.service-info.outputs.desired_count }}
            Task Definition: ${{ steps.service-info.outputs.task_definition }}

      - name: Inform Port about failed deletion
        if: failure()
        uses: port-labs/port-github-action@v1
        with:
          clientId: ${{ secrets.PORT_CLIENT_ID }}
          clientSecret: ${{ secrets.PORT_CLIENT_SECRET }}
          baseUrl: https://api.port.io
          operation: PATCH_RUN
          status: 'FAILURE'
          runId: ${{fromJson(inputs.port_context).runId}}
          logMessage: ❌ Failed to delete ECS service ${{ fromJson(inputs.port_context).entity.identifier }}
Create Port action
-
Go to the Self-service page of your portal.
-
Click on the
+ New Actionbutton. -
Click on the
{...} Edit JSONbutton. -
Copy and paste the following JSON configuration into the editor.
Delete ECS Service action (Click to expand)
Replace the variables<GITHUB-ORG>- your GitHub organization or user name.<GITHUB-REPO>- your GitHub repository name.<YOUR_GITHUB_OCEAN_INTEGRATION_ID>- your GitHub Ocean integration installation ID.
{"identifier": "delete_ecs_service","title": "Delete ECS Service","icon": "AWS","description": "Permanently delete an ECS service","trigger": {"type": "self-service","operation": "DELETE","userInputs": {"properties": {"confirmation": {"title": "Confirmation","type": "string","description": "Type 'DELETE' to confirm permanent deletion","pattern": "^DELETE$"}},"required": ["confirmation"],"order": ["confirmation"]},"blueprintIdentifier": "awsEcsService"},"invocationMethod": {"type": "INTEGRATION_ACTION","installationId": "<YOUR_GITHUB_OCEAN_INTEGRATION_ID>","integrationActionType": "dispatch_workflow","integrationActionExecutionProperties": {"org": "<GITHUB-ORG>","repo": "<GITHUB-REPO>","workflow": "delete-ecs-service.yml","workflowInputs": {"confirmation": "{{.inputs.\"confirmation\"}}","port_context": {"entity": "{{ .entity }}","blueprint": "{{ .action.blueprint }}","runId": "{{ .run.id }}","trigger": "{{ .trigger }}"}},"reportWorkflowStatus": true}},"requiredApproval": true} -
Click
Save.
Now you should see the Delete ECS Service action in the self-service page. 🎉
The delete service action includes multiple safety measures:
- Double confirmation: Requires typing "DELETE" exactly
- Manual approval:
requiredApproval: true - Graceful shutdown: Scales to 0 before deletion
- Verification: Confirms deletion completed
- Port cleanup: Removes the entity from Port catalog
Let's test it!
Now that you have set up all the self-service actions, let's test them to ensure they work correctly with your ECS services.
-
Head to the self-service page of your portal.
-
Click on the
Service Health Checkaction.- Choose any ECS service from your catalog.
- Click on
Execute. - Verify the health summary provides useful insights about your service.
-
Scale ECS Service
- Click on the
Scale ECS Serviceaction. - Choose an ECS service that currently has running tasks.
- Enter a different desired count (e.g., if it has 2 tasks, try 3 or 1).
- Click on
Execute. - Wait for the scaling operation to complete.
- Verify in the AWS Console that the service now has the new desired count.
- Click on the
-
Update Task Definition
- Click on the
Update Task Definitionaction. - Choose an ECS service to update.
- Enter a new container image URI. Some examples:
- If currently using
nginx:1.24, trynginx:1.25 - If using a custom image, try a different tag like
:v2.0
- If currently using
- Click on
Execute.
- Click on the
-
Restart ECS Service
- Click on the
Restart ECS Serviceaction. - Choose an ECS service to restart.
- Click on
Execute.
- Click on the
-
Rollback Deployment
- Click on the
Rollback Deploymentaction. - Choose an ECS service that has been updated at least once.
- Click on
Execute. - Approve the action when prompted (due to
requiredApproval: true). - Monitor the rollback process:
- Previous task definition identified
- Service updated to previous revision
- Deployment completion verification
- Click on the
-
Delete ECS Service
- Click on the
Delete ECS Serviceaction. - Choose a test service that can be safely deleted.
- Type
DELETEexactly in the confirmation field. - Click on
Execute. - Approve the action when prompted.
- Monitor the deletion process:
- Service information captured
- Scaling to 0 tasks
- Service deletion
- Verification of removal
- Click on the
Visualize metrics
With your data and actions in place, we can create a dedicated dashboard in Port to visualize all ECS services by state, launch type, or cluster using customizable widgets. In addition, we can trigger actions (scale, restart) directly from the dashboard.
Create a dashboard
-
Navigate to the Catalog page of your portal.
-
Click on the
+button in the left sidebar. -
Select New dashboard.
-
Name the dashboard ECS Management.
-
Input
Scale and restart your AWS ECS servicesunder Description. -
Select the
AWSicon. -
Click
Create.
We now have a blank dashboard where we can start adding widgets to visualize insights from our AWS ECS.
Add widgets
In the new dashboard, create the following widgets:
Total ECS services (Click to expand)
-
Click
+ Widgetand select Number Chart. -
Title:
Total services(add theAWSicon). -
Select
Count entitiesChart type and choose AWS ECS Service as the Blueprint. -
Select
countfor the Function. -
Select
customas the Unit and inputservicesas the Custom unit -
Click
Save.
Services by launch type (Click to expand)
-
Click
+ Widgetand select Pie chart. -
Title:
Services by launch type(add theAWSicon). -
Choose the AWS ECS Service blueprint.
-
Under
Breakdown by property, select the Launch Type property -
Click Save.
Service health status (Click to expand)
-
Click
+ Widgetand select Pie chart. -
Title:
Service health status(add theDefaultPropertyicon). -
Choose the AWS ECS Service blueprint.
-
Under
Breakdown by property, select the Health Status property -
Click Save.
ECS services view (Click to expand)
-
Click
+ Widgetand select Table. -
Title the widget All Services.
-
Choose the AWS ECS Service blueprint
-
Click Save to add the widget to the dashboard.
-
Click on the
...button in the top right corner of the table and select Customize table. -
In the top right corner of the table, click on
Manage Propertiesand add the following properties:- Status: The current status of the service.
- Desired Count: Target number of tasks.
- Launch Type: How tasks are launched.
- Cluster: Related ECS cluster.
-
Click on the save icon in the top right corner of the widget to save the customized table.
Task count distribution (Click to expand)
-
Click
+ Widgetand select Number Chart. -
Title:
Total running tasks(add theDefaultPropertyicon). -
Choose the AWS ECS Service blueprint.
-
Select
countas the Aggregation function. -
Under
Measure property, select the Running Count property. -
Select
customas the Unit and inputtasksas the Custom unit. -
Click Save.
Platform version overview (Click to expand)
-
Click
+ Widgetand select Pie chart. -
Title:
Platform versions(add theDefaultPropertyicon). -
Choose the AWS ECS Service blueprint.
-
Under
Breakdown by property, select the Platform Version property. -
Click Save.
ECS management actions (Click to expand)
-
Click
+ Widgetand select Action Card. -
Title:
ECS service management(add theAWSicon). -
Choose the AWS ECS Service blueprint.
-
Under
Actions, select all the ECS management actions we created:- Scale ECS Service
- Restart ECS Service
- Update Task Definition
- Service Health Check
- Rollback Deployment
- Delete ECS Service
-
Click Save.
AWS EC2 instances
Use this section to bring your AWS EC2 management experience into Port.
In this section, you will:
- Ingest EC2 data into Port's software catalog using Port's AWS integration.
- Set up self-service actions to manage EC2 instances (start, reboot, and terminate).
- Build dashboards in Port to monitor and take action on your EC2 resources.
Prerequisites
This section assumes the following:
- You have a Port account and have completed the onboarding process.
- Port's AWS integration is installed in your account.
- Port's GitHub Ocean integration is installed for running workflows.
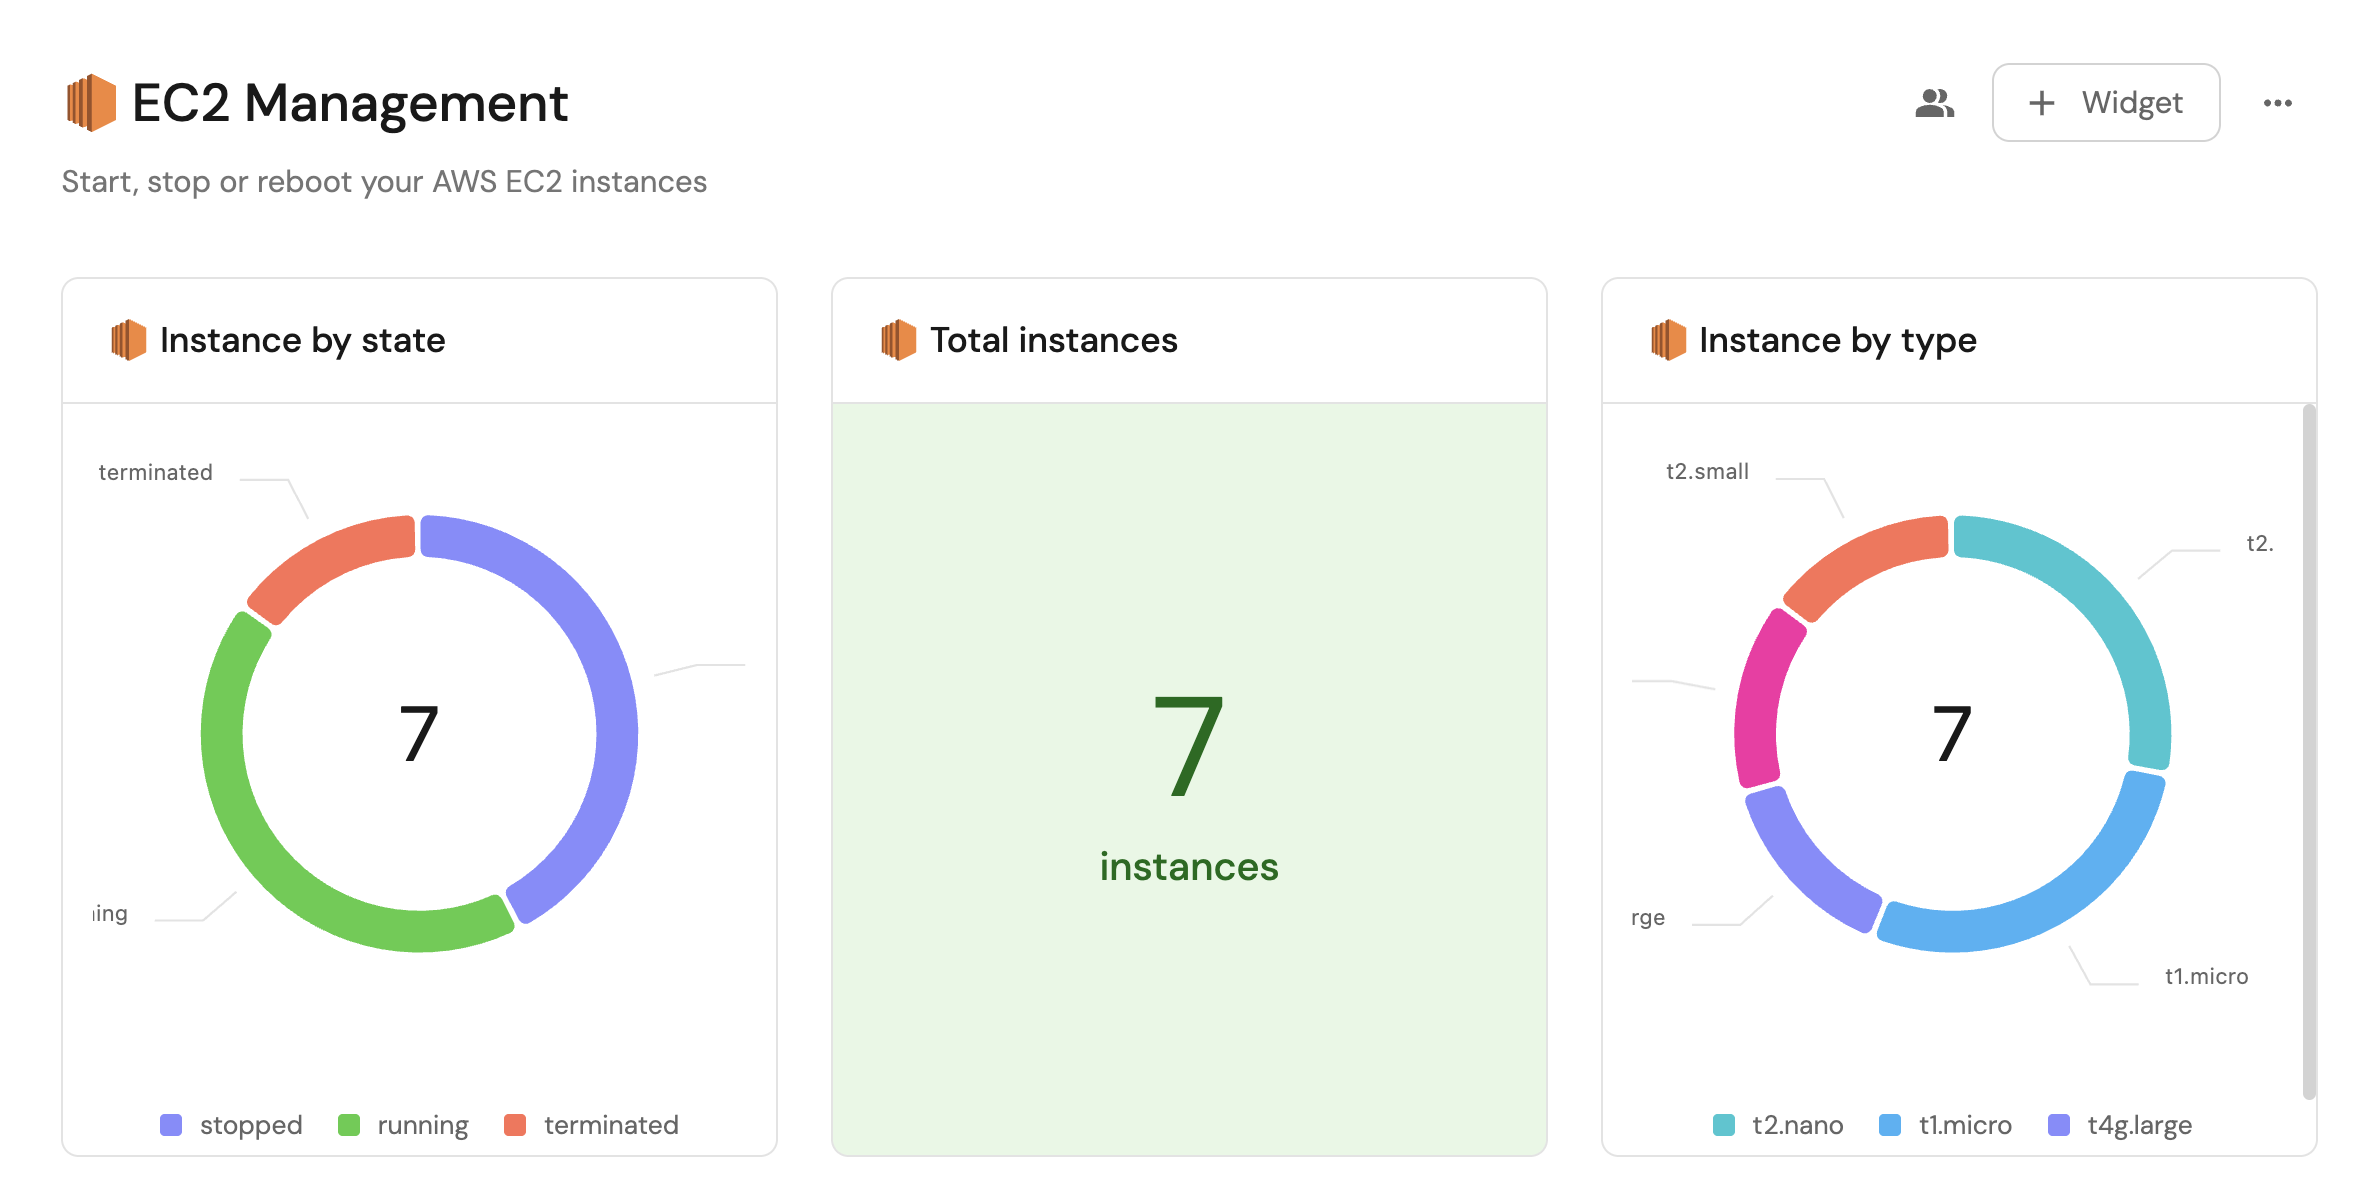
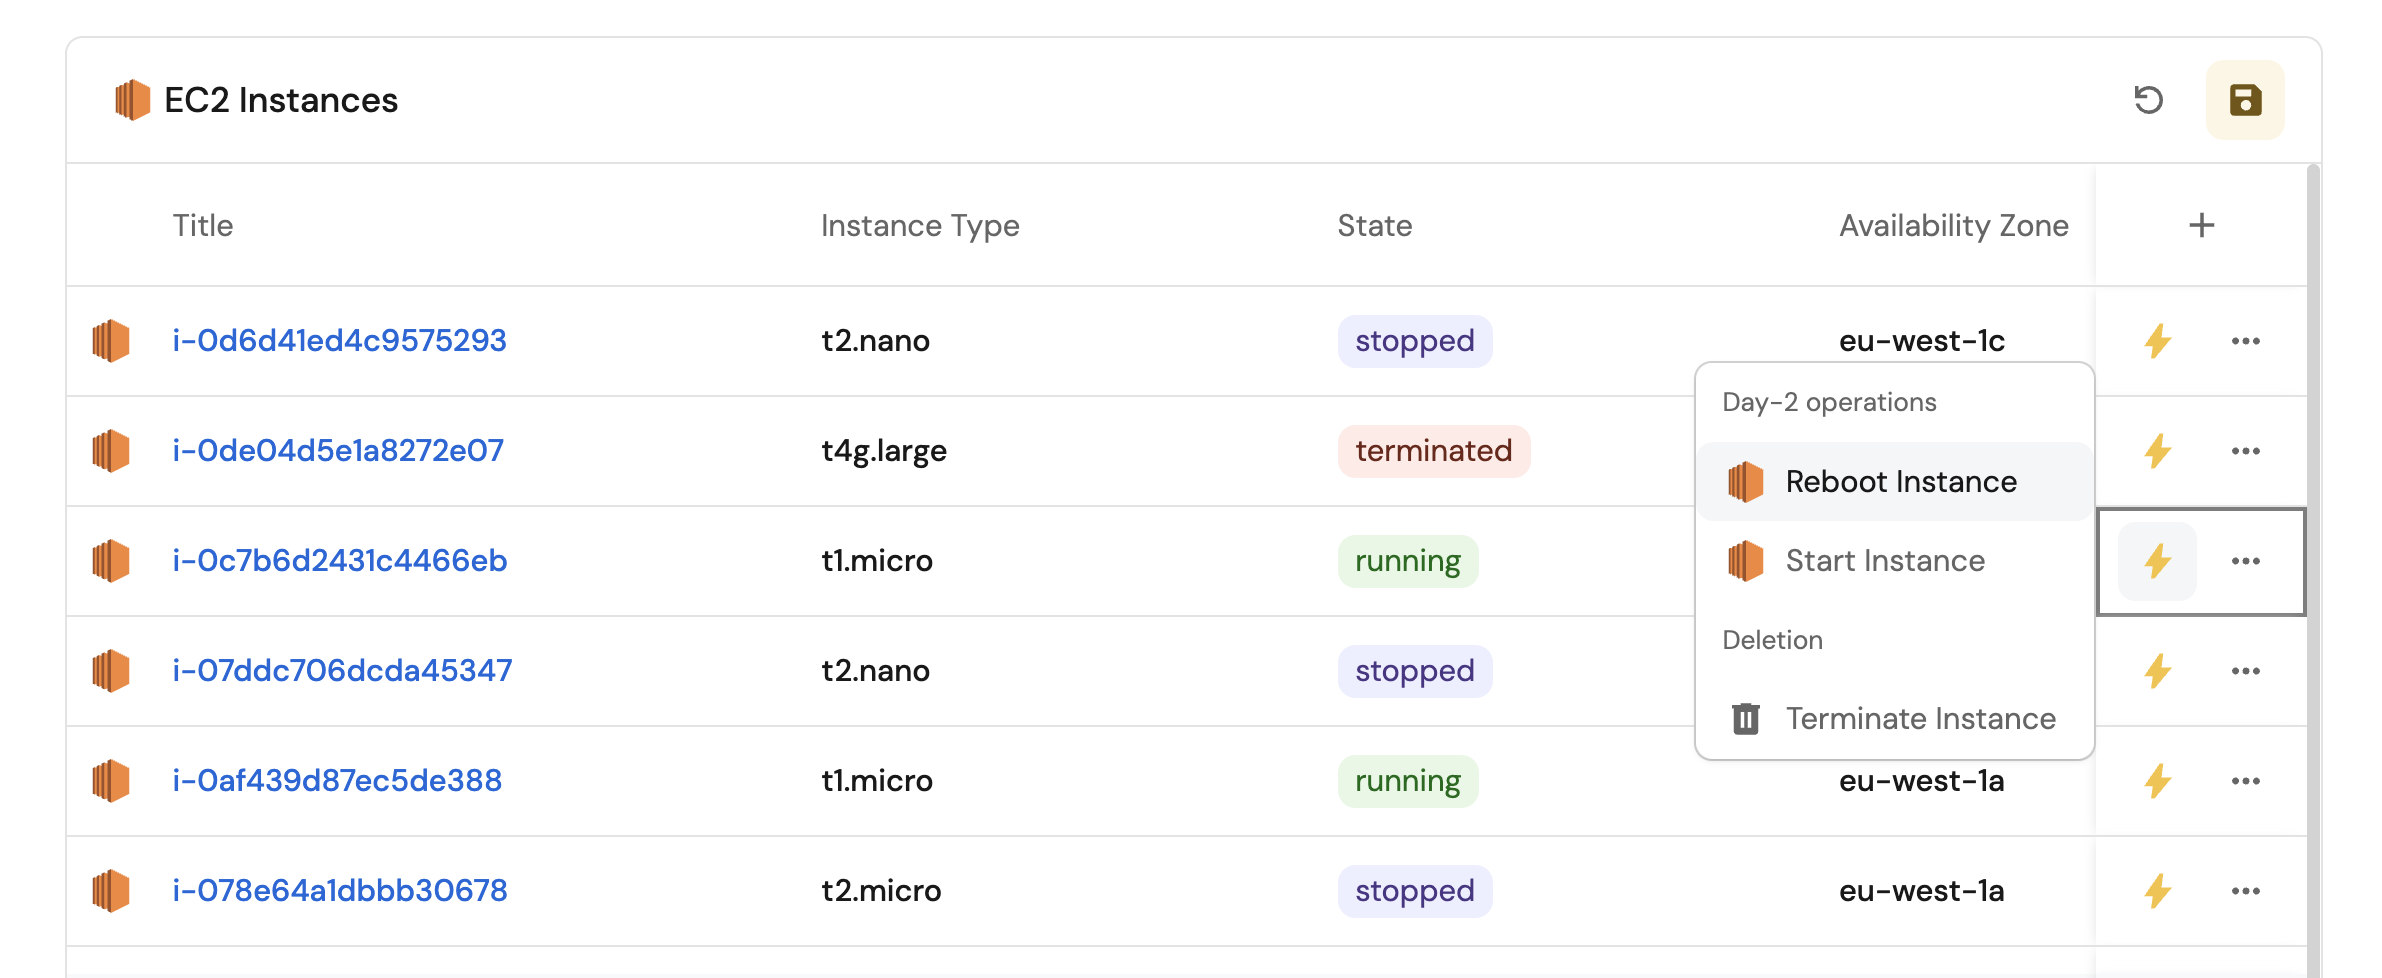
Set up data model
When installing the AWS integration in Port, the AWS Account blueprint is created by default.
However, the EC2 Instance blueprint is not created automatically so we will need to create it manually.
Create the EC2 instance blueprint
-
Go to the Builder page of your portal.
-
Click on
+ Blueprint. -
Click on the
{...}button in the top right corner, and chooseEdit JSON. -
Add this JSON schema:
AWS EC2 Instance blueprint (Click to expand)
{"identifier": "ec2Instance","description": "This blueprint represents an AWS EC2 instance in our software catalog","title": "EC2 Instance","icon": "EC2","schema": {"properties": {"monitoring": {"type": "boolean","title": "Monitoring","description": "Indicates if detailed monitoring is enabled for the EC2 instance."},"instance_state": {"type": "string","title": "Instance State","description": "The state of the EC2 instance (e.g., running, stopped).","enum": ["pending","running","shutting-down","terminated","stopping","stopped"],"enumColors": {"pending": "yellow","running": "green","shutting-down": "pink","stopped": "purple","stopping": "orange","terminated": "red"}},"instance_type": {"type": "string","title": "Instance Type","description": "The type of EC2 instance (e.g., t2.micro, m5.large)."},"availability_zone": {"type": "string","title": "Availability Zone","description": "The Availability Zone where the EC2 instance is deployed."},"public_dns": {"type": "string","title": "Public DNS","description": "The public DNS name assigned to the EC2 instance."},"private_dns": {"type": "string","title": "Private DNS","description": "The private DNS name assigned to the EC2 instance within its VPC."},"security_group_ids": {"type": "array","title": "Security Group IDs","description": "The list of security group IDs assigned to the EC2 instance."},"key_name": {"type": "string","title": "Key Name","description": "The name of the key pair associated with the EC2 instance."},"image": {"type": "string","title": "Image ID","description": "The image ID of the EC2 instance."}},"required": []},"mirrorProperties": {},"calculationProperties": {},"aggregationProperties": {},"relations": {"account": {"title": "Account","target": "awsAccount","required": false,"many": false}}} -
Click
Saveto create the blueprint.
Update the integration mapping
-
Go to the Data Sources page of your portal.
-
Select the AWS integration.
-
Add the following YAML block into the editor to ingest ec2 instances from your AWS account:
AWS integration configuration (Click to expand)
deleteDependentEntities: truecreateMissingRelatedEntities: trueenableMergeEntity: trueresources:- kind: AWS::Organizations::Accountselector:query: 'true'port:entity:mappings:identifier: .Idtitle: .Nameblueprint: '"awsAccount"'properties:arn: .Arnemail: .Emailstatus: .Statusjoined_method: .JoinedMethodjoined_timestamp: .JoinedTimestamp | sub(" "; "T")- kind: AWS::EC2::Instanceselector:query: 'true'useGetResourceAPI: trueport:entity:mappings:identifier: .Identifiertitle: (.Properties.Tags[]? | select(.Key == "Name") | .Value | tostring) // .Identifierblueprint: '"ec2Instance"'properties:instance_state: .Properties.State.Nameimage: .Properties.ImageIdavailability_zone: .Properties.AvailabilityZonetags: .Properties.Tagsinstance_type: .Properties.InstanceTypepublic_dns: .Properties.PublicDnsNameprivate_dns: .Properties.PrivateDnsNamesecurity_group_ids: .Properties.SecurityGroupIdsmonitoring: .Properties.Monitoringkey_name: .Properties.KeyNamerelations:account: .__AccountId -
Click
Save & Resyncto apply the mapping.
Set up self-service actions
Now let us create self-service actions to manage your EC2 instances directly from Port using GitHub Actions. You will implement workflows to:
-
Start an EC2 instance.
-
Reboot an EC2 instance.
-
Terminate an EC2 instance.
-
Resize a related Auto Scaling Group.
To implement these use-cases, follow the steps below:
Add GitHub secrets
In your GitHub repository, go to Settings > Secrets and add the following secrets:
PORT_CLIENT_ID- Port Client ID learn more.PORT_CLIENT_SECRET- Port Client Secret learn more.AWS_ACCESS_KEY_ID- AWS IAM user's access key.AWS_SECRET_ACCESS_KEY- AWS IAM user's secret access key.AWS_REGION- AWS region (e.g.,us-east-1).
To resize Auto Scaling Groups, the AWS IAM user must also have the autoscaling:UpdateAutoScalingGroup permission, and the autoScalingGroup blueprint must be populated. See manage your AWS Auto Scaling Groups to set up the data model and mapping.
Start an EC2 instance
To start an EC2 instance from Port, first add a GitHub workflow that starts the instance in AWS. Then create a Port self-service action that triggers the workflow.
Add GitHub workflow
Create the file .github/workflows/start-instance.yaml in the .github/workflows folder of your repository.
We recommend creating a dedicated repository for the workflows that are used by Port actions.
Start EC2 GitHub workflow (Click to expand)
name: Start EC2 Instance

on:
  workflow_dispatch:
    inputs:
      port_context:
        required: true
        description: 'Action and general context (blueprint, entity, run id, etc...)'
        type: string

jobs:
  start-instance:
    runs-on: ubuntu-latest
    steps:
      - name: Inform Port of workflow start
        uses: port-labs/port-github-action@v1
        with:
          clientId: ${{ secrets.PORT_CLIENT_ID }}
          clientSecret: ${{ secrets.PORT_CLIENT_SECRET }}
          baseUrl: https://api.port.io
          operation: PATCH_RUN
          runId: ${{fromJson(inputs.port_context).runId}}
          logMessage: Configuring AWS credentials to start EC2 instance with ID ${{ fromJson(inputs.port_context).entity.identifier }}

      - name: Configure AWS credentials
        uses: aws-actions/configure-aws-credentials@v4
        with:
          aws-access-key-id: ${{ secrets.AWS_ACCESS_KEY_ID }}
          aws-secret-access-key: ${{ secrets.AWS_SECRET_ACCESS_KEY }}
          aws-region: ${{ secrets.AWS_REGION }}

      - name: Start EC2 instance
        run: aws ec2 start-instances --instance-ids ${{ fromJson(inputs.port_context).entity.identifier }}

      - name: Inform Port about EC2 start success
        if: success()
        uses: port-labs/port-github-action@v1
        with:
          clientId: ${{ secrets.PORT_CLIENT_ID }}
          clientSecret: ${{ secrets.PORT_CLIENT_SECRET }}
          baseUrl: https://api.port.io
          operation: PATCH_RUN
          runId: ${{ fromJson(inputs.port_context).runId }}
          status: 'SUCCESS'
          logMessage: ✅ EC2 instance with ID ${{ fromJson(inputs.port_context).entity.identifier }} started successfully
          summary: EC2 instance start completed successfully

      - name: Inform Port about EC2 start failure
        if: failure()
        uses: port-labs/port-github-action@v1
        with:
          clientId: ${{ secrets.PORT_CLIENT_ID }}
          clientSecret: ${{ secrets.PORT_CLIENT_SECRET }}
          baseUrl: https://api.port.io
          operation: PATCH_RUN
          runId: ${{ fromJson(inputs.port_context).runId }}
          status: 'FAILURE'
          logMessage: ❌ Failed to start EC2 instance with ID ${{ fromJson(inputs.port_context).entity.identifier }}
          summary: EC2 instance start failed
Create Port action
-
Go to the Self-service page of your portal.
-
Click on the
+ New Actionbutton. -
Click on the
{...} Edit JSONbutton. -
Copy and paste the following JSON configuration into the editor.
Start EC2 instance action (Click to expand)
Replace the variables<GITHUB-ORG>- your GitHub organization or user name.<GITHUB-REPO>- your GitHub repository name.<YOUR_GITHUB_OCEAN_INTEGRATION_ID>- your GitHub Ocean integration installation ID.
{"identifier": "start_ec2_instance","title": "Start EC2 Instance","icon": "EC2","description": "Start an EC2 Instance","trigger": {"type": "self-service","operation": "DAY-2","userInputs": {"properties": {},"required": []},"blueprintIdentifier": "ec2Instance"},"invocationMethod": {"type": "INTEGRATION_ACTION","installationId": "<YOUR_GITHUB_OCEAN_INTEGRATION_ID>","integrationActionType": "dispatch_workflow","integrationActionExecutionProperties": {"org": "<GITHUB-ORG>","repo": "<GITHUB-REPO>","workflow": "start-instance.yaml","workflowInputs": {"port_context": {"entity": "{{ .entity }}","blueprint": "{{ .action.blueprint }}","runId": "{{ .run.id }}"}},"reportWorkflowStatus": true}},"requiredApproval": false} -
Click
Save.
Now you should see the Start EC2 Instance action in the self-service page. 🎉
Reboot an EC2 instance
To reboot an EC2 instance from Port, first add a GitHub workflow that reboots the instance in AWS. Then create a Port self-service action that triggers the workflow.
Add GitHub workflow
Create the file .github/workflows/reboot-instance.yaml in the .github/workflows folder of your repository.
We recommend creating a dedicated repository for the workflows that are used by Port actions.
Reboot EC2 GitHub workflow (Click to expand)
name: Reboot EC2 Instance

on:
  workflow_dispatch:
    inputs:
      port_context:
        required: true
        description: 'Action and general context (blueprint, entity, run id, etc...)'
        type: string

jobs:
  reboot-instance:
    runs-on: ubuntu-latest
    steps:
      - name: Inform Port of workflow start
        uses: port-labs/port-github-action@v1
        with:
          clientId: ${{ secrets.PORT_CLIENT_ID }}
          clientSecret: ${{ secrets.PORT_CLIENT_SECRET }}
          baseUrl: https://api.port.io
          operation: PATCH_RUN
          runId: ${{fromJson(inputs.port_context).runId}}
          logMessage: Configuring AWS credentials to reboot EC2 instance with ID ${{ fromJson(inputs.port_context).entity.identifier }}

      - name: Configure AWS credentials
        uses: aws-actions/configure-aws-credentials@v4
        with:
          aws-access-key-id: ${{ secrets.AWS_ACCESS_KEY_ID }}
          aws-secret-access-key: ${{ secrets.AWS_SECRET_ACCESS_KEY }}
          aws-region: ${{ secrets.AWS_REGION }}

      - name: Reboot EC2 instance
        run: aws ec2 reboot-instances --instance-ids ${{ fromJson(inputs.port_context).entity.identifier }}

      - name: Inform Port about EC2 reboot success
        if: success()
        uses: port-labs/port-github-action@v1
        with:
          clientId: ${{ secrets.PORT_CLIENT_ID }}
          clientSecret: ${{ secrets.PORT_CLIENT_SECRET }}
          baseUrl: https://api.port.io
          operation: PATCH_RUN
          runId: ${{ fromJson(inputs.port_context).runId }}
          status: 'SUCCESS'
          logMessage: ✅ EC2 instance with ID ${{ fromJson(inputs.port_context).entity.identifier }} rebooted successfully
          summary: EC2 instance reboot completed successfully

      - name: Inform Port about EC2 reboot failure
        if: failure()
        uses: port-labs/port-github-action@v1
        with:
          clientId: ${{ secrets.PORT_CLIENT_ID }}
          clientSecret: ${{ secrets.PORT_CLIENT_SECRET }}
          baseUrl: https://api.port.io
          operation: PATCH_RUN
          runId: ${{ fromJson(inputs.port_context).runId }}
          status: 'FAILURE'
          logMessage: ❌ Failed to reboot EC2 instance with ID ${{ fromJson(inputs.port_context).entity.identifier }}
          summary: EC2 instance reboot failed
Create Port action
-
Go to the Self-service page of your portal.
-
Click on the
+ New Actionbutton. -
Click on the
{...} Edit JSONbutton. -
Copy and paste the following JSON configuration into the editor.
Reboot EC2 instance action (Click to expand)
Replace the variables<GITHUB-ORG>- your GitHub organization or user name.<GITHUB-REPO>- your GitHub repository name.<YOUR_GITHUB_OCEAN_INTEGRATION_ID>- your GitHub Ocean integration installation ID.
{"identifier": "reboot_ec2_instance","title": "Reboot EC2 Instance","icon": "EC2","description": "Reboot an EC2 Instance","trigger": {"type": "self-service","operation": "DAY-2","userInputs": {"properties": {},"required": []},"blueprintIdentifier": "ec2Instance"},"invocationMethod": {"type": "INTEGRATION_ACTION","installationId": "<YOUR_GITHUB_OCEAN_INTEGRATION_ID>","integrationActionType": "dispatch_workflow","integrationActionExecutionProperties": {"org": "<GITHUB-ORG>","repo": "<GITHUB-REPO>","workflow": "reboot-instance.yaml","workflowInputs": {"port_context": {"entity": "{{ .entity }}","blueprint": "{{ .action.blueprint }}","runId": "{{ .run.id }}"}},"reportWorkflowStatus": true}},"requiredApproval": false} -
Click
Save.
Now you should see the Reboot EC2 Instance action in the self-service page. 🎉
Terminate an EC2 instance
To terminate an EC2 instance from Port, first add a GitHub workflow that terminates the instance in AWS. Then create a Port self-service action that triggers the workflow.
Add GitHub workflow
Create the file .github/workflows/terminate-instance.yaml in the .github/workflows folder of your repository.
We recommend creating a dedicated repository for the workflows that are used by Port actions.
Terminate EC2 GitHub workflow (Click to expand)
name: Terminate EC2 Instance

on:
  workflow_dispatch:
    inputs:
      port_context:
        required: true
        description: 'Action and general context (blueprint, entity, run id, etc...)'
        type: string

jobs:
  terminate-instance:
    runs-on: ubuntu-latest
    steps:
      - name: Inform Port of workflow start
        uses: port-labs/port-github-action@v1
        with:
          clientId: ${{ secrets.PORT_CLIENT_ID }}
          clientSecret: ${{ secrets.PORT_CLIENT_SECRET }}
          baseUrl: https://api.port.io
          operation: PATCH_RUN
          runId: ${{fromJson(inputs.port_context).runId}}
          logMessage: Configuring AWS credentials to terminate EC2 instance with ID ${{ fromJson(inputs.port_context).entity.identifier }}

      - name: Configure AWS credentials
        uses: aws-actions/configure-aws-credentials@v4
        with:
          aws-access-key-id: ${{ secrets.AWS_ACCESS_KEY_ID }}
          aws-secret-access-key: ${{ secrets.AWS_SECRET_ACCESS_KEY }}
          aws-region: ${{ secrets.AWS_REGION }}

      - name: Terminate EC2 instance
        run: aws ec2 terminate-instances --instance-ids ${{ fromJson(inputs.port_context).entity.identifier }}

      - name: Inform Port about EC2 terminate success
        if: success()
        uses: port-labs/port-github-action@v1
        with:
          clientId: ${{ secrets.PORT_CLIENT_ID }}
          clientSecret: ${{ secrets.PORT_CLIENT_SECRET }}
          baseUrl: https://api.port.io
          operation: PATCH_RUN
          runId: ${{ fromJson(inputs.port_context).runId }}
          status: 'SUCCESS'
          logMessage: ✅ EC2 instance with ID ${{ fromJson(inputs.port_context).entity.identifier }} terminated successfully
          summary: EC2 instance terminate completed successfully

      - name: Inform Port about EC2 terminate failure
        if: failure()
        uses: port-labs/port-github-action@v1
        with:
          clientId: ${{ secrets.PORT_CLIENT_ID }}
          clientSecret: ${{ secrets.PORT_CLIENT_SECRET }}
          baseUrl: https://api.port.io
          operation: PATCH_RUN
          runId: ${{ fromJson(inputs.port_context).runId }}
          status: 'FAILURE'
          logMessage: ❌ Failed to terminate EC2 instance with ID ${{ fromJson(inputs.port_context).entity.identifier }}
          summary: EC2 instance terminate failed
Create Port action
-
Go to the Self-service page of your portal.
-
Click on the
+ New Actionbutton. -
Click on the
{...} Edit JSONbutton. -
Copy and paste the following JSON configuration into the editor.
Terminate EC2 instance action (Click to expand)
Replace the variables<GITHUB-ORG>- your GitHub organization or user name.<GITHUB-REPO>- your GitHub repository name.<YOUR_GITHUB_OCEAN_INTEGRATION_ID>- your GitHub Ocean integration installation ID.
{"identifier": "terminate_ec2_instance","title": "Terminate EC2 Instance","icon": "EC2","description": "Terminate an EC2 Instance","trigger": {"type": "self-service","operation": "DELETE","userInputs": {"properties": {},"required": []},"blueprintIdentifier": "ec2Instance"},"invocationMethod": {"type": "INTEGRATION_ACTION","installationId": "<YOUR_GITHUB_OCEAN_INTEGRATION_ID>","integrationActionType": "dispatch_workflow","integrationActionExecutionProperties": {"org": "<GITHUB-ORG>","repo": "<GITHUB-REPO>","workflow": "terminate-instance.yaml","workflowInputs": {"port_context": {"entity": "{{ .entity }}","blueprint": "{{ .action.blueprint }}","runId": "{{ .run.id }}"}},"reportWorkflowStatus": true}},"requiredApproval": false} -
Click
Save.
Now you should see the Terminate EC2 Instance action in the self-service page. 🎉
Resize an Auto Scaling Group
This action updates the minimum, maximum, and desired capacity of an Auto Scaling Group related to your EC2 estate.
Add GitHub workflow
Create the file .github/workflows/resize-asg.yaml in the .github/workflows folder of your repository.
We recommend creating a dedicated repository for the workflows that are used by Port actions.
Resize Auto Scaling Group GitHub workflow (Click to expand)
name: Resize Auto Scaling Group

on:
  workflow_dispatch:
    inputs:
      desired_capacity:
        description: 'New desired capacity'
        required: true
      minimum_capacity:
        description: 'Minimum size of the Auto Scaling Group'
        required: true
      maximum_capacity:
        description: 'Maximum size of the Auto Scaling Group'
        required: true
      port_context:
        required: true
        description: 'Action and general context (blueprint, run id, etc...)'
        type: string

jobs:
  resize-asg:
    runs-on: ubuntu-latest
    steps:
      - name: Inform Port about workflow start
        uses: port-labs/port-github-action@v1
        with:
          clientId: ${{ secrets.PORT_CLIENT_ID }}
          clientSecret: ${{ secrets.PORT_CLIENT_SECRET }}
          baseUrl: https://api.port.io
          operation: PATCH_RUN
          runId: ${{ fromJson(inputs.port_context).runId }}
          logMessage: Configuring AWS credentials

      - name: Configure AWS credentials
        uses: aws-actions/configure-aws-credentials@v4
        with:
          aws-access-key-id: ${{ secrets.AWS_ACCESS_KEY_ID }}
          aws-secret-access-key: ${{ secrets.AWS_SECRET_ACCESS_KEY }}
          aws-region: ${{ secrets.AWS_REGION }}

      - name: Resize Auto Scaling Group
        run: |
          aws autoscaling update-auto-scaling-group \
            --auto-scaling-group-name ${{ fromJson(inputs.port_context).entity.title }} \
            --desired-capacity ${{ github.event.inputs.desired_capacity }} \
            --min-size ${{ github.event.inputs.minimum_capacity }} \
            --max-size ${{ github.event.inputs.maximum_capacity }}

      - name: Inform Port about Auto Scaling Group resize success
        uses: port-labs/port-github-action@v1
        with:
          clientId: ${{ secrets.PORT_CLIENT_ID }}
          clientSecret: ${{ secrets.PORT_CLIENT_SECRET }}
          baseUrl: https://api.port.io
          operation: PATCH_RUN
          status: 'SUCCESS'
          runId: ${{ fromJson(inputs.port_context).runId }}
          logMessage: Resized Auto Scaling Group ${{ fromJson(inputs.port_context).entity.title }} to ${{ github.event.inputs.desired_capacity }} instances
Create Port action
-
Go to the Self-service page of your portal.
-
Click on the
+ New Actionbutton. -
Click on the
{...} Edit JSONbutton. -
Copy and paste the following JSON configuration into the editor.
Resize Auto Scaling Group action (Click to expand)
Replace the variables<GITHUB-ORG>- your GitHub organization or user name.<GITHUB-REPO>- your GitHub repository name.<YOUR_GITHUB_OCEAN_INTEGRATION_ID>- your GitHub Ocean integration installation ID.
{"identifier": "resize_auto_scaling_group","title": "Resize Auto Scaling Group","icon": "AWS","trigger": {"type": "self-service","operation": "DAY-2","userInputs": {"properties": {"minimum_capacity": {"icon": "DefaultProperty","title": "Minimum capacity","description": "Minimum number of instances","type": "number","default": 1,"minimum": 0},"maximum_capacity": {"icon": "DefaultProperty","title": "Maximum capacity","type": "number","default": 1,"minimum": 1},"desired_capacity": {"title": "Desired capacity","type": "number","default": 1}},"required": ["desired_capacity","maximum_capacity","minimum_capacity"],"order": ["minimum_capacity","maximum_capacity","desired_capacity"]},"blueprintIdentifier": "autoScalingGroup"},"invocationMethod": {"type": "INTEGRATION_ACTION","installationId": "<YOUR_GITHUB_OCEAN_INTEGRATION_ID>","integrationActionType": "dispatch_workflow","integrationActionExecutionProperties": {"org": "<GITHUB-ORG>","repo": "<GITHUB-REPO>","workflow": "resize-asg.yaml","workflowInputs": {"minimum_capacity": "{{ .inputs.\"minimum_capacity\" }}","maximum_capacity": "{{ .inputs.\"maximum_capacity\" }}","desired_capacity": "{{ .inputs.\"desired_capacity\" }}","port_context": {"entity": "{{ .entity }}","blueprint": "{{ .action.blueprint }}","runId": "{{ .run.id }}","trigger": "{{ .trigger }}"}},"reportWorkflowStatus": true}},"requiredApproval": false} -
Click Save to create the action.
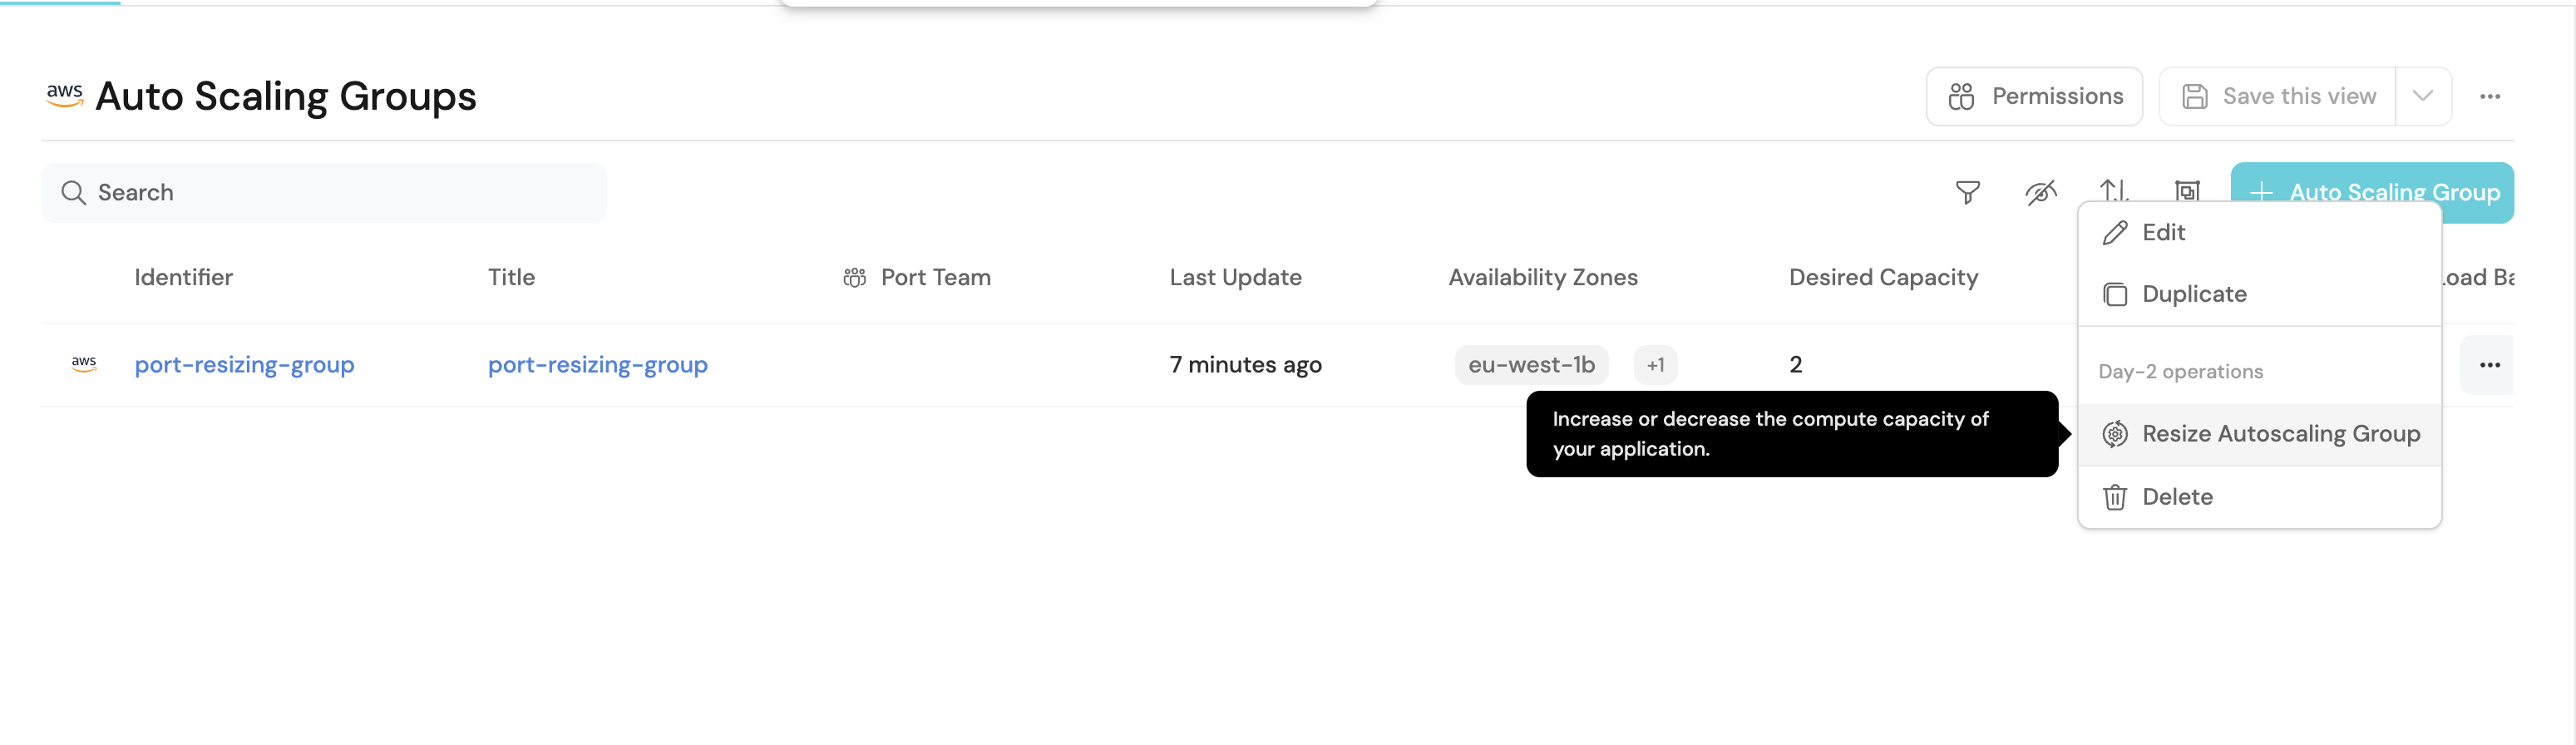
Visualize metrics
With your data and actions in place, we can create a dedicated dashboard in Port to visualize all EC2 instances by state, type, or account using customizable widgets. In addition, we can trigger actions (start, reboot, terminate) directly from the dashboard.
Create a dashboard
-
Navigate to your software catalog.
-
Click on the
+button in the left sidebar. -
Select New dashboard.
-
Name the dashboard EC2 Management.
-
Input
Start, stop or reboot your AWS EC2 instancesunder Description. -
Select the
EC2icon. -
Click
Create.
We now have a blank dashboard where we can start adding widgets to visualize insights from our AWS EC2.
Add widgets
In the new dashboard, create the following widgets:
Instance by state (Click to expand)
-
Click
+ Widgetand select Pie chart. -
Title:
Instance by state(add theEC2icon). -
Choose the EC2 Instance blueprint.
-
Under
Breakdown by property, select the Instance State property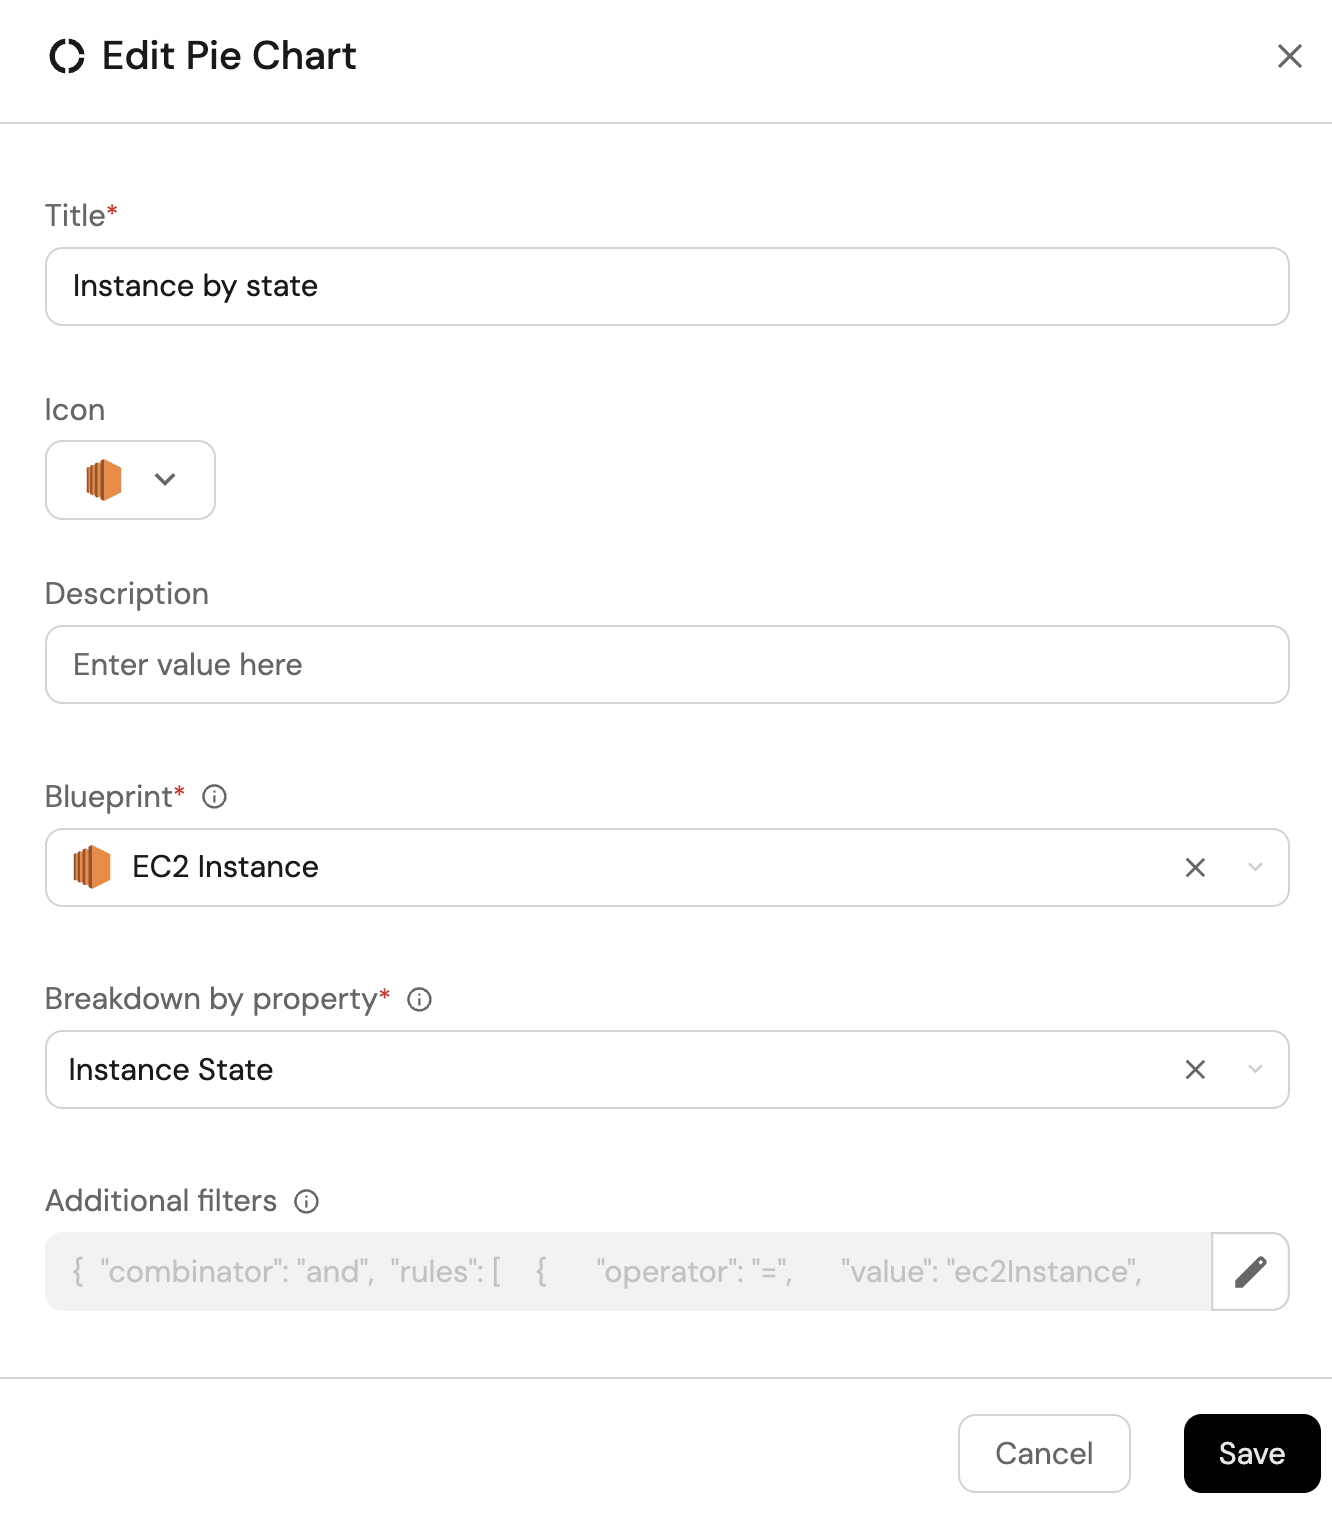
-
Click Save.
Instance by type (Click to expand)
-
Click
+ Widgetand select Pie chart. -
Title:
Instance by type(add theEC2icon). -
Choose the EC2 Instance blueprint.
-
Under
Breakdown by property, select the Instance Type property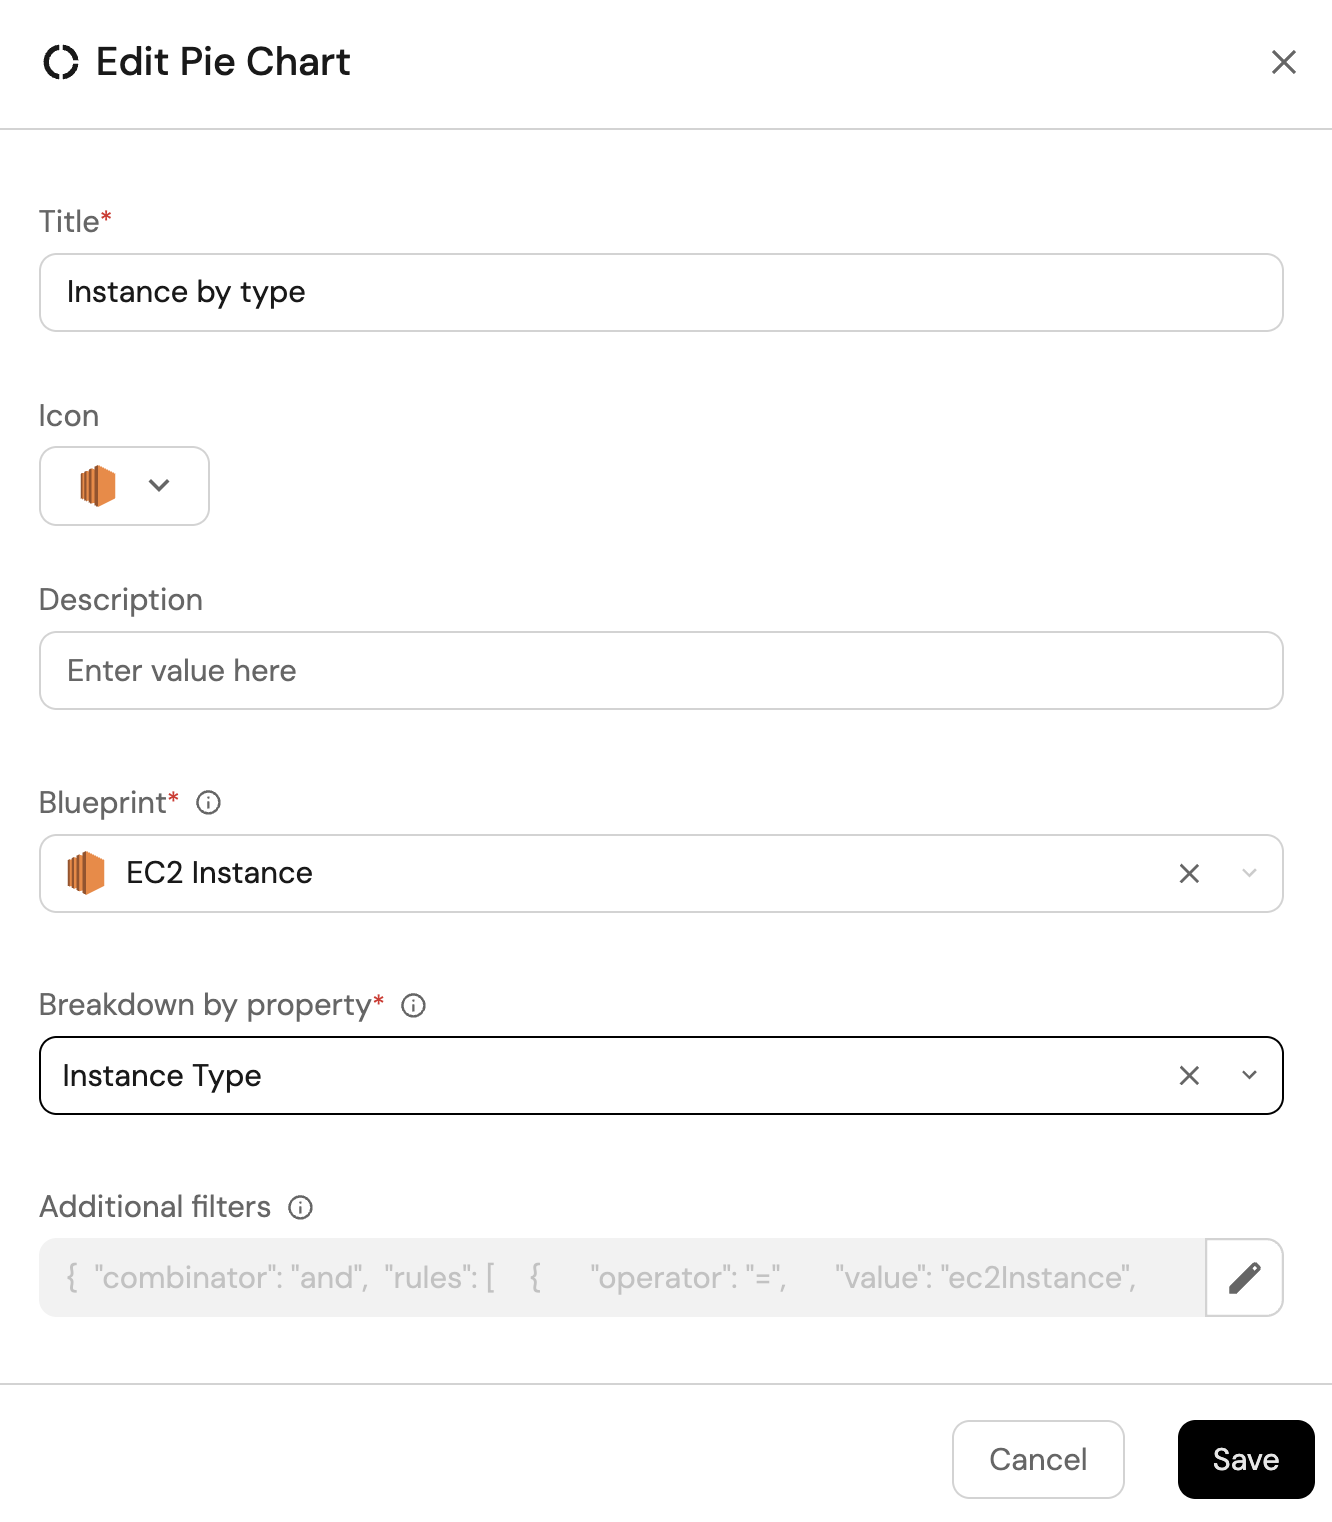
-
Click Save.
Total instances (Click to expand)
-
Click
+ Widgetand select Number Chart. -
Title:
Total instances(add theEC2icon). -
Select
Count entitiesChart type and choose EC2 Instance as the Blueprint. -
Select
countfor the Function. -
Select
customas the Unit and inputinstancesas the Custom unit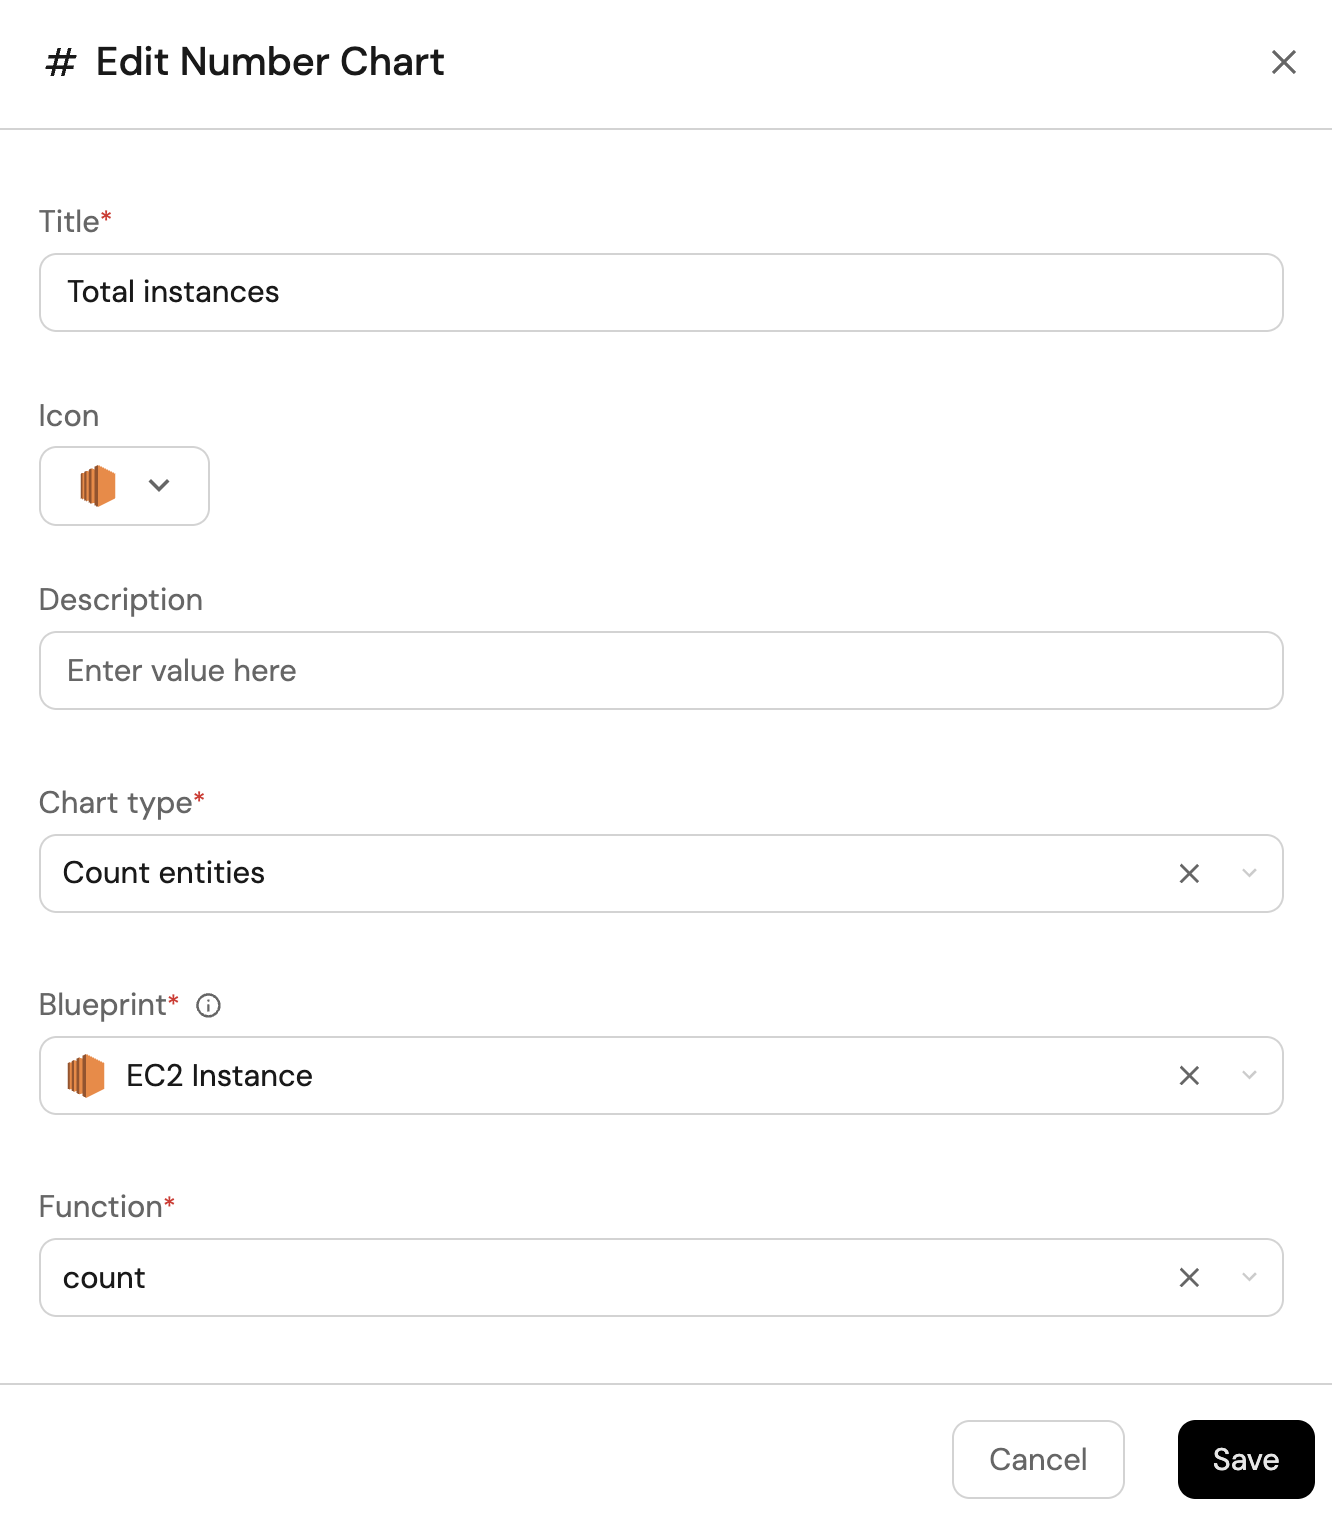
-
Click
Save.
EC2 instances view (Click to expand)
-
Click
+ Widgetand select Table. -
Title the widget All Instances.
-
Choose the EC2 Instance blueprint
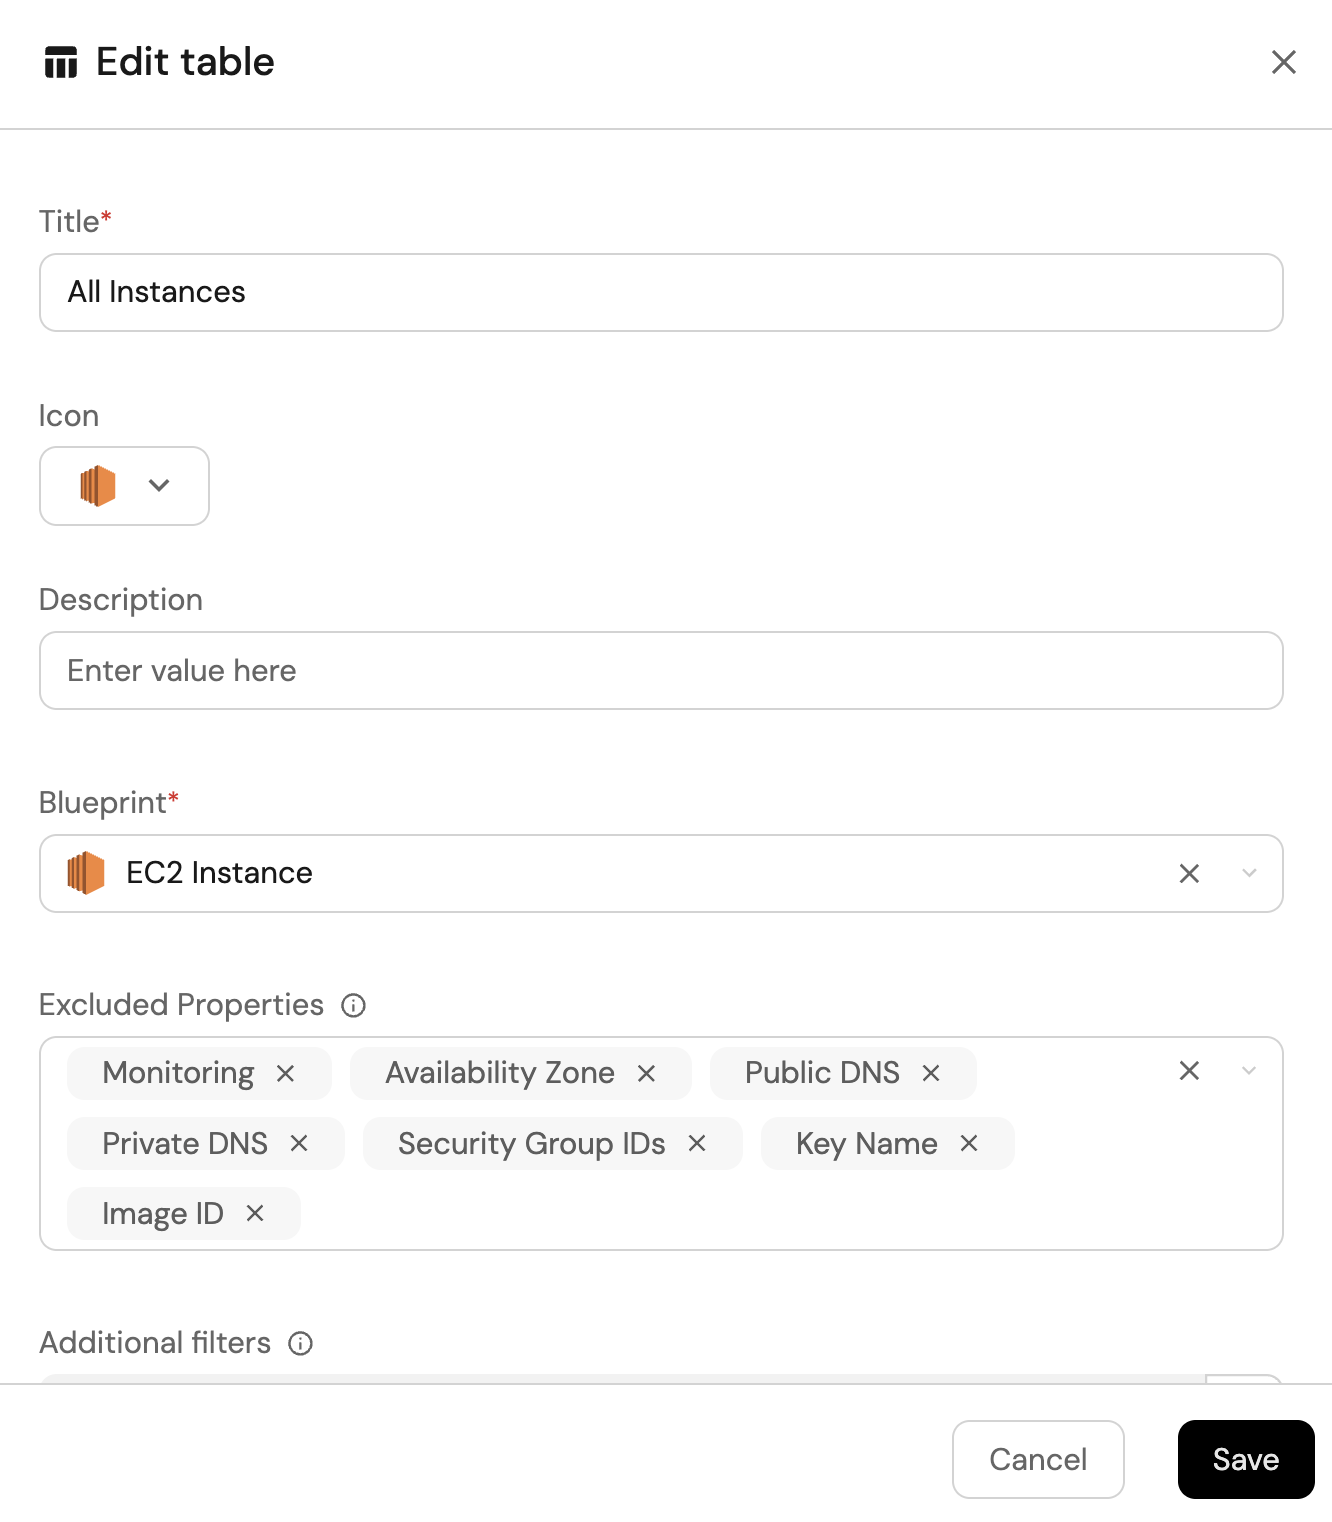
-
Click Save to add the widget to the dashboard.
-
Click on the
...button in the top right corner of the table and select Customize table. -
In the top right corner of the table, click on
Manage Propertiesand add the following properties:- Instance State: The current state of the instance.
- Instance Type: The instance type.
- Account: The name of each related AWS account.
-
Click on the save icon in the top right corner of the widget to save the customized table.
AWS S3 buckets and RDS instances
Use this section to set up a monitoring solution to gain visibility into security configurations from your AWS S3 and RDS instances using Port's AWS integration.
In this section, you will:
- Ingest AWS S3 and RDS data into Port's software catalog using Port's AWS integration.
- Set up self-service actions to manage RDS instances (reboot and delete).
- Build dashboards in Port to monitor and take action on your AWS storage resources.
Prerequisites
This section assumes the following:
- You have a Port account and have completed the onboarding process.
- Port's AWS integration is installed in your account.
- Port's GitHub Ocean integration is installed (required for self-service actions).
We recommend creating a dedicated repository for the workflows that are used by Port actions.
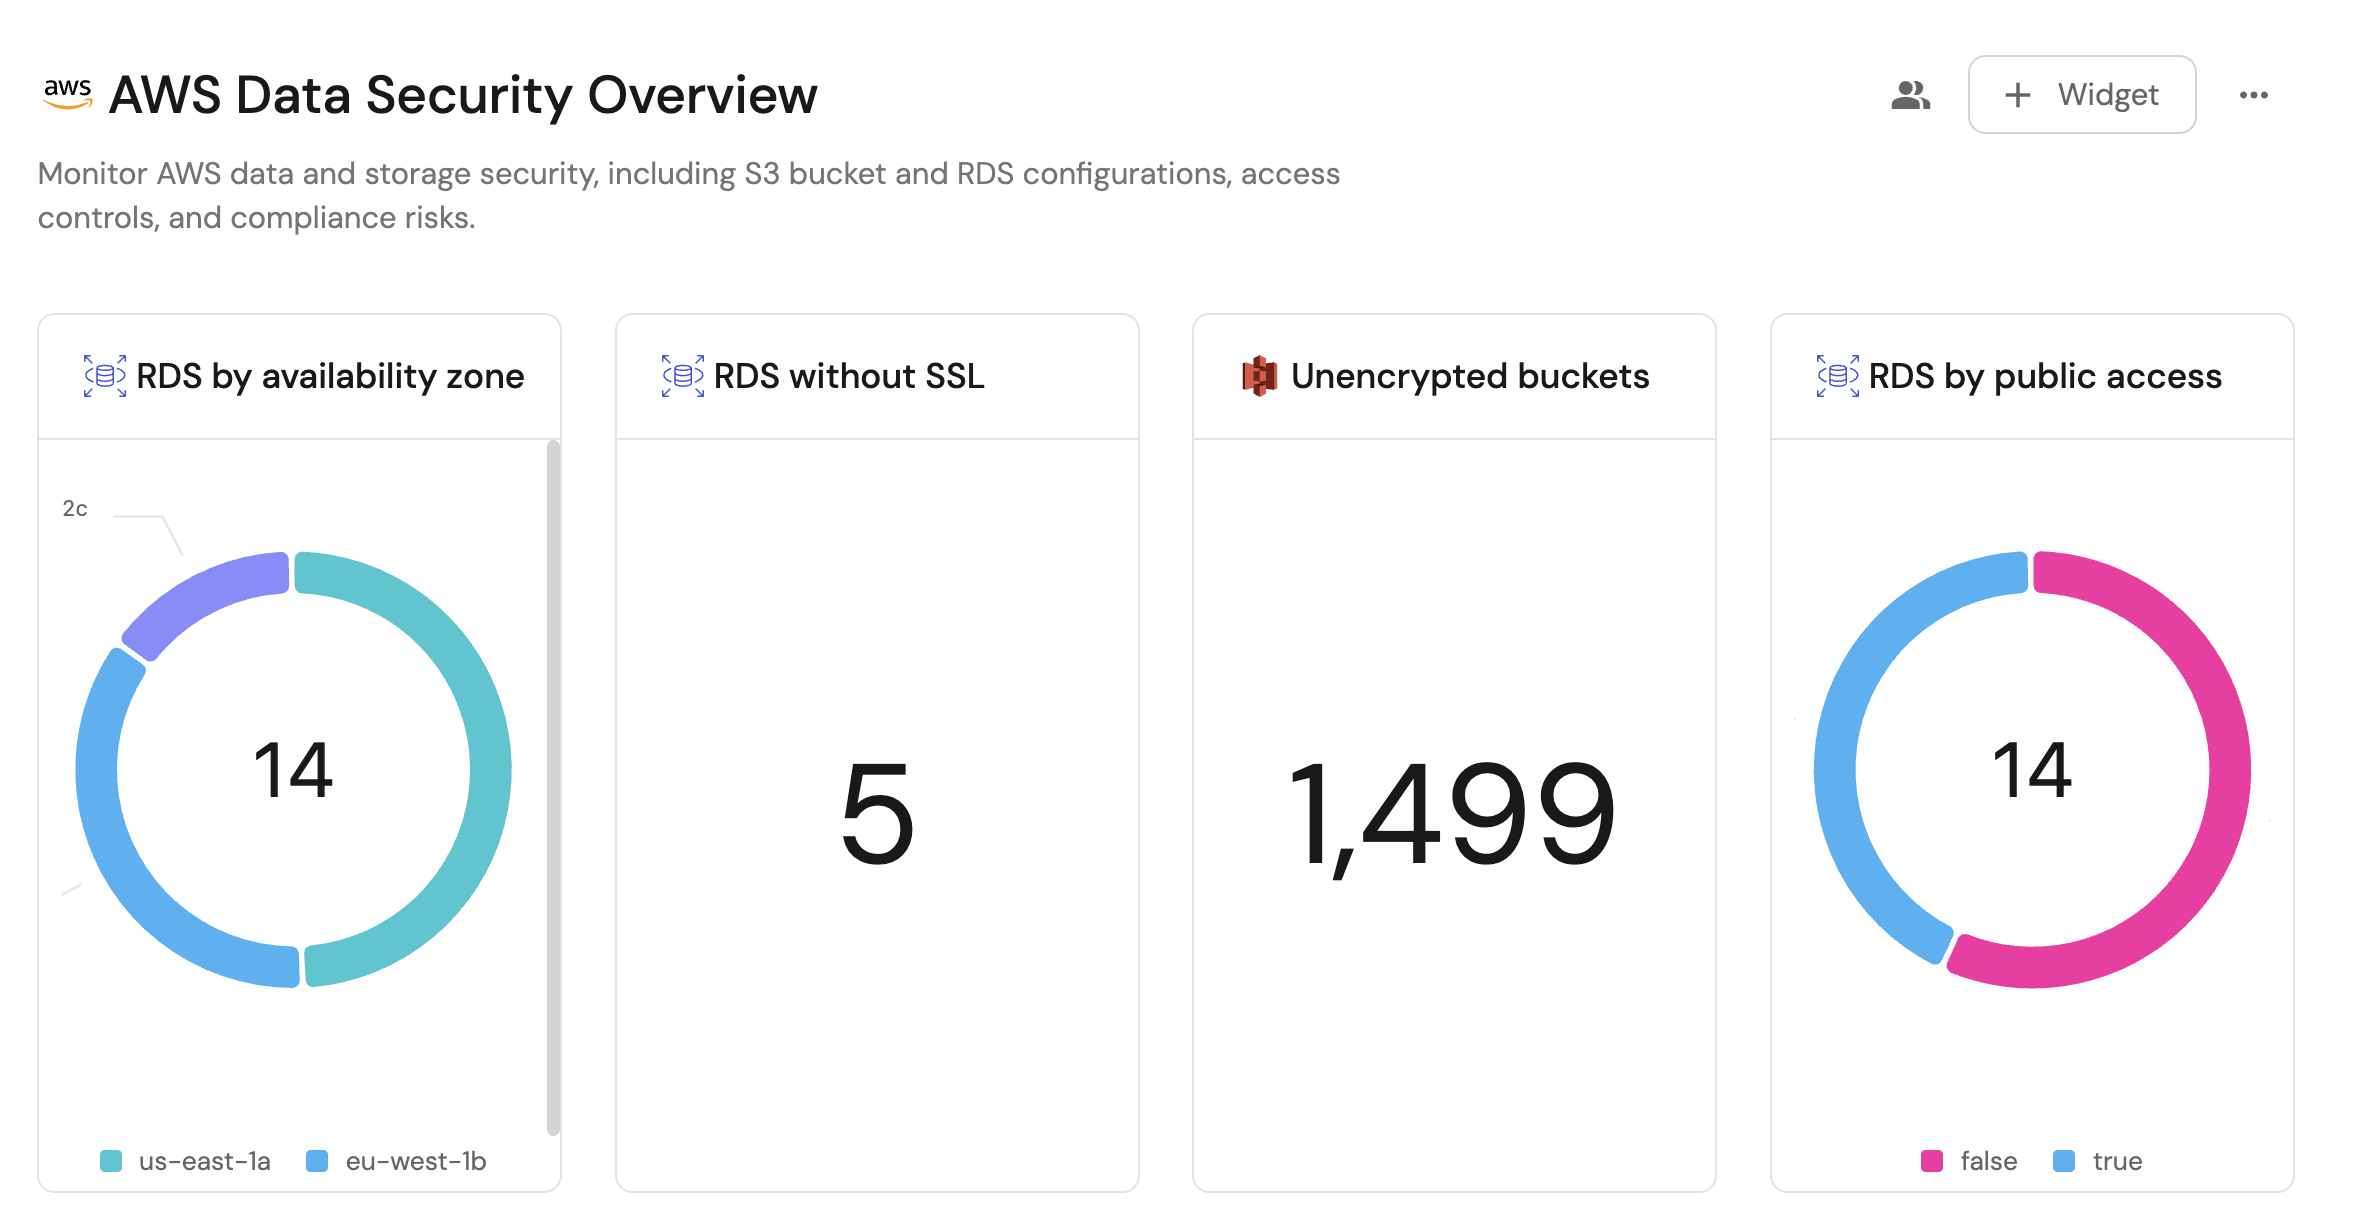
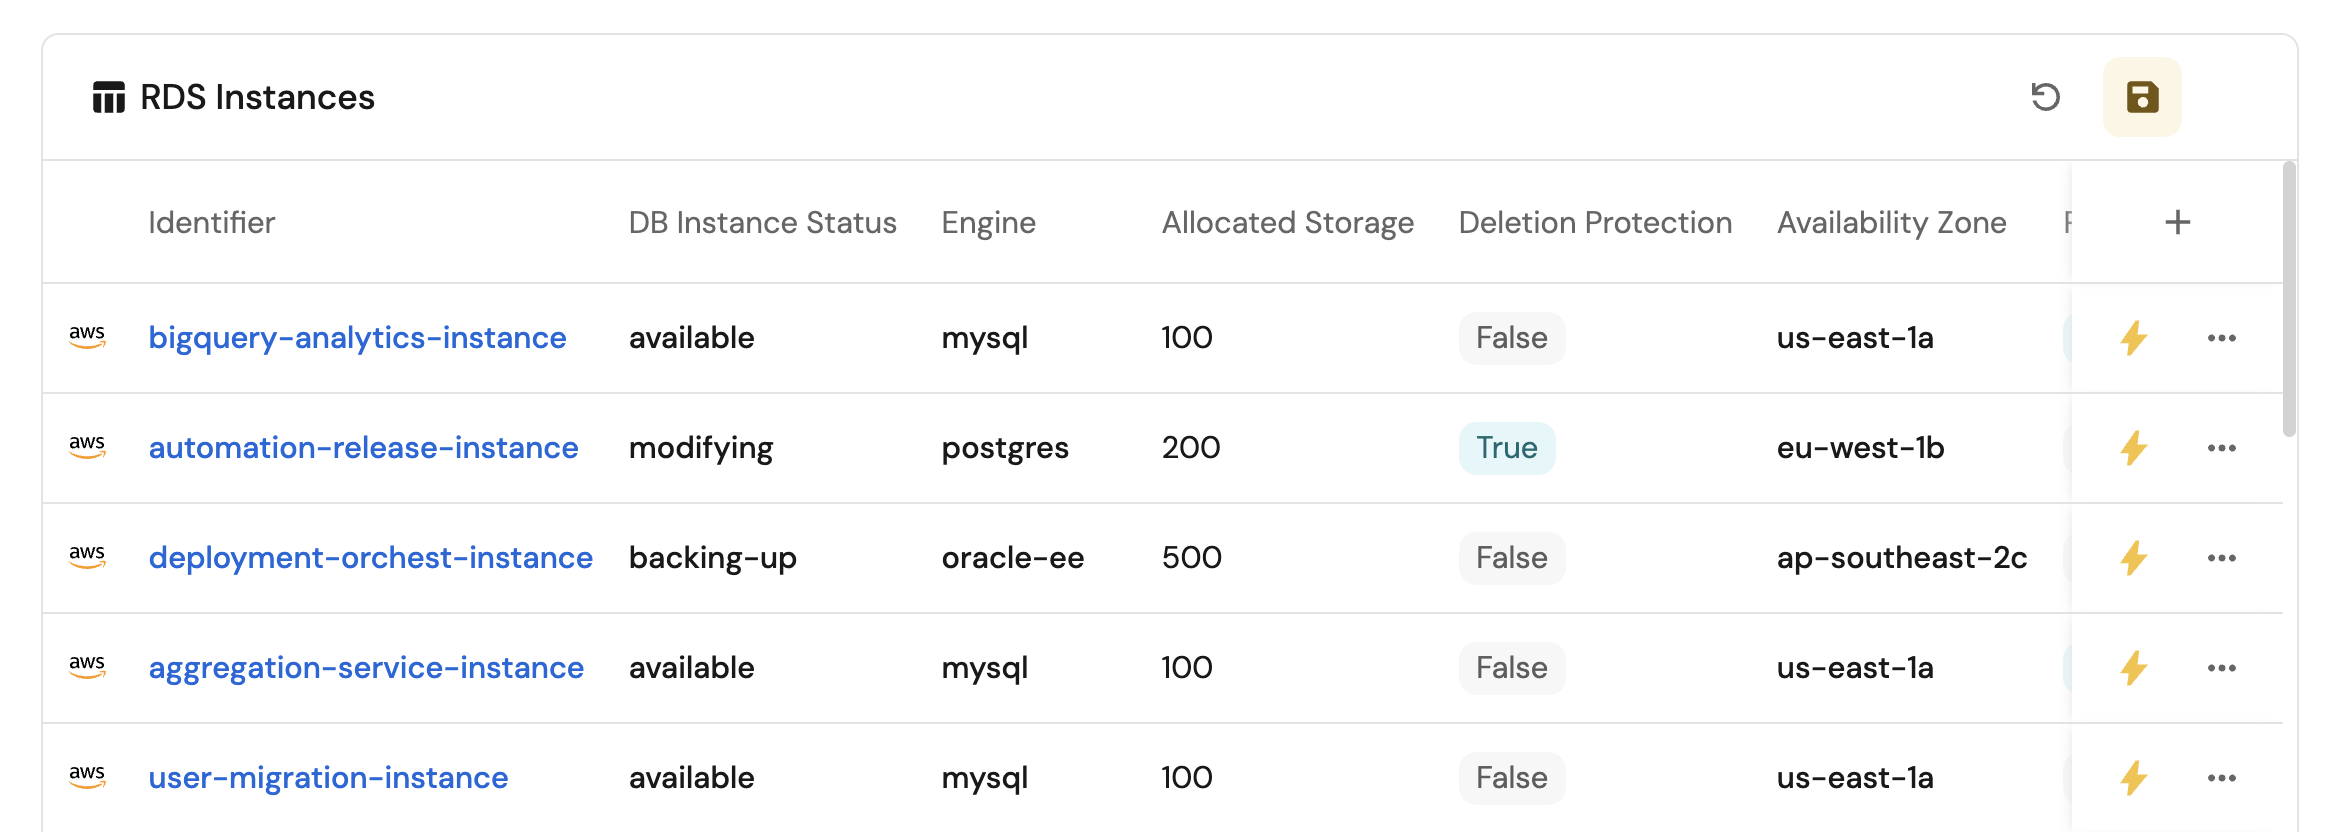
Set up data model
When installing the AWS integration in Port, the AWS Account blueprint is created by default.
However, the S3 and RDS Instance blueprints are not created automatically so we will need to create them manually.
Create the S3 blueprint
-
Go to the Builder page of your portal.
-
Click on
+ Blueprint. -
Click on the
{...}button in the top right corner, and chooseEdit JSON. -
Add this JSON schema:
AWS S3 blueprint (Click to expand)
{"identifier": "awsS3Bucket","description": "This blueprint represents an AWS S3 bucket in our software catalog","title": "S3","icon": "Bucket","schema": {"properties": {"link": {"type": "string","format": "url","title": "Link"},"regionalDomainName": {"type": "string","title": "Regional Domain Name"},"versioningStatus": {"type": "string","title": "Versioning Status","enum": ["Enabled","Suspended"]},"encryption": {"type": "array","title": "Encryption"},"lifecycleRules": {"type": "array","title": "Lifecycle Rules"},"publicAccessConfig": {"type": "object","title": "Public Access"},"tags": {"type": "array","title": "Tags"},"arn": {"type": "string","title": "ARN"},"region": {"type": "string","title": "Region"},"blockPublicAccess": {"type": "boolean","title": "Block Public Access"}},"required": []},"mirrorProperties": {},"calculationProperties": {},"aggregationProperties": {},"relations": {"account": {"title": "account","target": "awsAccount","required": false,"many": false}}} -
Click
Saveto create the blueprint.
Create the RDS instance blueprint
-
Go to the Builder page of your portal.
-
Click on
+ Blueprint. -
Click on the
{...}button in the top right corner, and chooseEdit JSON. -
Add this JSON schema:
AWS RDS instance blueprint (Click to expand)
{"identifier": "rdsInstance","description": "This blueprint represents an AWS RDS DBInstance in our software catalog","title": "RDS Instance","icon": "AWS","schema": {"properties": {"link": {"type": "string","format": "url","title": "Link"},"dbInstanceClass": {"type": "string","title": "DB Instance Class"},"dbInstanceStatus": {"type": "string","title": "DB Instance Status"},"engine": {"type": "string","title": "Engine"},"storageType": {"type": "string","title": "Storage Type"},"engineVersion": {"type": "string","title": "Engine Version"},"port": {"type": "number","title": "Port"},"allocatedStorage": {"type": "number","title": "Allocated Storage"},"endpoint": {"type": "string","title": "Endpoint"},"multiAZ": {"type": "boolean","title": "Multi-AZ"},"deletionProtection": {"type": "boolean","title": "Deletion Protection"},"availabilityZone": {"type": "string","title": "Availability Zone"},"masterUsername": {"type": "string","title": "Master Username"},"publicAccess": {"type": "boolean","title": "Public Access"},"vpcSecurityGroups": {"type": "array","items": {"type": "string"},"title": "VPC Security Groups"},"arn": {"type": "string","title": "ARN"},"storageEncrypted": {"type": "boolean","title": "Storage Encrypted"}},"required": []},"mirrorProperties": {},"calculationProperties": {},"aggregationProperties": {},"relations": {"account": {"title": "Account","target": "awsAccount","required": true,"many": false}}} -
Click
Saveto create the blueprint.
Update integration mapping
-
Go to the Data Sources page of your portal.
-
Select the AWS integration.
-
Add the following YAML block into the editor to ingest storage data from AWS:
AWS integration configuration (Click to expand)
deleteDependentEntities: truecreateMissingRelatedEntities: trueenableMergeEntity: trueresources:- kind: AWS::Organizations::Accountselector:query: 'true'port:entity:mappings:identifier: .Idtitle: .Nameblueprint: '"awsAccount"'properties:arn: .Arnemail: .Emailstatus: .Statusjoined_method: .JoinedMethodjoined_timestamp: .JoinedTimestamp | sub(" "; "T")- kind: AWS::S3::Bucketselector:query: 'true'useGetResourceAPI: trueport:entity:mappings:identifier: .Identifiertitle: .Identifierblueprint: '"awsS3Bucket"'properties:regionalDomainName: .Properties.RegionalDomainNameencryption: .Properties.BucketEncryption.ServerSideEncryptionConfigurationlifecycleRules: .Properties.LifecycleConfiguration.RulespublicAccessConfig: .Properties.PublicAccessBlockConfigurationblockPublicAccess: >-.Properties.PublicAccessBlockConfiguration | (.BlockPublicAcls and.IgnorePublicAcls and .BlockPublicPolicy and.RestrictPublicBuckets)tags: .Properties.Tagsarn: .Properties.Arnregion: .Properties.RegionalDomainName | capture(".*\\.(?<region>[^\\.]+)\\.amazonaws\\.com") | .regionlink: .Properties | select(.Arn != null) | "https://console.aws.amazon.com/go/view?arn=" + .Arnrelations:account: .__AccountId- kind: AWS::RDS::DBInstanceselector:query: 'true'useGetResourceAPI: 'true'port:entity:mappings:identifier: .Identifiertitle: .Properties.DBInstanceIdentifierblueprint: '"rdsInstance"'properties:link: 'https://console.aws.amazon.com/go/view?arn=' + .Properties.DBInstanceArndbInstanceClass: .Properties.DBInstanceClassdbInstanceStatus: .Properties.DBInstanceStatusengine: .Properties.EnginestorageType: .Properties.StorageTypeengineVersion: .Properties.EngineVersionport: .Properties.Endpoint.PortallocatedStorage: .Properties.AllocatedStorageendpoint: .Properties.Endpoint.AddressmultiAZ: .Properties.MultiAZdeletionProtection: .Properties.DeletionProtectionavailabilityZone: .Properties.AvailabilityZonemasterUsername: .Properties.MasterUsernamepublicAccess: .Properties.PubliclyAccessiblevpcSecurityGroups: .Properties.VpcSecurityGroupsarn: .Properties.DBInstanceArnstorageEncrypted: .Porperties.StorageEncryptedrelations:account: .__AccountId -
Click
Save & Resyncto apply the mapping.
Set up self-service actions
Now let us create self-service actions to manage your RDS instances directly from Port using GitHub Actions. You will implement workflows to:
-
Reboot an RDS instance.
-
Delete an RDS instance.
To implement these use-cases, follow the steps below:
Add GitHub secrets
In your GitHub repository, go to Settings > Secrets and add the following secrets:
PORT_CLIENT_ID- Port Client ID learn more.PORT_CLIENT_SECRET- Port Client Secret learn more.AWS_ACCESS_KEY_ID- AWS IAM user's access key.AWS_SECRET_ACCESS_KEY- AWS IAM user's secret access key.AWS_REGION- AWS region (e.g.,us-east-1).
Reboot an RDS instance
To reboot an RDS instance from Port, first add a GitHub workflow that reboots the instance in AWS. Then create a Port self-service action that triggers the workflow.
Add GitHub workflow
Create the file .github/workflows/reboot-rds-instance.yaml in the .github/workflows folder of your repository.
Reboot RDS GitHub workflow (Click to expand)
name: Reboot RDS Instance

on:
  workflow_dispatch:
    inputs:
      port_context:
        required: true
        description: 'Action and general context (blueprint, entity, run id, etc...)'
        type: string

jobs:
  reboot-rds-instance:
    runs-on: ubuntu-latest
    steps:
      - name: Inform Port of workflow start
        uses: port-labs/port-github-action@v1
        with:
          clientId: ${{ secrets.PORT_CLIENT_ID }}
          clientSecret: ${{ secrets.PORT_CLIENT_SECRET }}
          baseUrl: https://api.port.io
          operation: PATCH_RUN
          runId: ${{fromJson(inputs.port_context).runId}}
          logMessage: Configuring AWS credentials to reboot RDS instance with ID ${{ fromJson(inputs.port_context).entity.identifier }}

      - name: Configure AWS credentials
        uses: aws-actions/configure-aws-credentials@v4
        with:
          aws-access-key-id: ${{ secrets.AWS_ACCESS_KEY_ID }}
          aws-secret-access-key: ${{ secrets.AWS_SECRET_ACCESS_KEY }}
          aws-region: ${{ secrets.AWS_REGION }}

      - name: Reboot RDS instance
        run: aws rds reboot-db-instance --db-instance-identifier ${{ fromJson(inputs.port_context).entity.identifier }}

      - name: Inform Port about RDS reboot success
        if: success()
        uses: port-labs/port-github-action@v1
        with:
          clientId: ${{ secrets.PORT_CLIENT_ID }}
          clientSecret: ${{ secrets.PORT_CLIENT_SECRET }}
          baseUrl: https://api.port.io
          operation: PATCH_RUN
          runId: ${{ fromJson(inputs.port_context).runId }}
          status: 'SUCCESS'
          logMessage: ✅ RDS instance with ID ${{ fromJson(inputs.port_context).entity.identifier }} rebooted successfully
          summary: RDS instance reboot completed successfully

      - name: Inform Port about RDS reboot failure
        if: failure()
        uses: port-labs/port-github-action@v1
        with:
          clientId: ${{ secrets.PORT_CLIENT_ID }}
          clientSecret: ${{ secrets.PORT_CLIENT_SECRET }}
          baseUrl: https://api.port.io
          operation: PATCH_RUN
          runId: ${{ fromJson(inputs.port_context).runId }}
          status: 'FAILURE'
          logMessage: ❌ Failed to reboot RDS instance with ID ${{ fromJson(inputs.port_context).entity.identifier }}
          summary: RDS instance reboot failed
Create Port action
-
Go to the Self-service page of your portal.
-
Click on the
+ New Actionbutton. -
Click on the
{...} Edit JSONbutton. -
Copy and paste the following JSON configuration into the editor.
Reboot RDS instance action (Click to expand)
Replace the placeholders<YOUR_GITHUB_OCEAN_INTEGRATION_ID>- your GitHub Ocean integration installation ID.<GITHUB-ORG>- your GitHub organization or user name.<GITHUB-REPO>- your GitHub repository name.
{"identifier": "reboot_rds_instance","title": "Reboot RDS Instance","icon": "AmazonRDS","description": "Reboot an RDS Instance","trigger": {"type": "self-service","operation": "DAY-2","userInputs": {"properties": {},"required": []},"blueprintIdentifier": "rdsInstance"},"invocationMethod": {"type": "INTEGRATION_ACTION","installationId": "<YOUR_GITHUB_OCEAN_INTEGRATION_ID>","integrationActionType": "dispatch_workflow","integrationActionExecutionProperties": {"org": "<GITHUB-ORG>","repo": "<GITHUB-REPO>","workflow": "reboot-rds-instance.yaml","workflowInputs": {"port_context": {"entity": "{{ .entity }}","blueprint": "{{ .action.blueprint }}","runId": "{{ .run.id }}"}},"reportWorkflowStatus": true}},"requiredApproval": false} -
Click
Save.
Now you should see the Reboot RDS Instance action in the self-service page. 🎉
Delete an RDS instance
To delete an RDS instance from Port, first add a GitHub workflow that deletes the instance in AWS. Then create a Port self-service action that triggers the workflow.
Add GitHub workflow
Create the file .github/workflows/delete-rds-instance.yaml in the .github/workflows folder of your repository.
Delete RDS GitHub workflow (Click to expand)
name: Delete RDS Instance

on:
  workflow_dispatch:
    inputs:
      port_context:
        required: true
        description: 'Action and general context (blueprint, entity, run id, etc...)'
        type: string
      should_create_db_snapshot:
        required: true
        description: 'Specifies whether to skip the creation of a final DB snapshot before deleting the instance'
        type: string

jobs:
  delete-rds-instance:
    runs-on: ubuntu-latest
    steps:
      - name: Inform Port of workflow start
        uses: port-labs/port-github-action@v1
        with:
          clientId: ${{ secrets.PORT_CLIENT_ID }}
          clientSecret: ${{ secrets.PORT_CLIENT_SECRET }}
          baseUrl: https://api.port.io
          operation: PATCH_RUN
          runId: ${{fromJson(inputs.port_context).runId}}
          logMessage: Configuring AWS credentials to delete RDS instance with ID ${{ fromJson(inputs.port_context).entity.identifier }}

      - name: Configure AWS credentials
        uses: aws-actions/configure-aws-credentials@v4
        with:
          aws-access-key-id: ${{ secrets.AWS_ACCESS_KEY_ID }}
          aws-secret-access-key: ${{ secrets.AWS_SECRET_ACCESS_KEY }}
          aws-region: ${{ secrets.AWS_REGION }}

      - name: Delete RDS instance
        run: aws rds delete-db-instance --db-instance-identifier ${{ fromJson(inputs.port_context).entity.identifier }} ${{ inputs.should_create_db_snapshot }}

      - name: Inform Port about RDS delete success
        if: success()
        uses: port-labs/port-github-action@v1
        with:
          clientId: ${{ secrets.PORT_CLIENT_ID }}
          clientSecret: ${{ secrets.PORT_CLIENT_SECRET }}
          baseUrl: https://api.port.io
          operation: PATCH_RUN
          runId: ${{ fromJson(inputs.port_context).runId }}
          status: 'SUCCESS'
          logMessage: ✅ RDS instance with ID ${{ fromJson(inputs.port_context).entity.identifier }} deleted successfully
          summary: RDS instance delete completed successfully

      - name: Inform Port about RDS delete failure
        if: failure()
        uses: port-labs/port-github-action@v1
        with:
          clientId: ${{ secrets.PORT_CLIENT_ID }}
          clientSecret: ${{ secrets.PORT_CLIENT_SECRET }}
          baseUrl: https://api.port.io
          operation: PATCH_RUN
          runId: ${{ fromJson(inputs.port_context).runId }}
          status: 'FAILURE'
          logMessage: ❌ Failed to delete RDS instance with ID ${{ fromJson(inputs.port_context).entity.identifier }}
          summary: RDS instance delete failed
Create Port action
-
Go to the Self-service page of your portal.
-
Click on the
+ New Actionbutton. -
Click on the
{...} Edit JSONbutton. -
Copy and paste the following JSON configuration into the editor.
Delete RDS instance action (Click to expand)
Replace the placeholders<YOUR_GITHUB_OCEAN_INTEGRATION_ID>- your GitHub Ocean integration installation ID.<GITHUB-ORG>- your GitHub organization or user name.<GITHUB-REPO>- your GitHub repository name.
{"identifier": "delete_rds_instance","title": "Delete RDS Instance","icon": "AmazonRDS","description": "Delete an RDS instance","trigger": {"type": "self-service","operation": "DELETE","userInputs": {"properties": {"skip_db_snapshot": {"type": "boolean","title": "Skip DB snapshot","description": "Specifies whether to skip the creation of a final DB snapshot before deleting the instance","default": false}},"required": ["skip_db_snapshot"],"order": ["skip_db_snapshot"]},"blueprintIdentifier": "rdsInstance"},"invocationMethod": {"type": "INTEGRATION_ACTION","installationId": "<YOUR_GITHUB_OCEAN_INTEGRATION_ID>","integrationActionType": "dispatch_workflow","integrationActionExecutionProperties": {"org": "<GITHUB-ORG>","repo": "<GITHUB-REPO>","workflow": "delete-rds-instance.yaml","workflowInputs": {"should_create_db_snapshot": "{{ if .inputs.skip_db_snapshot == true then \"--skip-final-snapshot\" else \"--no-skip-final-snapshot\" end }}","port_context": {"runId": "{{ .run.id }}","entity": "{{ .entity }}"}},"reportWorkflowStatus": true}},"requiredApproval": false} -
Click
Save.
Now you should see the Delete RDS Instance action in the self-service page. 🎉
Visualize metrics
Once the AWS storage data is synced, we can create a dedicated dashboard in Port to monitor and analyze security configurations and access controls using customizable widgets.
Create a dashboard
-
Navigate to your software catalog.
-
Click on the
+button in the left sidebar. -
Select New dashboard.
-
Name the dashboard AWS Storage Security Overview.
-
Input
Monitor and manage AWS S3 buckets and RDS instances security configurationsunder Description. -
Select the
AWSicon. -
Click
Create.
We now have a blank dashboard where we can start adding widgets to visualize security insights from our AWS storage.
Add widgets
In the new dashboard, create the following widgets:
RDS by availability zone (Click to expand)
-
Click
+ Widgetand select Pie chart. -
Title:
RDS by availability zone(add theAmazonRDSicon). -
Choose the RDS Instance blueprint.
-
Under
Breakdown by property, select the Availability Zone property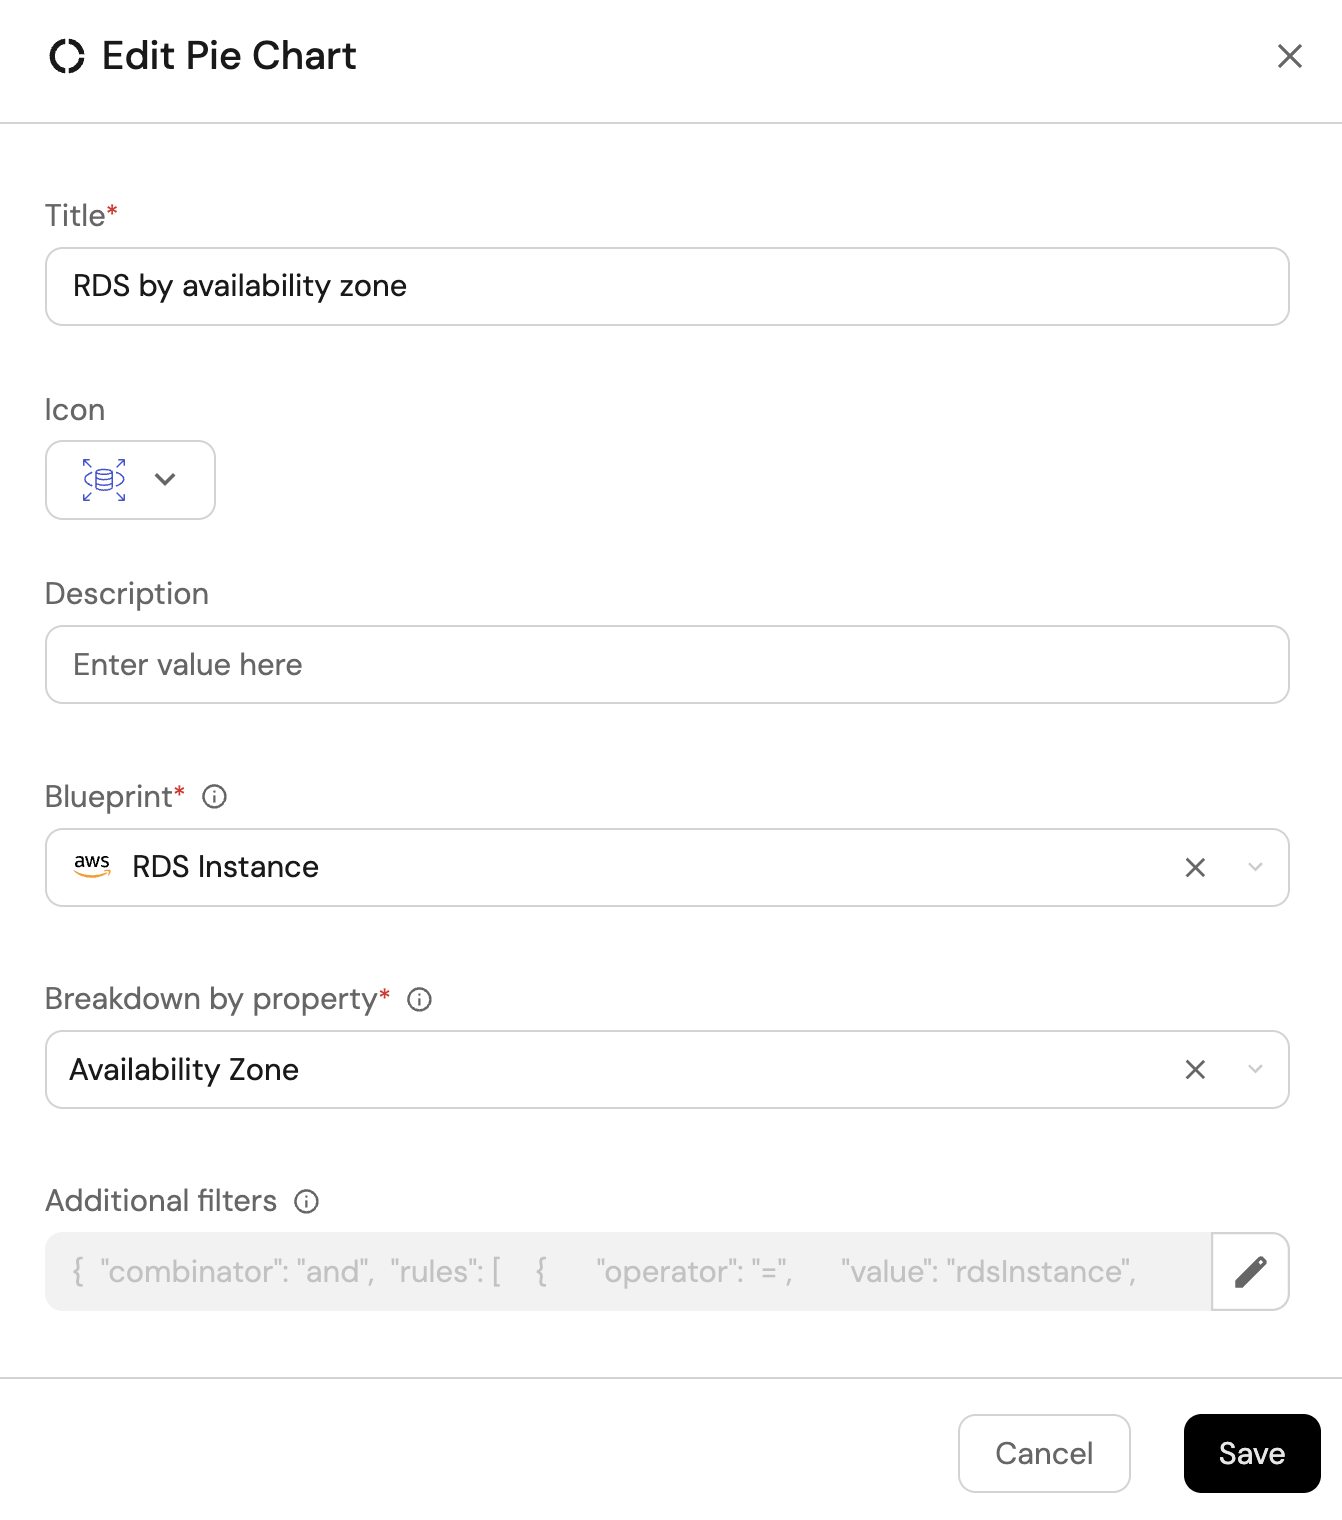
-
Click Save.
RDS by public access (Click to expand)
-
Click
+ Widgetand select Pie chart. -
Title:
RDS by public access(add theAmazonRDSicon). -
Choose the RDS Instance blueprint.
-
Under
Breakdown by property, select the Public Access property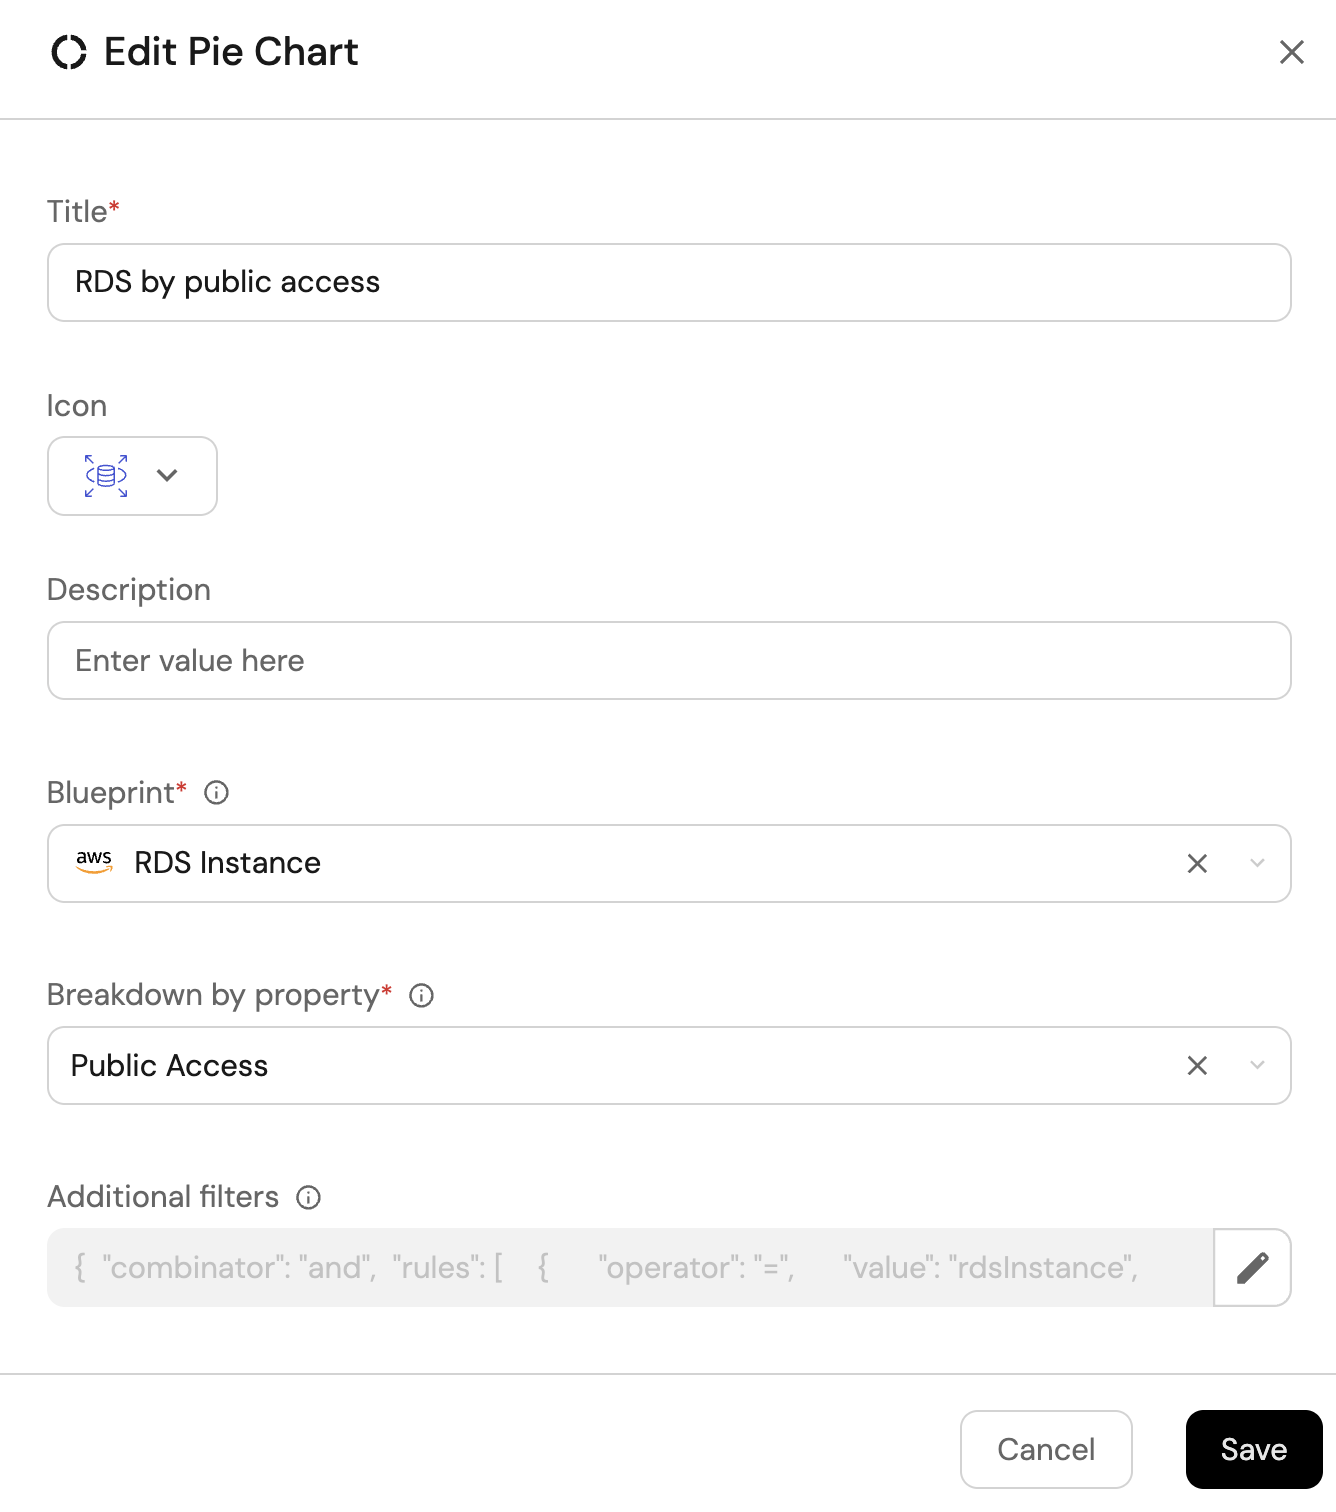
-
Click Save.
Unprotected RDS by engine (Click to expand)
-
Click
+ Widgetand select Pie chart. -
Title:
Unprotected RDS by engine(add theAmazonRDSicon). -
Choose the RDS Instance blueprint.
-
Under
Breakdown by property, select the Engine property. -
Add this JSON to the Additional filters editor to filter unprotected RDS instances:
[{"combinator":"and","rules":[{"property":"deletionProtection","operator":"=","value":false}]}]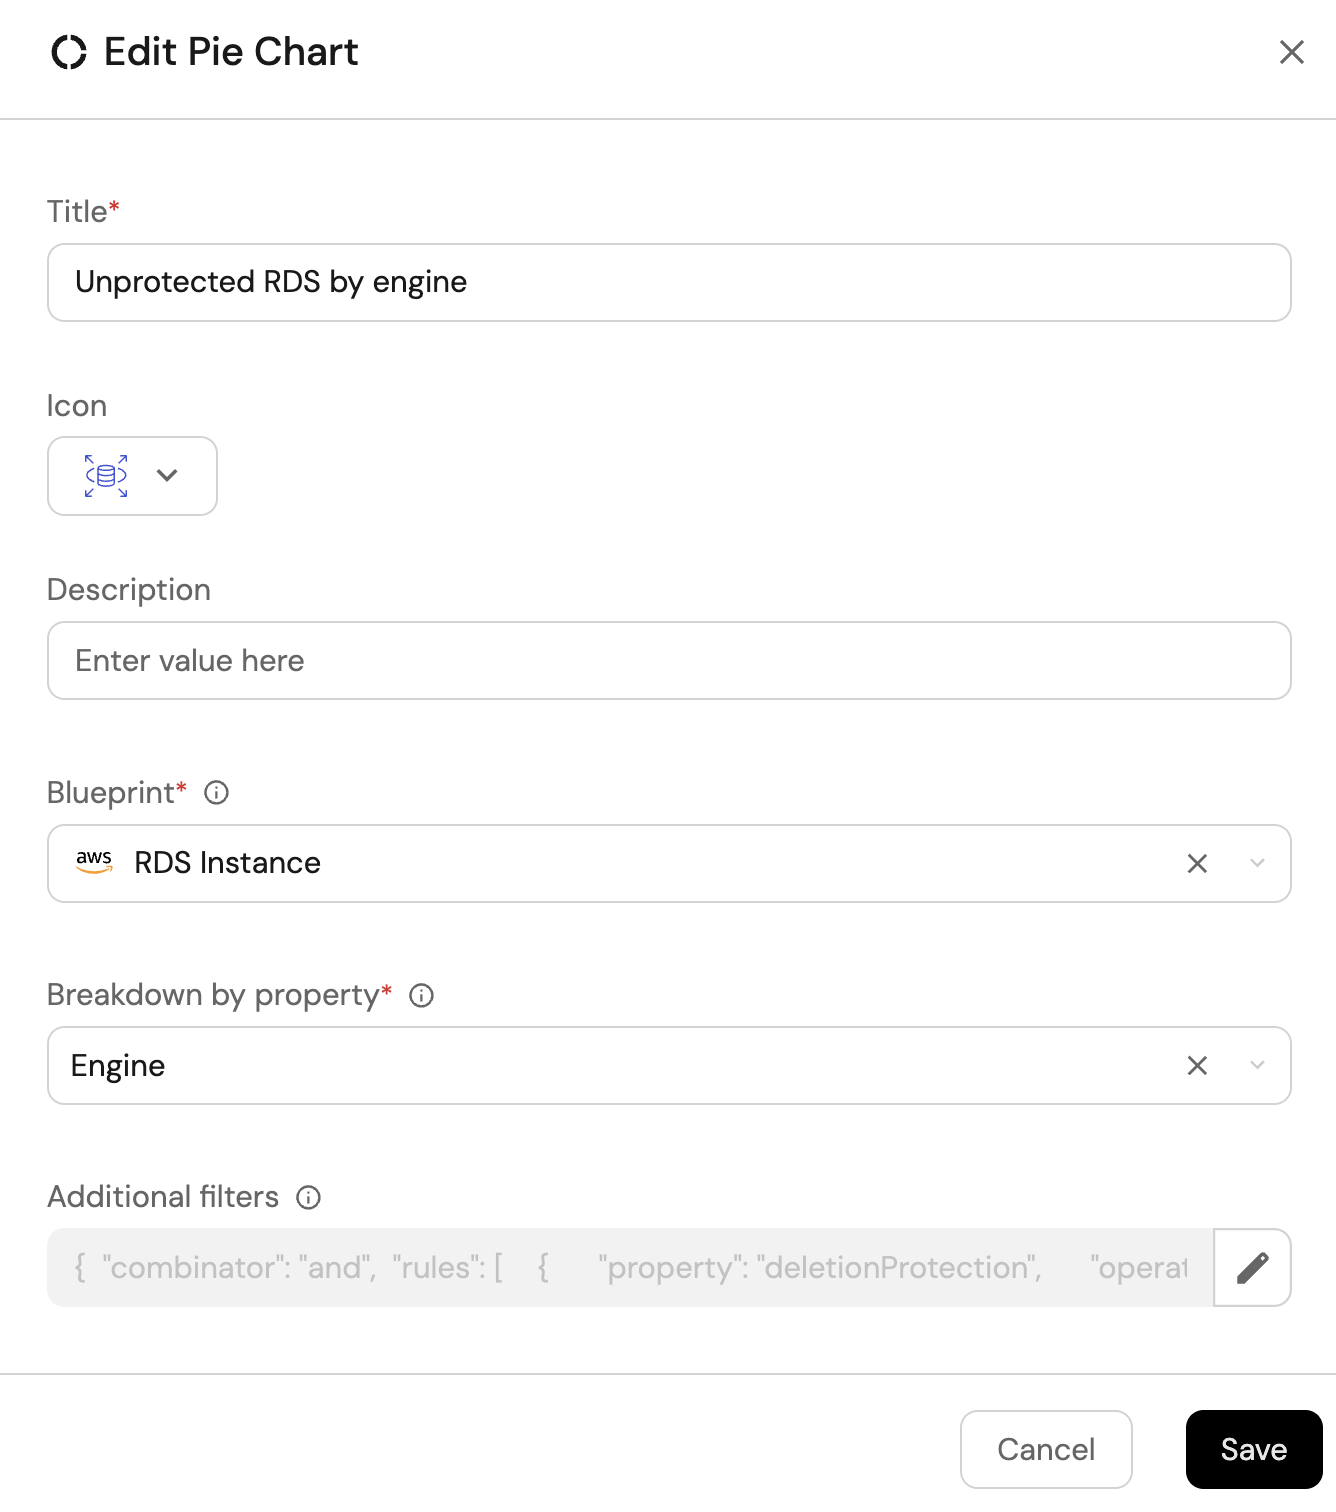
-
Click Save.
RDS without SSL (Click to expand)
-
Click
+ Widgetand select Number Chart. -
Title:
RDS without SSL(add theAmazonRDSicon). -
Select
Count entitiesChart type and choose RDS Instance as the Blueprint. -
Select
countfor the Function. -
Add this JSON to the Additional filters editor to filter RDS instances without SSL configuration:
[{"combinator":"and","rules":[{"property":"storageEncrypted","operator":"=","value":false}]}]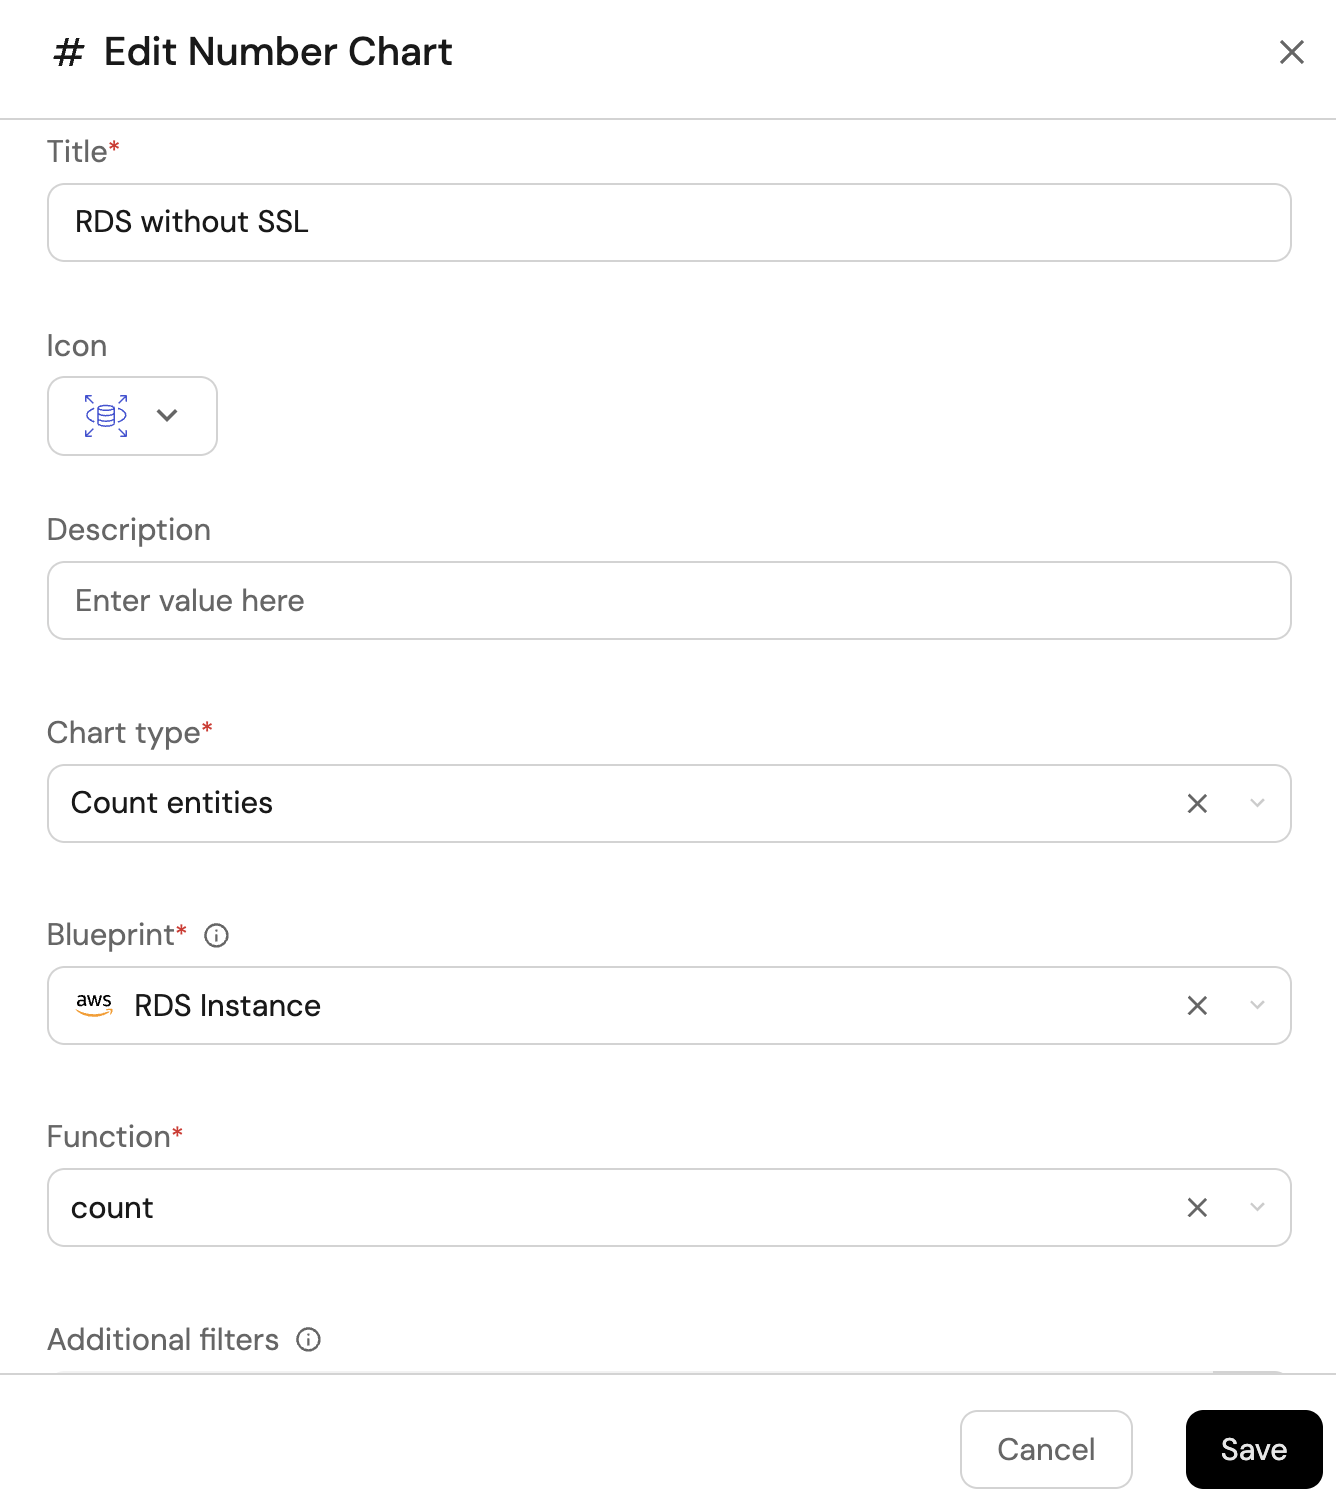
-
Click
Save.
S3 buckets by public access (Click to expand)
-
Click
+ Widgetand select Pie chart. -
Title:
S3 by public access(add theS3icon). -
Choose the S3 blueprint.
-
Under
Breakdown by property, select the Block Public Access property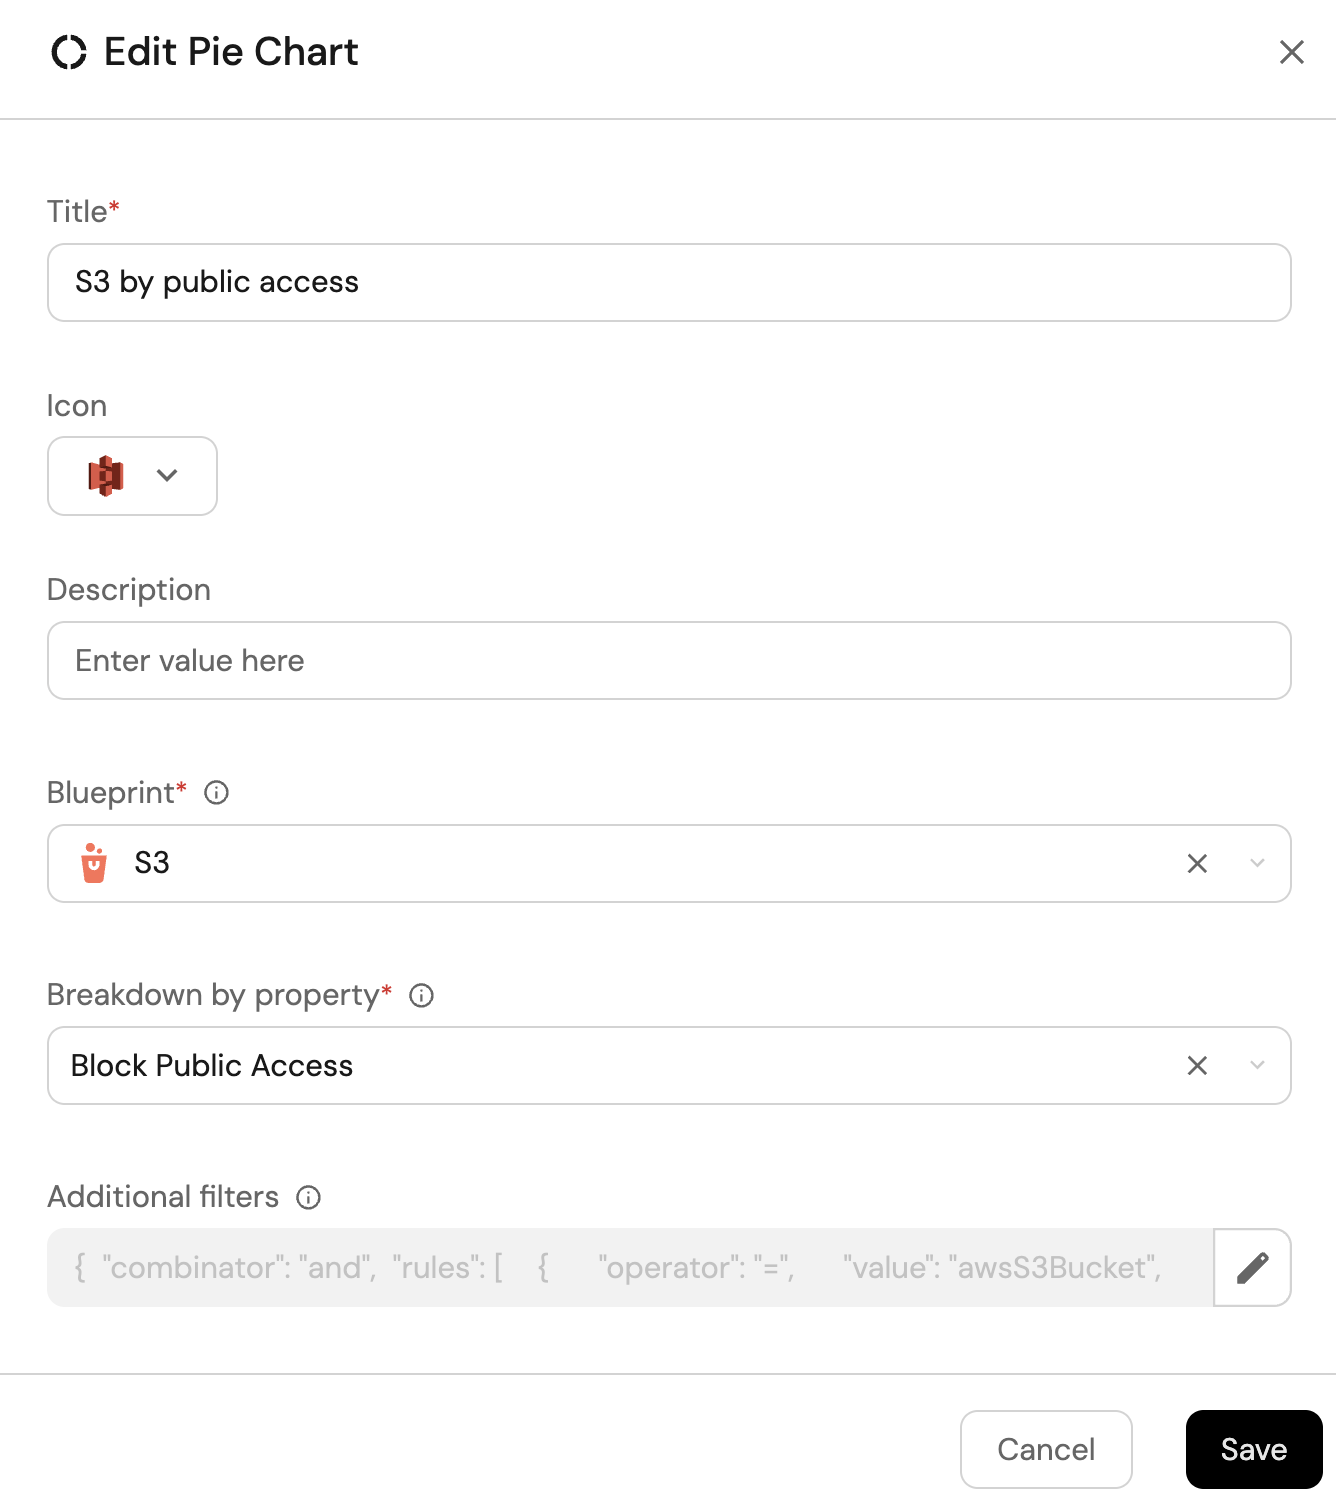
-
Click Save.
Unencrypted S3 buckets (Click to expand)
-
Click
+ Widgetand select Number Chart. -
Title:
Unencrypted S3 buckets(add theS3icon). -
Select
Count entitiesChart type and choose S3 as the Blueprint. -
Select
countfor the Function. -
Add this JSON to the Additional filters editor to filter S3 buckets without encryption configurations:
[{"combinator":"and","rules":[{"property":"encryption","operator":"isNotEmpty"}]}]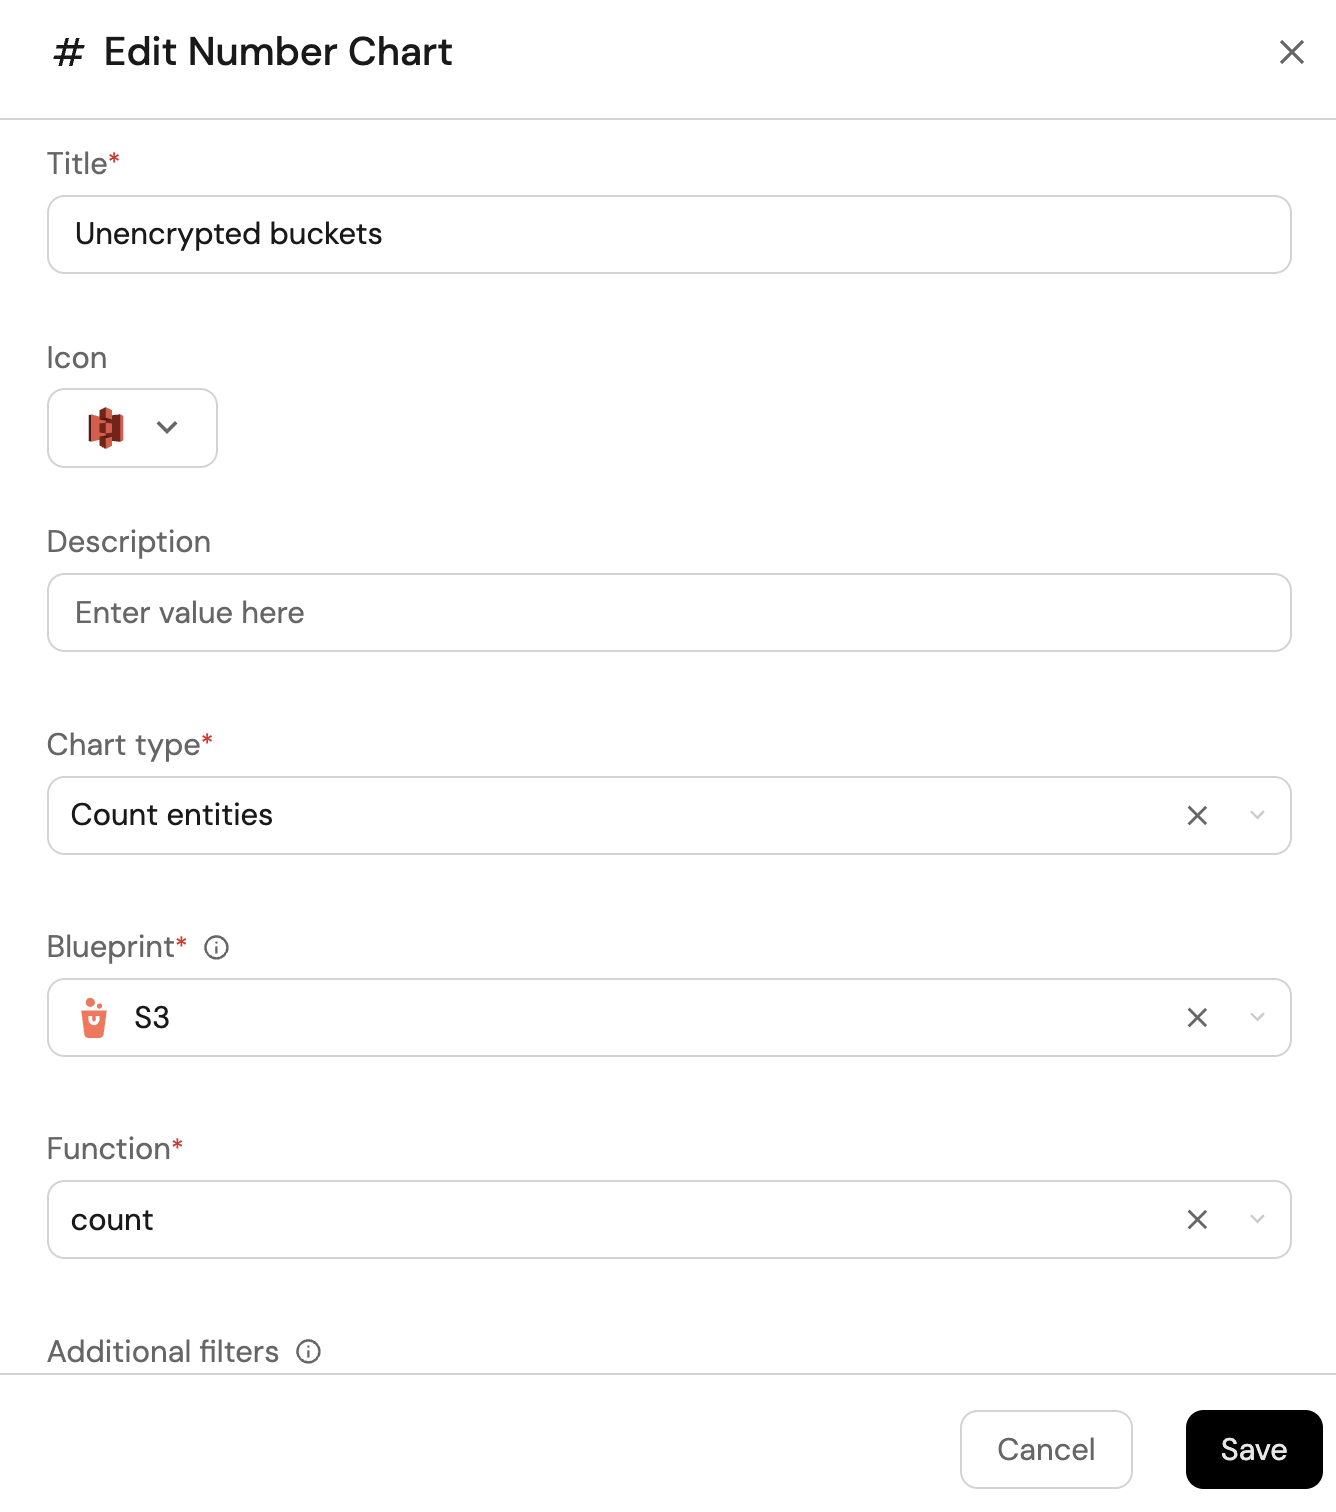
-
Click
Save.
Insecure RDS instances table (Click to expand)
-
Click
+ Widgetand select Table. -
Title the widget Insecure RDS Instances.
-
Choose the RDS Instance blueprint
-
Add this JSON to the Additional filters editor to filter insecure RDS instances:
[{"combinator":"or","rules":[{"property":"storageEncrypted","operator":"=","value":false},{"property":"deletionProtection","operator":"=","value":false},{"property":"publicAccess","operator":"=","value":true}]}] -
Click Save to add the widget to the dashboard.
-
Click on the
...button in the top right corner of the table and select Customize table. -
In the top right corner of the table, click on
Manage Propertiesand add the following properties:- DB Instance Status: The current status of the RDS instance.
- Engine: The database engine type.
- Storage Encrypted: Whether storage encryption is enabled.
- Deletion Protection: Whether deletion protection is enabled.
- Public Access: Whether the instance is publicly accessible.
- Account: The name of each related AWS account.
-
Click on the save icon in the top right corner of the widget to save the customized table.
GCP Compute Engine instances
Use this section to bring your GCP Compute Engine management experience into Port.
In this section, you will:
- Ingest Compute Engine data into Port's software catalog using Port's GCP integration.
- Set up self-service actions to manage Compute Engine instances (start and stop).
- Build dashboards in Port to monitor and take action on your Compute Engine resources.
Prerequisites
This section assumes the following:
-
You have a Port account and have completed the onboarding process.
-
Port's GCP integration is installed in your account.
-
You have a GitHub integration for running workflows:
-
GitHub Ocean is installed.
We recommend creating a dedicated repository for the workflows that are used by Port actions.
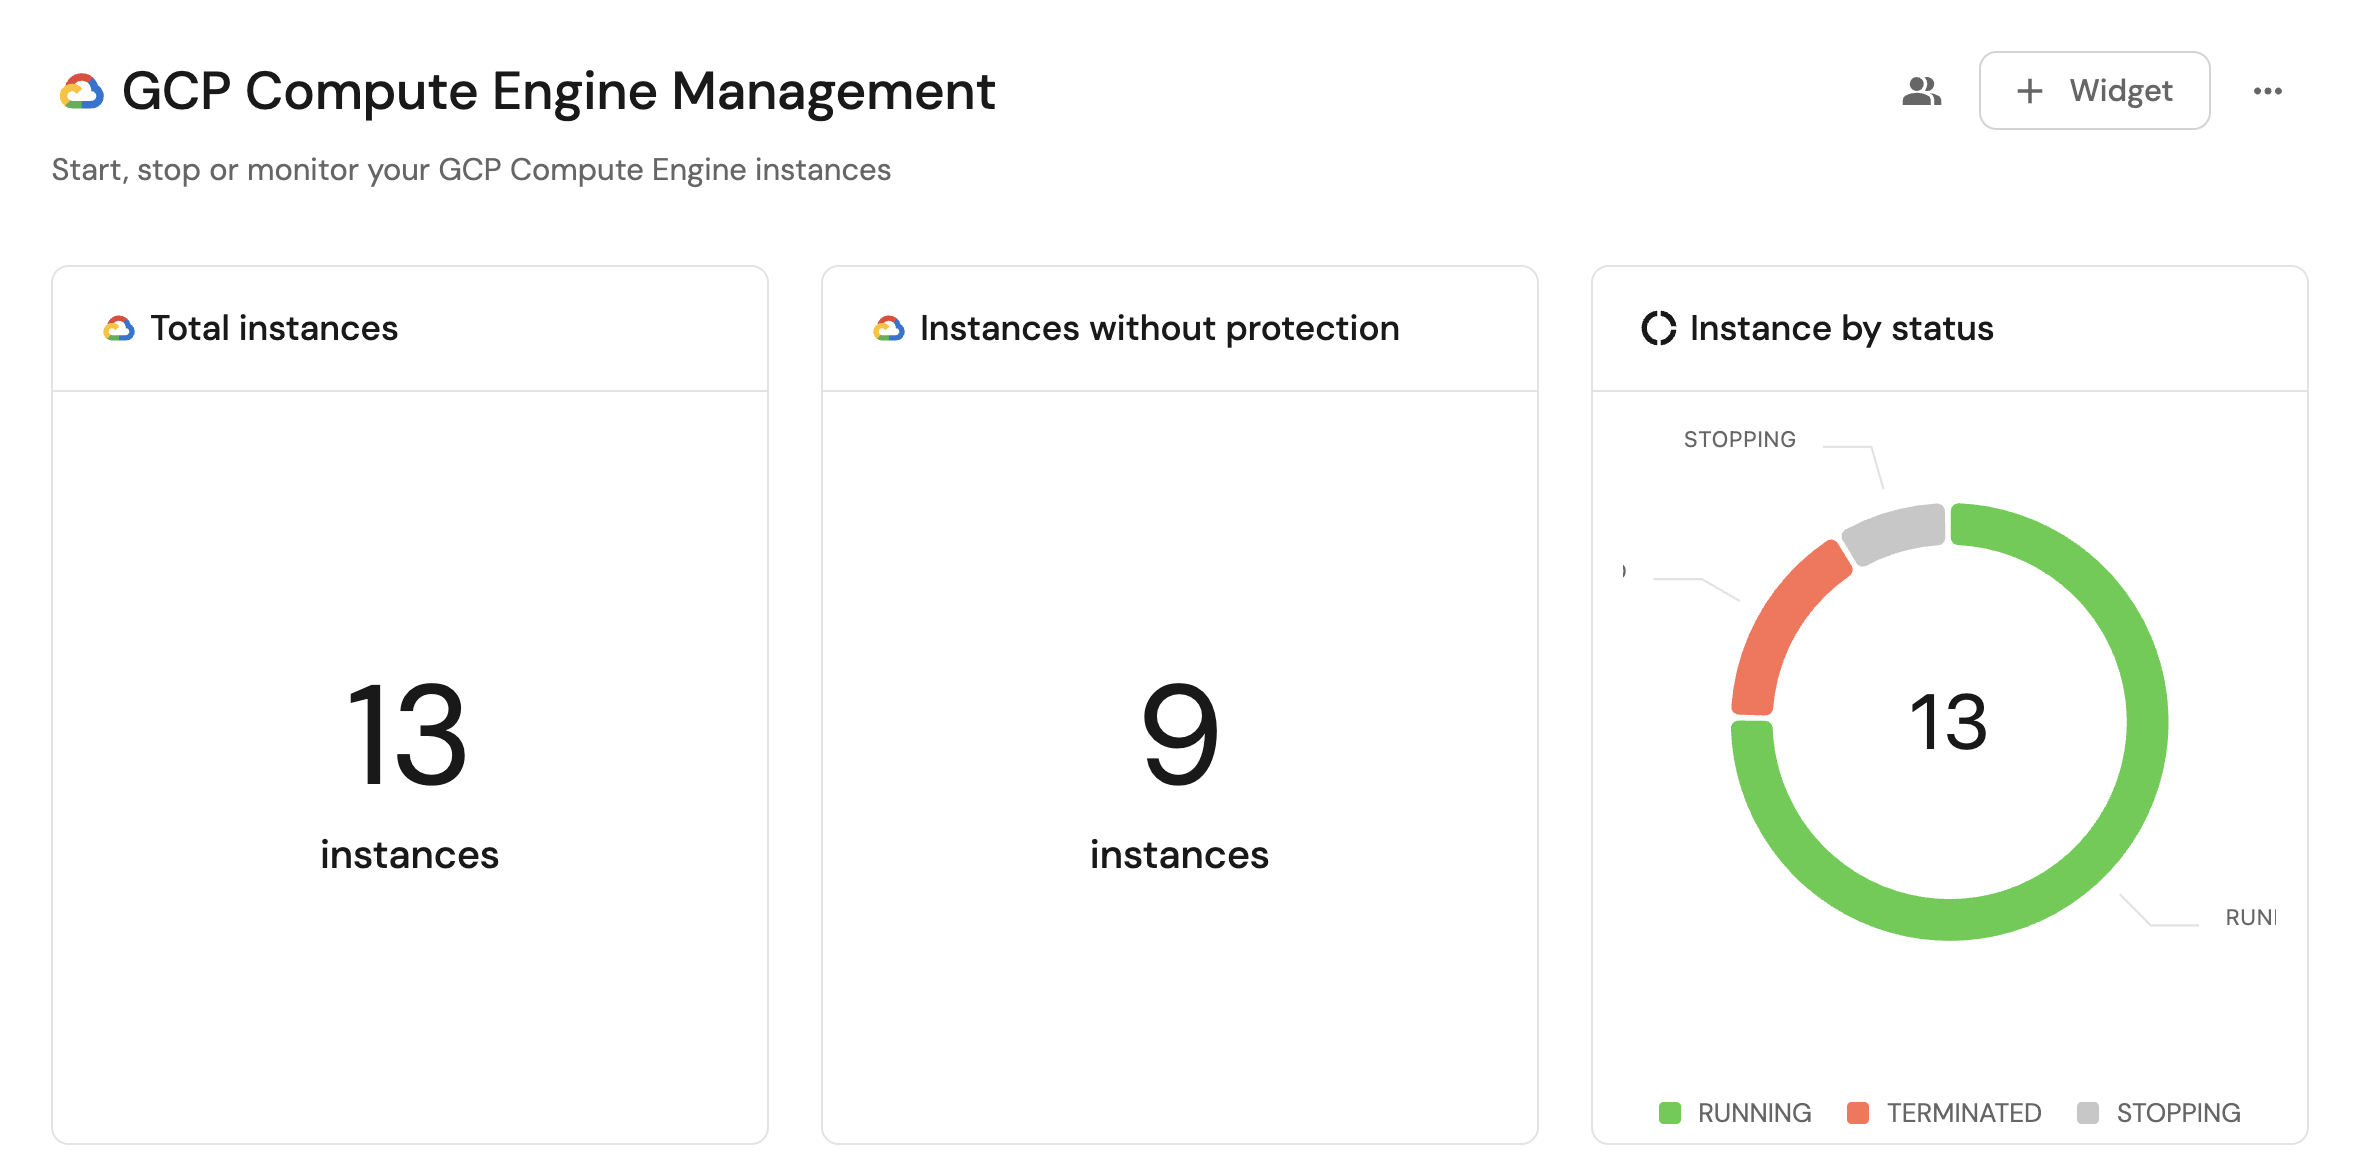
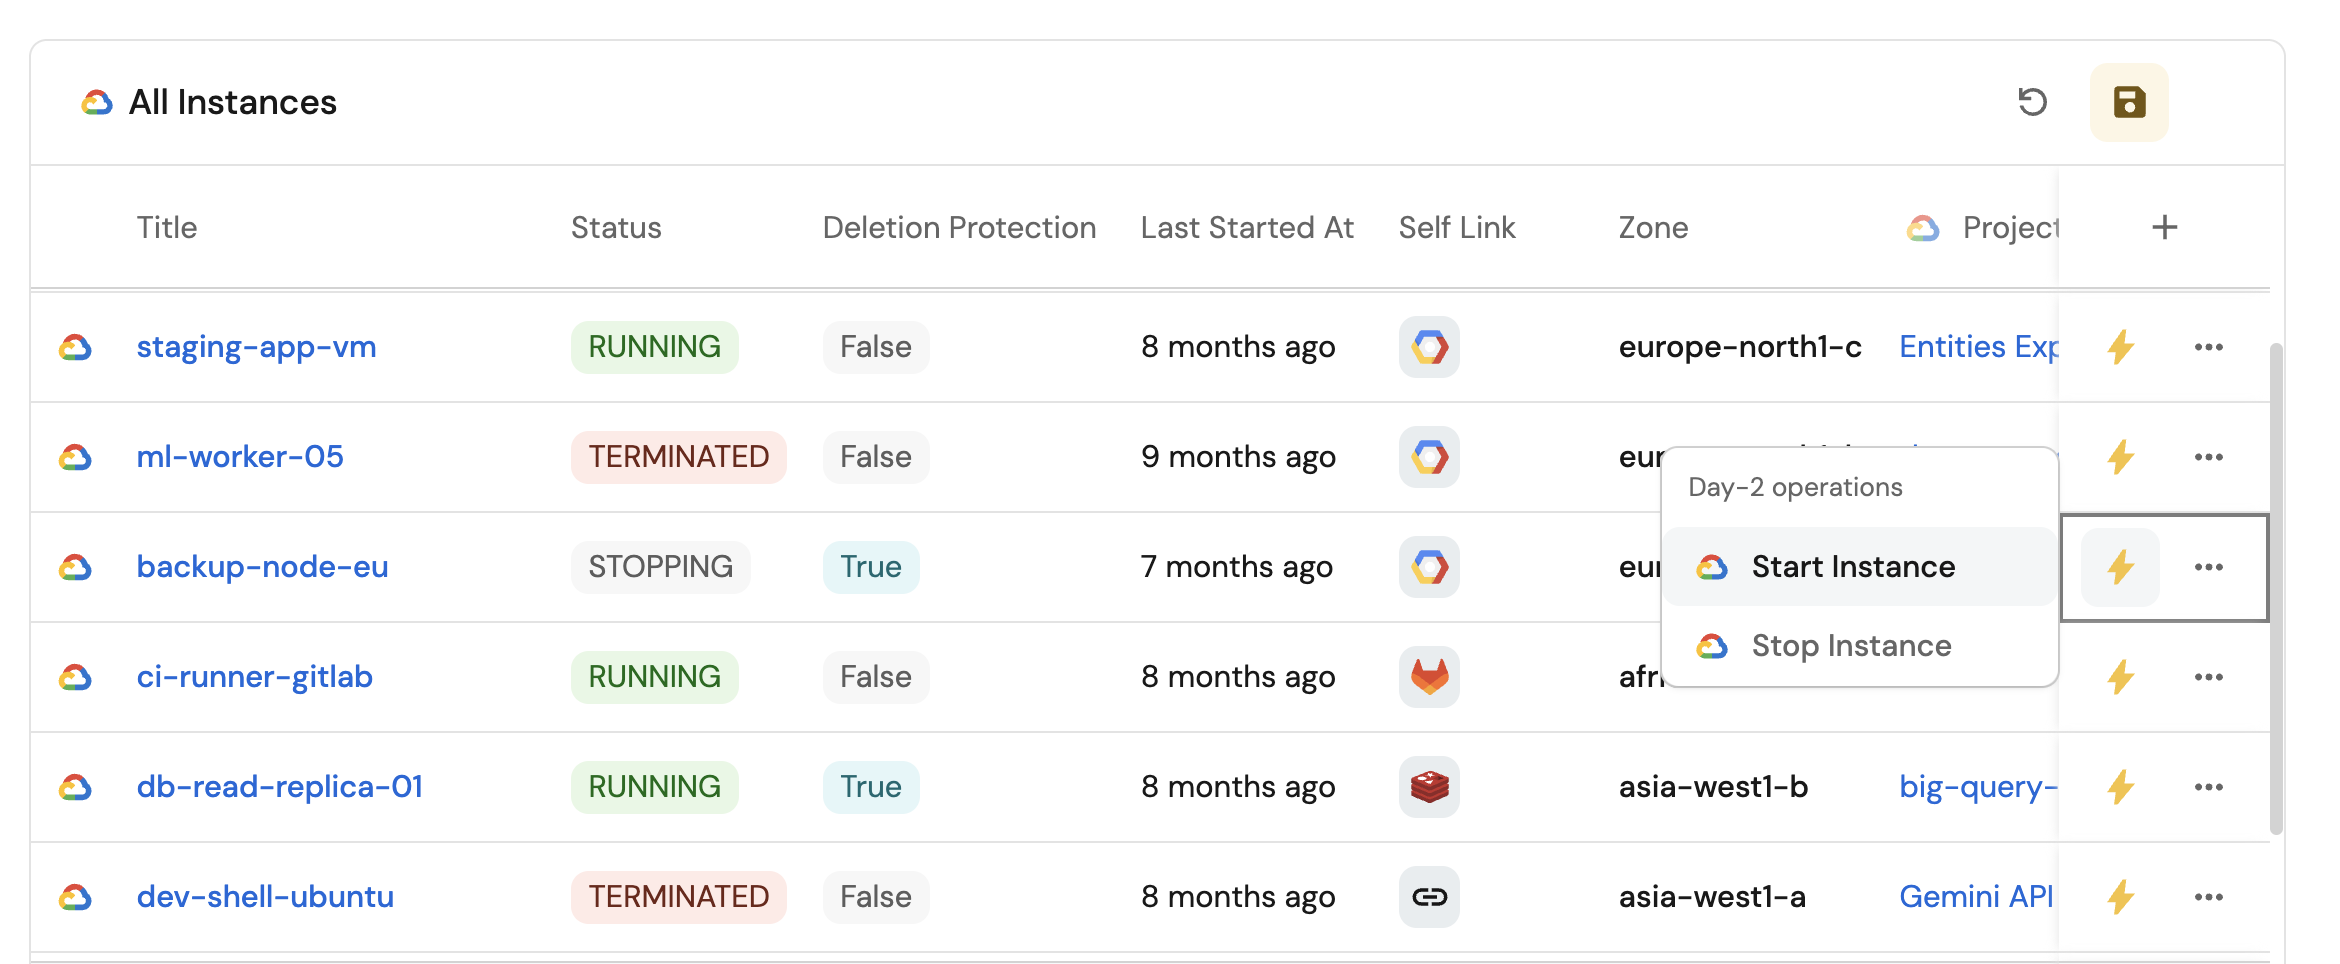
Set up data model
When installing the GCP integration in Port, the GCP Project blueprint is created by default.
However, the Compute Instance blueprint is not created automatically so we will need to create it manually.
Create the Compute Instance blueprint
-
Go to the Builder page of your portal.
-
Click on
+ Blueprint. -
Click on the
{...}button in the top right corner, and chooseEdit JSON. -
Add this JSON schema:
GCP Compute Instance blueprint (Click to expand)
{"identifier": "gcpComputeInstance","description": "This blueprint represents a GCP Compute Instance in our software catalog","title": "Compute Instance","icon": "GoogleCloud","schema": {"properties": {"subnetworks": {"title": "Subnetwork","type": "array"},"cpuPlatform": {"title": "CPU Platform","type": "string"},"status": {"type": "string","title": "Status","enum": ["RUNNING","STOPPING","TERMINATED"],"enumColors": {"RUNNING": "green","STOPPING": "lightGray","TERMINATED": "red"}},"createdAt": {"type": "string","title": "Created At","format": "date-time"},"tags": {"type": "object","title": "Tags"},"deletionProtection": {"type": "boolean","title": "Deletion Protection"},"lastStartedAt": {"type": "string","title": "Last Started At","format": "date-time"},"selfLink": {"type": "string","title": "Self Link","format": "url"},"zone": {"type": "string","title": "Zone"}},"required": []},"mirrorProperties": {},"calculationProperties": {},"aggregationProperties": {},"relations": {"project": {"title": "Project","target": "gcpProject","required": false,"many": false}}} -
Click
Saveto create the blueprint.
Update the integration mapping
-
Go to the Data Sources page of your portal.
-
Select the GCP integration.
-
Add the following YAML block into the editor to ingest compute instances from your GCP projects:
GCP integration configuration (Click to expand)
deleteDependentEntities: truecreateMissingRelatedEntities: trueenableMergeEntity: trueresources:- kind: cloudresourcemanager.googleapis.com/Projectselector:query: 'true'port:entity:mappings:identifier: .nametitle: .display_nameblueprint: '"gcpProject"'properties:labels: .labels- kind: compute.googleapis.com/Instanceselector:query: 'true'port:entity:mappings:identifier: .idtitle: .nameblueprint: '"gcpComputeInstance"'properties:machineType: .machineTypecreatedAt: .creationTimestampstatus: .statussubnetworks: .networkInterfaces[].subnetworkcpuPlatform: .cpuPlatformselfLink: .selfLinktags: .tagsdeletionProtection: .deletionProtectionlastStartedAt: .lastStartTimestampzone: .zone | split("/")[-1]relations:project: .__project.name -
Click
Save & Resyncto apply the mapping.
Set up self-service actions
Now let us create self-service actions to manage your Compute Engine instances directly from Port using GitHub Actions. You will implement workflows to:
-
Start a Compute Engine instance.
-
Stop a Compute Engine instance.
To implement these use-cases, follow the steps below:
Add GitHub secrets
In your GitHub repository, go to Settings > Secrets and add the following secrets:
PORT_CLIENT_ID- Port Client ID learn more.PORT_CLIENT_SECRET- Port Client Secret learn more.GCP_SERVICE_ACCOUNT_KEY- Your GCP service account key JSON (minified to a single line).
To avoid aggressive log sanitization, minify your service account JSON into a single line before storing it as a GitHub secret. You can use an online tool or the following command to minify the json:
jq -c '.' your-service-account-key.json | pbcopy
Before running the workflows, make sure the service account has the required Compute Engine permissions.
The GCP service account must have the following permissions:
compute.instances.start- to start Compute Engine instancescompute.instances.stop- to stop Compute Engine instancescompute.instances.get- to read instance details (used to extract zone information)compute.zones.get- to list zones (for zone validation)
Alternatively, you can assign the roles/compute.instanceAdmin.v1 role which includes these permissions.
Start a Compute Engine instance
To start a Compute Engine instance from Port, first add a GitHub workflow that starts the instance in GCP. Then create a Port self-service action that triggers the workflow.
Add GitHub workflow
Create the file .github/workflows/start-gcp-instance.yaml in the .github/workflows folder of your repository.
Start Compute Engine GitHub workflow (Click to expand)
name: Start GCP Compute Engine Instance

on:
  workflow_dispatch:
    inputs:
      port_context:
        required: true
        description: 'Action and general context (blueprint, entity, run id, etc...)'
        type: string

jobs:
  start-instance:
    runs-on: ubuntu-latest
    # Add "id-token" with the intended permissions.
    permissions:
      contents: 'read'
      id-token: 'write'
    steps:
      - uses: 'actions/checkout@v6'

      - name: Inform Port of workflow start
        uses: port-labs/port-github-action@v1
        with:
          clientId: ${{ secrets.PORT_CLIENT_ID }}
          clientSecret: ${{ secrets.PORT_CLIENT_SECRET }}
          baseUrl: https://api.port.io
          operation: PATCH_RUN
          runId: ${{fromJson(inputs.port_context).runId}}
          logMessage: Configuring GCP credentials to start Compute Engine instance with name ${{ fromJson(inputs.port_context).entity.title }}

      - id: 'auth'
        uses: 'google-github-actions/auth@v2'
        with:
          credentials_json: '${{ secrets.GCP_SERVICE_ACCOUNT_KEY }}'

      - name: Set up Cloud SDK
        uses: google-github-actions/setup-gcloud@v2

      - name: Start Compute Engine instance
        run: |
          gcloud compute instances start ${{ fromJson(inputs.port_context).entity.title }} --zone=${{ fromJson(inputs.port_context).entity.properties.zone }}

      - name: Inform Port about Compute Engine start success
        if: success()
        uses: port-labs/port-github-action@v1
        with:
          clientId: ${{ secrets.PORT_CLIENT_ID }}
          clientSecret: ${{ secrets.PORT_CLIENT_SECRET }}
          baseUrl: https://api.port.io
          operation: PATCH_RUN
          runId: ${{ fromJson(inputs.port_context).runId }}
          status: 'SUCCESS'
          logMessage: ✅ Compute Engine instance with name ${{ fromJson(inputs.port_context).entity.title }} started successfully
          summary: Compute Engine instance start completed successfully

      - name: Inform Port about Compute Engine start failure
        if: failure()
        uses: port-labs/port-github-action@v1
        with:
          clientId: ${{ secrets.PORT_CLIENT_ID }}
          clientSecret: ${{ secrets.PORT_CLIENT_SECRET }}
          baseUrl: https://api.port.io
          operation: PATCH_RUN
          runId: ${{ fromJson(inputs.port_context).runId }}
          status: 'FAILURE'
          logMessage: ❌ Failed to start Compute Engine instance with name ${{ fromJson(inputs.port_context).entity.title }}
          summary: Compute Engine instance start failed
Create Port action
-
Go to the Self-service page of your portal.
-
Click on the
+ New Actionbutton. -
Click on the
{...} Edit JSONbutton. -
Copy and paste the following JSON configuration into the editor.
Start Compute Engine instance action (Click to expand)
Replace the variables<GITHUB-ORG>- your GitHub organization or user name.<GITHUB-REPO>- your GitHub repository name.<YOUR_GITHUB_OCEAN_INTEGRATION_ID>- your GitHub Ocean integration installation ID.
{"identifier": "start_gcp_compute_instance","title": "Start Compute Engine Instance","icon": "GoogleCloud","description": "Start a GCP Compute Engine Instance","trigger": {"type": "self-service","operation": "DAY-2","userInputs": {"properties": {},"required": []},"blueprintIdentifier": "gcpComputeInstance"},"invocationMethod": {"type": "INTEGRATION_ACTION","installationId": "<YOUR_GITHUB_OCEAN_INTEGRATION_ID>","integrationActionType": "dispatch_workflow","integrationActionExecutionProperties": {"org": "<GITHUB-ORG>","repo": "<GITHUB-REPO>","workflow": "start-gcp-instance.yaml","workflowInputs": {"port_context": {"entity": "{{ .entity }}","runId": "{{ .run.id }}"}},"reportWorkflowStatus": true}},"requiredApproval": false} -
Click
Save.
Now you should see the Start Compute Engine Instance action in the self-service page. 🎉
Stop a Compute Engine instance
To stop a Compute Engine instance from Port, first add a GitHub workflow that stops the instance in GCP. Then create a Port self-service action that triggers the workflow.
Add GitHub workflow
Create the file .github/workflows/stop-gcp-instance.yaml in the .github/workflows folder of your repository.
Stop Compute Engine GitHub workflow (Click to expand)
name: Stop GCP Compute Engine Instance

on:
  workflow_dispatch:
    inputs:
      port_context:
        required: true
        description: 'Action and general context (blueprint, entity, run id, etc...)'
        type: string

jobs:
  stop-instance:
    runs-on: ubuntu-latest
    # Add "id-token" with the intended permissions.
    permissions:
      contents: 'read'
      id-token: 'write'
    steps:
      - uses: 'actions/checkout@v6'

      - name: Inform Port of workflow stop
        uses: port-labs/port-github-action@v1
        with:
          clientId: ${{ secrets.PORT_CLIENT_ID }}
          clientSecret: ${{ secrets.PORT_CLIENT_SECRET }}
          baseUrl: https://api.port.io
          operation: PATCH_RUN
          runId: ${{fromJson(inputs.port_context).runId}}
          logMessage: Configuring GCP credentials to stop Compute Engine instance with name ${{ fromJson(inputs.port_context).entity.title }}

      - id: 'auth'
        uses: 'google-github-actions/auth@v2'
        with:
          credentials_json: '${{ secrets.GCP_SERVICE_ACCOUNT_KEY }}'

      - name: Set up Cloud SDK
        uses: google-github-actions/setup-gcloud@v2

      - name: Stop Compute Engine instance
        run: |
          gcloud compute instances stop ${{ fromJson(inputs.port_context).entity.title }} --zone=${{ fromJson(inputs.port_context).entity.properties.zone }}

      - name: Inform Port about Compute Engine stop success
        if: success()
        uses: port-labs/port-github-action@v1
        with:
          clientId: ${{ secrets.PORT_CLIENT_ID }}
          clientSecret: ${{ secrets.PORT_CLIENT_SECRET }}
          baseUrl: https://api.port.io
          operation: PATCH_RUN
          runId: ${{ fromJson(inputs.port_context).runId }}
          status: 'SUCCESS'
          logMessage: ✅ Compute Engine instance with name ${{ fromJson(inputs.port_context).entity.title }} stopped successfully
          summary: Compute Engine instance stop completed successfully

      - name: Inform Port about Compute Engine stop failure
        if: failure()
        uses: port-labs/port-github-action@v1
        with:
          clientId: ${{ secrets.PORT_CLIENT_ID }}
          clientSecret: ${{ secrets.PORT_CLIENT_SECRET }}
          baseUrl: https://api.port.io
          operation: PATCH_RUN
          runId: ${{ fromJson(inputs.port_context).runId }}
          status: 'FAILURE'
          logMessage: ❌ Failed to stop Compute Engine instance with name ${{ fromJson(inputs.port_context).entity.title }}
          summary: Compute Engine instance stop failed
Create Port action
-
Go to the Self-service page of your portal.
-
Click on the
+ New Actionbutton. -
Click on the
{...} Edit JSONbutton. -
Copy and paste the following JSON configuration into the editor.
Stop Compute Engine instance action (Click to expand)
Replace the variables<GITHUB-ORG>- your GitHub organization or user name.<GITHUB-REPO>- your GitHub repository name.<YOUR_GITHUB_OCEAN_INTEGRATION_ID>- your GitHub Ocean integration installation ID.
{"identifier": "stop_gcp_compute_instance","title": "Stop Compute Engine Instance","icon": "GoogleCloud","description": "Stop a GCP Compute Engine Instance","trigger": {"type": "self-service","operation": "DAY-2","userInputs": {"properties": {},"required": []},"blueprintIdentifier": "gcpComputeInstance"},"invocationMethod": {"type": "INTEGRATION_ACTION","installationId": "<YOUR_GITHUB_OCEAN_INTEGRATION_ID>","integrationActionType": "dispatch_workflow","integrationActionExecutionProperties": {"org": "<GITHUB-ORG>","repo": "<GITHUB-REPO>","workflow": "stop-gcp-instance.yaml","workflowInputs": {"port_context": {"entity": "{{ .entity }}","blueprint": "{{ .action.blueprint }}","runId": "{{ .run.id }}"}},"reportWorkflowStatus": true}},"requiredApproval": false} -
Click
Save.
Now you should see the Stop Compute Engine Instance action in the self-service page. 🎉
Visualize metrics
With your data and actions in place, we can create a dedicated dashboard in Port to visualize all Compute Engine instances by status, track deletion protection, and take action directly from the dashboard.
Create a dashboard
-
Navigate to your software catalog.
-
Click on the
+button in the left sidebar. -
Select New dashboard.
-
Name the dashboard GCP Compute Engine Management.
-
Input
Start, stop or monitor your GCP Compute Engine instancesunder Description. -
Select the
GoogleCloudicon. -
Click
Create.
We now have a blank dashboard where we can start adding widgets to visualize insights from our GCP Compute Engine instances.
Add widgets
In the new dashboard, create the following widgets:
Total instances (Click to expand)
-
Click
+ Widgetand select Number Chart. -
Title:
Total instances(add theGoogleCloudicon). -
Select
Count entitiesChart type and choose Compute Instance as the Blueprint. -
Select
countfor the Function. -
Select
customas the Unit and inputinstancesas the Custom unit -
Click
Save.
Instances without deletion protection (Click to expand)
-
Click
+ Widgetand select Number Chart. -
Title:
Instances without deletion protection(add theGoogleCloudicon). -
Select
Count entitiesChart type and choose Compute Instance as the Blueprint. -
Add a filter:
deletionProtectionequalsfalse. -
Select
countfor the Function. -
Select
customas the Unit and inputinstancesas the Custom unit -
Click
Save.
Instance by status (Click to expand)
-
Click
+ Widgetand select Pie chart. -
Title:
Instance by status(add theGoogleCloudicon). -
Choose the Compute Instance blueprint.
-
Under
Breakdown by property, select the Status property -
Click Save.
Compute instances view (Click to expand)
-
Click
+ Widgetand select Table. -
Title the widget All Instances.
-
Choose the Compute Instance blueprint
-
Click Save to add the widget to the dashboard.
-
Click on the
...button in the top right corner of the table and select Customize table. -
In the top right corner of the table, click on
Manage Propertiesand add the following properties:- Status: The current status of the instance.
- Created At: When the instance was created.
- Deletion Protection: Whether deletion protection is enabled.
- Project: The name of each related GCP project.
- Zone: The zone where the instance is located.
-
Click on the save icon in the top right corner of the widget to save the customized table.
Azure Virtual Machines
Use this section to bring your Azure Virtual Machine management experience into Port.
In this section, you will:
- Ingest Azure Virtual Machine data into Port's software catalog using Port's Azure integration.
- Set up self-service actions to manage Azure Virtual Machines (start, deallocate, and restart VMs).
Prerequisites
This section assumes the following:
-
You have a Port account and have completed the onboarding process.
-
Port's Azure integration is installed in your account.
-
Install the GitHub integration relevant to you:
Install GitHub Ocean.
We recommend creating a dedicated repository for the workflows that are used by Port actions.
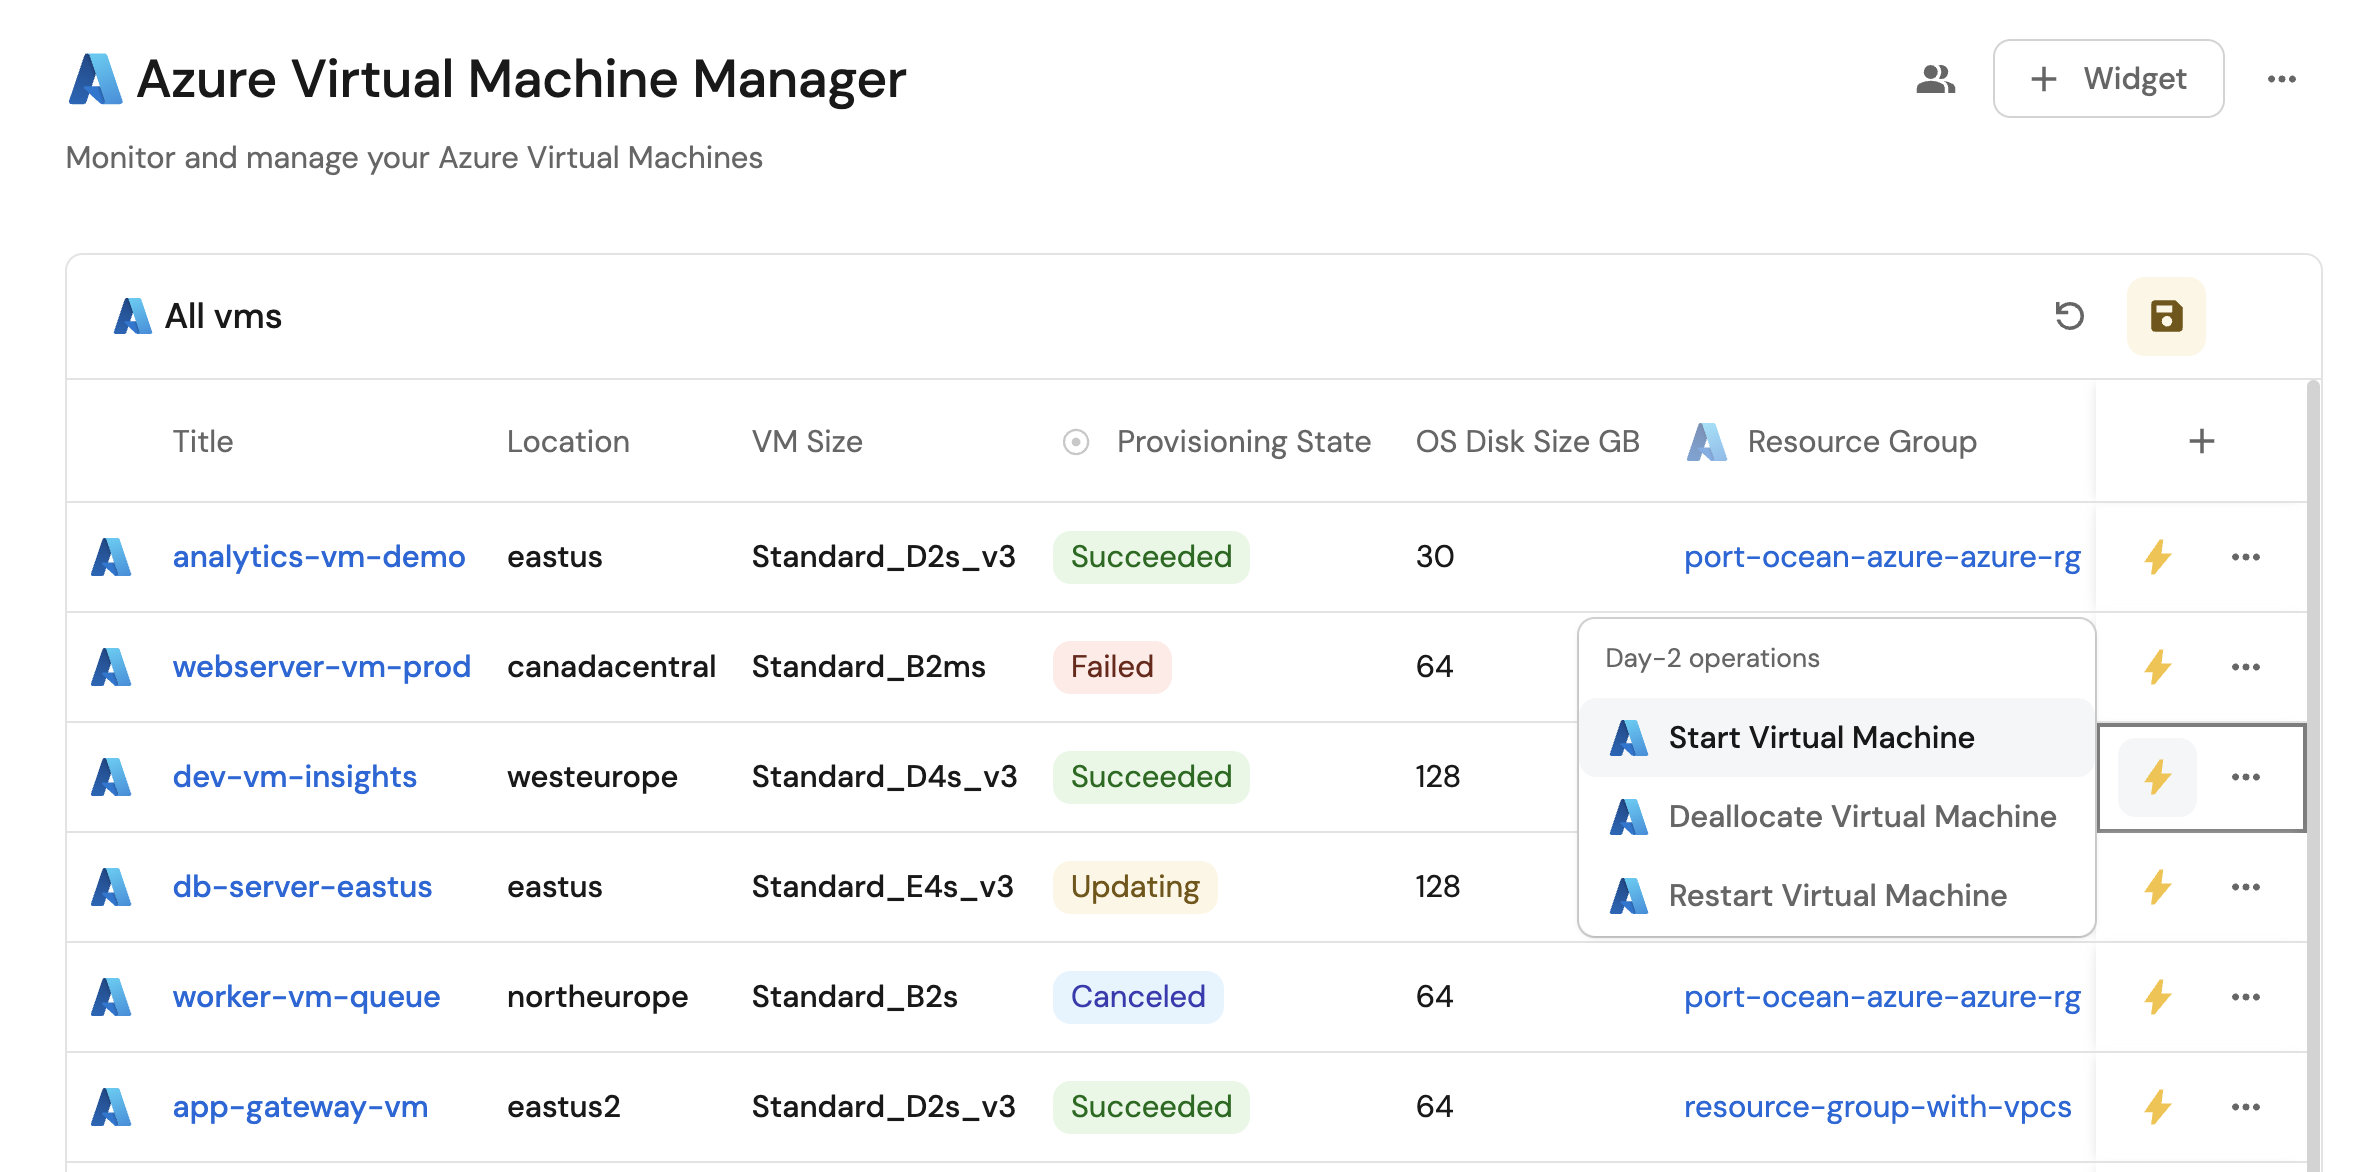
Set up data model
When installing the Azure integration in Port, the Azure Subscription and Azure Resource Group blueprints are created by default.
However, the Virtual Machine blueprint is not created automatically so we will need to create it manually.
Create the Virtual Machine blueprint
-
Go to the Builder page of your portal.
-
Click on
+ Blueprint. -
Click on the
{...}button in the top right corner, and chooseEdit JSON. -
Add this JSON schema:
Azure Virtual Machine blueprint (Click to expand)
{"identifier": "azureVirtualMachine","description": "This blueprint represents an Azure Virtual Machine in our software catalog","title": "Virtual Machine","icon": "Azure","schema": {"properties": {"location": {"title": "Location","type": "string"},"provisioningState": {"title": "Provisioning State","type": "string"},"vmSize": {"title": "VM Size","type": "string"},"osDiskName": {"title": "OS Disk Name","type": "string"},"osType": {"title": "OS Type","type": "string"},"osDiskCaching": {"title": "OS Disk Caching","type": "string"},"osDiskSizeGB": {"title": "OS Disk Size GB","type": "number"},"osDiskCreateOption": {"title": "OS Disk Create Option","type": "string"},"networkInterfaceIds": {"title": "Network Interface IDs","type": "array"},"licenseType": {"title": "License Type","type": "string"},"vmOsProfile": {"title": "VM OS Profile","type": "object"},"vmHardwareProfile": {"title": "VM Hardware Profile","type": "object"},"vmStorageProfile": {"title": "VM Storage Profile","type": "object"},"tags": {"title": "Tags","type": "object"}},"required": []},"mirrorProperties": {},"calculationProperties": {},"aggregationProperties": {},"relations": {"resourceGroup": {"title": "Resource Group","target": "azureResourceGroup","required": false,"many": false}}} -
Click
Saveto create the blueprint.
Update the integration mapping
-
Go to the Data Sources page of your portal.
-
Select the Azure integration.
-
Add the following YAML block into the editor to ingest Azure Virtual Machines from your Azure subscription:
Azure integration configuration (Click to expand)
deleteDependentEntities: truecreateMissingRelatedEntities: trueenableMergeEntity: trueresources:- kind: subscriptionselector:query: 'true'apiVersion: '2022-09-01'port:entity:mappings:identifier: .idtitle: .display_nameblueprint: '"azureSubscription"'properties:tags: .tags- kind: Microsoft.Resources/resourceGroupsselector:query: 'true'apiVersion: '2022-09-01'port:entity:mappings:identifier: >-.id | split("/") | .[3] |= ascii_downcase |.[4] |= ascii_downcase |join("/")title: .nameblueprint: '"azureResourceGroup"'properties:location: .locationprovisioningState: .properties.provisioningState + .properties.provisioning_statetags: .tagsrelations:subscription: >-.id | split("/") | .[1] |= ascii_downcase |.[2] |= ascii_downcase| .[:3] |join("/")- kind: Microsoft.Compute/virtualMachinesselector:query: 'true'apiVersion: '2023-03-01'port:entity:mappings:identifier: >-.id | split("/") | .[3] |= ascii_downcase |.[4] |= ascii_downcase |join("/")title: .nameblueprint: '"azureVirtualMachine"'properties:location: .locationprovisioningState: .properties.provisioningStatevmSize: .properties.hardwareProfile.vmSizeosDiskName: .properties.storageProfile.osDisk.nameosType: .properties.storageProfile.osDisk.osTypeosDiskCaching: .properties.storageProfile.osDisk.cachingosDiskSizeGB: .properties.storageProfile.osDisk.diskSizeGBosDiskCreateOption: .properties.storageProfile.osDisk.createOptionnetworkInterfaceIds: .properties.networkProfile.networkInterfaces[].idlicenseType: .properties.licenseTypevmOsProfile: .properties.osProfilevmHardwareProfile: .properties.hardwareProfilevmStorageProfile: .properties.storageProfiletags: .tagsrelations:resourceGroup: >-.id | split("/") | .[3] |= ascii_downcase | .[4] |= ascii_downcase| .[:5] |join("/") -
Click
Save & Resyncto apply the mapping.
Set up self-service actions
Now let us create self-service actions to manage your Azure Virtual Machines directly from Port using GitHub Actions. You will implement workflows to:
-
Start an Azure Virtual Machine.
-
Deallocate an Azure Virtual Machine.
-
Restart an Azure Virtual Machine.
Add GitHub secrets
In your GitHub repository, go to Settings > Secrets and add the following secrets:
PORT_CLIENT_ID- Port Client ID learn more.PORT_CLIENT_SECRET- Port Client Secret learn more.AZURE_CLIENT_ID- Azure service principal client ID.AZURE_CLIENT_SECRET- Azure service principal client secret.AZURE_TENANT_ID- Azure tenant ID.
The Azure service principal must have the following permissions to manage Virtual Machines:
Microsoft.Compute/virtualMachines/start/actionMicrosoft.Compute/virtualMachines/powerOff/actionMicrosoft.Compute/virtualMachines/restart/actionMicrosoft.Compute/virtualMachines/read
Alternatively, you can assign the Virtual Machine Contributor built-in role which includes these permissions.
Start an Azure Virtual Machine
To start an Azure Virtual Machine from Port, first add a GitHub workflow that starts the virtual machine in Azure. Then create a Port self-service action that triggers the workflow.
Add GitHub workflow
Create the file .github/workflows/start-azure-vm.yaml in the .github/workflows folder of your repository.
Start Azure Virtual Machine GitHub workflow (Click to expand)
name: Start Azure Virtual Machine

on:
  workflow_dispatch:
    inputs:
      port_context:
        required: true
        description: 'Action and general context (blueprint, entity, run id, etc...)'
        type: string

jobs:
  start-vm:
    runs-on: ubuntu-latest
    steps:
      - name: Inform Port of workflow start
        uses: port-labs/port-github-action@v1
        with:
          clientId: ${{ secrets.PORT_CLIENT_ID }}
          clientSecret: ${{ secrets.PORT_CLIENT_SECRET }}
          baseUrl: https://api.port.io
          operation: PATCH_RUN
          runId: ${{fromJson(inputs.port_context).runId}}
          logMessage: Configuring Azure credentials to start VM ${{ fromJson(inputs.port_context).entity.title }}

      - name: Azure Login
        uses: azure/login@v2
        env:
          AZURE_LOGIN_PRE_CLEANUP: true
          AZURE_LOGIN_POST_CLEANUP: true
        with:
          creds: '{"clientId":"${{ secrets.AZURE_CLIENT_ID }}","clientSecret":"${{ secrets.AZURE_CLIENT_SECRET }}","subscriptionId":"${{ fromJson(inputs.port_context).subscription_id }}","tenantId":"${{ secrets.AZURE_TENANT_ID }}"}'

      - name: Start Azure Virtual Machine
        run: |
          az vm start --name ${{ fromJson(inputs.port_context).entity.title }} --resource-group ${{ fromJson(inputs.port_context).resource_group }}

      - name: Inform Port about VM start success
        if: success()
        uses: port-labs/port-github-action@v1
        with:
          clientId: ${{ secrets.PORT_CLIENT_ID }}
          clientSecret: ${{ secrets.PORT_CLIENT_SECRET }}
          baseUrl: https://api.port.io
          operation: PATCH_RUN
          runId: ${{ fromJson(inputs.port_context).runId }}
          status: 'SUCCESS'
          logMessage: ✅ Azure VM ${{ fromJson(inputs.port_context).entity.title }} started successfully
          summary: Azure VM started successfully

      - name: Inform Port about VM start failure
        if: failure()
        uses: port-labs/port-github-action@v1
        with:
          clientId: ${{ secrets.PORT_CLIENT_ID }}
          clientSecret: ${{ secrets.PORT_CLIENT_SECRET }}
          baseUrl: https://api.port.io
          operation: PATCH_RUN
          runId: ${{ fromJson(inputs.port_context).runId }}
          status: 'FAILURE'
          logMessage: ❌ Failed to start Azure VM ${{ fromJson(inputs.port_context).entity.title }}
          summary: Azure VM start failed
Create Port action
-
Go to the Self-service page of your portal.
-
Click on the
+ New Actionbutton. -
Click on the
{...} Edit JSONbutton. -
Copy and paste the following JSON configuration into the editor.
Start Azure Virtual Machine action (Click to expand)
Replace the variables<GITHUB-ORG>- your GitHub organization or user name.<GITHUB-REPO>- your GitHub repository name.<YOUR_GITHUB_OCEAN_INTEGRATION_ID>- your GitHub Ocean integration installation ID.
{"identifier": "start_azure_vm","title": "Start Azure Virtual Machine","icon": "Azure","description": "Starts an Azure Virtual Machine","trigger": {"type": "self-service","operation": "DAY-2","userInputs": {"properties": {},"required": [],"order": []},"blueprintIdentifier": "azureVirtualMachine"},"invocationMethod": {"type": "INTEGRATION_ACTION","installationId": "<YOUR_GITHUB_OCEAN_INTEGRATION_ID>","integrationActionType": "dispatch_workflow","integrationActionExecutionProperties": {"org": "<GITHUB-ORG>","repo": "<GITHUB-REPO>","workflow": "start-azure-vm.yaml","workflowInputs": {"port_context": {"runId": "{{ .run.id }}","entity": "{{ .entity }}","subscription_id": "{{.entity.relations.resourceGroup | split(\"/\")[2]}}","resource_group": "{{.entity.relations.resourceGroup | split(\"/\")[-1]}}"}},"reportWorkflowStatus": true}},"requiredApproval": false} -
Click
Save.
Deallocate an Azure Virtual Machine
To deallocate an Azure Virtual Machine from Port, first add a GitHub workflow that deallocates the virtual machine in Azure. Then create a Port self-service action that triggers the workflow.
Add GitHub workflow
Create the file .github/workflows/deallocate-azure-vm.yaml in the .github/workflows folder of your repository.
Deallocate Azure Virtual Machine GitHub workflow (Click to expand)
name: Deallocate Azure Virtual Machine

on:
  workflow_dispatch:
    inputs:
      port_context:
        required: true
        description: 'Action and general context (blueprint, entity, run id, etc...)'
        type: string

jobs:
  deallocate-vm:
    runs-on: ubuntu-latest
    steps:
      - name: Inform Port of workflow stop
        uses: port-labs/port-github-action@v1
        with:
          clientId: ${{ secrets.PORT_CLIENT_ID }}
          clientSecret: ${{ secrets.PORT_CLIENT_SECRET }}
          baseUrl: https://api.port.io
          operation: PATCH_RUN
          runId: ${{fromJson(inputs.port_context).runId}}
          logMessage: Configuring Azure credentials to deallocate VM ${{ fromJson(inputs.port_context).entity.title }}

      - name: Azure Login
        uses: azure/login@v2
        env:
          AZURE_LOGIN_PRE_CLEANUP: true
          AZURE_LOGIN_POST_CLEANUP: true
        with:
          creds: '{"clientId":"${{ secrets.AZURE_CLIENT_ID }}","clientSecret":"${{ secrets.AZURE_CLIENT_SECRET }}","subscriptionId":"${{ fromJson(inputs.port_context).subscription_id }}","tenantId":"${{ secrets.AZURE_TENANT_ID }}"}'

      - name: Deallocate Azure Virtual Machine
        run: |
          az vm deallocate --name ${{ fromJson(inputs.port_context).entity.title }} --resource-group ${{ fromJson(inputs.port_context).resource_group }}

      - name: Inform Port about VM deallocate success
        if: success()
        uses: port-labs/port-github-action@v1
        with:
          clientId: ${{ secrets.PORT_CLIENT_ID }}
          clientSecret: ${{ secrets.PORT_CLIENT_SECRET }}
          baseUrl: https://api.port.io
          operation: PATCH_RUN
          runId: ${{ fromJson(inputs.port_context).runId }}
          status: 'SUCCESS'
          logMessage: ✅ Azure VM ${{ fromJson(inputs.port_context).entity.title }} deallocated successfully
          summary: Azure VM deallocated successfully

      - name: Inform Port about VM deallocate failure
        if: failure()
        uses: port-labs/port-github-action@v1
        with:
          clientId: ${{ secrets.PORT_CLIENT_ID }}
          clientSecret: ${{ secrets.PORT_CLIENT_SECRET }}
          baseUrl: https://api.port.io
          operation: PATCH_RUN
          runId: ${{ fromJson(inputs.port_context).runId }}
          status: 'FAILURE'
          logMessage: ❌ Failed to deallocate Azure VM ${{ fromJson(inputs.port_context).entity.title }}
          summary: Azure VM deallocate failed
Create Port action
-
Go to the Self-service page of your portal.
-
Click on the
+ New Actionbutton. -
Click on the
{...} Edit JSONbutton. -
Copy and paste the following JSON configuration into the editor.
Deallocate Azure Virtual Machine action (Click to expand)
Replace the variables<GITHUB-ORG>- your GitHub organization or user name.<GITHUB-REPO>- your GitHub repository name.<YOUR_GITHUB_OCEAN_INTEGRATION_ID>- your GitHub Ocean integration installation ID.
{"identifier": "deallocate_azure_vm","title": "Deallocate Azure Virtual Machine","icon": "Azure","description": "Deallocates an Azure Virtual Machine","trigger": {"type": "self-service","operation": "DAY-2","userInputs": {"properties": {},"required": [],"order": []},"blueprintIdentifier": "azureVirtualMachine"},"invocationMethod": {"type": "INTEGRATION_ACTION","installationId": "<YOUR_GITHUB_OCEAN_INTEGRATION_ID>","integrationActionType": "dispatch_workflow","integrationActionExecutionProperties": {"org": "<GITHUB-ORG>","repo": "<GITHUB-REPO>","workflow": "deallocate-azure-vm.yaml","workflowInputs": {"port_context": {"runId": "{{ .run.id }}","entity": "{{ .entity }}","subscription_id": "{{.entity.relations.resourceGroup | split(\"/\")[2]}}","resource_group": "{{.entity.relations.resourceGroup | split(\"/\")[-1]}}"}},"reportWorkflowStatus": true}},"requiredApproval": false} -
Click
Save.
Restart an Azure Virtual Machine
To restart an Azure Virtual Machine from Port, first add a GitHub workflow that restarts the virtual machine in Azure. Then create a Port self-service action that triggers the workflow.
Add GitHub workflow
Create the file .github/workflows/restart-azure-vm.yaml in the .github/workflows folder of your repository.
Restart Azure Virtual Machine GitHub workflow (Click to expand)
name: Restart Azure Virtual Machine

on:
  workflow_dispatch:
    inputs:
      port_context:
        required: true
        description: 'Action and general context (blueprint, entity, run id, etc...)'
        type: string

jobs:
  restart-vm:
    runs-on: ubuntu-latest
    steps:
      - name: Inform Port of workflow restart
        uses: port-labs/port-github-action@v1
        with:
          clientId: ${{ secrets.PORT_CLIENT_ID }}
          clientSecret: ${{ secrets.PORT_CLIENT_SECRET }}
          baseUrl: https://api.port.io
          operation: PATCH_RUN
          runId: ${{fromJson(inputs.port_context).runId}}
          logMessage: Configuring Azure credentials to restart VM ${{ fromJson(inputs.port_context).entity.title }}

      - name: Azure Login
        uses: azure/login@v2
        env:
          AZURE_LOGIN_PRE_CLEANUP: true
          AZURE_LOGIN_POST_CLEANUP: true
        with:
          creds: '{"clientId":"${{ secrets.AZURE_CLIENT_ID }}","clientSecret":"${{ secrets.AZURE_CLIENT_SECRET }}","subscriptionId":"${{ fromJson(inputs.port_context).subscription_id }}","tenantId":"${{ secrets.AZURE_TENANT_ID }}"}'

      - name: Restart Azure Virtual Machine
        run: |
          az vm restart --name ${{ fromJson(inputs.port_context).entity.title }} --resource-group ${{ fromJson(inputs.port_context).resource_group }}

      - name: Inform Port about VM restart success
        if: success()
        uses: port-labs/port-github-action@v1
        with:
          clientId: ${{ secrets.PORT_CLIENT_ID }}
          clientSecret: ${{ secrets.PORT_CLIENT_SECRET }}
          baseUrl: https://api.port.io
          operation: PATCH_RUN
          runId: ${{ fromJson(inputs.port_context).runId }}
          status: 'SUCCESS'
          logMessage: ✅ Azure VM ${{ fromJson(inputs.port_context).entity.title }} restarted successfully
          summary: Azure VM restarted successfully

      - name: Inform Port about VM restart failure
        if: failure()
        uses: port-labs/port-github-action@v1
        with:
          clientId: ${{ secrets.PORT_CLIENT_ID }}
          clientSecret: ${{ secrets.PORT_CLIENT_SECRET }}
          baseUrl: https://api.port.io
          operation: PATCH_RUN
          runId: ${{ fromJson(inputs.port_context).runId }}
          status: 'FAILURE'
          logMessage: ❌ Failed to restart Azure VM ${{ fromJson(inputs.port_context).entity.title }}
          summary: Azure VM restart failed
Create Port action
-
Go to the Self-service page of your portal.
-
Click on the
+ New Actionbutton. -
Click on the
{...} Edit JSONbutton. -
Copy and paste the following JSON configuration into the editor.
Restart Azure Virtual Machine action (Click to expand)
Replace the variables<GITHUB-ORG>- your GitHub organization or user name.<GITHUB-REPO>- your GitHub repository name.<YOUR_GITHUB_OCEAN_INTEGRATION_ID>- your GitHub Ocean integration installation ID.
{"identifier": "restart_azure_vm","title": "Restart Azure Virtual Machine","icon": "Azure","description": "Restarts an Azure Virtual Machine","trigger": {"type": "self-service","operation": "DAY-2","userInputs": {"properties": {},"required": [],"order": []},"blueprintIdentifier": "azureVirtualMachine"},"invocationMethod": {"type": "INTEGRATION_ACTION","installationId": "<YOUR_GITHUB_OCEAN_INTEGRATION_ID>","integrationActionType": "dispatch_workflow","integrationActionExecutionProperties": {"org": "<GITHUB-ORG>","repo": "<GITHUB-REPO>","workflow": "restart-azure-vm.yaml","workflowInputs": {"port_context": {"runId": "{{ .run.id }}","entity": "{{ .entity }}","subscription_id": "{{.entity.relations.resourceGroup | split(\"/\")[2]}}","resource_group": "{{.entity.relations.resourceGroup | split(\"/\")[-1]}}"}},"reportWorkflowStatus": true}},"requiredApproval": false} -
Click
Save.
Azure web apps
Use this section to bring your Azure web app management experience into Port.
In this section, you will:
- Ingest Azure web app data into Port's software catalog using Port's Azure integration.
- Set up self-service actions to manage Azure web apps (start, stop, and restart web apps).
- Build dashboards in Port to monitor and take action on your Azure web app resources.
Prerequisites
This section assumes the following:
-
You have a Port account and have completed the onboarding process.
-
Port's Azure integration is installed in your account.
-
Install the GitHub integration relevant to you:
Install GitHub Ocean.
We recommend creating a dedicated repository for the workflows that are used by Port actions.
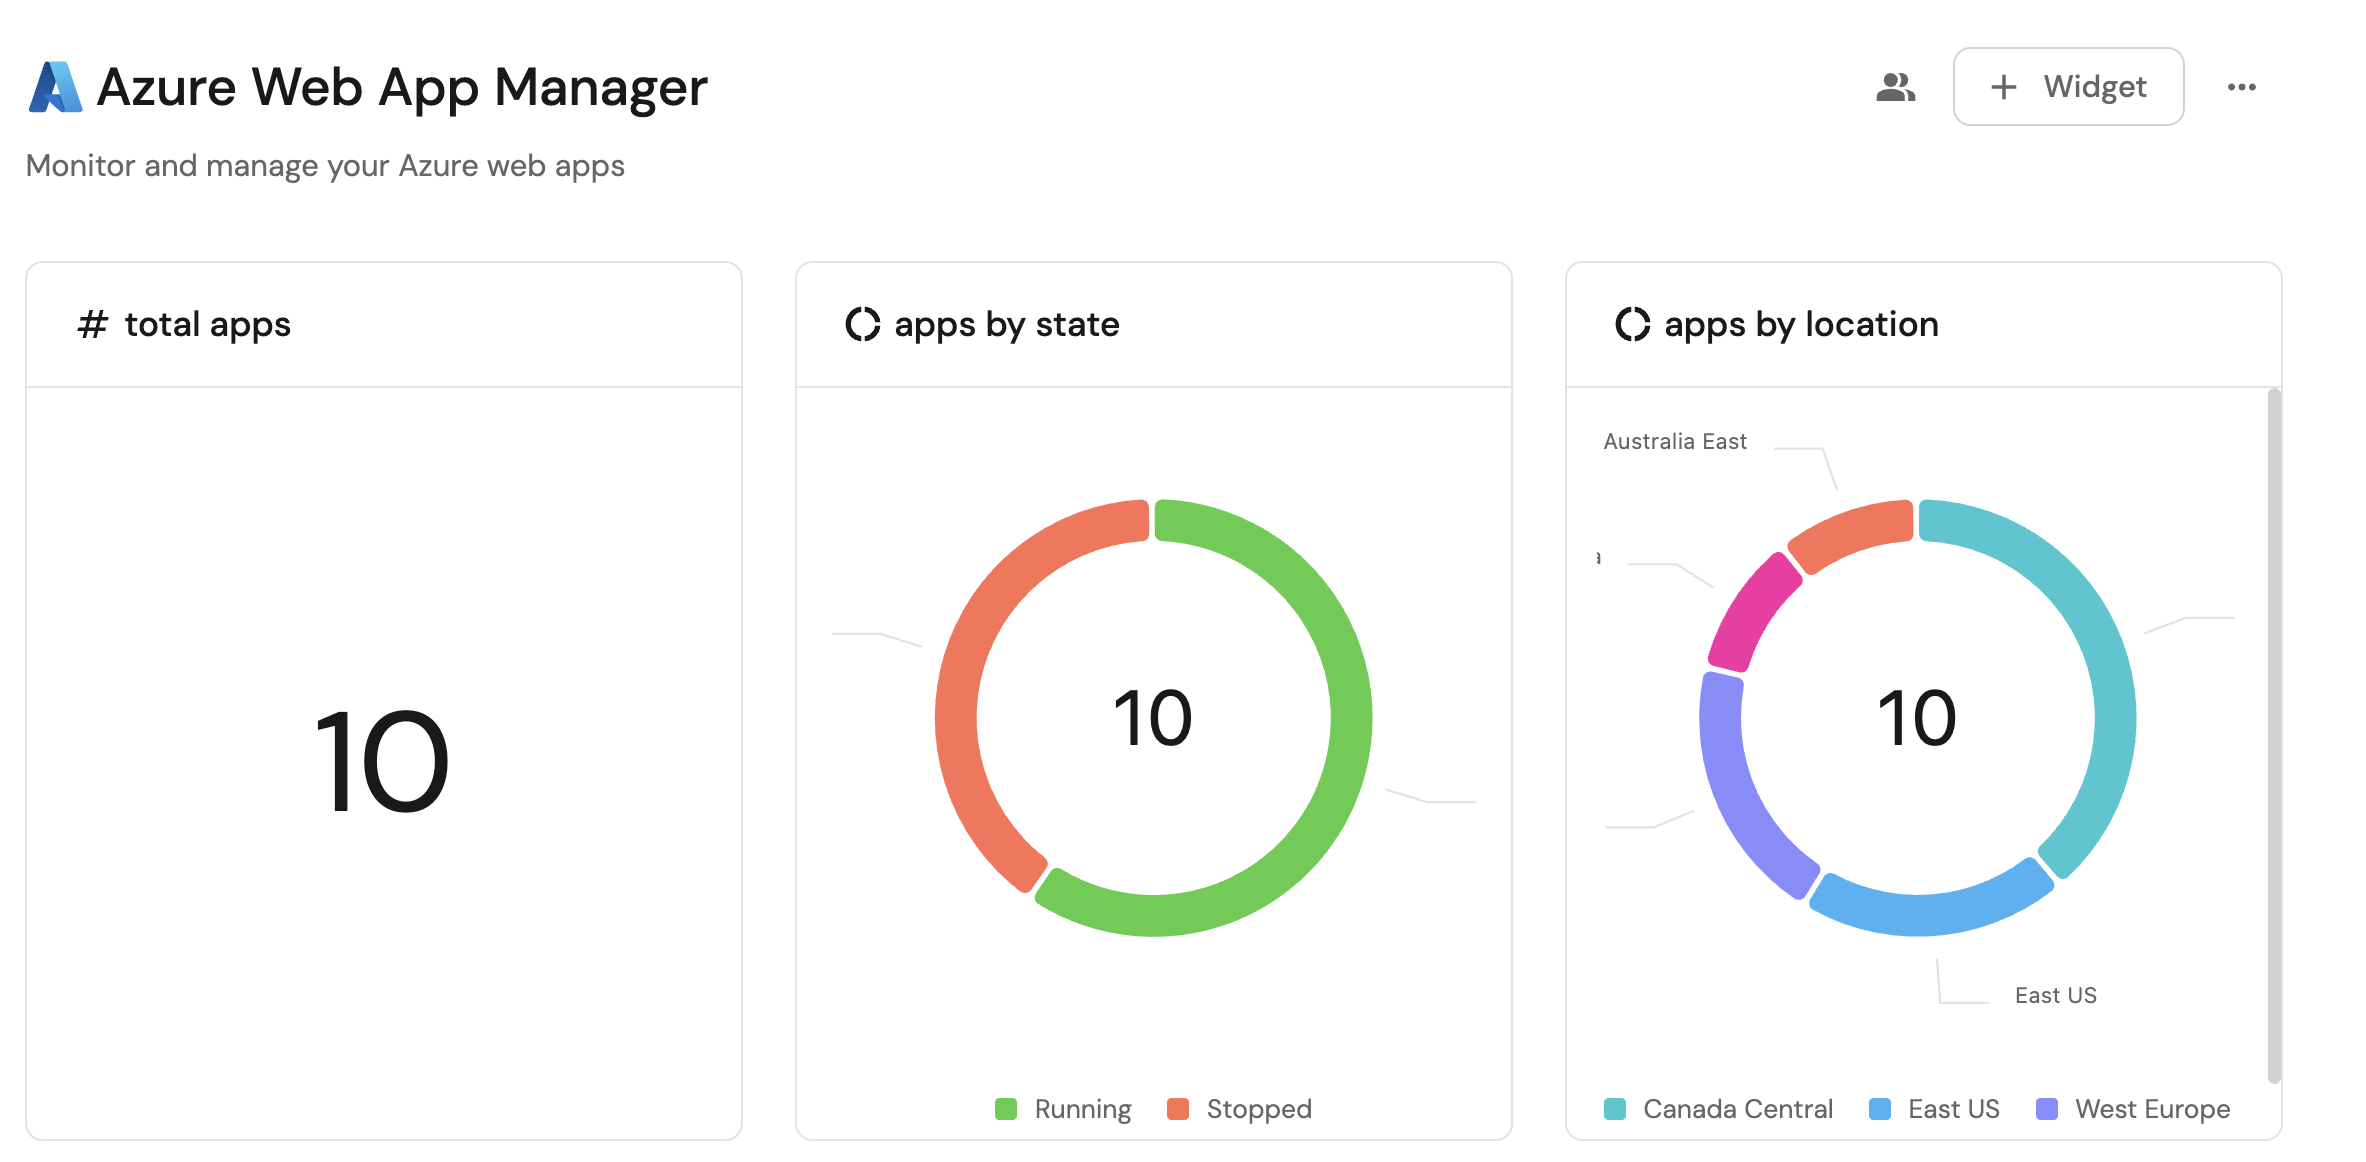
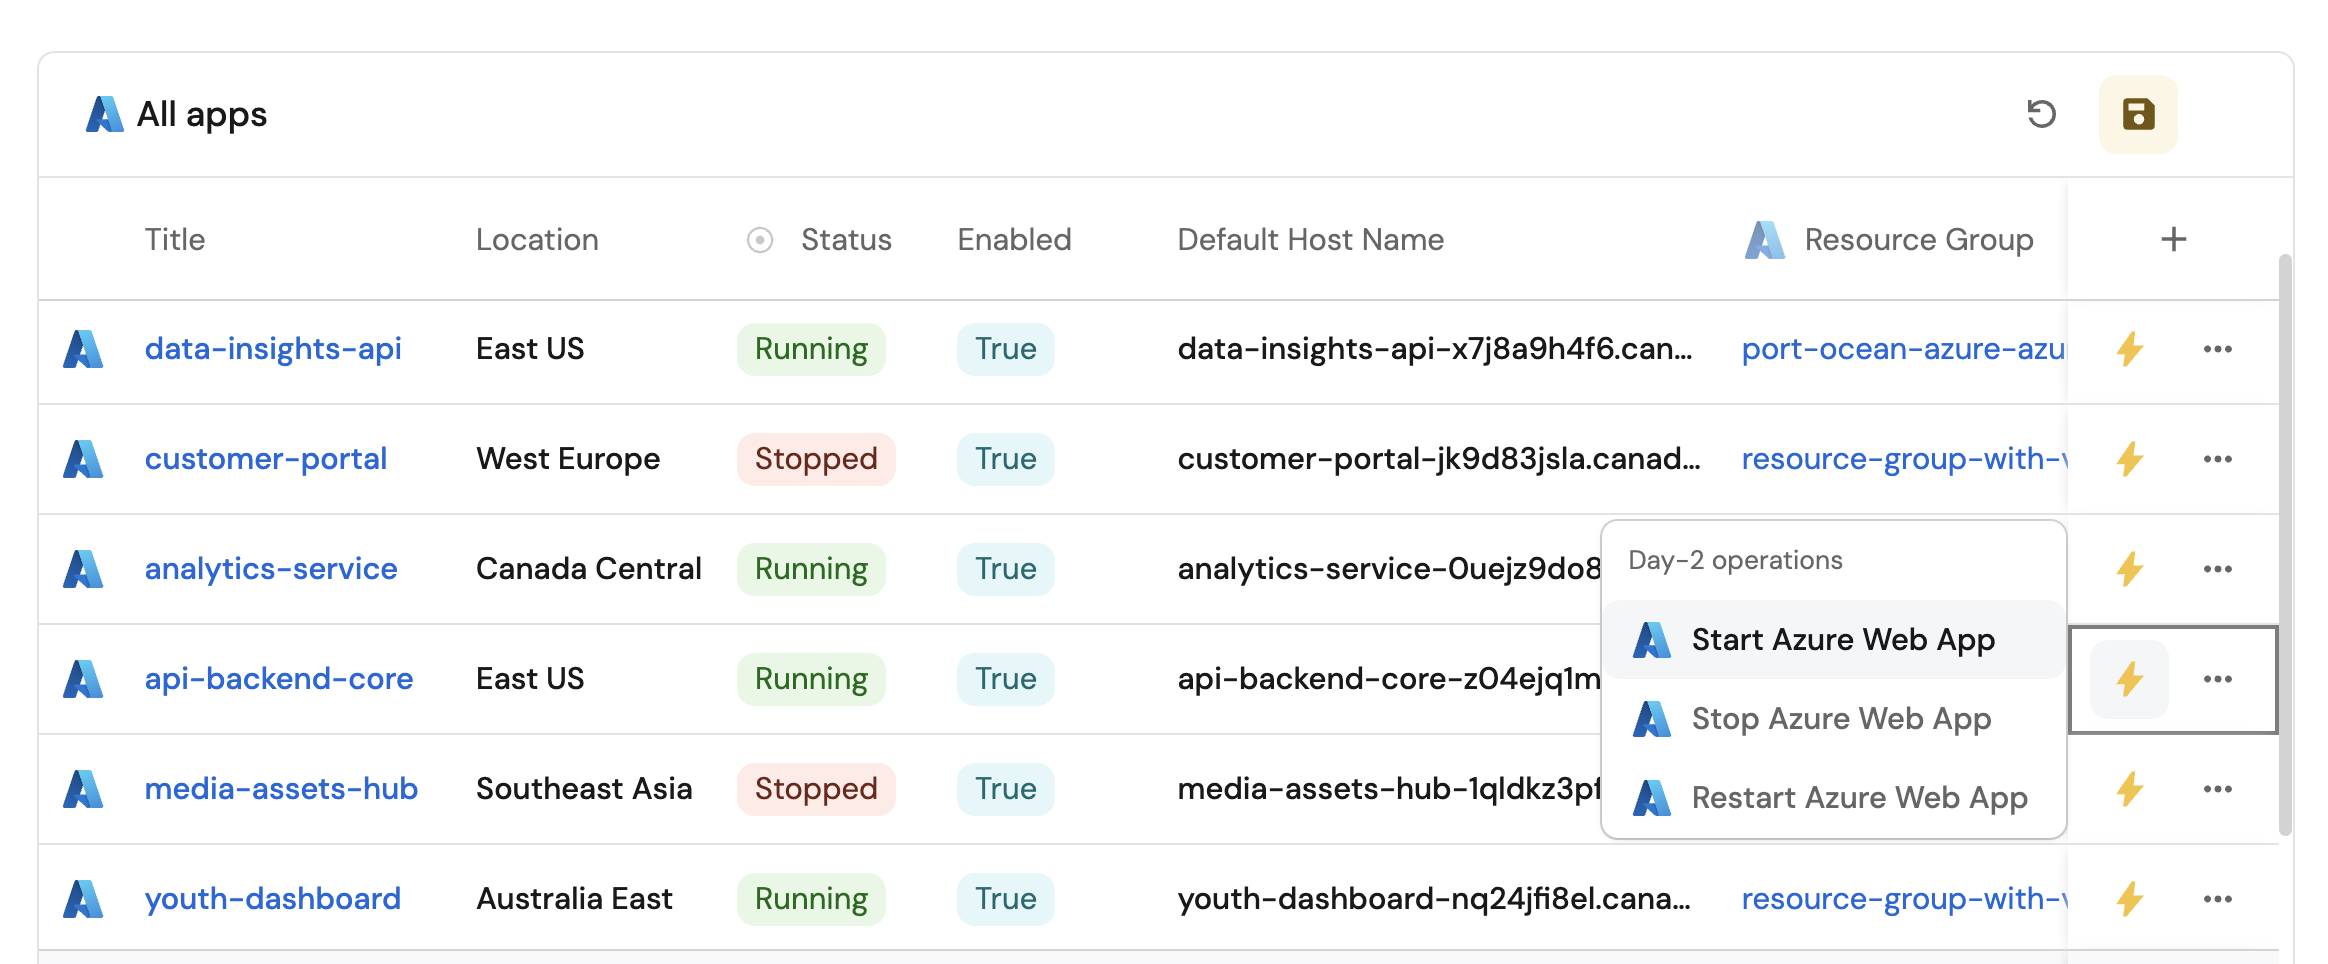
Set up data model
When installing the Azure integration in Port, the Azure Subscription and Azure Resource Group blueprints are created by default.
However, the Web App blueprint is not created automatically so we will need to create it manually.
Create the Web App blueprint
-
Go to the Builder page of your portal.
-
Click on
+ Blueprint. -
Click on the
{...}button in the top right corner, and chooseEdit JSON. -
Add this JSON schema:
Azure Web App blueprint (Click to expand)
{"identifier": "azureWebApp","description": "This blueprint represents an Azure Web App in our software catalog","title": "Web App","icon": "Azure","schema": {"properties": {"location": {"title": "Location","type": "string"},"enabled": {"title": "Enabled","type": "boolean"},"defaultHostName": {"title": "Default Host Name","type": "string"},"appServicePlanId": {"title": "App Service Plan ID","type": "string"},"state": {"icon": "DefaultProperty","title": "State","type": "string","enum": ["Running","Stopped","Starting","Stopping","Failed","Restarting","Pending","Unknown","Provisioning"],"enumColors": {"Running": "green","Stopped": "red","Starting": "lime","Stopping": "bronze","Failed": "red","Restarting": "yellow","Pending": "lightGray","Unknown": "lightGray","Provisioning": "blue"}}},"required": []},"mirrorProperties": {},"calculationProperties": {},"aggregationProperties": {},"relations": {"resourceGroup": {"title": "Resource Group","target": "azureResourceGroup","required": false,"many": false}}} -
Click
Saveto create the blueprint.
Update the integration mapping
-
Go to the Data Sources page of your portal.
-
Select the Azure integration.
-
Add the following YAML block into the editor to ingest Azure web apps from your Azure subscription:
Azure integration configuration (Click to expand)
deleteDependentEntities: truecreateMissingRelatedEntities: trueenableMergeEntity: trueresources:- kind: subscriptionselector:query: 'true'apiVersion: '2022-09-01'port:entity:mappings:identifier: .idtitle: .display_nameblueprint: '"azureSubscription"'properties:tags: .tags- kind: Microsoft.Resources/resourceGroupsselector:query: 'true'apiVersion: '2022-09-01'port:entity:mappings:identifier: >-.id | split("/") | .[3] |= ascii_downcase |.[4] |= ascii_downcase |join("/")title: .nameblueprint: '"azureResourceGroup"'properties:location: .locationprovisioningState: .properties.provisioningState + .properties.provisioning_statetags: .tagsrelations:subscription: >-.id | split("/") | .[1] |= ascii_downcase |.[2] |= ascii_downcase| .[:3] |join("/")- kind: Microsoft.Web/sitesselector:query: 'true'apiVersion: '2022-03-01'port:entity:mappings:identifier: >-.id | split("/") | .[3] |= ascii_downcase |.[4] |= ascii_downcase |join("/")title: .nameblueprint: '"azureWebApp"'properties:location: .locationstate: .properties.stateenabled: .properties.enableddefaultHostName: .properties.defaultHostNameappServicePlanId: .properties.serverFarmIdrelations:resourceGroup: >-.id | split("/") | .[3] |= ascii_downcase |.[4] |= ascii_downcase| .[:5] |join("/") -
Click
Save & Resyncto apply the mapping.
Set up self-service actions
Now let us create self-service actions to manage your Azure web apps directly from Port using GitHub Actions. You will implement workflows to:
-
Start an Azure web app.
-
Stop an Azure web app.
-
Restart an Azure web app.
To implement these use-cases, follow the steps below:
Add GitHub secrets
In your GitHub repository, go to Settings > Secrets and add the following secrets:
PORT_CLIENT_ID- Port Client ID learn more.PORT_CLIENT_SECRET- Port Client Secret learn more.AZURE_CLIENT_ID- Azure service principal client ID.AZURE_CLIENT_SECRET- Azure service principal client secret.AZURE_TENANT_ID- Azure tenant ID.
The Azure service principal must have the following permissions to manage web apps:
Microsoft.Web/sites/start/actionMicrosoft.Web/sites/stop/actionMicrosoft.Web/sites/restart/actionMicrosoft.Web/sites/read
Alternatively, you can assign the Website Contributor built-in role which includes these permissions.
Start an Azure web app
To start an Azure web app from Port, first add a GitHub workflow that starts the web app in Azure. Then create a Port self-service action that triggers the workflow.
Add GitHub workflow
Create the file .github/workflows/start-azure-webapp.yaml in the .github/workflows folder of your repository.
Start Azure Web App GitHub workflow (Click to expand)
name: Start Azure Web App

on:
  workflow_dispatch:
    inputs:
      port_context:
        required: true
        description: 'Action and general context (blueprint, entity, run id, etc...)'
        type: string

jobs:
  start-webapp:
    runs-on: ubuntu-latest
    steps:
      - name: Inform Port of workflow start
        uses: port-labs/port-github-action@v1
        with:
          clientId: ${{ secrets.PORT_CLIENT_ID }}
          clientSecret: ${{ secrets.PORT_CLIENT_SECRET }}
          baseUrl: https://api.port.io
          operation: PATCH_RUN
          runId: ${{fromJson(inputs.port_context).runId}}
          logMessage: Configuring Azure credentials to start web app ${{ fromJson(inputs.port_context).entity.title }}

      - name: Azure Login
        uses: azure/login@v2
        env:
          AZURE_LOGIN_PRE_CLEANUP: true
          AZURE_LOGIN_POST_CLEANUP: true
        with:
          creds: '{"clientId":"${{ secrets.AZURE_CLIENT_ID }}","clientSecret":"${{ secrets.AZURE_CLIENT_SECRET }}","subscriptionId":"${{ fromJson(inputs.port_context).subscription_id }}","tenantId":"${{ secrets.AZURE_TENANT_ID }}"}'

      - name: Start Azure Web App
        run: |
          az webapp start --name ${{ fromJson(inputs.port_context).entity.title }} --resource-group ${{ fromJson(inputs.port_context).resource_group }}

      - name: Inform Port about web app start success
        if: success()
        uses: port-labs/port-github-action@v1
        with:
          clientId: ${{ secrets.PORT_CLIENT_ID }}
          clientSecret: ${{ secrets.PORT_CLIENT_SECRET }}
          baseUrl: https://api.port.io
          operation: PATCH_RUN
          runId: ${{ fromJson(inputs.port_context).runId }}
          status: 'SUCCESS'
          logMessage: ✅ Azure web app ${{ fromJson(inputs.port_context).entity.title }} started successfully
          summary: Azure web app started successfully

      - name: Inform Port about web app start failure
        if: failure()
        uses: port-labs/port-github-action@v1
        with:
          clientId: ${{ secrets.PORT_CLIENT_ID }}
          clientSecret: ${{ secrets.PORT_CLIENT_SECRET }}
          baseUrl: https://api.port.io
          operation: PATCH_RUN
          runId: ${{ fromJson(inputs.port_context).runId }}
          status: 'FAILURE'
          logMessage: ❌ Failed to start Azure web app ${{ fromJson(inputs.port_context).entity.title }}
          summary: Azure web app start failed
Create Port action
-
Go to the Self-service page of your portal.
-
Click on the
+ New Actionbutton. -
Click on the
{...} Edit JSONbutton. -
Copy and paste the following JSON configuration into the editor.
Start Azure Web App action (Click to expand)
Replace the variables<GITHUB-ORG>- your GitHub organization or user name.<GITHUB-REPO>- your GitHub repository name.<YOUR_GITHUB_OCEAN_INTEGRATION_ID>- your GitHub Ocean integration installation ID.
{"identifier": "start_azure_webapp","title": "Start Azure Web App","icon": "Azure","description": "Starts an Azure web app","trigger": {"type": "self-service","operation": "UPDATE","userInputs": {"properties": {},"required": [],"order": []},"blueprintIdentifier": "azureWebApp"},"invocationMethod": {"type": "INTEGRATION_ACTION","installationId": "<YOUR_GITHUB_OCEAN_INTEGRATION_ID>","integrationActionType": "dispatch_workflow","integrationActionExecutionProperties": {"org": "<GITHUB-ORG>","repo": "<GITHUB-REPO>","workflow": "start-azure-webapp.yaml","workflowInputs": {"port_context": {"runId": "{{ .run.id }}","entity": "{{ .entity }}","subscription_id": "{{.entity.relations.resourceGroup | split(\"/\")[2]}}","resource_group": "{{.entity.relations.resourceGroup | split(\"/\")[-1]}}"}},"reportWorkflowStatus": true}},"requiredApproval": false} -
Click
Save.
Now you should see the Start Azure Web App action in the self-service page. 🎉
Stop an Azure web app
To stop an Azure web app from Port, first add a GitHub workflow that stops the web app in Azure. Then create a Port self-service action that triggers the workflow.
Add GitHub workflow
Create the file .github/workflows/stop-azure-webapp.yaml in the .github/workflows folder of your repository.
Stop Azure Web App GitHub workflow (Click to expand)
name: Stop Azure Web App

on:
  workflow_dispatch:
    inputs:
      port_context:
        required: true
        description: 'Action and general context (blueprint, entity, run id, etc...)'
        type: string

jobs:
  stop-webapp:
    runs-on: ubuntu-latest
    steps:
      - name: Inform Port of workflow stop
        uses: port-labs/port-github-action@v1
        with:
          clientId: ${{ secrets.PORT_CLIENT_ID }}
          clientSecret: ${{ secrets.PORT_CLIENT_SECRET }}
          baseUrl: https://api.port.io
          operation: PATCH_RUN
          runId: ${{fromJson(inputs.port_context).runId}}
          logMessage: Configuring Azure credentials to stop web app ${{ fromJson(inputs.port_context).entity.title }}

      - name: Azure Login
        uses: azure/login@v2
        env:
          AZURE_LOGIN_PRE_CLEANUP: true
          AZURE_LOGIN_POST_CLEANUP: true
        with:
          creds: '{"clientId":"${{ secrets.AZURE_CLIENT_ID }}","clientSecret":"${{ secrets.AZURE_CLIENT_SECRET }}","subscriptionId":"${{ fromJson(inputs.port_context).subscription_id }}","tenantId":"${{ secrets.AZURE_TENANT_ID }}"}'

      - name:  Azure Web App
        run: |
          az webapp stop --name ${{ fromJson(inputs.port_context).entity.title }} --resource-group ${{ fromJson(inputs.port_context).resource_group }}

      - name: Inform Port about web app stop success
        if: success()
        uses: port-labs/port-github-action@v1
        with:
          clientId: ${{ secrets.PORT_CLIENT_ID }}
          clientSecret: ${{ secrets.PORT_CLIENT_SECRET }}
          baseUrl: https://api.port.io
          operation: PATCH_RUN
          runId: ${{ fromJson(inputs.port_context).runId }}
          status: 'SUCCESS'
          logMessage: ✅ Azure web app ${{ fromJson(inputs.port_context).entity.title }} stopped successfully
          summary: Azure web app stopped successfully

      - name: Inform Port about web app stop failure
        if: failure()
        uses: port-labs/port-github-action@v1
        with:
          clientId: ${{ secrets.PORT_CLIENT_ID }}
          clientSecret: ${{ secrets.PORT_CLIENT_SECRET }}
          baseUrl: https://api.port.io
          operation: PATCH_RUN
          runId: ${{ fromJson(inputs.port_context).runId }}
          status: 'FAILURE'
          logMessage: ❌ Failed to stop Azure web app ${{ fromJson(inputs.port_context).entity.title }}
          summary: Azure web app stop failed
Create Port action
-
Go to the Self-service page of your portal.
-
Click on the
+ New Actionbutton. -
Click on the
{...} Edit JSONbutton. -
Copy and paste the following JSON configuration into the editor.
Stop Azure Web App action (Click to expand)
Replace the variables<GITHUB-ORG>- your GitHub organization or user name.<GITHUB-REPO>- your GitHub repository name.<YOUR_GITHUB_OCEAN_INTEGRATION_ID>- your GitHub Ocean integration installation ID.
{"identifier": "stop_azure_webapp","title": "Stop Azure Web App","icon": "Azure","description": "Stops an Azure web app","trigger": {"type": "self-service","operation": "UPDATE","userInputs": {"properties": {},"required": [],"order": []},"blueprintIdentifier": "azureWebApp"},"invocationMethod": {"type": "INTEGRATION_ACTION","installationId": "<YOUR_GITHUB_OCEAN_INTEGRATION_ID>","integrationActionType": "dispatch_workflow","integrationActionExecutionProperties": {"org": "<GITHUB-ORG>","repo": "<GITHUB-REPO>","workflow": "stop-azure-webapp.yaml","workflowInputs": {"port_context": {"runId": "{{ .run.id }}","entity": "{{ .entity }}","subscription_id": "{{.entity.relations.resourceGroup | split(\"/\")[2]}}","resource_group": "{{.entity.relations.resourceGroup | split(\"/\")[-1]}}"}},"reportWorkflowStatus": true}},"requiredApproval": false} -
Click
Save.
Now you should see the Stop Azure Web App action in the self-service page. 🎉
Restart an Azure web app
To restart an Azure web app from Port, first add a GitHub workflow that restarts the web app in Azure. Then create a Port self-service action that triggers the workflow.
Add GitHub workflow
Create the file .github/workflows/restart-azure-webapp.yaml in the .github/workflows folder of your repository.
Restart Azure Web App GitHub workflow (Click to expand)
name: Restart Azure Web App

on:
  workflow_dispatch:
    inputs:
      port_context:
        required: true
        description: 'Action and general context (blueprint, entity, run id, etc...)'
        type: string

jobs:
  restart-webapp:
    runs-on: ubuntu-latest
    steps:
      - name: Inform Port of workflow restart
        uses: port-labs/port-github-action@v1
        with:
          clientId: ${{ secrets.PORT_CLIENT_ID }}
          clientSecret: ${{ secrets.PORT_CLIENT_SECRET }}
          baseUrl: https://api.port.io
          operation: PATCH_RUN
          runId: ${{fromJson(inputs.port_context).runId}}
          logMessage: Configuring Azure credentials to restart web app ${{ fromJson(inputs.port_context).entity.title }}

      - name: Azure Login
        uses: azure/login@v2
        env:
          AZURE_LOGIN_PRE_CLEANUP: true
          AZURE_LOGIN_POST_CLEANUP: true
        with:
          creds: '{"clientId":"${{ secrets.AZURE_CLIENT_ID }}","clientSecret":"${{ secrets.AZURE_CLIENT_SECRET }}","subscriptionId":"${{ fromJson(inputs.port_context).subscription_id }}","tenantId":"${{ secrets.AZURE_TENANT_ID }}"}'

      - name:  Azure Web App
        run: |
          az webapp restart --name ${{ fromJson(inputs.port_context).entity.title }} --resource-group ${{ fromJson(inputs.port_context).resource_group }}

      - name: Inform Port about web app restart success
        if: success()
        uses: port-labs/port-github-action@v1
        with:
          clientId: ${{ secrets.PORT_CLIENT_ID }}
          clientSecret: ${{ secrets.PORT_CLIENT_SECRET }}
          baseUrl: https://api.port.io
          operation: PATCH_RUN
          runId: ${{ fromJson(inputs.port_context).runId }}
          status: 'SUCCESS'
          logMessage: ✅ Azure web app ${{ fromJson(inputs.port_context).entity.title }} restarted successfully
          summary: Azure web app restarted successfully

      - name: Inform Port about web app restart failure
        if: failure()
        uses: port-labs/port-github-action@v1
        with:
          clientId: ${{ secrets.PORT_CLIENT_ID }}
          clientSecret: ${{ secrets.PORT_CLIENT_SECRET }}
          baseUrl: https://api.port.io
          operation: PATCH_RUN
          runId: ${{ fromJson(inputs.port_context).runId }}
          status: 'FAILURE'
          logMessage: ❌ Failed to restart Azure web app ${{ fromJson(inputs.port_context).entity.title }}
          summary: Azure web app restart failed
Create Port action
-
Go to the Self-service page of your portal.
-
Click on the
+ New Actionbutton. -
Click on the
{...} Edit JSONbutton. -
Copy and paste the following JSON configuration into the editor.
Restart Azure Web App action (Click to expand)
Replace the variables<GITHUB-ORG>- your GitHub organization or user name.<GITHUB-REPO>- your GitHub repository name.<YOUR_GITHUB_OCEAN_INTEGRATION_ID>- your GitHub Ocean integration installation ID.
{"identifier": "restart_azure_webapp","title": "Restart Azure Web App","icon": "Azure","description": "Restarts an Azure web app","trigger": {"type": "self-service","operation": "UPDATE","userInputs": {"properties": {},"required": [],"order": []},"blueprintIdentifier": "azureWebApp"},"invocationMethod": {"type": "INTEGRATION_ACTION","installationId": "<YOUR_GITHUB_OCEAN_INTEGRATION_ID>","integrationActionType": "dispatch_workflow","integrationActionExecutionProperties": {"org": "<GITHUB-ORG>","repo": "<GITHUB-REPO>","workflow": "restart-azure-webapp.yaml","workflowInputs": {"port_context": {"runId": "{{ .run.id }}","entity": "{{ .entity }}","subscription_id": "{{.entity.relations.resourceGroup | split(\"/\")[2]}}","resource_group": "{{.entity.relations.resourceGroup | split(\"/\")[-1]}}"}},"reportWorkflowStatus": true}},"requiredApproval": false} -
Click
Save.
Now you should see the Restart Azure Web App action in the self-service page. 🎉
Visualize web app metrics
With your data and actions in place, we can create a dedicated dashboard in Port to visualize all Azure web apps by status, location, and resource group. In addition, we can trigger actions (start, stop, restart) directly from the dashboard.
Create a dashboard
-
Navigate to your software catalog.
-
Click on the
+button in the left sidebar. -
Select New dashboard.
-
Name the dashboard Azure Web App Management.
-
Input
Monitor and manage your Azure web appsunder Description. -
Select the
Azureicon. -
Click
Create.
We now have a blank dashboard where we can start adding widgets to visualize insights from our Azure web apps.
Add widgets
In the new dashboard, create the following widgets:
Total web apps (Click to expand)
-
Click
+ Widgetand select Number Chart. -
Title:
Total web apps(add theAzureicon). -
Select
Count entitiesChart type and choose Web App as the Blueprint. -
Select
countfor the Function. -
Select
customas the Unit and inputweb appsas the Custom unit. -
Click Save.
Web apps by state (Click to expand)
-
Click
+ Widgetand select Pie chart. -
Title:
Web apps by state(add theAzureicon). -
Choose the Web App blueprint.
-
Under
Breakdown by property, select the State property. -
Click Save.
Web apps by location (Click to expand)
-
Click
+ Widgetand select Pie chart. -
Title:
Web apps by location(add theAzureicon). -
Choose the Web App blueprint.
-
Under
Breakdown by property, select the Location property. -
Click Save.
All web apps table (Click to expand)
-
Click
+ Widgetand select Table. -
Title:
All web apps(add theAzureicon). -
Choose the Web App blueprint.
-
Click Save to add the widget to the dashboard.
-
Click on the
...button in the top right corner of the table and select Customize table. -
In the top right corner of the table, click on
Manage Propertiesand add the following properties:- Title: The web app name.
- State: The current state of the web app.
- Location: The Azure region where the web app is deployed.
- Enabled: Whether the web app is enabled.
- Default Host Name: The default hostname of the web app.
- Resource Group: The name of each related Azure resource group.
-
Click on the save icon in the top right corner of the widget to save the customized table.
List of self service actions (Click to expand)
-
Click
+ Widgetand select Action card. -
Choose the Start Azure Web App, Stop Azure Web App and Restart Azure Web App actions we created in this guide.
-
Title:
Manage web apps(add theAzureicon). -
Click Save.