Ingest data via Airbyte and S3
Send this guide to your coding agent.
Prerequisite: Install Port MCP
Open plan mode. Implement this Port guide in my org via MCP:

https://docs.port.io/guides/all/ingest-data-via-airbyte-and-s3

Goal: get the guide's core flow working end-to-end in my org; adapting it to fit my existing setup takes priority over matching the guide 1:1.

Plan:
1. Confirm MCP is connected, in the right org, with sufficient permissions.
2. Diff the guide's data model (blueprints, properties, relations, actions, agents, automations, integrations, secrets) against mine.
3. Propose adaptations for gaps, reusing existing blueprints/relations over guide-named duplicates.
4. Flag what needs a UI click, credential, or secret from me, testing MCP capability empirically before ruling anything out.
5. Stop on any blocker and give me options. Approving this plan authorizes the writes it lists; pause only for writes beyond what's listed.

Build:
- Extend blueprint schema additively when upserting; don't remove or overwrite existing properties, and treat type conflicts as a blocker, not an auto-fix.
- List any mock data in the plan, minimal and labeled mock; once approved, seed it without re-asking, and tell me what you seeded.
- For anything the guide writes downstream (e.g. a webhook target), use a real entity, not a mock.
- For pages/widgets, use the real page identifier from the app URL, not a guessed slug.
- When you hit a UI step confirmed (not assumed) unsupported via MCP, pause, give exact clicks, then resume via MCP.
- Validate and give links after each meaningful step (only a tool-returned URL, no guessed paths); don't proceed if the last run wasn't a success.

Done:
- Confirm the guide's expected output exists and runs in Port.
- Summarize adaptations, seeded data, what was mocked or skipped, remaining UI steps, and how to verify.
This guide demonstrates how to ingest HiBob or Okta data into Port using Airbyte to extract source data, Amazon S3 for intermediate storage, and a custom webhook integration to create entities.
Select your source once and the HiBob or Okta tabs will stay synchronized throughout the guide.
S3 integrations do not provide every capability available in Ocean integrations, including reconciliation. If a record is deleted from the source after ingestion, it remains in Port unless the payload includes a deletion indicator and the webhook mapping defines a corresponding delete operation.
See the webhook mapping configuration to configure delete operations.
Common use cases
- Ingest HiBob employee payroll and profile data into Port.
- Ingest Okta permissions, roles, role assignments, and users into Port.
- Use Airbyte for sources that do not have a native Port integration.
- Transform S3 records into related catalog entities through a custom webhook mapping.
Prerequisites
This guide assumes the following:
- You have a Port account and have completed the onboarding process.
- Port has provided the managed S3 bucket and credentials required for this limited-access integration. Contact Port through chat, Slack, or the support site to request them.
- You can access an Airbyte Cloud or self-hosted instance. See Airbyte's self-managed quickstart.
Set up Airbyte locally on macOS (Click to expand)
-
Install Docker Desktop.
-
Install
abctl:curl -LsfS https://get.airbyte.com | bash - -
Install Airbyte locally:
abctl local install -
Open Airbyte on localhost.
-
Retrieve the local login credentials:
abctl local credentials
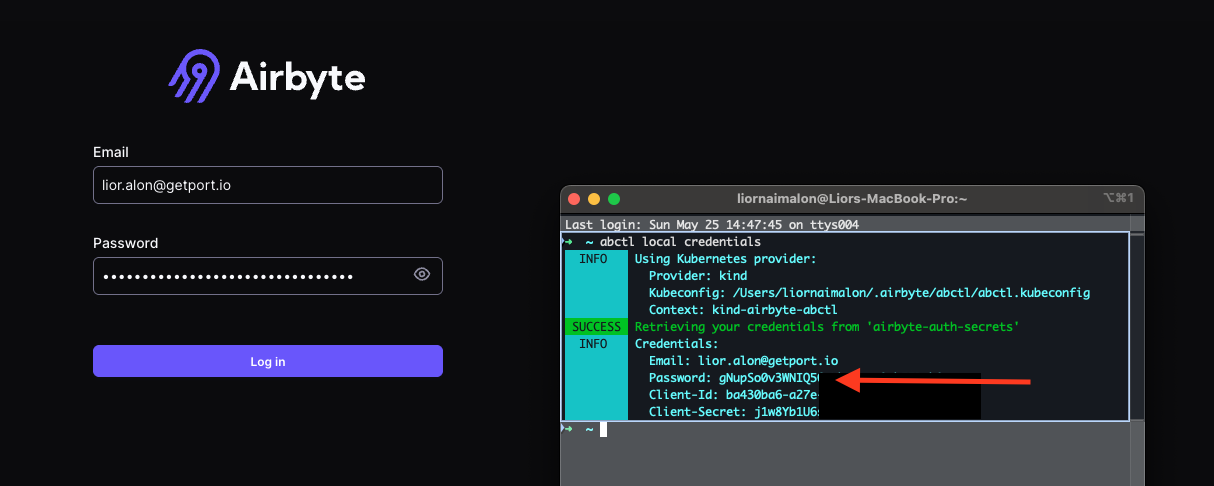
Configure the credential required by your selected source:
- HiBob
- Okta
- Create a HiBob API service user by following the HiBob API service user guide.
- Create an Okta personal API token that Airbyte can use to retrieve data.
Understand the ingestion flow
The same transport pattern applies to both sources:
-
Airbyte reads the selected HiBob or Okta streams.
-
Airbyte writes newline-delimited, GZIP-compressed JSON files to the Port-managed S3 bucket.
-
Port forwards each S3 record to the custom webhook whose identifier is used as the Airbyte destination namespace.
-
The webhook mapping identifies the source stream through
_PORT_SOURCE_OBJECT_KEYand creates the matching Port entity.
Set up data model
Create the blueprints required by your selected source.
- HiBob
- Okta
Create the HiBob blueprints
-
Go to the Builder page of your portal.
-
Click + Blueprint.
-
Click Edit JSON.
-
Create the payroll and profile blueprints with the following JSON configurations:
HiBob payroll blueprint (Click to expand)
{"identifier": "hibob_payroll","description": "Represents an employee record.","title": "Hibob Payroll","icon": "Service","schema": {"properties": {"creationdate": {"type": "string","format": "date-time"},"firstname": {"type": "string"},"avatarurl": {"type": "string","format": "url"},"companyid": {"type": "string"},"surname": {"type": "string"},"state": {"type": "string"},"email": {"type": "string","format": "email"},"creationdatetime": {"type": "string","format": "date-time"},"coverimageurl": {"type": "string","format": "url"},"fullname": {"type": "string"}},"required": []},"mirrorProperties": {},"calculationProperties": {},"aggregationProperties": {},"relations": {}}HiBob profile blueprint (Click to expand)
{"identifier": "hibob_profile","description": "Represents an employee record.","title": "Hibob Profile","icon": "User","schema": {"properties": {"companyid": {"type": "string"},"firstname": {"type": "string"},"surname": {"type": "string"},"email": {"type": "string","format": "email"},"is_manager": {"type": "boolean","title": "is_manager"},"duration_of_employment": {"type": "string","title": "duration_of_employment"}},"required": []},"mirrorProperties": {},"calculationProperties": {},"aggregationProperties": {},"relations": {"payroll": {"title": "Payroll","target": "hibob_payroll","required": false,"many": false}}} -
Click Save after creating each blueprint.
Create the Okta blueprints
-
Go to the Builder page of your portal.
-
Click + Blueprint.
-
Click Edit JSON.
-
Create the permission, role, role assignment, and user blueprints with the following JSON configurations:
Okta permission blueprint (Click to expand)
{"identifier": "okta_permission","description": "Represents an Okta permission.","title": "Okta Permission","icon": "Okta","schema": {"properties": {"created": {"type": "string","format": "date-time","description": "Creation timestamp of the permission."},"conditions": {"type": "object","description": "Conditions associated with the permission (can be null)."},"links": {"type": "object","description": "Links related to the permission."}},"required": ["created"]},"mirrorProperties": {},"calculationProperties": {},"aggregationProperties": {},"relations": {}}Okta role blueprint (Click to expand)
{"identifier": "okta_role","description": "Represents an Okta role.","title": "Okta Role","icon": "Okta","schema": {"properties": {"description": {"type": "string","description": "Description of the role."},"created": {"type": "string","format": "date-time","description": "Creation timestamp of the role."},"links": {"type": "object","description": "Links related to the role."}},"required": ["created"]},"mirrorProperties": {},"calculationProperties": {},"aggregationProperties": {},"relations": {"permissions": {"title": "Permissions","target": "okta_permission","required": false,"many": true}}}Okta role assignment blueprint (Click to expand)
{"identifier": "okta_role_assignment","description": "Represents an assignment of a role to a user in Okta.","title": "Okta Role Assignment","icon": "Okta","schema": {"properties": {"type": {"type": "string","description": "Type of role (e.g., SUPER_ADMIN)."},"status": {"type": "string","description": "Status of the role assignment (e.g., ACTIVE)."},"created": {"type": "string","format": "date-time","description": "Creation timestamp of the role assignment."},"assignmentType": {"type": "string","description": "Type of assignment (e.g., USER)."},"links": {"type": "object","description": "Links related to the role assignment."},"userId": {"type": "string","description": "ID of the assigned user."}},"required": ["type","status","created","assignmentType","userId"]},"mirrorProperties": {},"calculationProperties": {},"aggregationProperties": {},"relations": {}}Okta user blueprint (Click to expand)
{"identifier": "okta_user","description": "Represents an Okta user.","title": "Okta User","icon": "Okta","schema": {"properties": {"status": {"type": "string","description": "Status of the user (e.g., ACTIVE)."},"created": {"type": "string","format": "date-time","description": "Creation timestamp of the user."},"activated": {"type": "string","format": "date-time","description": "Activation timestamp of the user."},"statusChanged": {"type": "string","format": "date-time","description": "Timestamp when the user's status last changed."},"lastLogin": {"type": "string","format": "date-time","description": "Timestamp of the user's last login."},"passwordChanged": {"type": "string","format": "date-time","description": "Timestamp when the user's password was last changed."},"type": {"type": "object","description": "Type information for the user.","properties": {"id": {"type": "string","description": "ID of the user type."}}},"profile": {"type": "object","description": "User profile information."},"links": {"type": "object","description": "Links related to the user."}},"required": ["status","created","activated","statusChanged","type","profile"]},"mirrorProperties": {},"calculationProperties": {},"aggregationProperties": {},"relations": {"role_assignments": {"title": "Role Assignments","target": "okta_role_assignment","required": false,"many": true}}} -
Click Save after creating each blueprint.
Create the webhook integration
Create a custom webhook that maps records arriving from the S3 bucket to your source-specific blueprints.
-
Go to the Data sources page of your portal.
-
Click + Data source.
-
Select Webhook, then click Custom integration.
-
Enter a name and optional description for the integration, then click Next.
-
Copy the generated webhook URL. You will use its final path segment as the Airbyte destination namespace.
-
Scroll to Map the data from the external system into Port and add the mapping for your selected source:
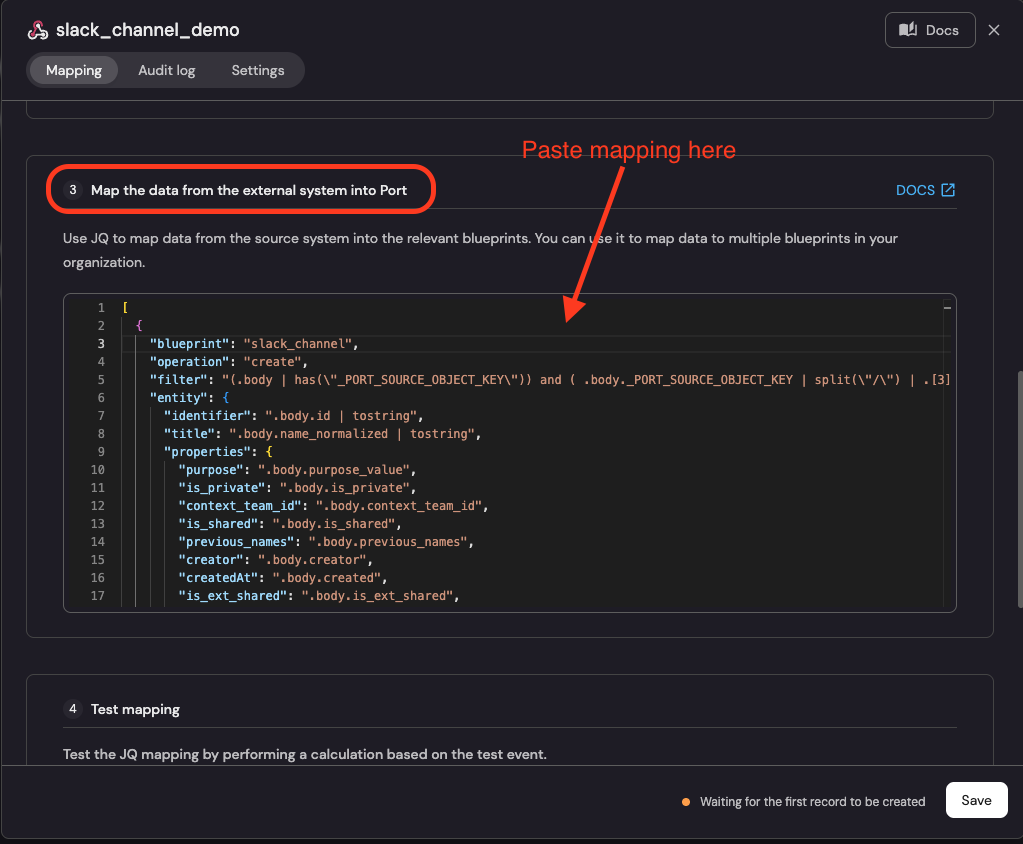
- HiBob
- Okta
HiBob webhook mapping (Click to expand)
[{"blueprint": "hibob_payroll","operation": "create","filter": "(.body | has(\"_PORT_SOURCE_OBJECT_KEY\")) and (.body._PORT_SOURCE_OBJECT_KEY | split(\"/\") | .[2] | IN(\"payroll\"))","entity": {"identifier": ".body.id","title": ".body.displayName","properties": {"creationdate": "(.body.creationDate? // null) | if type == \"string\" then strptime(\"%Y-%m-%d\") | strftime(\"%Y-%m-%dT%H:%M:%SZ\") else null end","firstname": ".body.firstName","avatarurl": ".body.avatarUrl","companyid": ".body.companyId","surname": ".body.surname","state": ".body.state","email": ".body.email","creationdatetime": ".body.creationDatetime","coverimageurl": ".body.coverImageUrl","fullname": ".body.fullName"}}},{"blueprint": "hibob_profile","operation": "create","filter": "(.body | has(\"_PORT_SOURCE_OBJECT_KEY\")) and (.body._PORT_SOURCE_OBJECT_KEY | split(\"/\") | .[2] | IN(\"profiles\"))","entity": {"identifier": ".body.id","title": ".body.displayName","properties": {"companyid": ".body.companyId","firstname": ".body.firstName","is_manager": ".body.work.isManager","duration_of_employment": ".body.work.durationOfEmployment.humanize","surname": ".body.surname","email": ".body.email"},"relations": {"payroll": ".body.id"}}}]Okta webhook mapping (Click to expand)
[{"blueprint": "okta_role","operation": "create","filter": "(.body | has(\"_PORT_SOURCE_OBJECT_KEY\")) and (.body._PORT_SOURCE_OBJECT_KEY | split(\"/\") | .[2] | IN(\"custom_roles\"))","entity": {"identifier": ".body.id","title": ".body.label","properties": {"description": ".body.description","created": ".body.created","links": ".body._links"}}},{"blueprint": "okta_permission","operation": "create","filter": "(.body | has(\"_PORT_SOURCE_OBJECT_KEY\")) and (.body._PORT_SOURCE_OBJECT_KEY | split(\"/\") | .[2] | IN(\"permissions\"))","entity": {"identifier": ".body._links.self.href","title": ".body.label","properties": {"created": ".body.created","conditions": ".body.conditions","links": ".body._links"}}},{"blueprint": "okta_role_assignment","operation": "create","filter": "(.body | has(\"_PORT_SOURCE_OBJECT_KEY\")) and (.body._PORT_SOURCE_OBJECT_KEY | split(\"/\") | .[2] | IN(\"user_role_assignments\"))","entity": {"identifier": ".body.id","title": ".body.label","properties": {"type": ".body.type","status": ".body.status","created": ".body.created","assignmentType": ".body.assignmentType","links": ".body._links","userId": ".body.userId"}}},{"blueprint": "okta_user","operation": "create","filter": "(.body | has(\"_PORT_SOURCE_OBJECT_KEY\")) and (.body._PORT_SOURCE_OBJECT_KEY | split(\"/\") | .[2] | IN(\"users\"))","entity": {"identifier": ".body.id","title": ".body.profile.login","properties": {"status": ".body.status","created": ".body.created","activated": ".body.activated","statusChanged": ".body.statusChanged","lastLogin": ".body.lastLogin","passwordChanged": ".body.passwordChanged","type": ".body.type","profile": ".body.profile","links": ".body._links"}}}] -
Click Save to create the webhook integration.
Set up the S3 destination
Configure Airbyte to write records to the Port-managed S3 bucket. Choose whether to create the destination in Airbyte's UI or with Terraform.
- UI
- Terraform
-
Log in to your Airbyte Cloud or self-hosted instance.
-
Select Destinations in the left sidebar.
-
Click + New destination and select S3.
-
Enter the S3 credentials and settings provided by Port:
- Enter the access key ID under S3 key ID.
- Enter the secret access key under S3 access key.
- Enter the bucket name, such as
org-xxx, under S3 bucket name. - Enter
data/under S3 bucket path. - Select the provided region under S3 bucket region.
- Select JSON Lines: Newline-delimited JSON as the output format.
- Select GZIP as the compression format.
- Enter
${NAMESPACE}/${STREAM_NAME}/year=${YEAR}/month=${MONTH}/${DAY}_${EPOCH}_under S3 path format in Optional fields.
-
Click Test and save and wait for Airbyte to confirm that the destination is configured correctly.
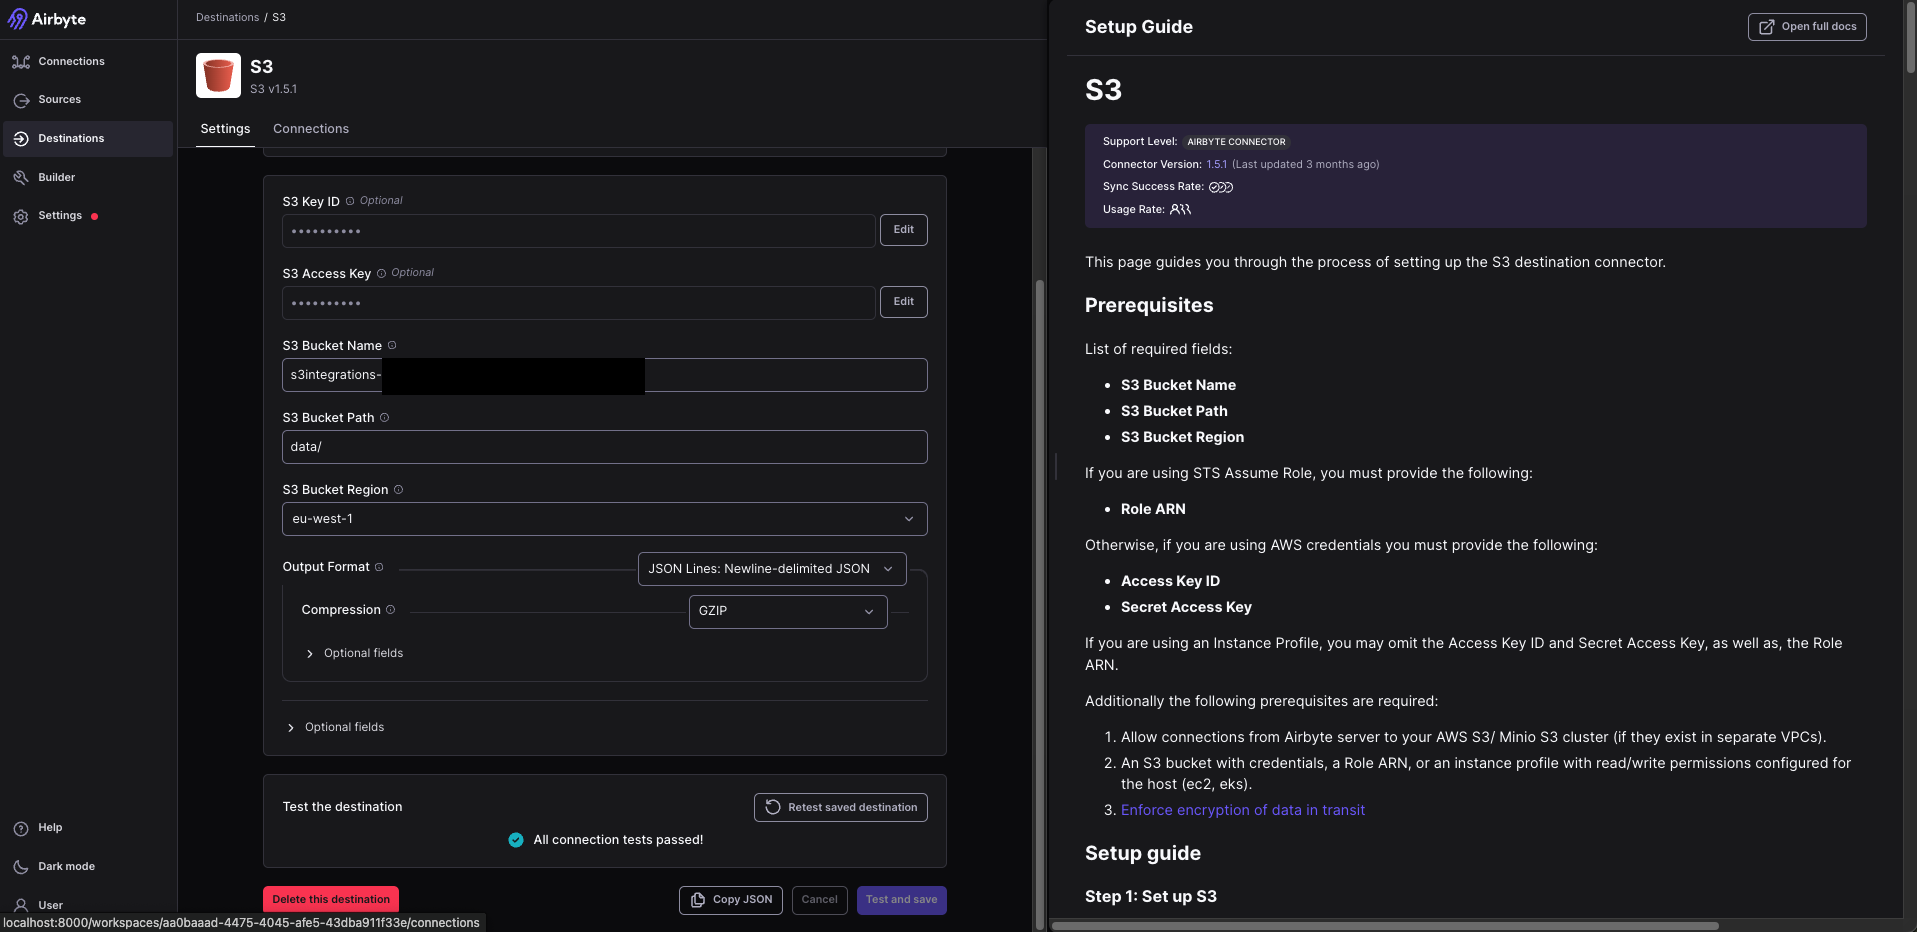
Use the following Terraform configuration to create the Airbyte S3 destination:Airbyte S3 destination Terraform configuration (Click to expand)
Connect the Airbyte source
Create an Airbyte connection that sends only the required source streams to the S3 destination.
- HiBob
- Okta
Configure the HiBob connection
-
Follow Airbyte's HiBob source setup guide to create the source. See Port's S3 integration source setup for additional context.
-
Click + New connection in Airbyte.
-
Select the HiBob source under Source.
-
Select the Port S3 destination under Destination.
-
In Select streams, enable only
payrollandprofilesfor synchronization. -
In Configuration, select Custom format under Destination namespace and enter the final path segment of the Port webhook URL, such as
wSLvwtI1LFwQzXXX. -
Click Finish & Sync to save the connection and start the first synchronization.
Configure the Okta connection
-
Follow Airbyte's Okta source setup guide to create the source. See Port's S3 integration source setup for additional context.
-
Click + New connection in Airbyte.
-
Select the Okta source under Source.
-
Select the Port S3 destination under Destination.
-
In Select streams, enable only
custom_roles,permissions,user_role_assignments, andusersfor synchronization. -
In Configuration, select Custom format under Destination namespace and enter the final path segment of the Port webhook URL, such as
wSLvwtI1LFwQzXXX. -
Click Finish & Sync to save the connection and start the first synchronization.
The webhook filters depend on the stream names and S3 path structure shown in this guide. Contact Port support before changing these values so the integration can be adjusted accordingly.
Let's test it!
After Airbyte starts the first synchronization, verify the complete ingestion flow:
-
Open the connection in Airbyte and confirm that the synchronization completes successfully.
-
Confirm that the selected stream files appear in the Port-managed S3 destination.
-
Open the custom webhook on Port's Data sources page and review its latest deliveries.
-
Open the relevant blueprint in the software catalog and verify that its entities and relations were created.
If records reach S3 but no entities appear, compare _PORT_SOURCE_OBJECT_KEY with the stream names used by the webhook filters.