Installation
The Port MCP server does not use Port AI capabilities. You can install and use it without enabling Port AI features or accepting the Port AI Terms.
This section details the installation process of the Port MCP server for your preferred IDE or AI assistant.
Use Port's remote MCP server for new connections. The Docker image and uvx mcp-server-port package from the deprecated local MCP server repository are no longer maintained. If you used that server, remove its entry from your client's MCP configuration and follow the setup below.
Select your client and Port region, then follow one setup path. Use the EU endpoint (https://mcp.port.io/v1) for app.port.io, or the US endpoint (https://mcp.us.port.io/v1) for app.us.port.io.
Cursor, VS Code, GitHub Copilot CLI, and Claude Code can connect directly over HTTP. The mcp-remote package is a local compatibility proxy for clients that need it; it connects to the same remote Port server and is separate from the deprecated Docker/uvx server.
- Cursor
- VS Code
- GitHub Copilot CLI
- Claude AI
- Claude Code (CLI)
- Codex CLI
To connect Cursor to Port's remote MCP, follow these steps:
For the EU region, you can use the Cursor install link and continue with authentication in step 3. For the US region, or to configure the connection manually, follow all steps below.
-
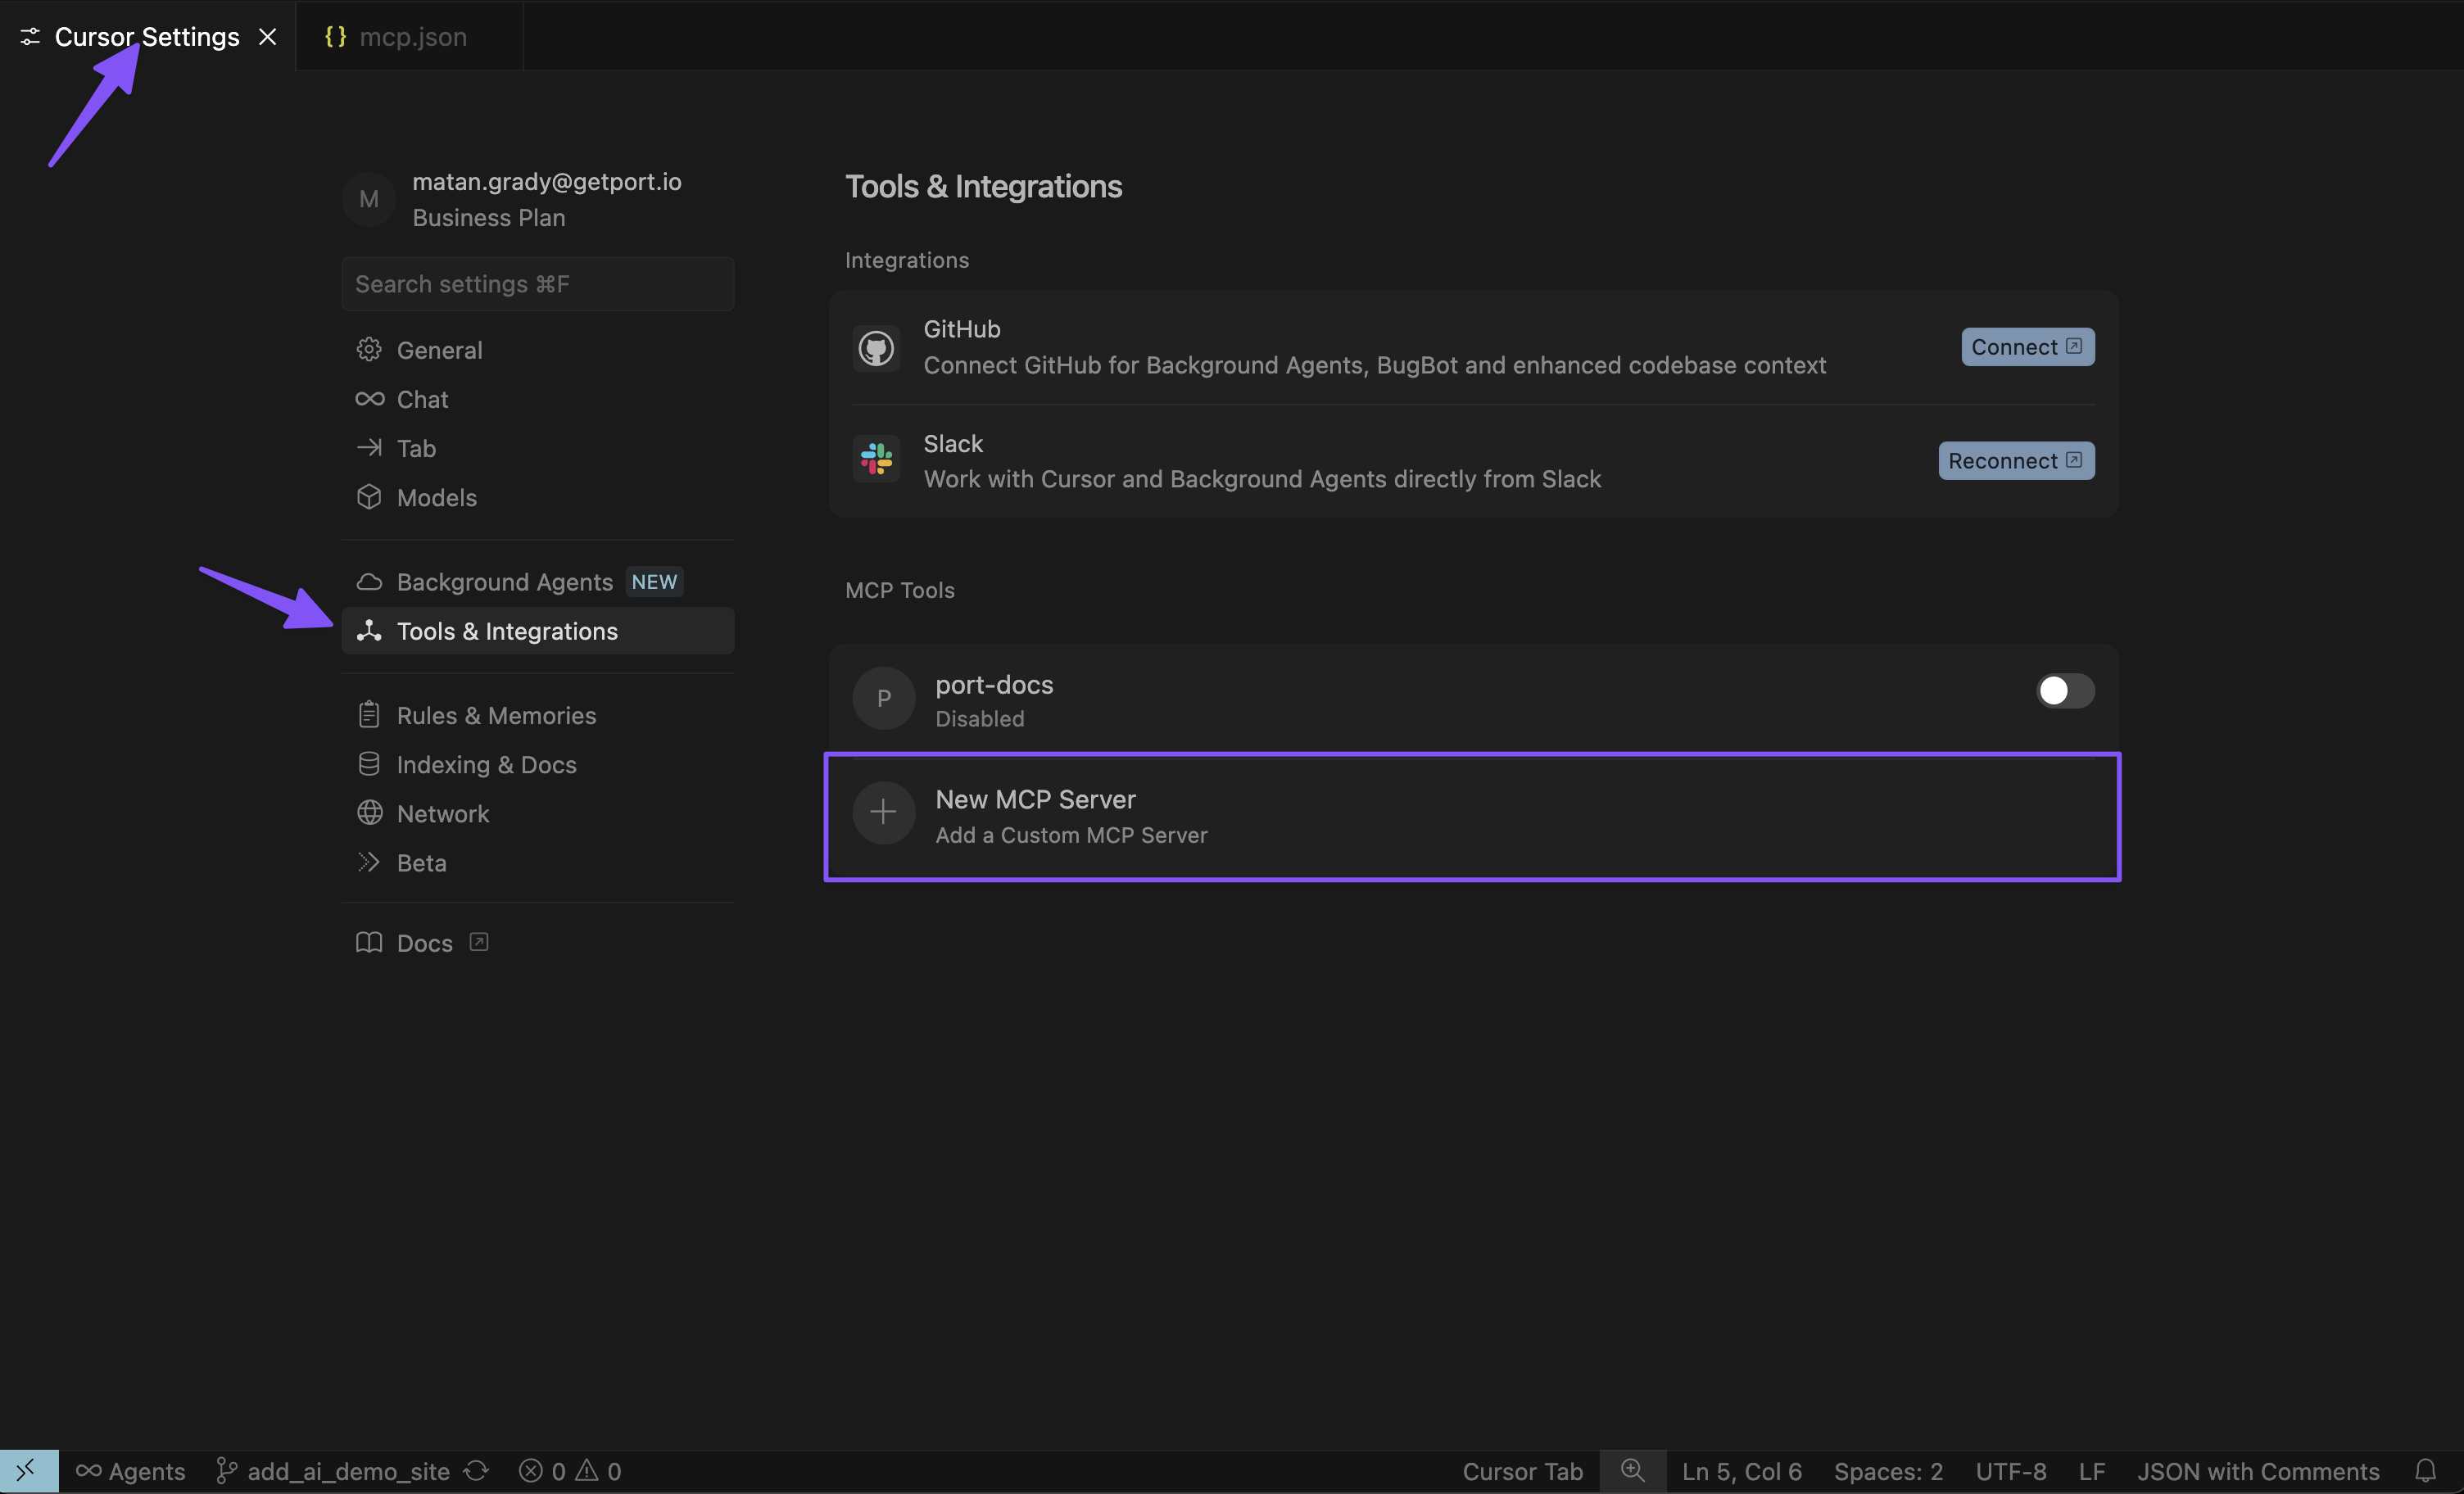
Open Cursor settings
In the settings, click Customize, select MCPs, and then click New MCP Server.
-
Configure the MCP server
Add the following configuration:
{"mcpServers": {"port-eu": {"url": "https://mcp.port.io/v1","headers": {"x-read-only-mode": "0"}}}}US regionIf your Port organization is in the US region, replace
https://mcp.port.io/v1withhttps://mcp.us.port.io/v1.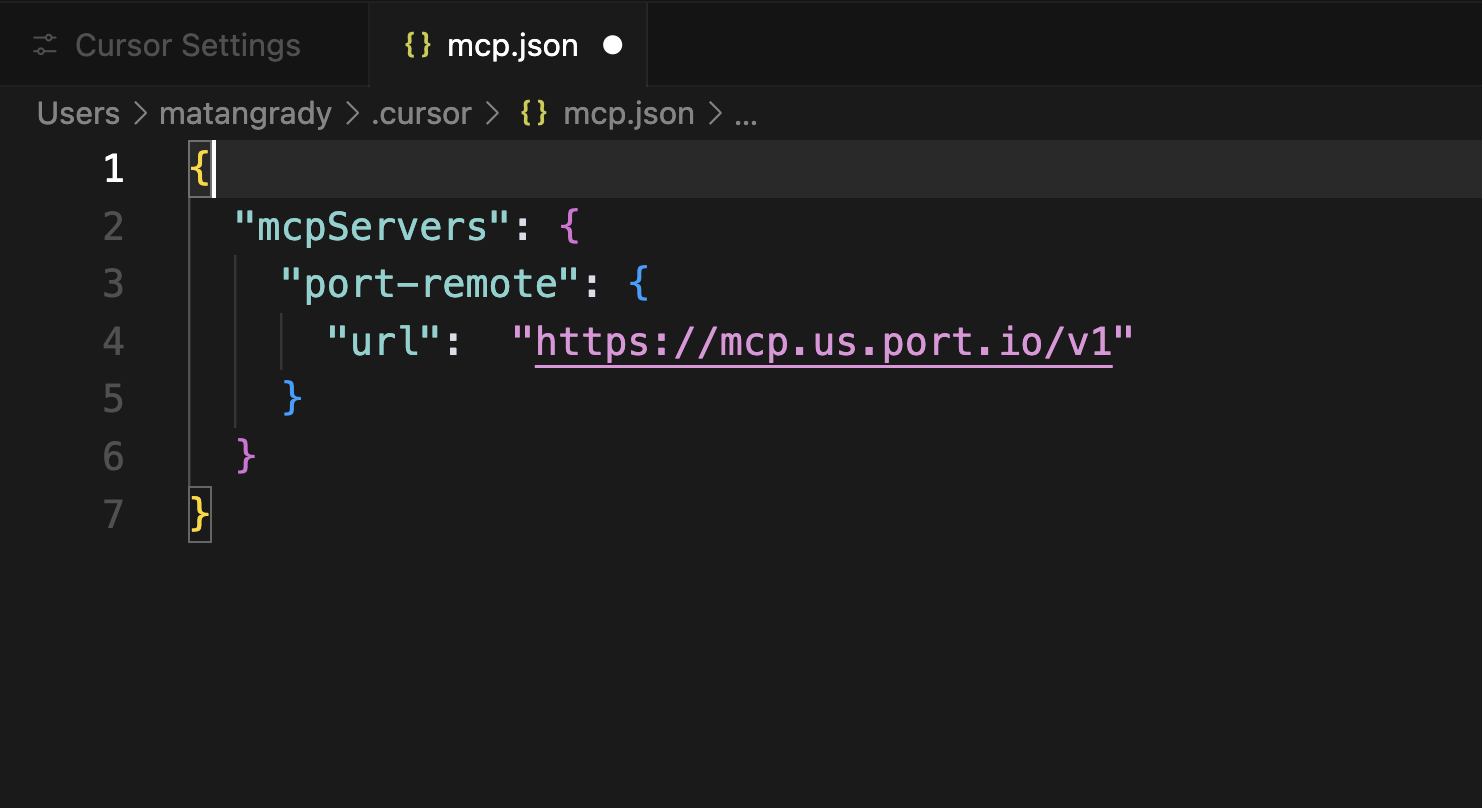 Read-only mode
The
x-read-only-modeheader defaults to0, which allows all tools based on your permissions. You can change it to1to restrict the MCP server to only expose read-only tools. When set to1, write tools are completely hidden from the available tools list, ensuring you can only query data without making modifications. -
Authenticate with Port
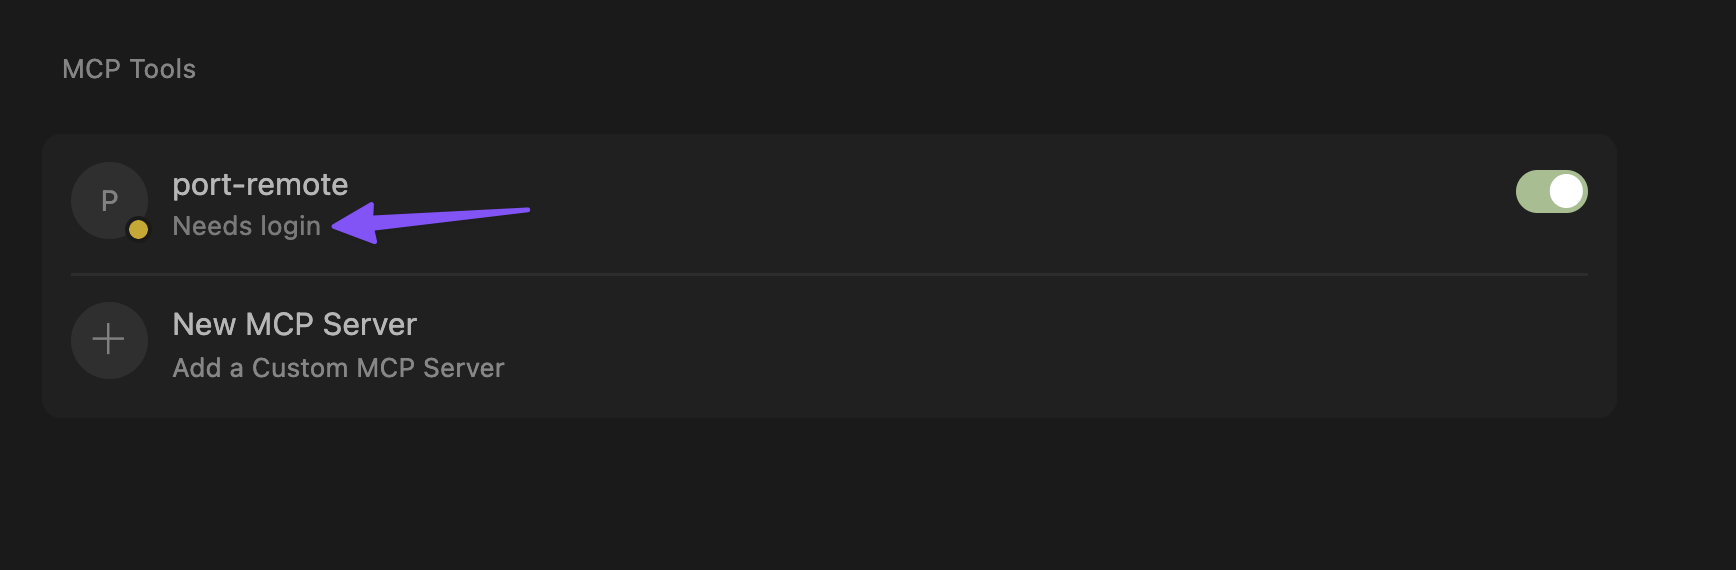
Click on "Needs login" and complete the authentication flow in the window that opens.
 Cursor OAuth session persistence
Port MCP authentication works on the initial connection. If Cursor prompts you to re-authenticate every day or two, this is typically caused by a known Cursor OAuth issue rather than a Port-side session or configuration problem.
When Cursor refreshes your OAuth session, it may fail to persist or update tokens correctly. This is especially common when you have multiple Cursor windows open. Port's logs may show
invalid_granterrors when Cursor attempts to refresh with a stale token.For more details and workarounds, see these Cursor community discussions:
-
Cursor does not refresh OAuth access tokens for MCP servers.
-
OAuth MCPs still require daily re-auth on 3.3.30, multi-window token store not synced.
Cursor has reported fixes for some MCP OAuth issues in stable releases after May 12, 2026. If you experience frequent re-authentication, update Cursor to the latest stable version and check whether the issue persists.
-
-
Verify connection
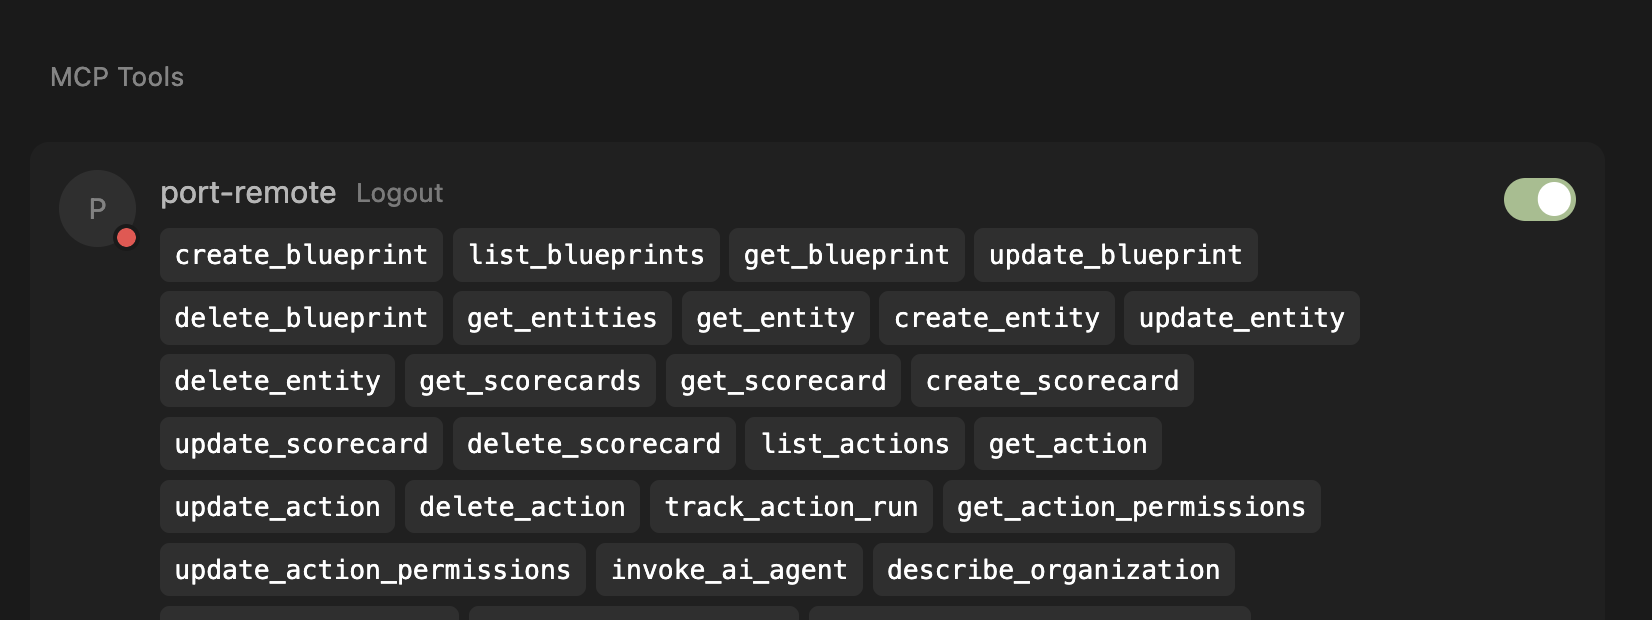
After successful authentication, you'll see the list of available tools from the MCP server.
Connect VS Code directly to Port's remote MCP server over HTTP. Use a current VS Code version with MCP access enabled by your organization. This setup does not require Node.js or mcp-remote. See the VS Code MCP documentation for client requirements.
-
Open the Command Palette and run MCP: Open User Configuration.
-
Add the following configuration to
mcp.json. If you already have aserversobject, add the Port entry to it:{"servers": {"port-vscode-eu": {"type": "http","url": "https://mcp.port.io/v1","headers": {"x-read-only-mode": "0"}}}}US regionIf your Port organization is in the US region, replace
https://mcp.port.io/v1withhttps://mcp.us.port.io/v1.Set
x-read-only-modeto1if you want to expose only read-only tools. The default,0, allows tools based on your Port permissions. -
Save the file, click Start above the Port server entry, and complete the browser authentication flow.
-
Verify that VS Code displays the available tools. Open a chat and select Port tools from the tool picker. Try asking, "List my Port blueprints."
If the connection fails, run MCP: List Servers, select your Port server, and choose Show Output to inspect the error. Check that your configuration uses the correct regional endpoint and that you completed browser authentication.
Connect GitHub Copilot CLI directly to Port's remote MCP server over HTTP. See the GitHub Copilot CLI MCP documentation for client requirements.
-
Add the following configuration to
mcp-config.json. If you already have anmcpServersobject, add the Port entry to it:{"mcpServers": {"port-copilot-eu": {"tools": ["*"],"type": "http","url": "https://mcp.port.io/v1","headers": {"x-read-only-mode": "0"}}}}US regionIf your Port organization is in the US region, replace
https://mcp.port.io/v1withhttps://mcp.us.port.io/v1.Set
x-read-only-modeto1if you want to expose only read-only tools. The default,0, allows tools based on your Port permissions.OAuth redirect portGitHub Copilot CLI uses CIMD (Client ID Metadata) authorization and expects OAuth callbacks on port
33418. If you get an error likeunauthorized_client: Callback URL mismatch, add anauthblock withredirectPortset to33418inside your Port server entry:"auth": {"redirectPort": 33418} -
Start Copilot CLI, run
/mcp, select your Port server, and complete the browser authentication flow. -
Verify that Copilot CLI displays the available Port tools. Try asking, "List my Port blueprints."
If authentication fails, check that your configuration uses the correct regional endpoint and that you completed browser authentication.
To connect Claude AI (Desktop & Web) to Port's remote MCP, install the Port official connector from the Claude connectors library. For detailed instructions, refer to the official Anthropic documentation on custom connectors.
- Direct install link: Install Port connector in Claude.
-
Open Port Connector page by visiting this link or searching for "Port" connector, and click Connect.
-
Enter your MCP server URL when prompted:
https://mcp.port.io/v1US regionIf your Port organization is in the US region, use
https://mcp.us.port.io/v1instead.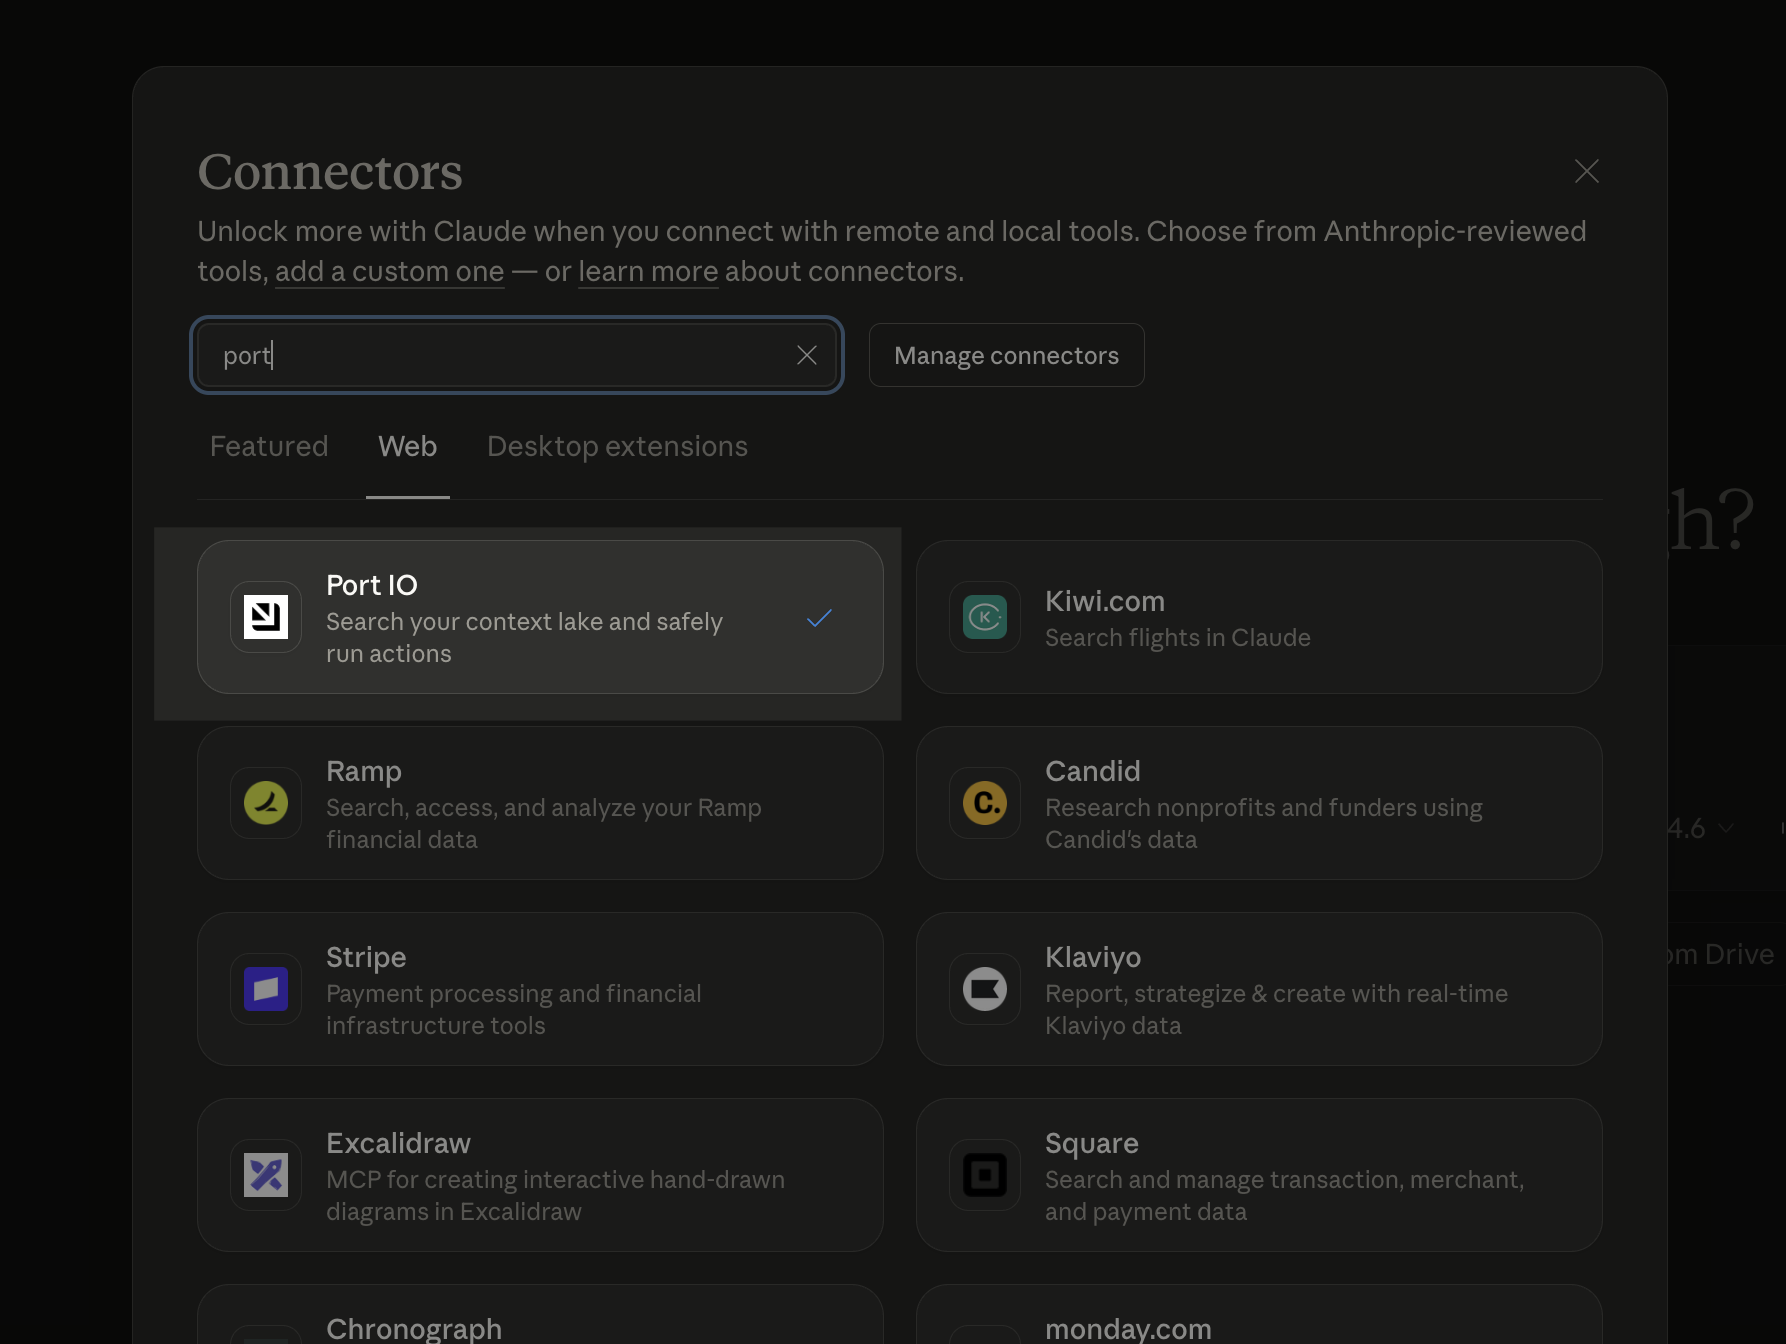
Connect Claude Code directly to Port's remote MCP server using HTTP. This is the recommended setup and does not require Node.js, npx, or a local MCP server.
Prerequisites
- Claude Code CLI installed on your machine. For installation instructions, refer to the official Claude Code documentation.
- Access to your Port account in the browser for OAuth authentication.
Add Port MCP
Run the following command from the directory where you use Claude Code:
claude mcp add --transport http port-eu https://mcp.port.io/v1 --header "x-read-only-mode: 0"
If your Port organization is in the US region, replace port-eu and https://mcp.port.io/v1 with port-us and https://mcp.us.port.io/v1.
The x-read-only-mode header defaults to 0, which allows all tools based on your permissions. Change it to 1 to restrict the MCP server to only expose read-only tools. When set to 1, write tools are completely hidden from the available tools list, ensuring you can only query data without making modifications.
Verify the connection
Start Claude Code:
claude
Run /mcp, select port-eu or port-us, and follow the browser authentication flow. After authentication, verify that the server shows its available tools. Try asking, "List my Port blueprints."
Resolve connection timeouts
If you previously used claude mcp add-json with npx mcp-remote, that configuration starts a local proxy. On first use, npx may need to download the package and its dependencies, adding startup time. The proxy also waits for browser authentication. Package registry access, proxy settings, or an incomplete login can cause this path to time out even when direct HTTP works.
Remove the old Port server entry from your MCP configuration before adding the direct HTTP connection above. If the direct connection also times out, check your region, access to the MCP endpoint from your terminal, and completion of the browser login. Use /mcp to inspect the connection status. See the Claude Code MCP documentation for connection diagnostics and startup timeout settings.
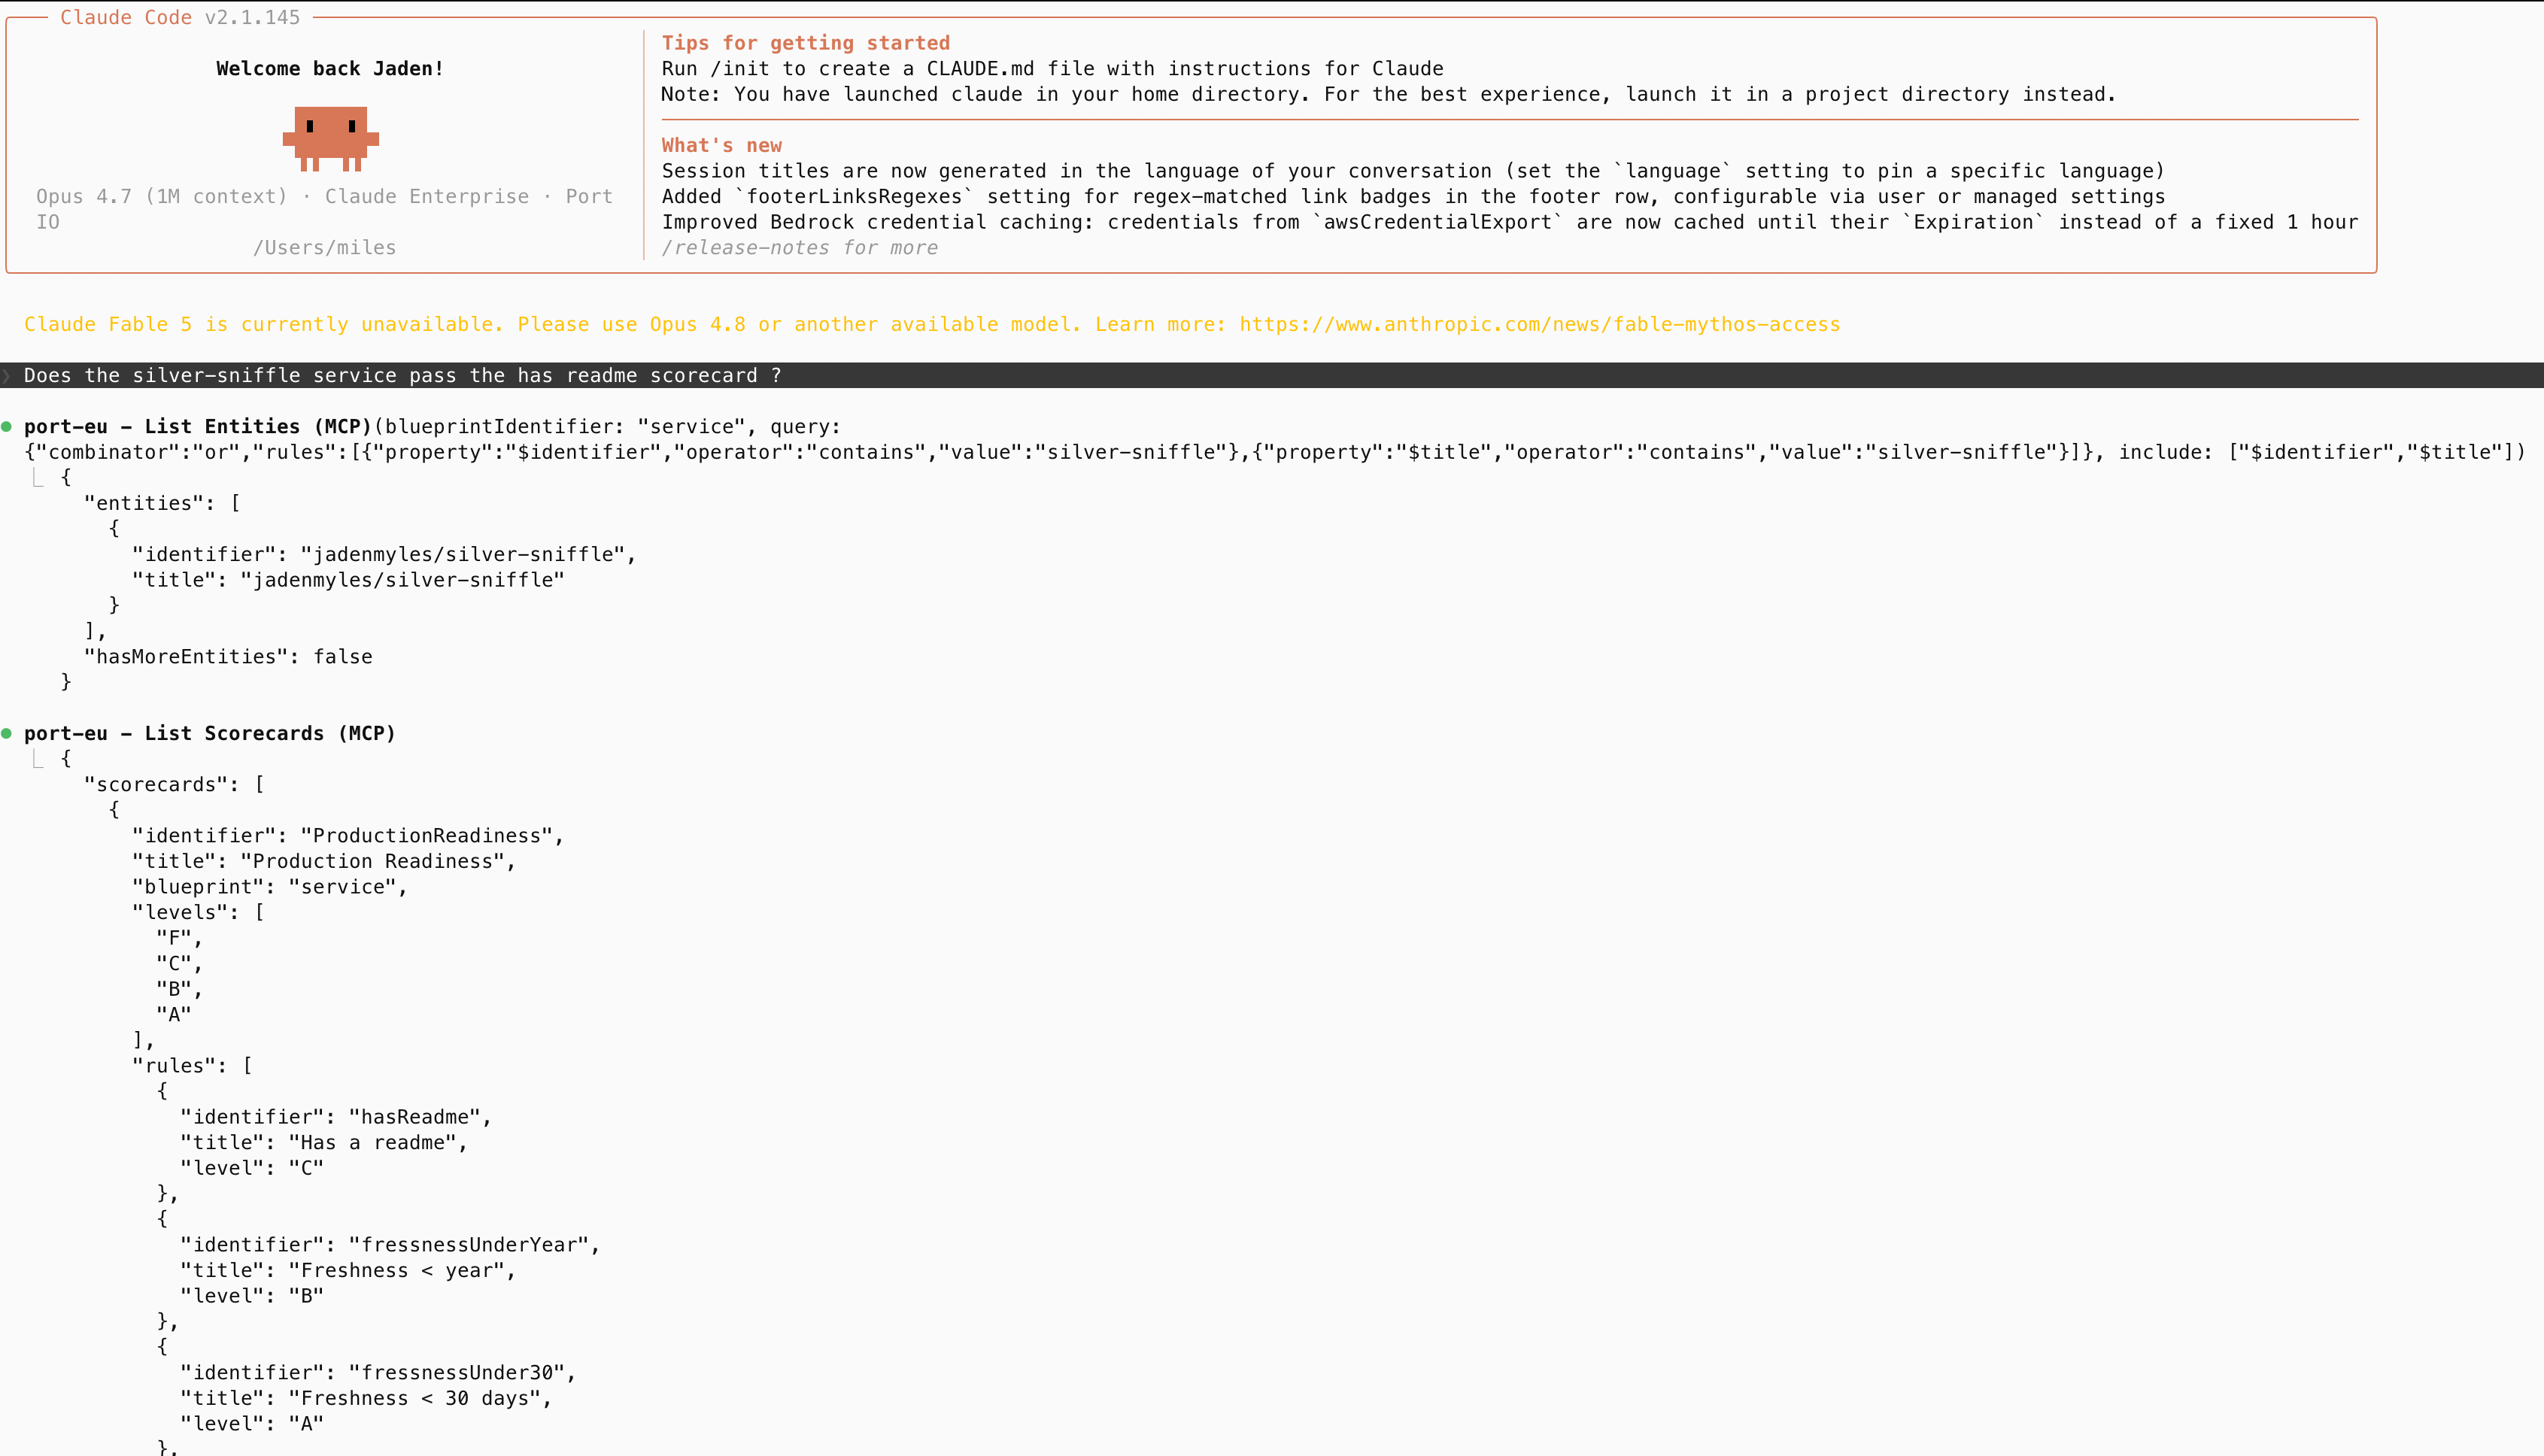
To connect OpenAI Codex CLI to Port's remote MCP server, install Codex CLI locally and add Port as a remote MCP server. For complete instructions, refer to the official Codex CLI documentation.
Prerequisites
- An OpenAI account with access to Codex CLI.
- The Codex CLI installed on your machine.
- Access to your Port account in the browser for OAuth authentication.
- Your Port region. If your Port app URL contains
us, use the US MCP URL. Otherwise, use the EU MCP URL. - Node.js installed on your machine.
Step 1: Install Codex CLI
Run the following command to install Codex CLI:
npm install -g @openai/codex
After installation, verify that Codex CLI is available:
codex --version
Step 2: Sign in to Codex
Start Codex and complete the sign-in flow:
codex
Step 3: Add Port MCP
Run the following command:
codex mcp add port-eu --url https://mcp.port.io/v1
If your Port organization is in the US region, replace port-eu and https://mcp.port.io/v1 with port-us and https://mcp.us.port.io/v1.
Step 4: Authenticate with Port
After adding the server, authenticate using OAuth. Run the matching login command for the region you used in step 3:
codex mcp login port-eu
If you used port-us in step 3, run codex mcp login port-us instead.
Complete the Port authentication flow in the browser window that opens.
Step 5: Verify the connection
Start a Codex session and run /mcp and type port-eu or port-us to verify that the Port MCP server is connected and showing its tools.
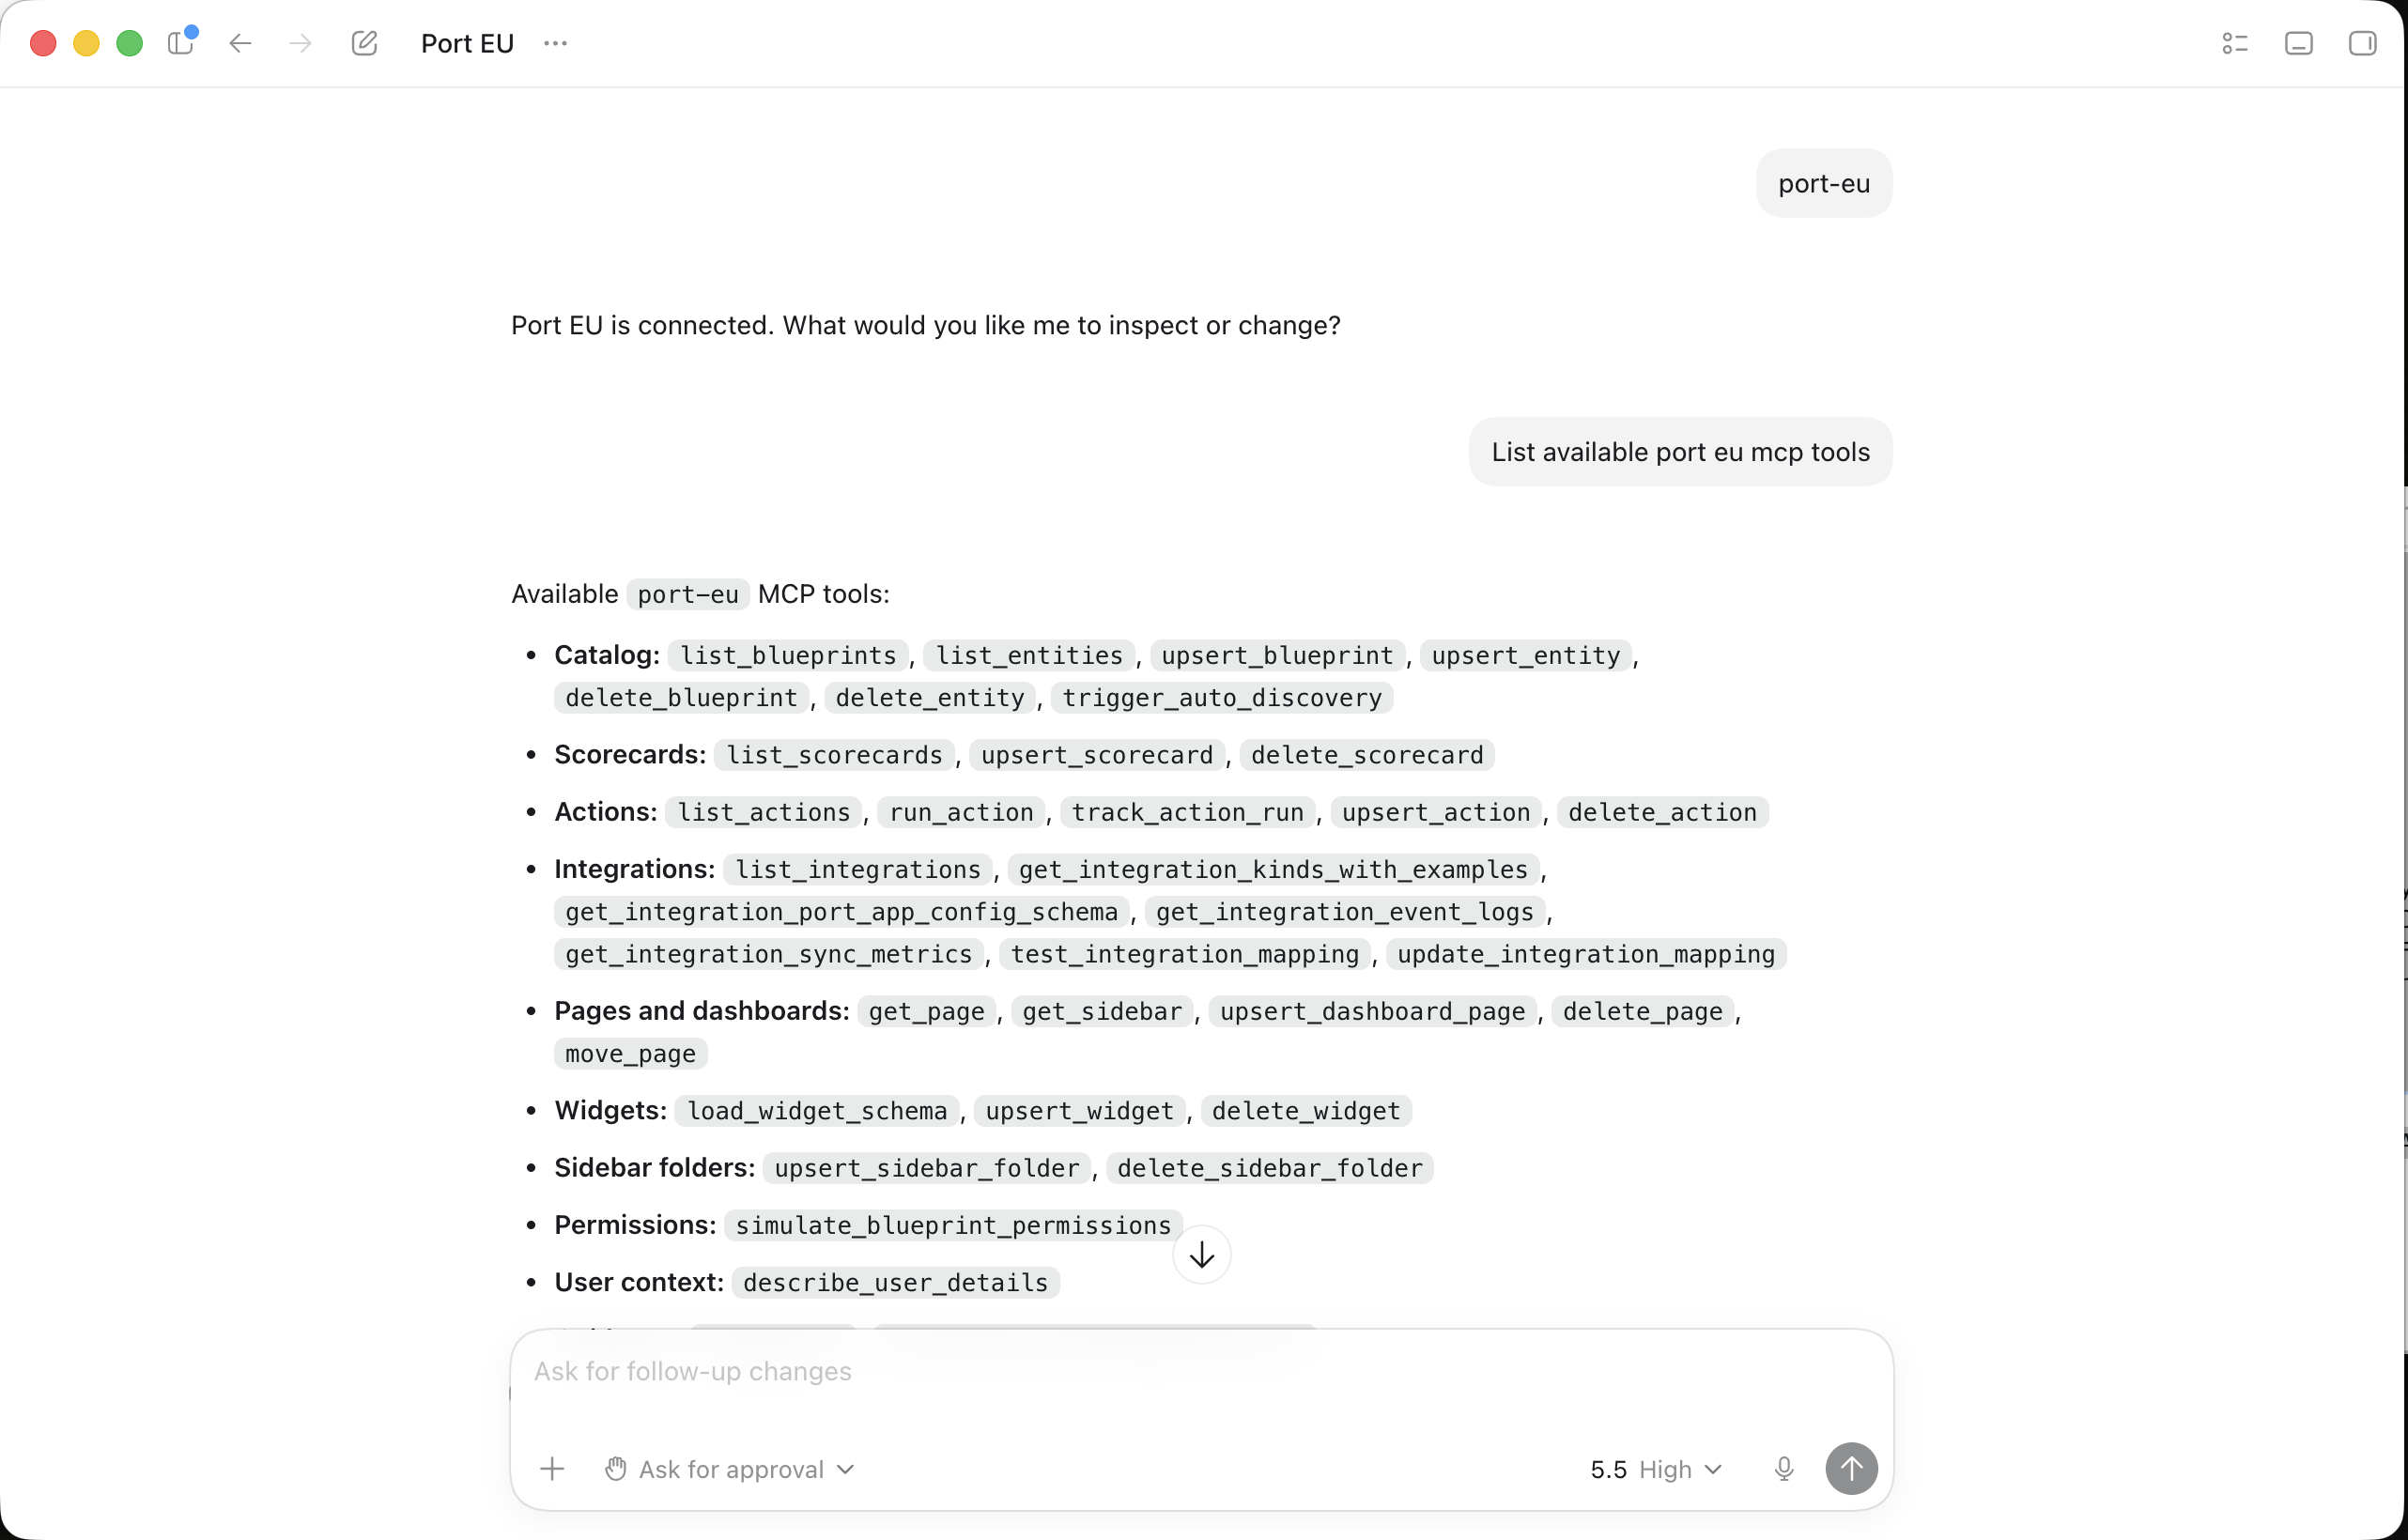
Step 6: Query Port through Codex
Once connected, you can interact with your Port catalog using natural language. Codex will automatically use the Port MCP tools to fulfill your requests. Try these example prompts:
- "Show me all services owned by the backend team"
- "What scorecards are failing for my production services?"
- "Who is the owner of the payments service?"
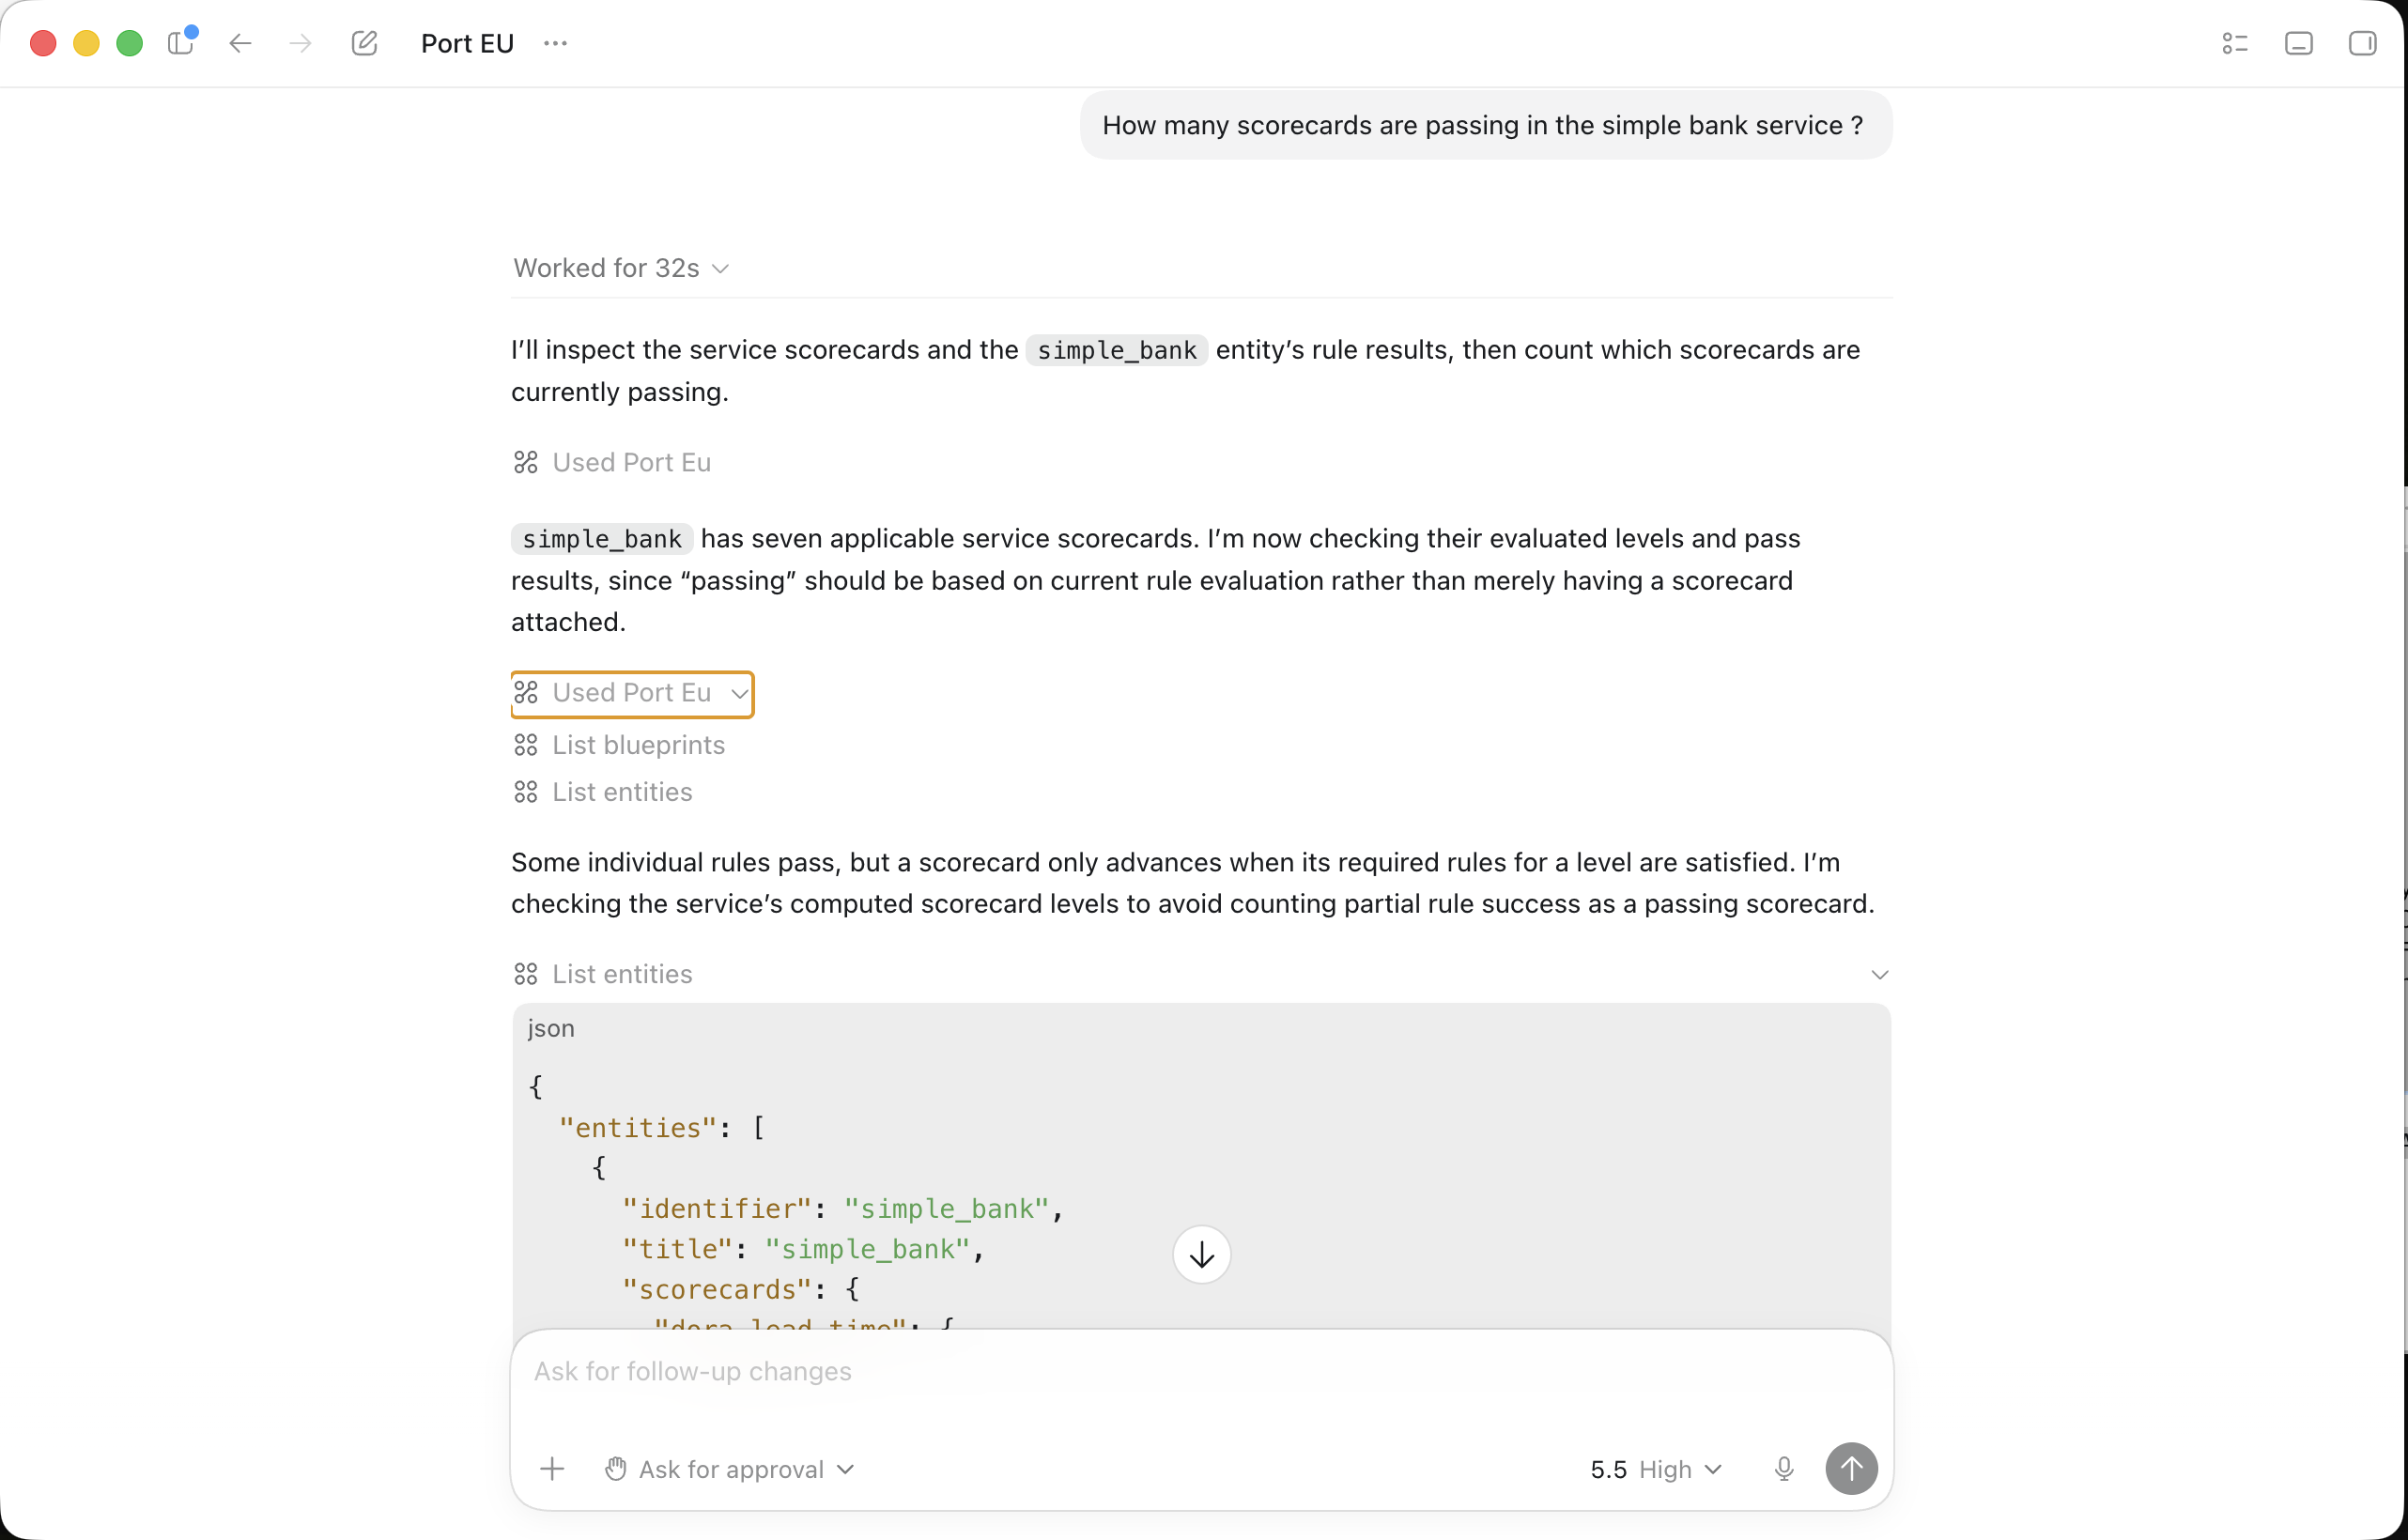
Optional: Configure Codex manually
You can also add the MCP server directly to your ~/.codex/config.toml file:
[mcp_servers.port-eu]
url = "https://mcp.port.io/v1"
enabled = true
If your Port organization is in the US region, replace port-eu and https://mcp.port.io/v1 with port-us and https://mcp.us.port.io/v1.
After editing the file, run the matching codex mcp login command from step 4.
You can restrict Codex to read-only Port tools by adding the x-read-only-mode header to your Codex MCP configuration. See the MCP server headers section for the full configuration.
MCP clients can maintain authenticated sessions for up to 30 days (as long as you're not idle for 15 days). This applies to OAuth-based authentication for interactive use, providing a more seamless experience for long-running integrations.
Connect the server to multiple organizations
Port uses your browser's OAuth session to approve MCP connections. When your MCP client opens the authentication prompt, you approve access in the organization where you are currently logged in. Follow these steps to connect to the correct organization:
- Make sure you are logged in to the desired organization in your browser before you start the MCP connection flow.
- Approve the OAuth prompt from your MCP client while you remain logged in to that organization.
- Continue using the MCP client; changing your browser session afterward does not change the connected organization.
To connect another organization from the same MCP client, add a second configuration and repeat the flow while logged in to the other organization. Each configuration keeps its own OAuth approval, so you can work with multiple organizations in parallel.
In addition to Port's native tools, you can also access external MCP servers (like Notion, Slack, Jira, and more) through the same interface. If you have configured MCP connectors, authenticate to them in Port and they will automatically be available in your IDE alongside Port's native capabilities.
Platform teams can also run an MCP registry in the software catalog to track which MCP servers are approved, let developers request new servers, and publish installation guidance.
Connecting the server when SSO is enabled
If your organization uses SSO (Single Sign-On) and you see an error like the one below when trying to connect to the MCP Server:
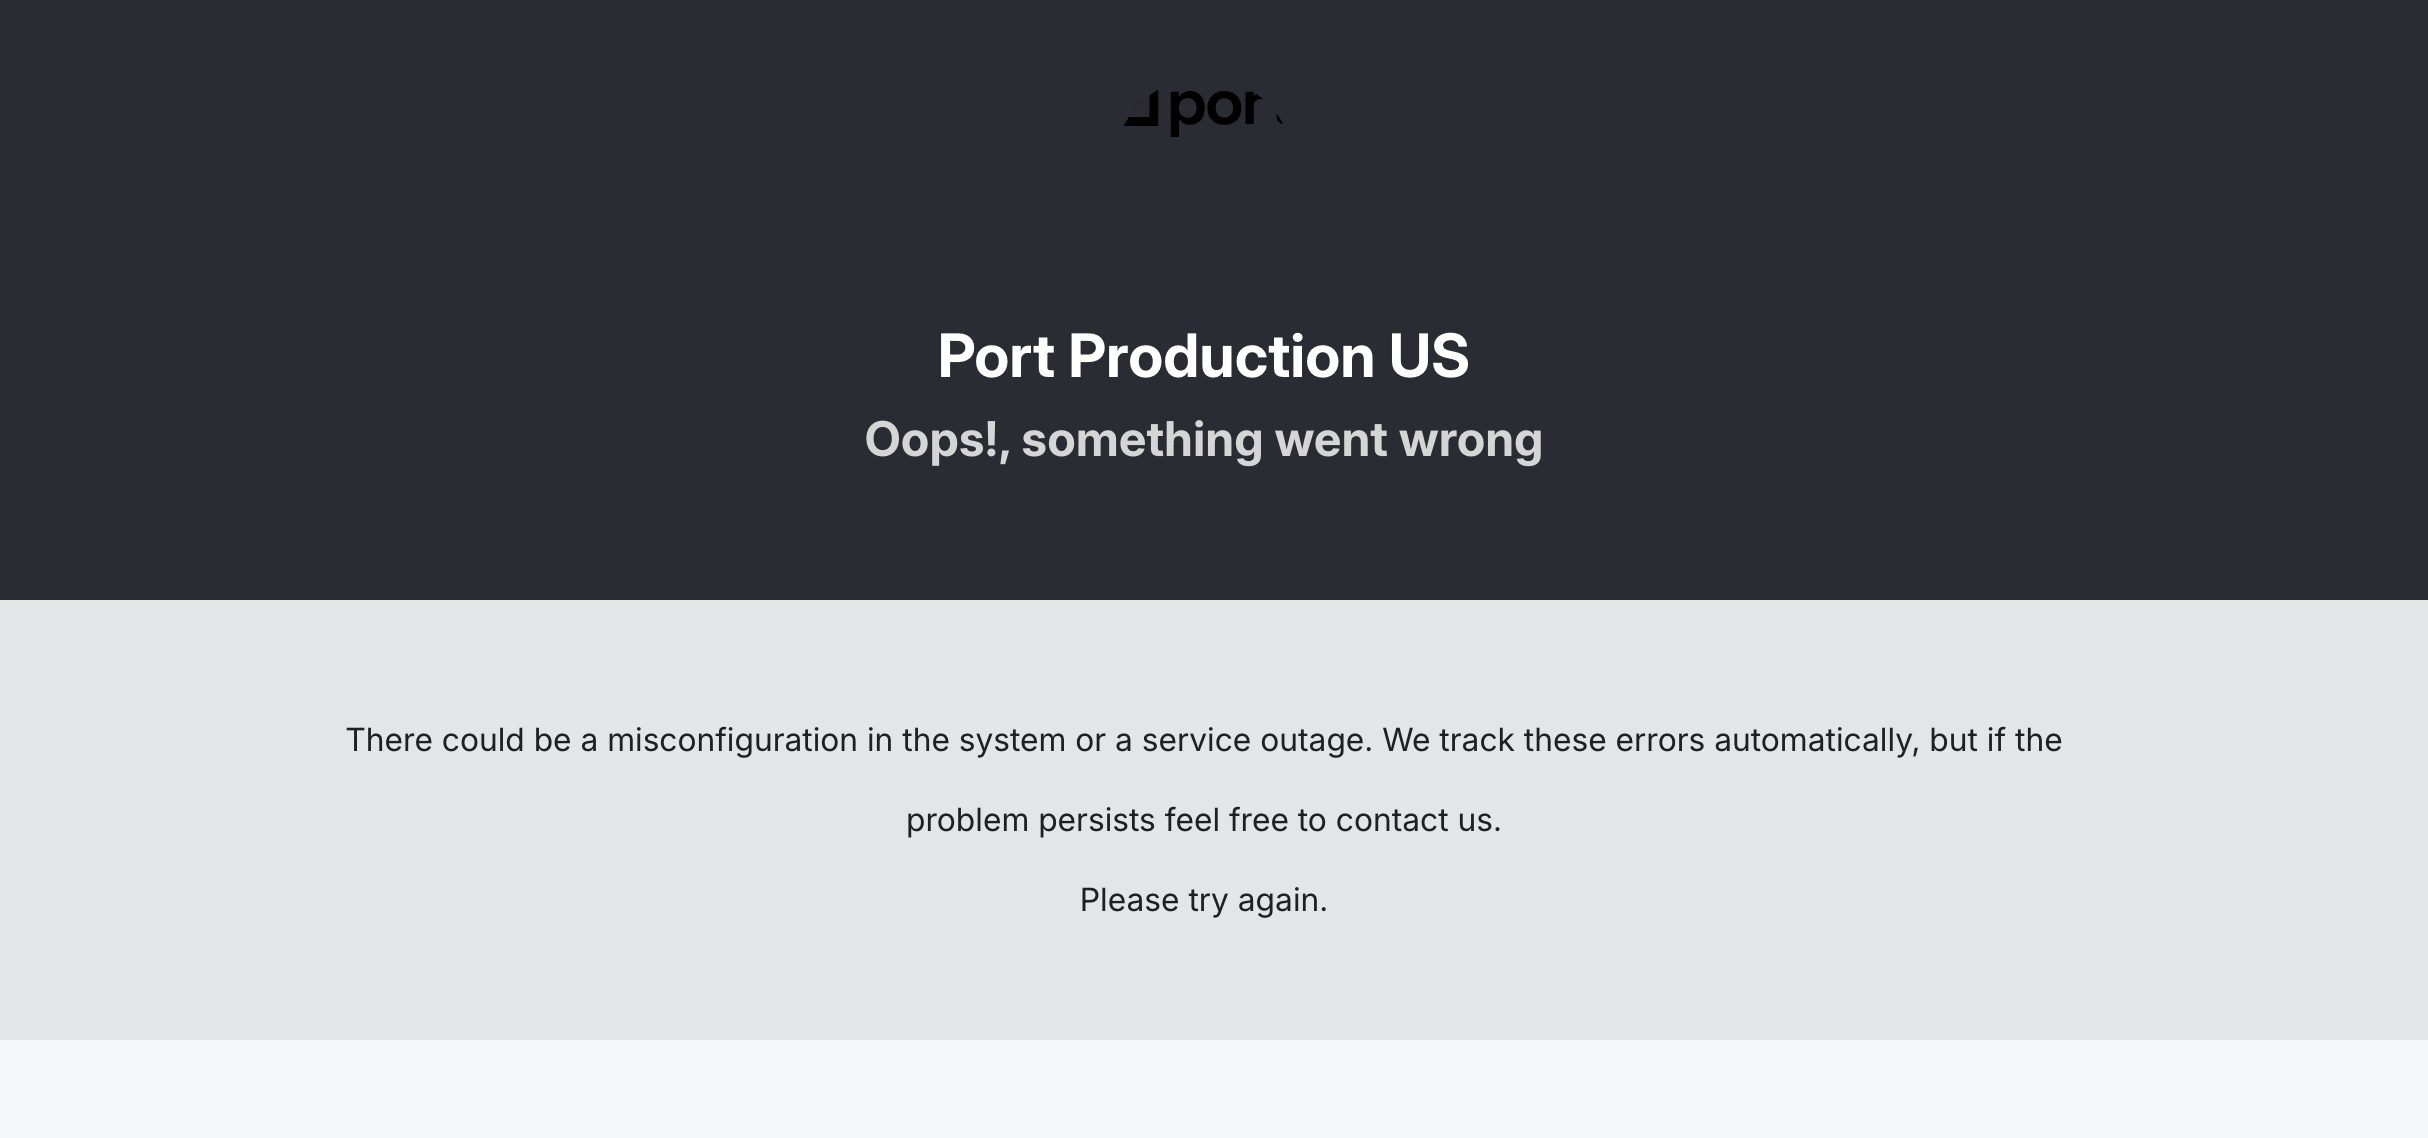
This error occurs because the SSO connection needs to be configured for domain-level authentication to work with the MCP Server's OAuth flow.
Why this happens - When SSO is initially configured in Port, the authentication connection starts as a standard type. For the MCP Server to authenticate users through SSO, the connection needs to be upgraded to "domain level" mode, which enables Dynamic Client Registration (DCR). This configuration change can only be made by Port on the backend.
How to resolve - Contact our support team and let them know you're experiencing an SSO authentication error when connecting to the MCP Server. The support team will update your SSO connection configuration to enable domain-level authentication, which will allow the MCP Server OAuth flow to work correctly with your SSO provider.
Once the configuration is updated, retry the MCP Server connection and the authentication should work as expected.
Token-based authentication
You can also connect using machine authentication for automated environments like CI/CD pipelines where interactive authentication isn't possible. Request a token from the MCP OAuth endpoint:
curl -X POST "https://mcp.port.io/v1/token" \
  -H "Content-Type: application/x-www-form-urlencoded" \
  -d "grant_type=client_credentials" \
  -d "client_id=YOUR_CLIENT_ID" \
  -d "client_secret=YOUR_CLIENT_SECRET"
For complete examples and detailed setup instructions, see our machine authentication guide.
MCP server headers
The Port MCP Server supports several headers that allow you to customize its behavior:
| Header | Type | Default | Description |
|---|---|---|---|
x-read-only-mode | String | 0 | Controls whether write tools are available. Set to 1 to restrict the MCP server to only expose read-only tools, completely hiding write tools from the available tools list. Set to 0 to allow all tools based on your permissions. |
x-allowed-actions-to-run | String | All actions | Comma-separated list of action identifiers that controls which actions are available through the run_action tool. Only the specified actions will be available. If not specified, all actions you have permission to run will be available. If set to an empty string, no actions will be allowed to run. Example: "create_github_issue,create_incident". |
Configuring headers in your MCP client
Headers are set in your MCP client's configuration file, not in Port itself. The exact syntax depends on your client.
- Claude Desktop
- Claude Code (CLI)
- Cursor
- VS Code
- GitHub Copilot CLI
- Codex CLI
Use the official Port connector for the standard Claude Desktop setup above. If you need to pass custom headers through a local proxy, configure mcp-remote in claude_desktop_config.json as shown below. This option requires Node.js and access to the npm registry. It connects to Port's remote MCP server.
{
  "mcpServers": {
    "port": {
      "command": "npx",
      "args": [
        "-y",
        "mcp-remote",
        "https://mcp.port.io/v1",
        "--header",
        "x-read-only-mode: 1",
        "--header",
        "x-allowed-actions-to-run: create_github_issue,deploy_service"
      ]
    }
  }
}
If your Port organization is in the US region, replace https://mcp.port.io/v1 with https://mcp.us.port.io/v1.
Pass headers using the --header flag when adding the direct HTTP connection. Each header requires a separate --header argument. If you already added port-eu, update that entry's headers in your MCP configuration instead of adding it again:
claude mcp add --transport http port-eu https://mcp.port.io/v1 \
  --header "x-read-only-mode: 1" \
  --header "x-allowed-actions-to-run: create_github_issue,deploy_service"
If your Port organization is in the US region, replace https://mcp.port.io/v1 with https://mcp.us.port.io/v1.
Add a headers block to your .cursor/mcp.json file:
{
  "mcpServers": {
    "port": {
      "url": "https://mcp.port.io/v1",
      "headers": {
        "x-read-only-mode": "1",
        "x-allowed-actions-to-run": "create_github_issue,deploy_service"
      }
    }
  }
}
If your Port organization is in the US region, replace https://mcp.port.io/v1 with https://mcp.us.port.io/v1.
Add a headers block to your .vscode/mcp.json file:
{
  "servers": {
    "port": {
      "url": "https://mcp.port.io/v1",
      "headers": {
        "x-read-only-mode": "1",
        "x-allowed-actions-to-run": "create_github_issue,deploy_service"
      }
    }
  }
}
If your Port organization is in the US region, replace https://mcp.port.io/v1 with https://mcp.us.port.io/v1.
Add a headers block to your mcp-config.json file:
{
  "mcpServers": {
    "port-copilot-eu": {
      "tools": ["*"],
      "type": "http",
      "url": "https://mcp.port.io/v1",
      "headers": {
        "x-read-only-mode": "1"
      }
    }
  }
}
If your Port organization is in the US region, replace https://mcp.port.io/v1 with https://mcp.us.port.io/v1.
Add an http_headers block to your ~/.codex/config.toml file:
[mcp_servers.port]
url = "https://mcp.port.io/v1"
enabled = true

[mcp_servers.port.http_headers]
x-read-only-mode = "1"
x-allowed-actions-to-run = "create_github_issue,deploy_service"
If your Port organization is in the US region, replace https://mcp.port.io/v1 with https://mcp.us.port.io/v1.
Use x-allowed-actions-to-run to scope a connection to only the actions relevant for a given context - for example, allowing a developer's IDE session to run only deployment actions, or giving a CI/CD integration access to a single scaffold action. To find an action's identifier, open the self-service page and copy the identifier from the action.
Prompts
The MCP server exposes static and custom prompts in supported MCP clients. For setup, the prompt blueprint, and using prompts in Port AI Assistant, see the Prompts overview.
Connecting to AI Agents
To connect the Port MCP server to AI agents in CI/CD environments or other automated contexts where interactive authentication isn't possible, see our machine authentication guide.