Build agents
AI Agents are built on top of Port AI and leverage its underlying capabilities for data access, security, and execution. This guide focuses on agent-specific building techniques.
Getting started
Building an AI agent in Port involves several key steps.
Let's walk through the process of creating an agent that can assist your developers with finding information and completing tasks.
Create a new AI agent
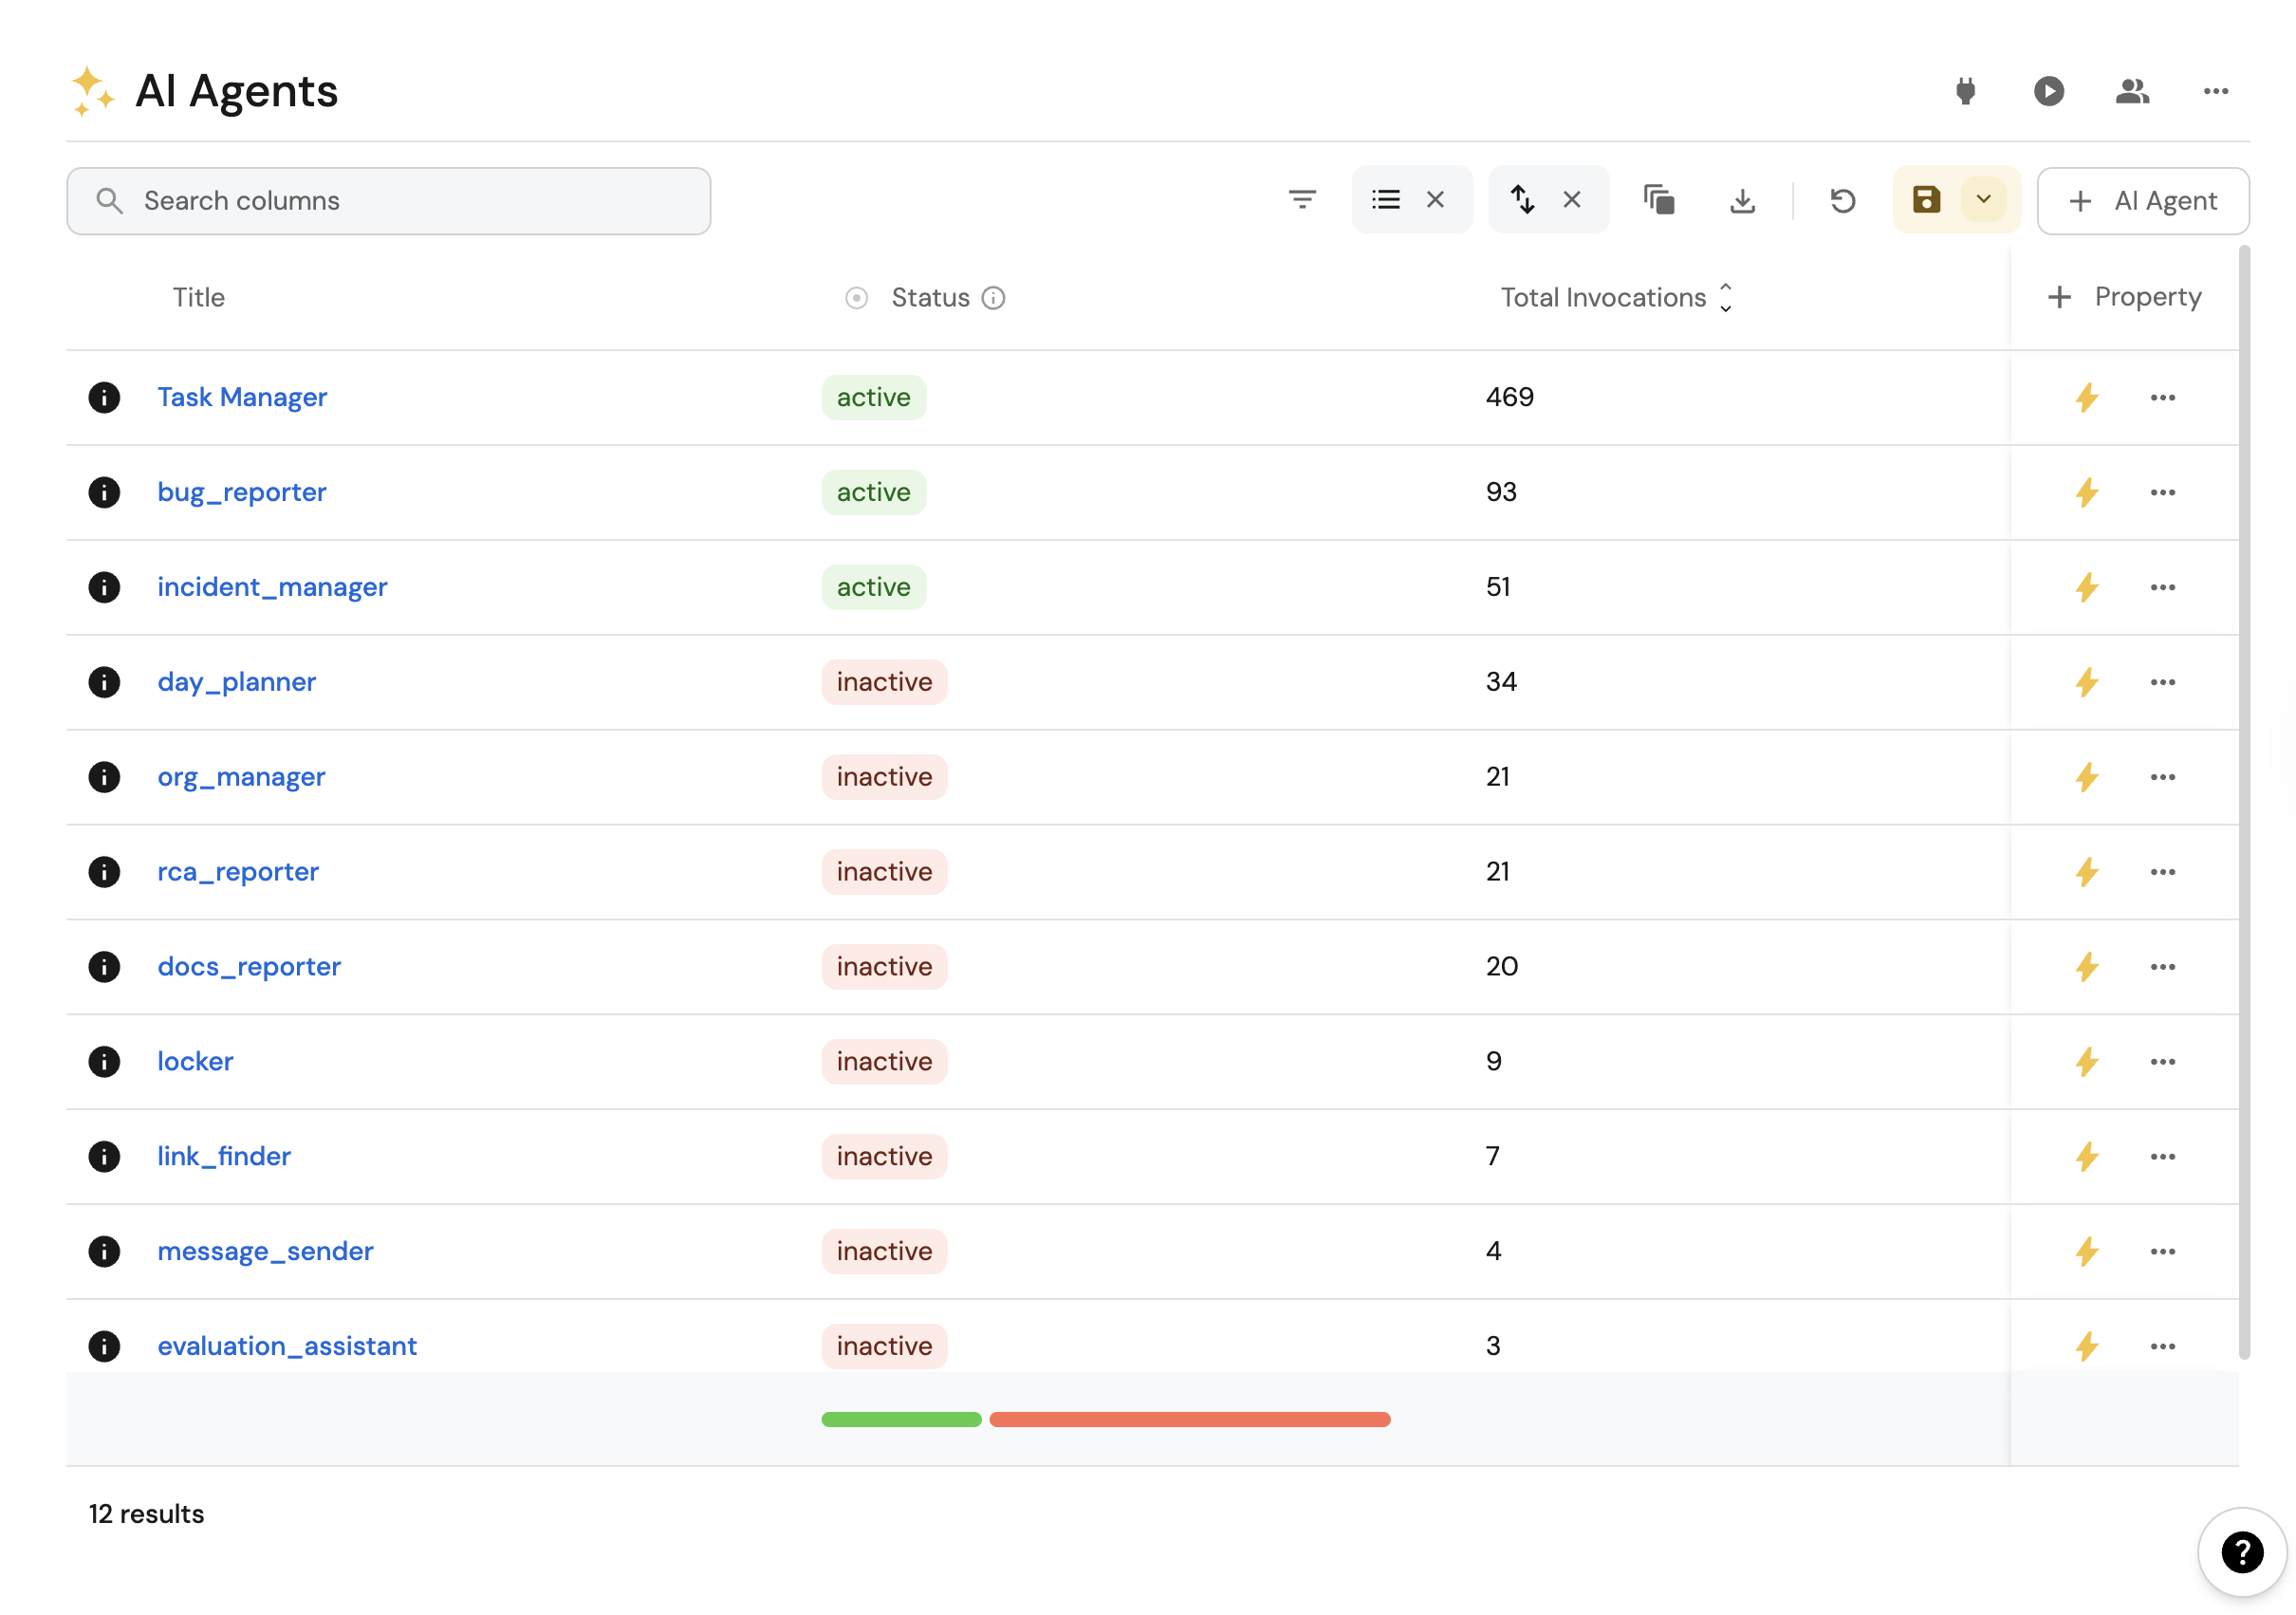
To create a new agent, head to the AI Agents catalog page (this page will be created for you when you activate the feature).
Click on the "New AI Agent" button and fill the form with the agent details.
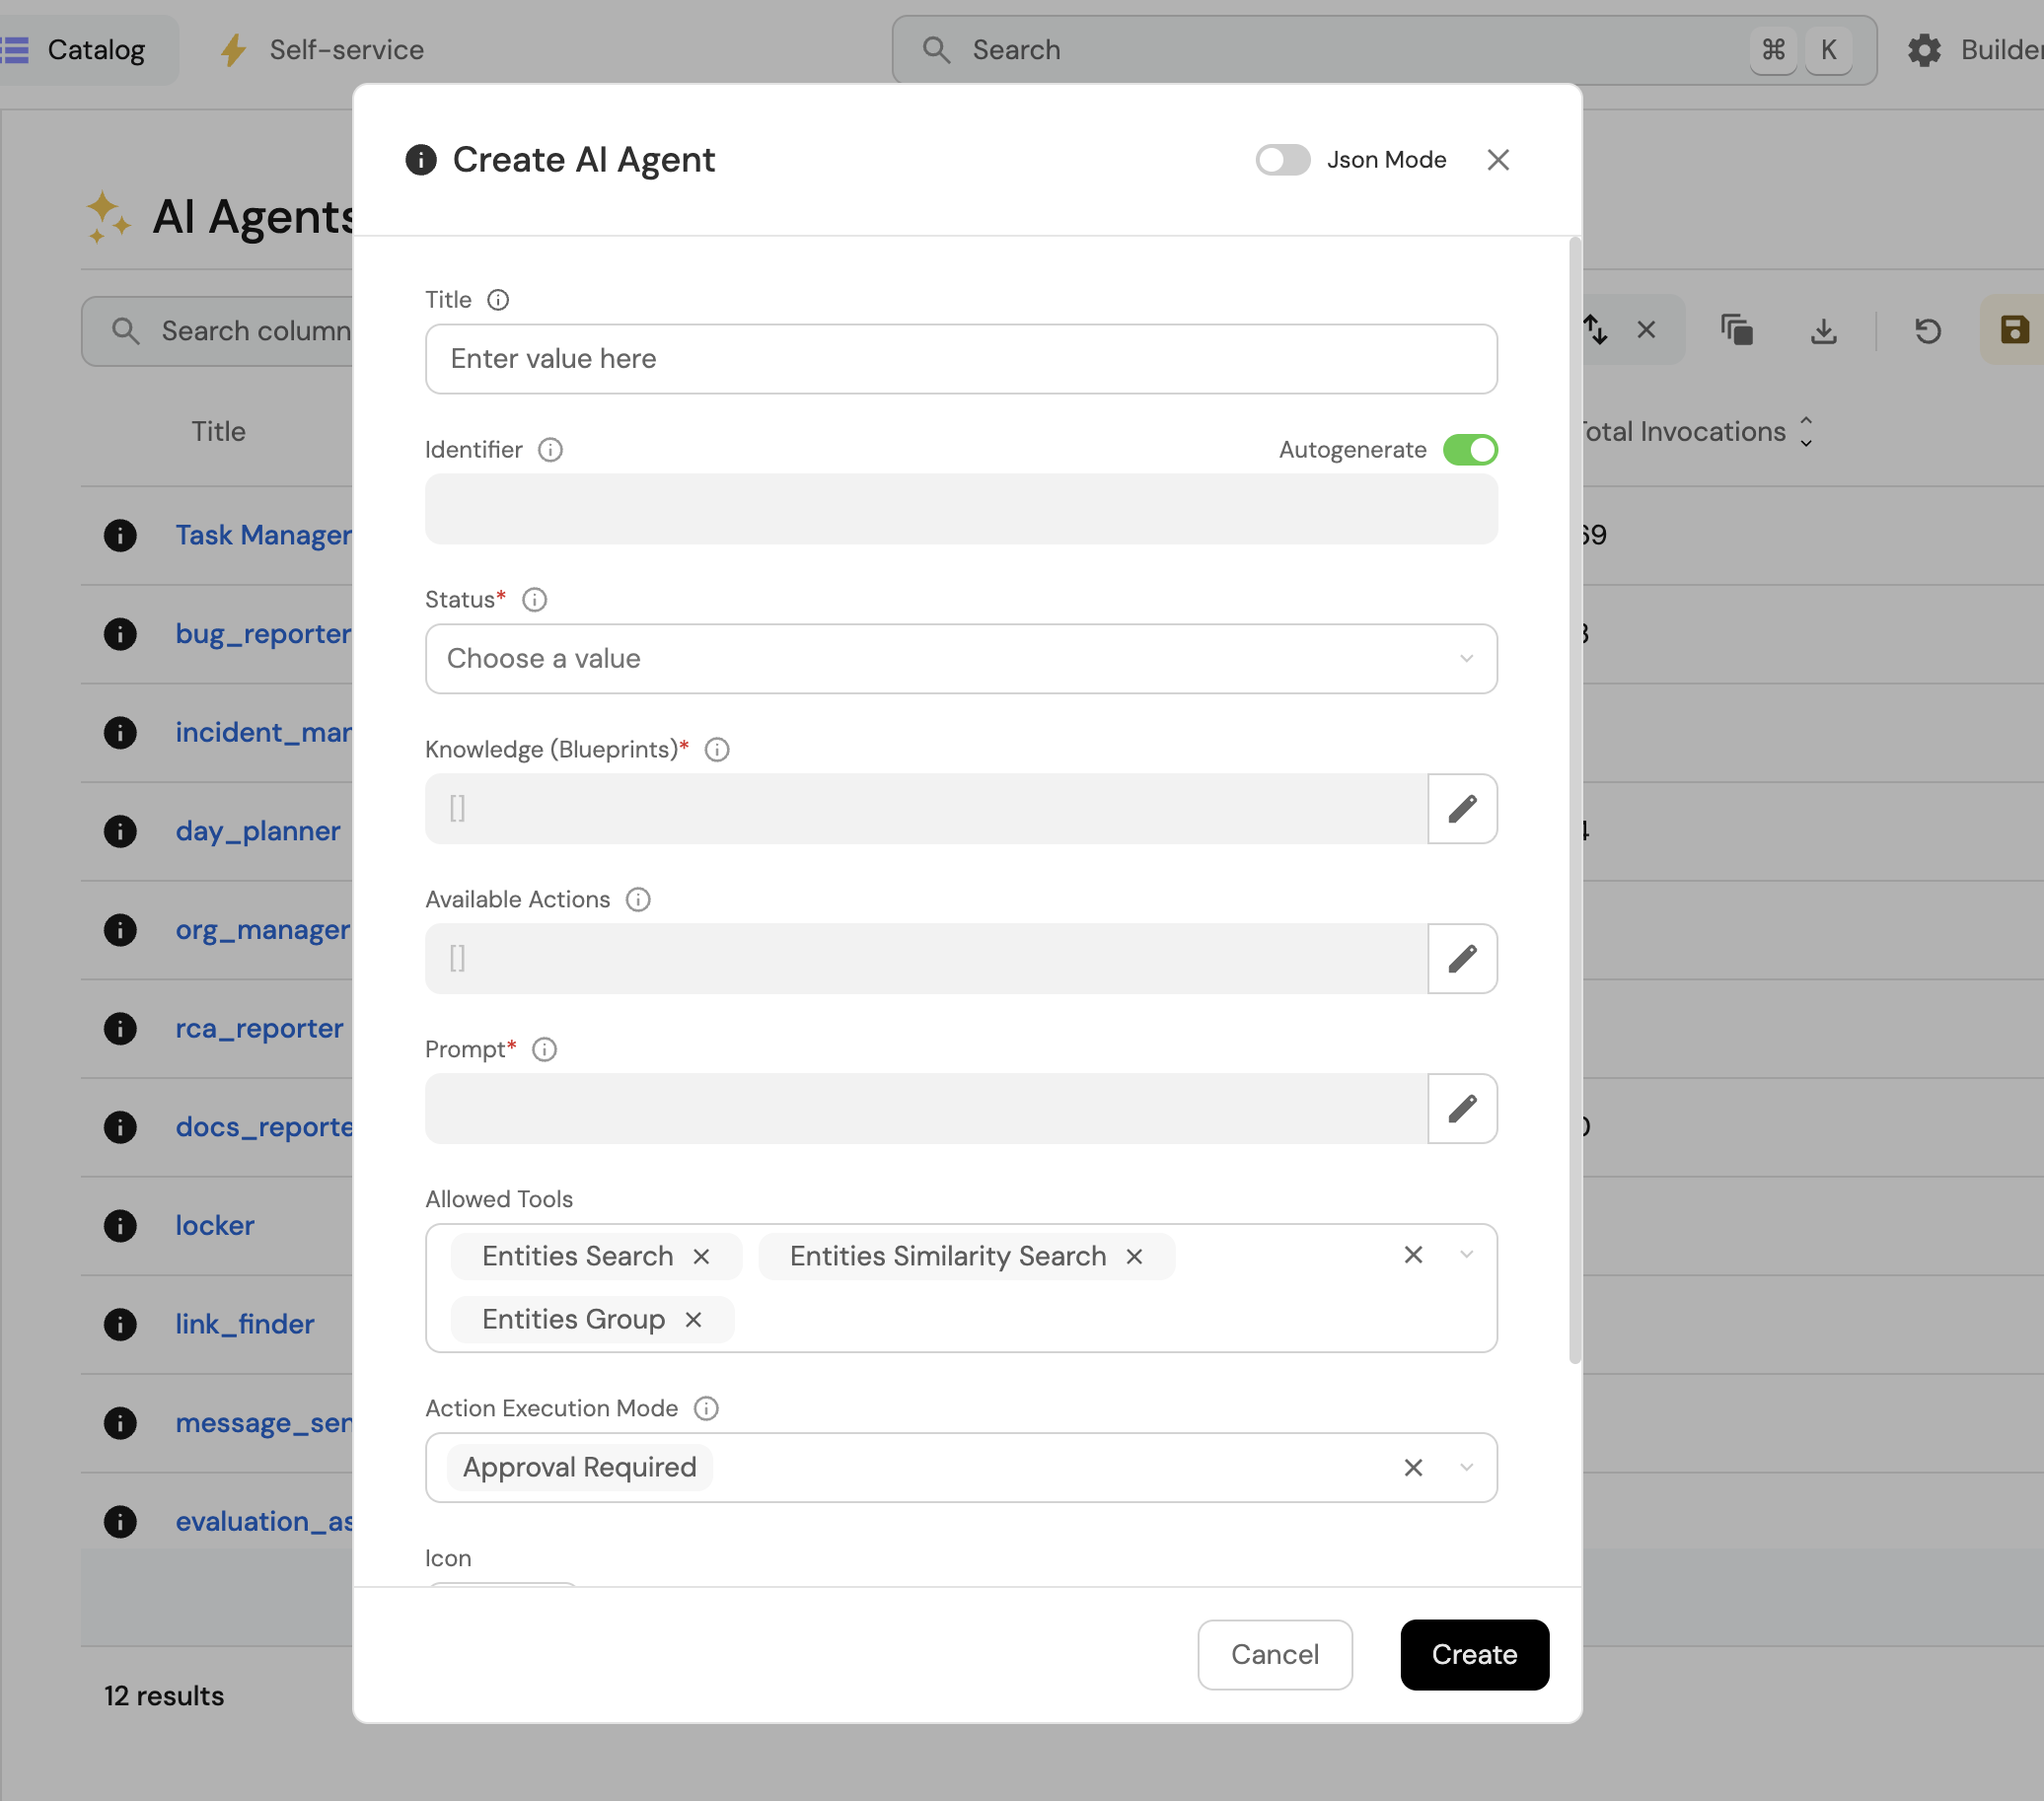
We recommend following the steps below.
Step 1: Define your agent's purpose
The first step in building an AI agent is deciding on its purpose.
Here we will determine whether the agent will:
- Answer questions about your development environment.
- Help run actions and complete tasks.
We recommend starting with a simple use case that a junior assistant with access to your data could assist with.
For inspiration, check our AI agents guides.
Step 2: Configure data access tools
Configure which data tools your agent can access. Configure access to Port data through Port AI tools. Available tools include data query tools for retrieving information from your catalog, as well as running self-service actions.
Step 3: Configure actions access
Actions are executed through the run_action tool, which dynamically handles all available actions in your Port instance. When you configure an action for the agent, it becomes available as a tool the agent can use.
Provide action access in one of these ways:
- Allowed Actions input (recommended) - Add the specific actions this agent can execute in the Allowed Actions input in the AI agent form.
- Advanced mode (regex) - Switch to Advanced mode (regex) if you need full control over the
toolslist (for example, mixed custom patterns). In this mode, you can add action tools using patterns such asrun_{action_identifier}. - Choose the execution mode (automatic or approval-required) for the selected actions.
To find an action identifier, open the self-service page and copy the action identifier.
While the underlying implementation uses the unified run_action tool, you can still reference specific actions with run_{action_identifier} for clarity and backward compatibility.
For details on manual approval vs automatic execution patterns, see Port AI tool execution modes.
Step 4: Configure MCP server access
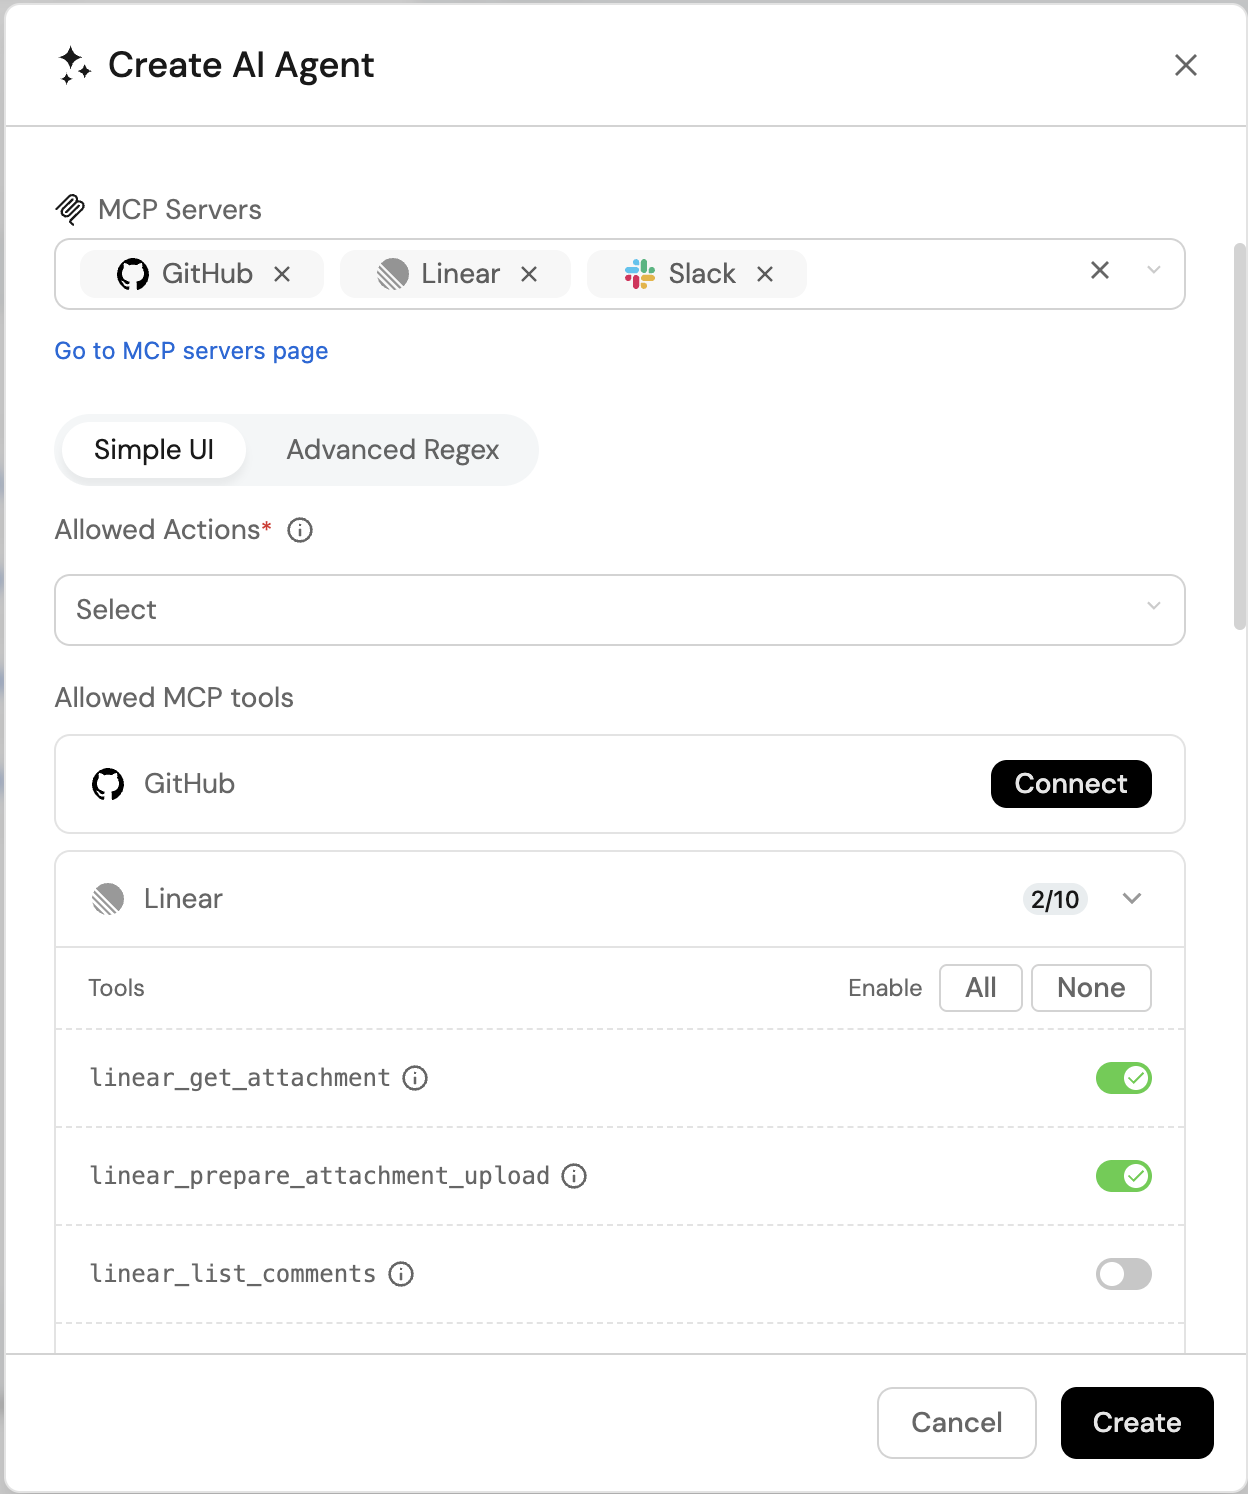
You can give your agent access to tools from external systems through MCP connectors. This lets the agent query or act on data that does not live in your Port catalog (for example, Notion, Linear, or Slack).
MCP connectors configured on the agent entity work in interactive chat when the user connects to each server. They do not run in automations or AI_AGENT workflow nodes. For workflow external MCP, see use MCP connectors in workflows.
- In the MCP servers relation field, select which MCP servers this agent can use.
- In the Allowed MCP tools section, choose which tools the agent may use for each selected server. You can toggle individual tools, or use All / None for a server.
- Save is available only when every selected server is connected and has at least one tool enabled.
For connector setup and authentication, see MCP connectors.
Step 5: Define the prompt
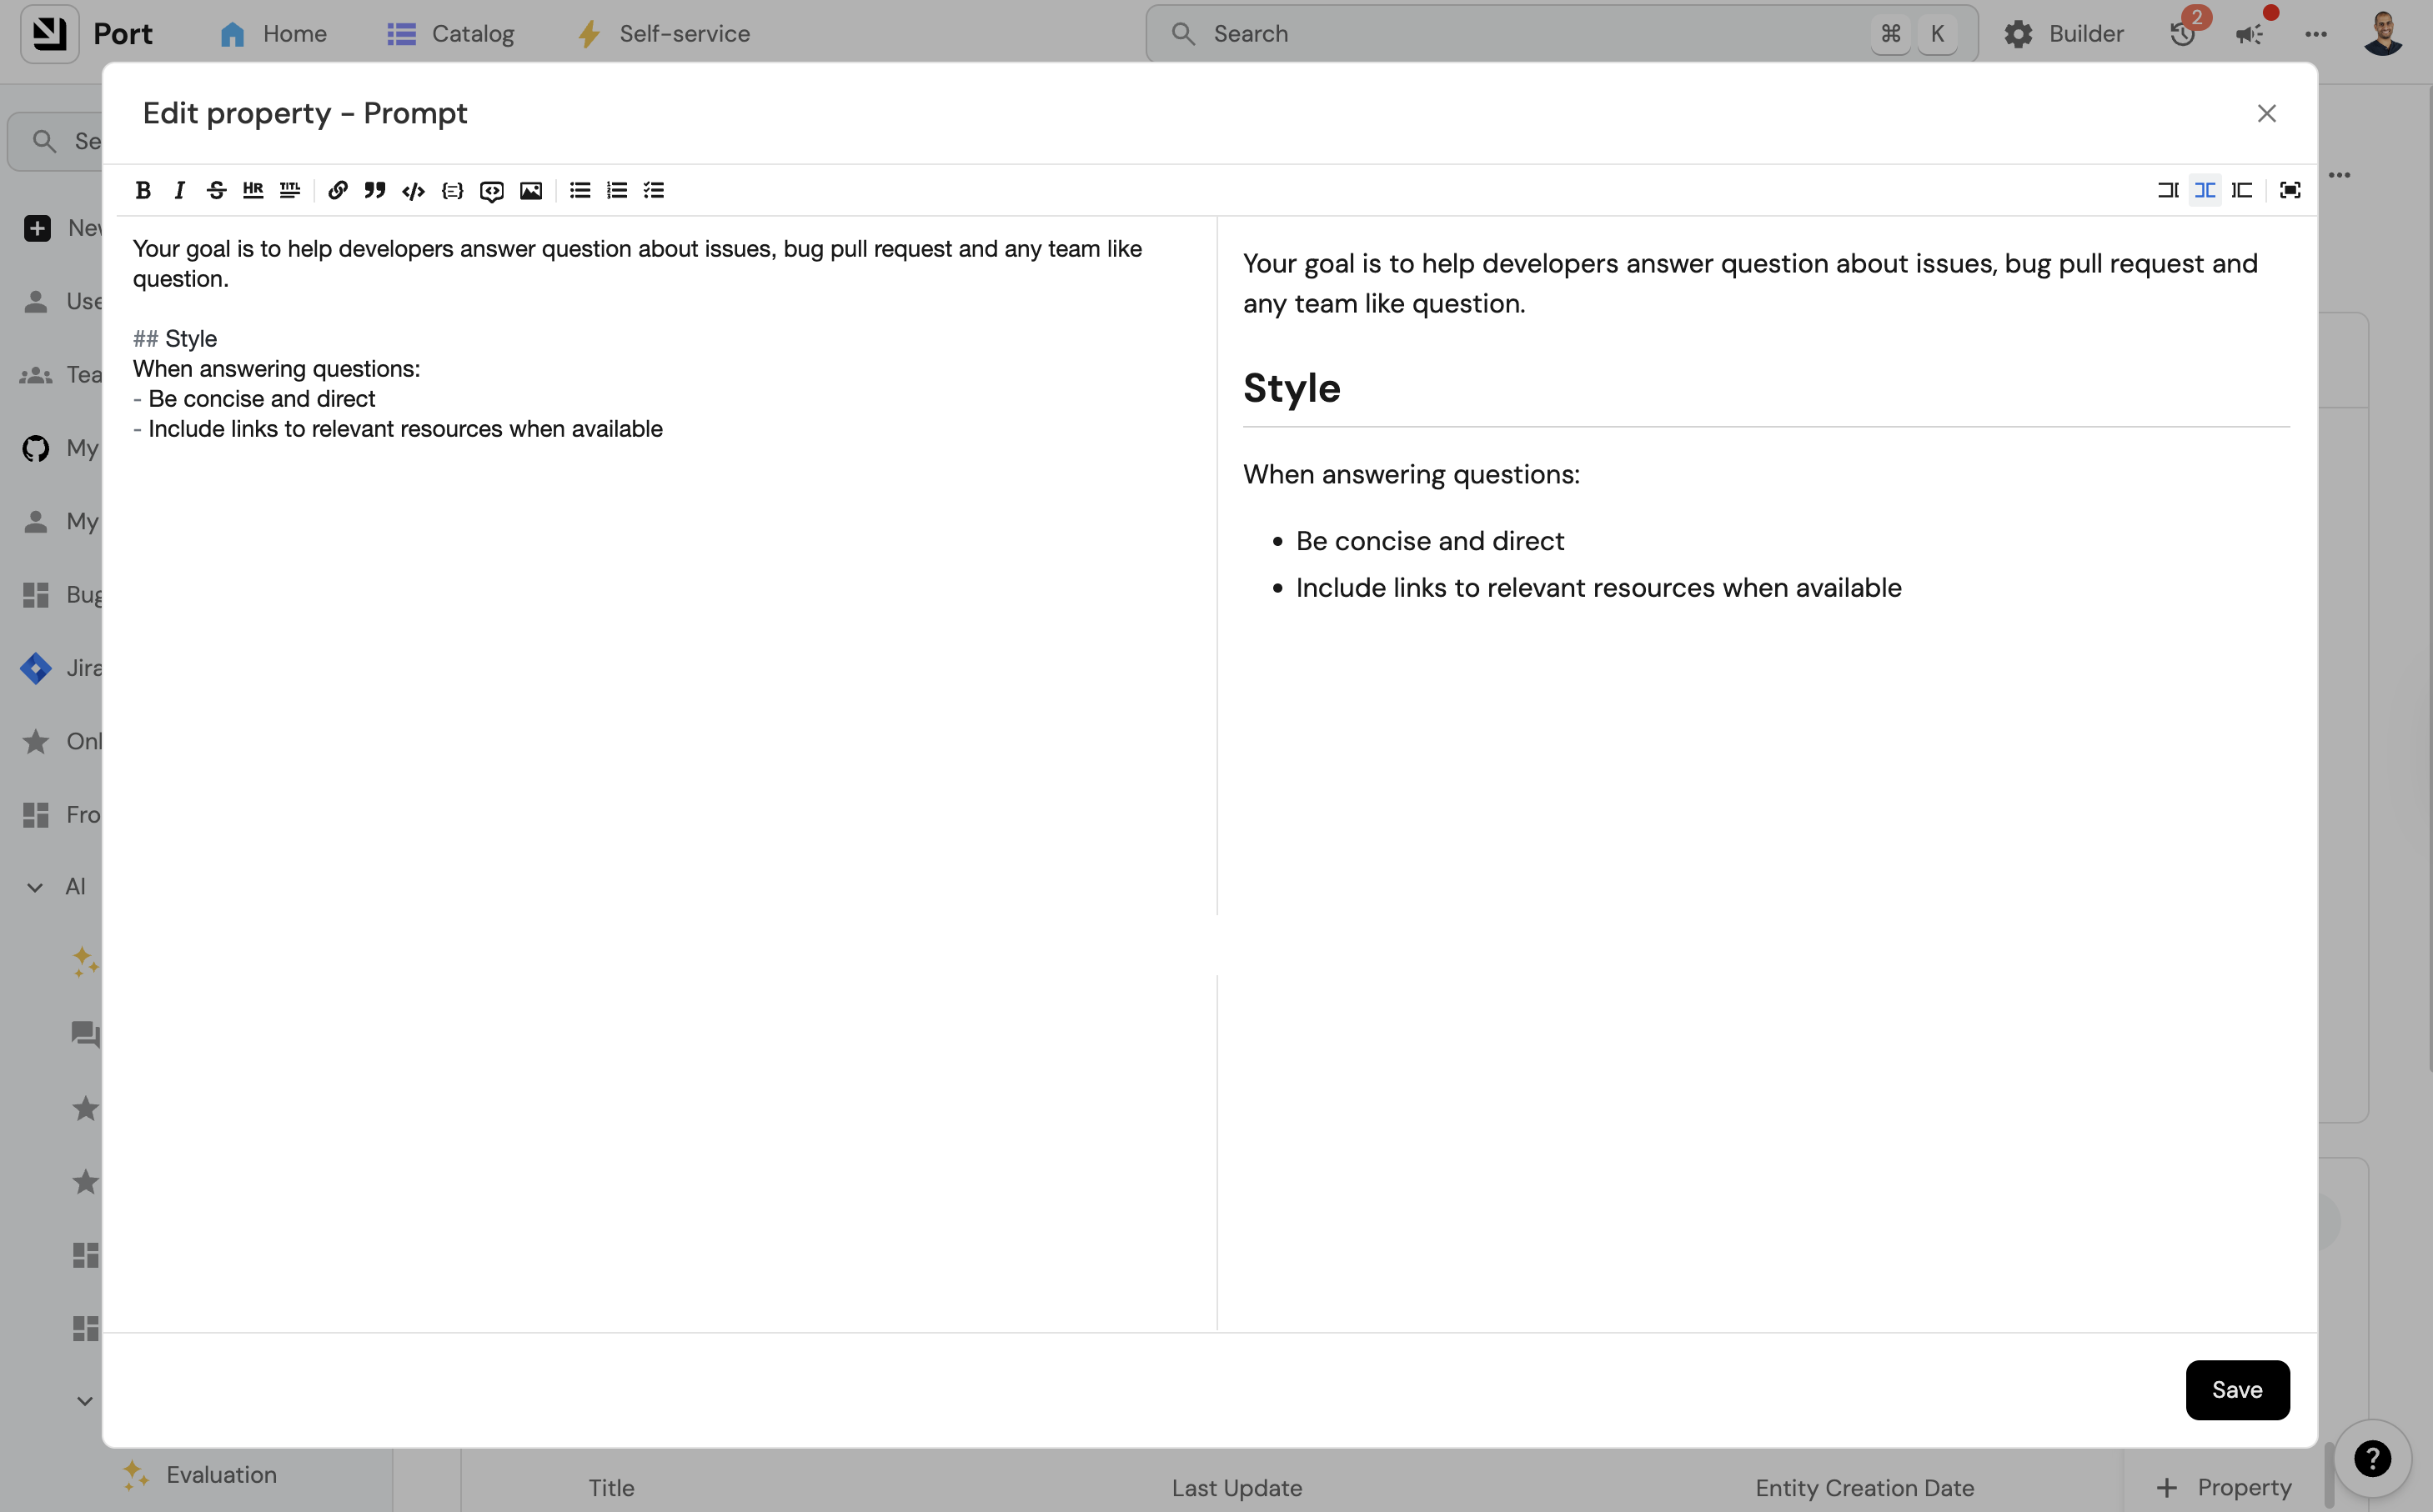
The prompt is your main tool for influencing your agent's success. You will likely iterate on it as you observe how the agent responds to different queries.
For comprehensive guidance on crafting effective prompts, see Context Engineering. This covers prompt design principles, examples, and best practices for creating prompts that leverage your organization's specific data and terminology.
Step 6: Activate your agent
When you feel your agent is ready:
- Set its status to "Active".
- Start interacting with it through the available interfaces.
Step 7: Configure user permissions
Creating and activating an agent is not enough for your users to interact with it. Access to Port AI features is controlled separately through the _ai_invocation blueprint's permissions.
Users need the Read, Register, and Update permissions on the _ai_invocation blueprint to invoke and interact with any Port AI feature, including your newly created agent.
Evaluating your agent performance
Continuous evaluation and improvement are essential for maintaining effective AI agents. We recommend implementing a regular review process:
- Weekly reviews: Set aside time each week to review agent interactions
- Identify patterns: Look for recurring issues or misunderstandings in how the agent interprets queries
- Refine the prompt: Update your agent's prompt based on your findings to address common issues
For details on how to analyze agent behavior and view execution plans, see AI invocations.
Examples
For comprehensive examples of AI agents in action, see our practical implementation guides:
Infrastructure & Operations:
- Heal unhealthy Kubernetes pods - Automated pod healing and recovery
- AI-powered incident management - AI-powered incident communication and updates
Development Workflow:
- Automatically resolve tickets with Port - AI-powered code generation and ticket resolution.
- PR Enricher AI Agent - Enhanced pull request analysis and context
Platform Operations:
- Platform Request Triage AI Agent - Intelligent request routing and prioritization
- Service Explorer AI Agent - Service discovery and exploration
These guides provide step-by-step implementation details, including tool configuration, prompt engineering, and real-world integration patterns.
Formatting the agent response
To format the agent's response, you can specify the desired format in its prompt. For optimal results when using the UI, it's recommended to request a markdown format response. This allows for better presentation and readability of the information provided by the agent. When sending messages through Slack, our Slack app convert the markdown format into a Slack compatible formatting.
Example of a Markdown Response
:rocket: *New version deployed!*
[Added logs](https://www.example.com)
From [john-123](https://github.com/john-123)