Set actions RBAC
Port provides granular control to make sure every user can only execute and invoke the actions that are relevant for them.
This section covers the self-service actions section of Port's RBAC functionality, while it is not a prerequisite, it is highly recommended you also go over Port's permission controls.
In order to manage who can view which pages in Port, check out page permissions.
Common Self-service actions RBAC usage
Self-service actions RBAC allows admins to finely control which users can execute which self-service actions, for example:
- Let a developer provision a database only to his microservice or developer environment.
- Specify that a new cluster provision request requires manual approval by the DevOps team.
Trigger an action on behalf of another user
You can trigger an action on behalf of another user within your organization using an API request. This can be accomplished by including the query parameter run_as=<user_email> in your API request.
This feature is accessible only using an organizational token, and is currently only available from Port's API.
Configure permissions for actions
When creating/editing self-service actions, you can set permissions using one of the following methods:
- UI
- Terraform
The last step of creating an action is configuring permissions:
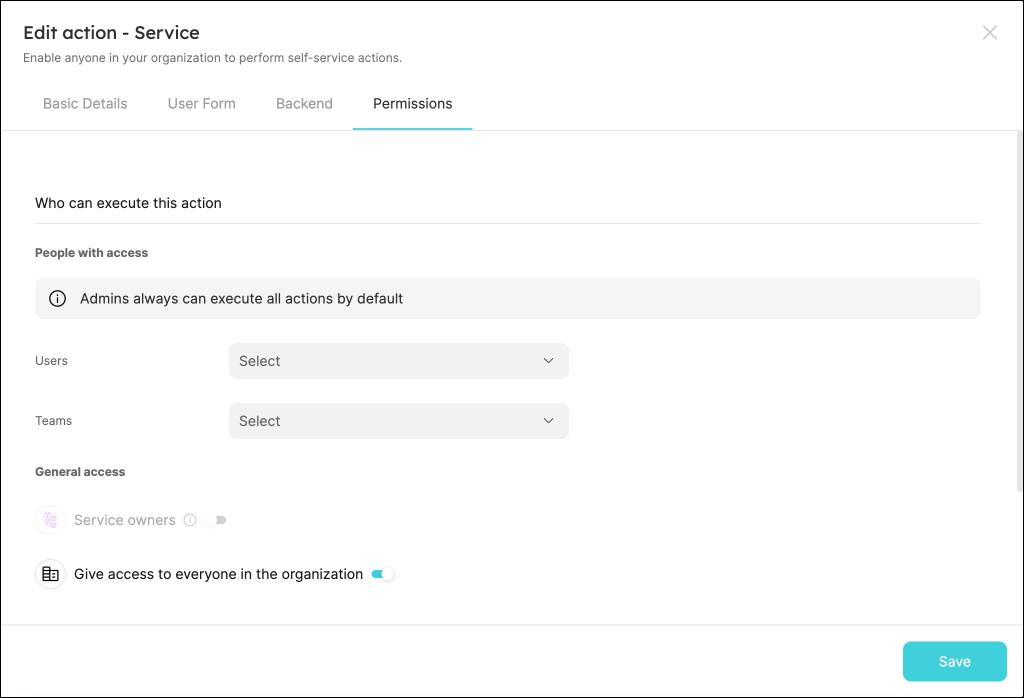
By default, the Give access to everyone in the organization toggle is enabled. To limit execution access to selected users/teams, switch off the toggle.
- To give access to specific users or teams, use the dropdown menus to select them.
- You can also give access to the owners of the entity the action is associated with, by enabling the
ownerstoggle. This means that theTeamproperty of the entity will be used to determine who can execute the action.
Port's Terraform provider allows you to control permissions via Terraform.
Click here for more information and examples.
Configure manual approval for actions
You have the ability to set up manual approval steps for your actions.
This feature is particularly useful in situations where an action has the potential to be dangerous, destructive, expensive, or when organizational policy mandates an additional level of review before proceeding.
When a user clicks on the execute button of an action that requires approval, a new run object will be created in Port. The run object will have the status WAITING_FOR_APPROVAL and will be visible in the Runs tab of the action.
When a new request requires approval, Port will send a notification via email to users that have the permissions to approve it, or it will send a notification to a configured url via a web request.
To configure a manual approval step:
- UI
- API
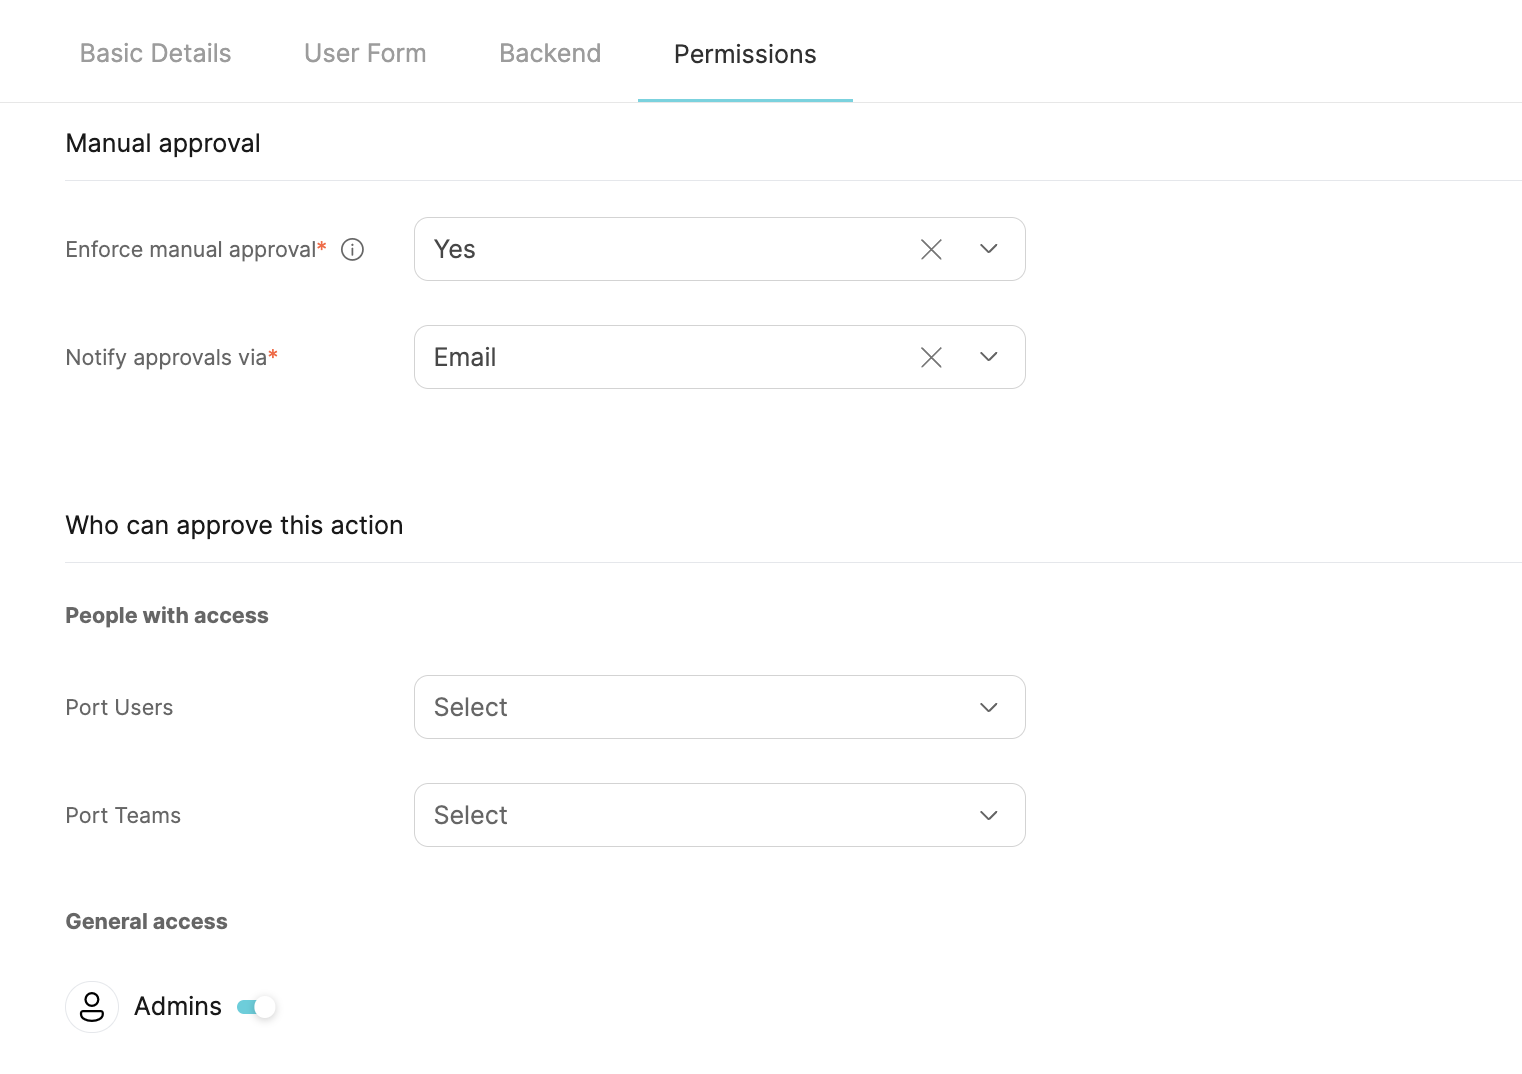
Scroll down the Permissions tab and set Enforce manual approval to Yes. This will introduce some new options:
Add the requiredApproval field to your action:
[
  {
    ...
    "invocationMethod": {
      "type": "WEBHOOK",
      "url": "https://example.com"
    },
    "trigger": {
      ...
      "operation": "CREATE",
    }
    "requiredApproval": true,
    ...
  }
]
Configure visibility for action runs
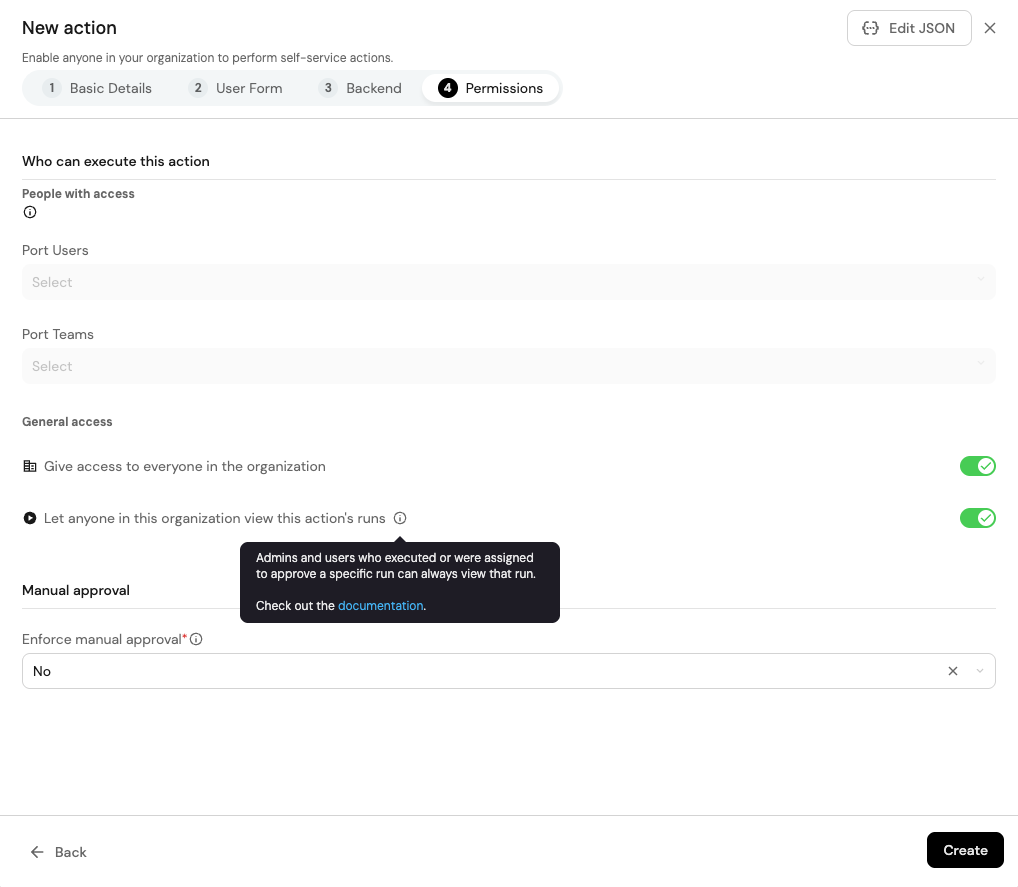
When creating or editing a self-service action, you can also control who can view its runs, using the relevant toggle in the Permissions tab.
- When enabled (default): All organization members can view the action’s runs.
- When disabled:
- Admins can view all runs.
- Approvers can view runs they are assigned to approve.
- Members can only view their own runs.
This ensures that sensitive operational data remains accessible only to authorized users, while maintaining flexibility and transparency where needed.
- UI
- API
Add the allowAnyoneToViewRuns field to your action:
[
  {
    ...
    "invocationMethod": {
      "type": "WEBHOOK",
      "url": "https://example.com"
    },
    "trigger": {
      ...
      "operation": "CREATE",
    }
    "allowAnyoneToViewRuns": true,
    ...
  }
]
Define approval notifications
By default manual approval notifications are sent via Email to users who have approval permissions.
Inputs that are hidden in the form using visibility rules (for example via visible) are still part of the submitted request and are included in approver notifications by design, to provide full context for review.
Port offers two alternatives:
Webhook
You can configure a webhook URL which the approval notification will be sent to, using the following configuration:
{
    ...
    "requiredApproval": true,
    "approvalNotification": {
      "type": "webhook",
      "format": "json",
      "url": "https://my-webhook-url.com"
    },
    ...
}
Slack
You can have your approval notifications sent to a Slack channel of your choice. The configuration in Port is as follows:
{
    ...
    "requiredApproval": true,
    "approvalNotification": {
      "type": "webhook",
      "format": "slack",
      "url": "https://my-slack-webhook.com"
    },
    ...
}
To generate the needed URL, you need to create a Slack app and install it in your workspace by following steps 1-3 outlined in the Slack API Documentation.
Once you have completed the installation process, you will obtain a webhook URL that looks like this:
https://hooks.slack.com/services/T00000000/B00000000/XXXXXXXXXXXXXXXXXXXXXXXX
Use this URL in the url field of the approvalNotification object.
Define approvers
You can assign specific users or teams to be approvers for an action.
After toggling on the Enforce manual approval option, you can add approvers by selecting them from the relevant dropdown menu (Port Users and/or Port Teams).
You can also choose whether all specified approvers must approve the action, or if only one (any) of them is enough.
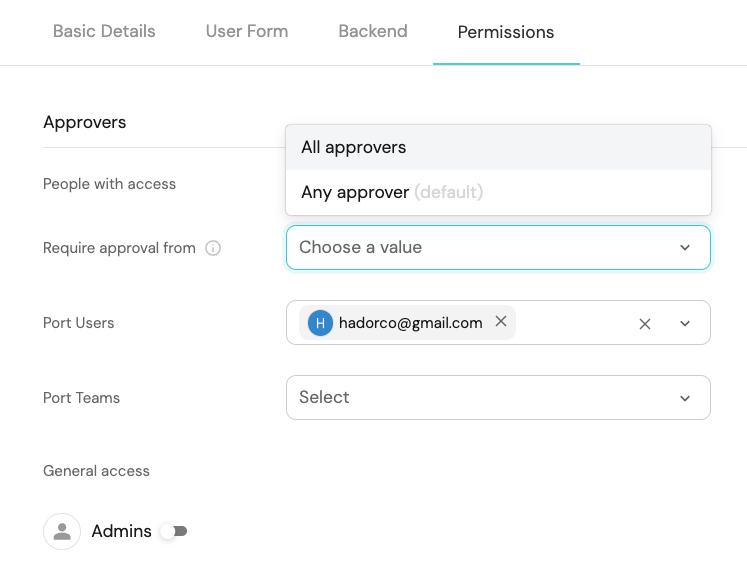
Alternatively, you can allow anyone with the Admin role to approve the action, by enabling the Admins toggle.
Example - automate approval based on an input value
Actions that require approval can also be approved/declined using Port's API.
Click here to see an example of an automation that approves a self-service action using Port's API, based on the value provided in a certain input field.